SALUS HTRP24 Triac Digital Programmable Room Thermostat Installation Guide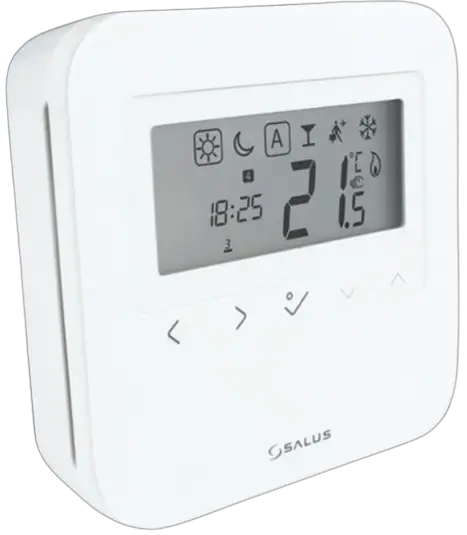
Introduction
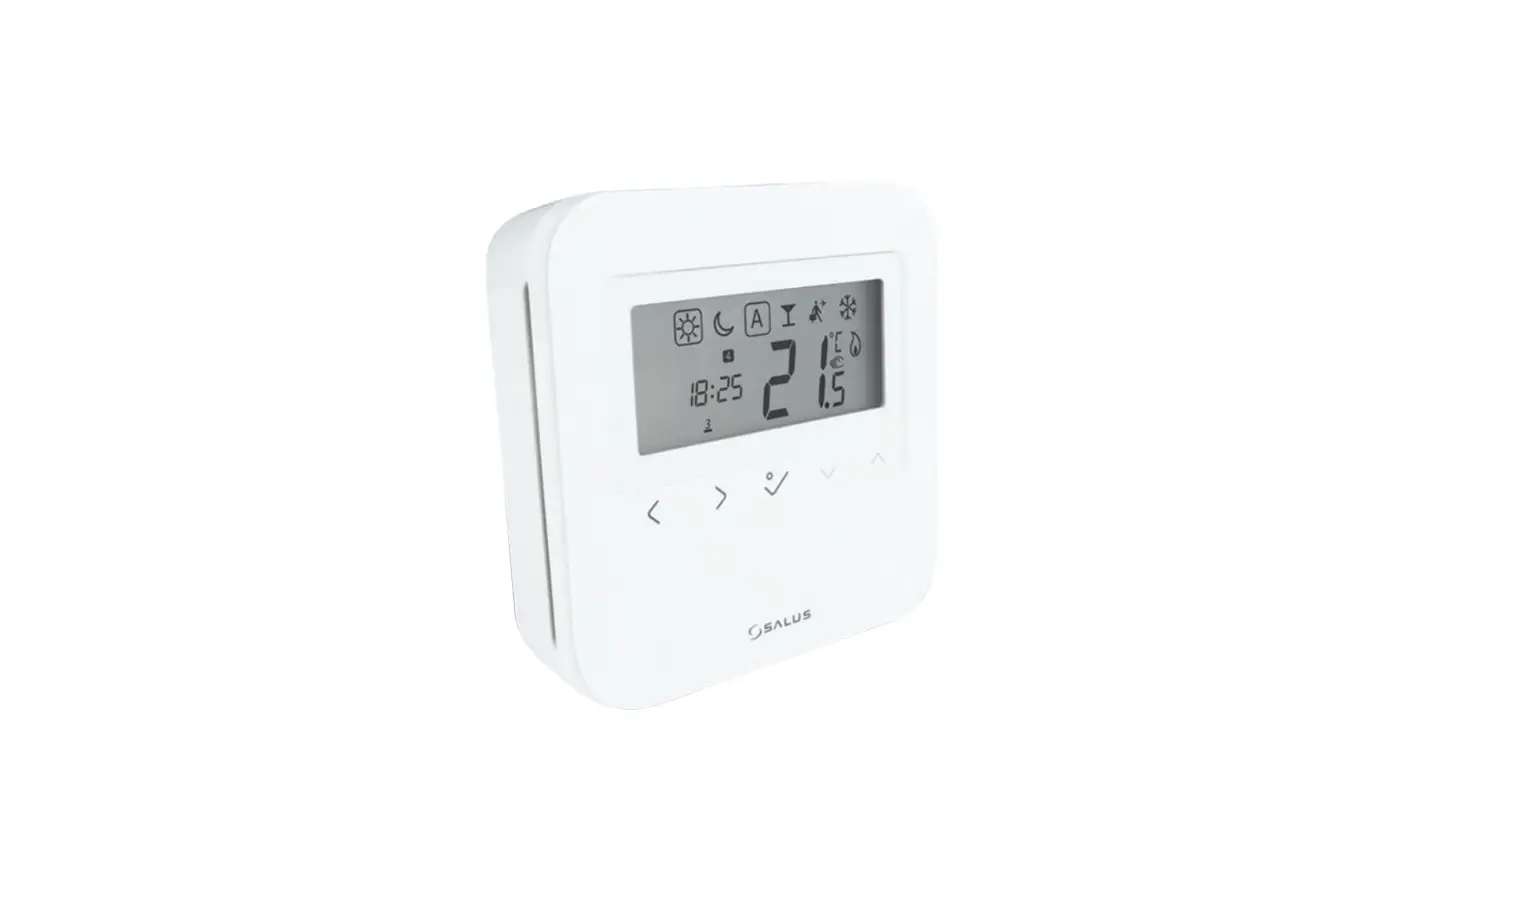
HTRP24 is a stylish and accurate programmable digital room thermostat which requires 24V power supply. You can now simply adjust your home temperature as desired in order to create a comfortable home environment.
Product Compliance
This product complies with EMC 2014/30/EU, LVD 2014/35/EU, RED 2014/53/EU and RoHS 2011/65/EU. Full text of the EU Declaration of Conformity on www.saluslegal.com.
![]() Safety Information
Safety Information
Use in accordance with the regulations. Indoor use only. Keep your equipment completely dry. Disconnect your equipment before cleaning it with a dry towe
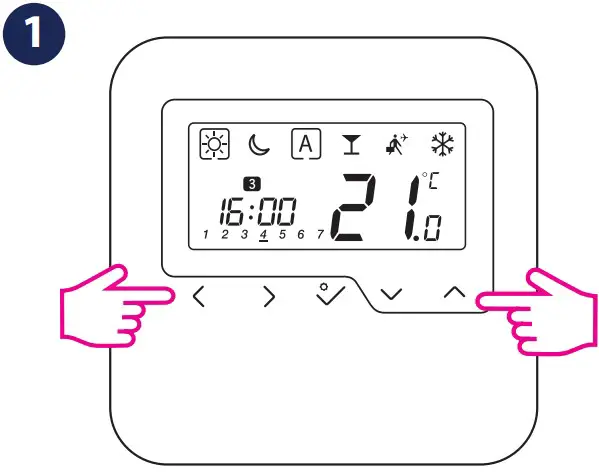
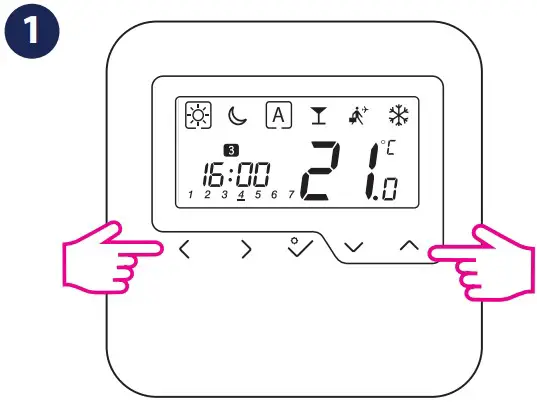
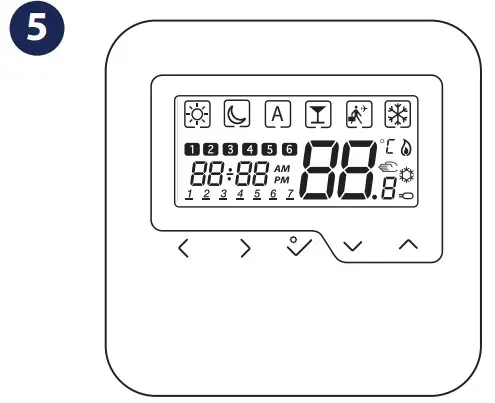
LCD icons
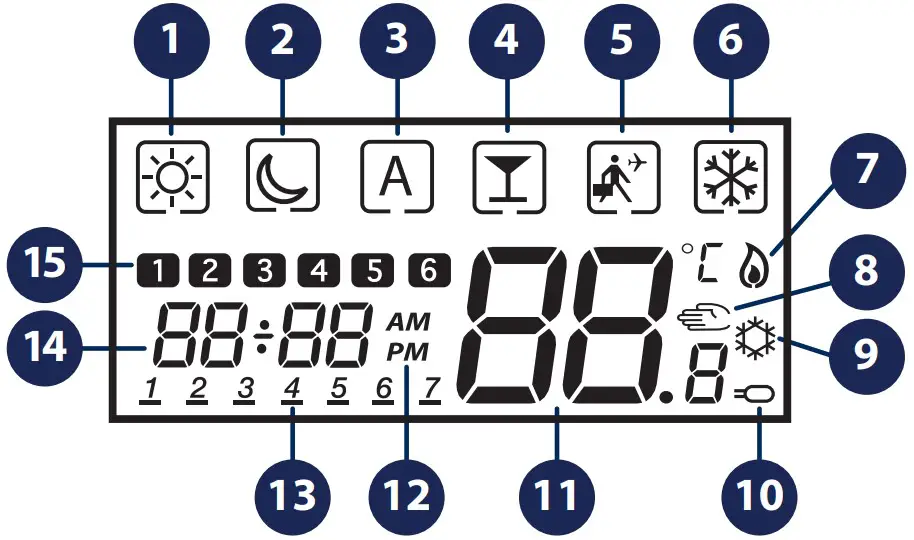
- Comfort temperature
- Reduced temperature
- Auto mode
- Party mode
- Holiday mode
- Frost protection mode
- Heating icon
- Manual Mode / Temporary Override
- Cooling icon
- Sensor icon
- Current Temperature
- AM/PM
- Day of the week
- Clock
- Program number
| Mode selection. Long press to return < to main screen without saving. Short press < to return to previous screen. | |
| OK key. Short press to confirm selection. Long press to save and return to main screen. Long press to enter Program/Clock/Offset. | |
| Decrease or increase Setpoint Temperature. Decrease or increase Day, Clock. |
Button combinations
 | Press and hold the buttons simultaneously to enter installer mode. |
Wiring diagram
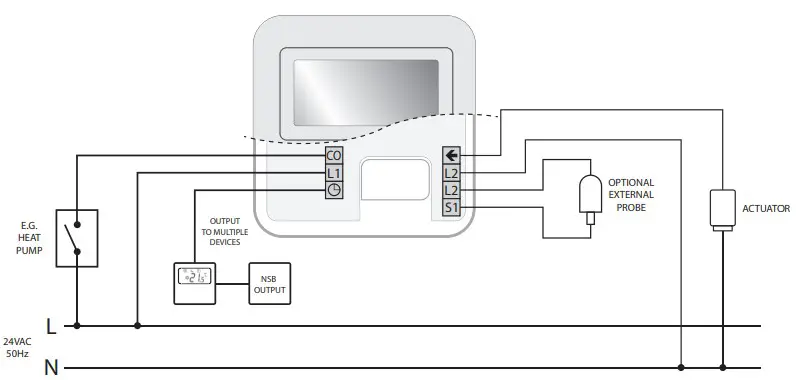
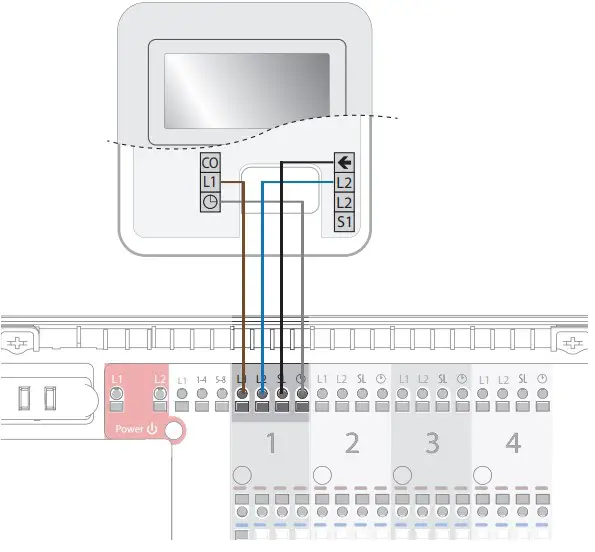
You can wire the thermostat directly to the wiring centre (24V) or to an actuator (24V) (purchased separately).
Installing the unit
Gently remove front housing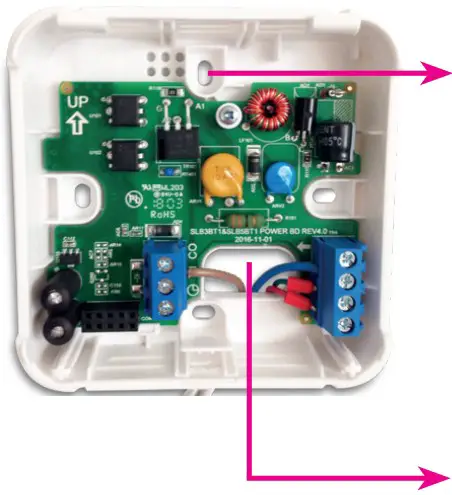
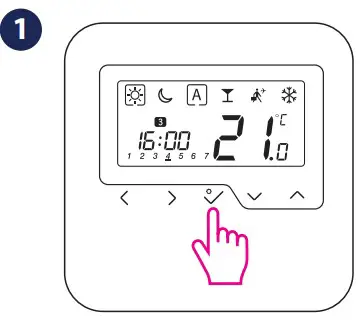
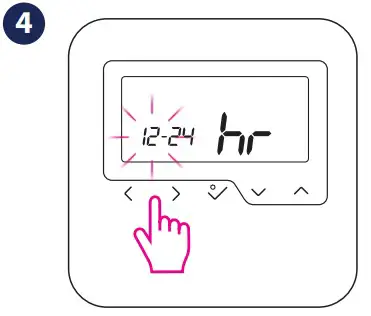
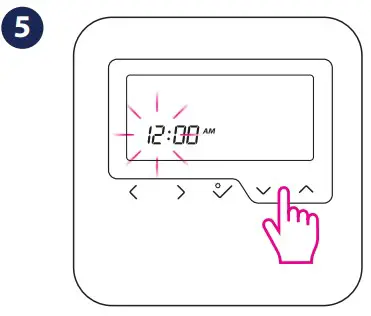
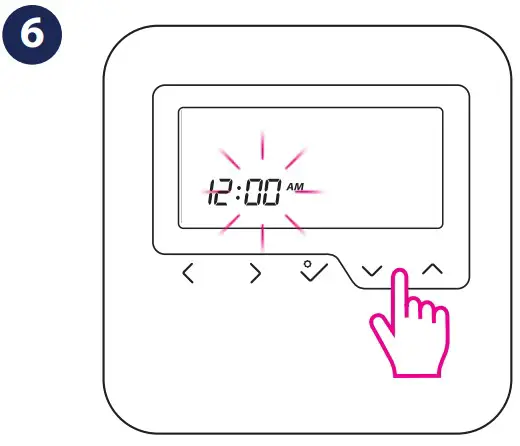
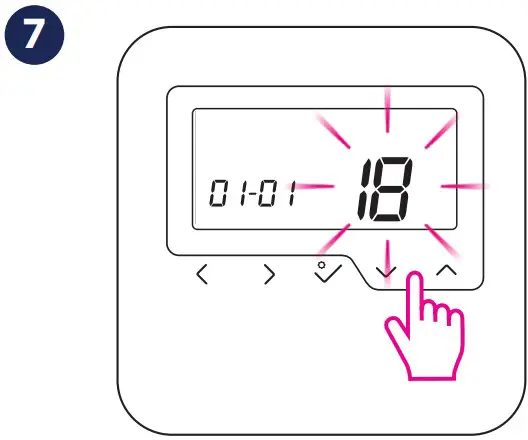
Setting date and time
- Long press
 .
.
- Press to confirm

- Press < or > to choose 12/24 hr
- Set the hour by using or.
- Set the hour by using
 or. Press to confirm
 - Set the minutes by using or . Press to confirm.

- Set year by using or . Press to confirm. Repeat same process for the month and day settings. Press to exit to main screen.

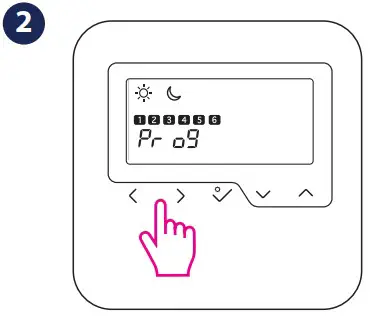
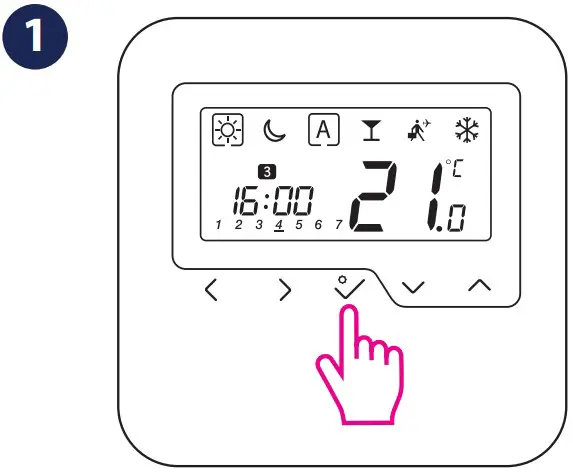
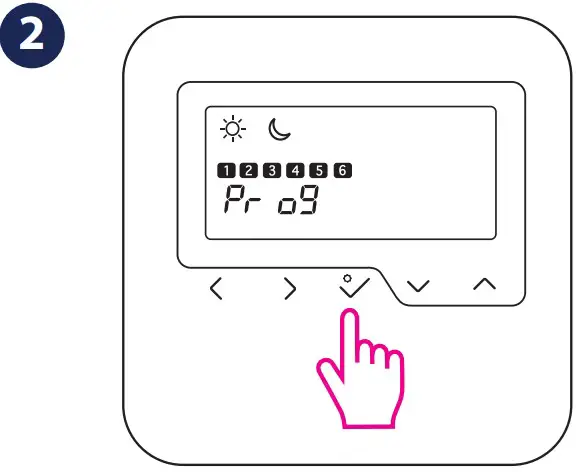
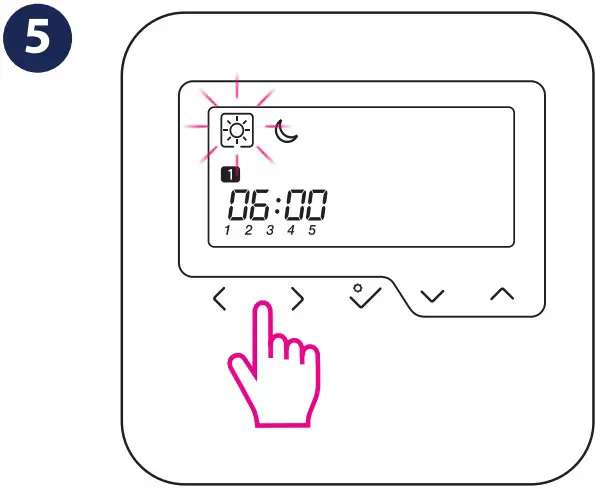
Setting program
- Long press .

- Press for programs settings

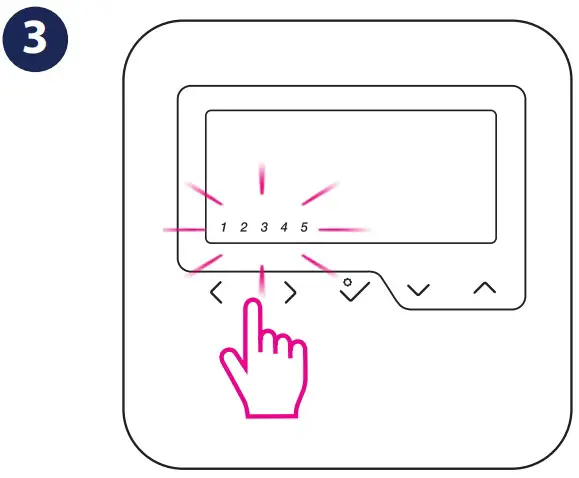
- Choose your program type by using or . Press to confirm. See note.

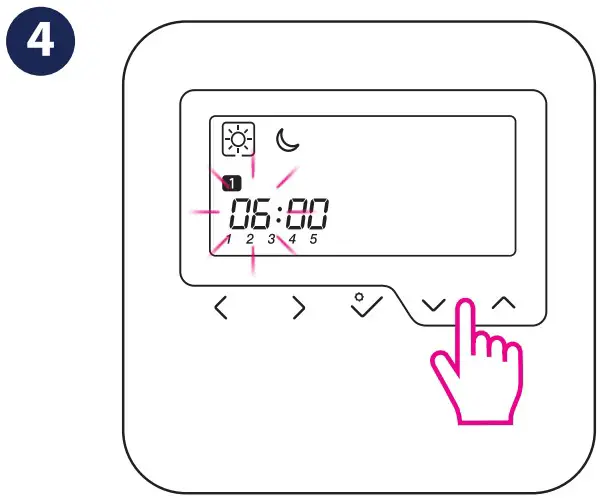
There are 3 program types available: Working Week 5+2 (1-5 + 6, 7), All week the same (1-7) and Individual Days (1,2,3,4,5,6,7). - Set the hour using or . Press to confirm. Repeat same process for setting the minutes.

- Select the desired temperature or
 by pressing
  . Press to confirm.
- Repeat the procedure for each of the 6 time sets available throughout the day
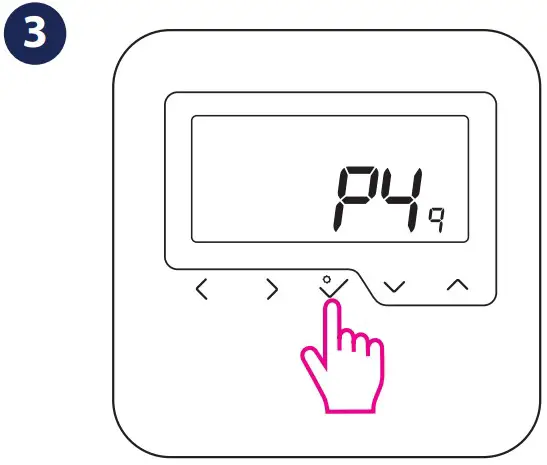
Installer Mode
- Press the indicated keys together for3 seconds

- Select P49.

- Press to confirm

- You have reached Installer Mode. Select setting by pressing or . Press to confirm.

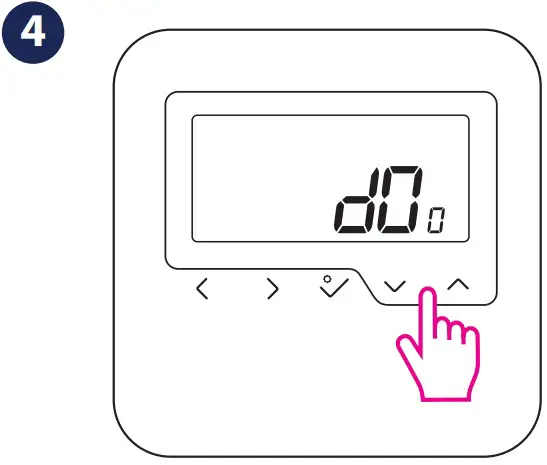
Resetting device
- Press the indicated keys together for3 seconds

- Select P47 if you want to reset to factory settings.

- Press to confirm
- Press to confirm.
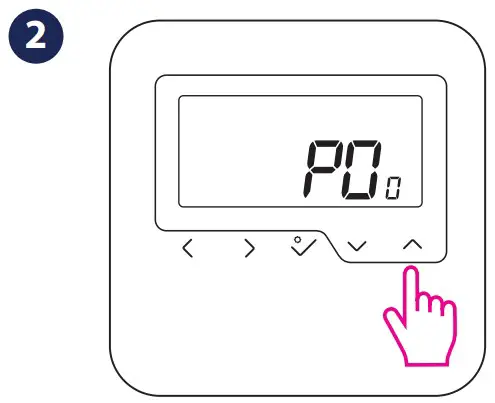
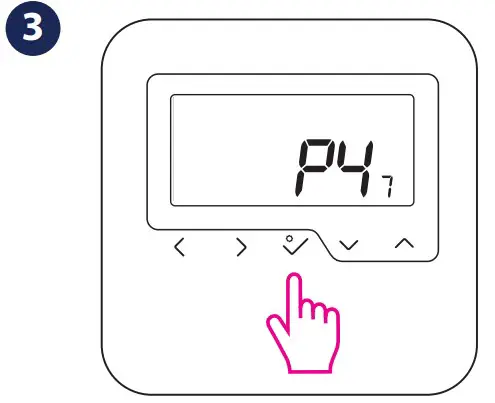
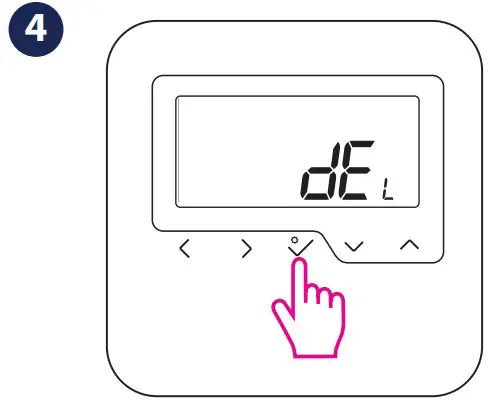
After Reset, all your settings will be lost.
Head Office:
SALUS Controls plc
SALUS House
Dodworth Business Park South,
Whinby Road, Dodworth,
Barnsley S75 3SP, UK.
T: +44 (0) 1226 323961
E: [email protected]
E: [email protected]
FR/ NL / DE:
[email protected]
tel: +49 6108 8258515
SALUS Controls is a member of the Computime Group Maintaining a policy of continuous product development SALUS Controls plc reserve the right to change specification, design and materials of products listed in this brochure without prior notice.
For PDF Installation guide please go to www.salus-manuals.com
Issue date: May 2018
Version: V004 02/05/18


 Wired Programmable Digital Thermostat User Manual")


