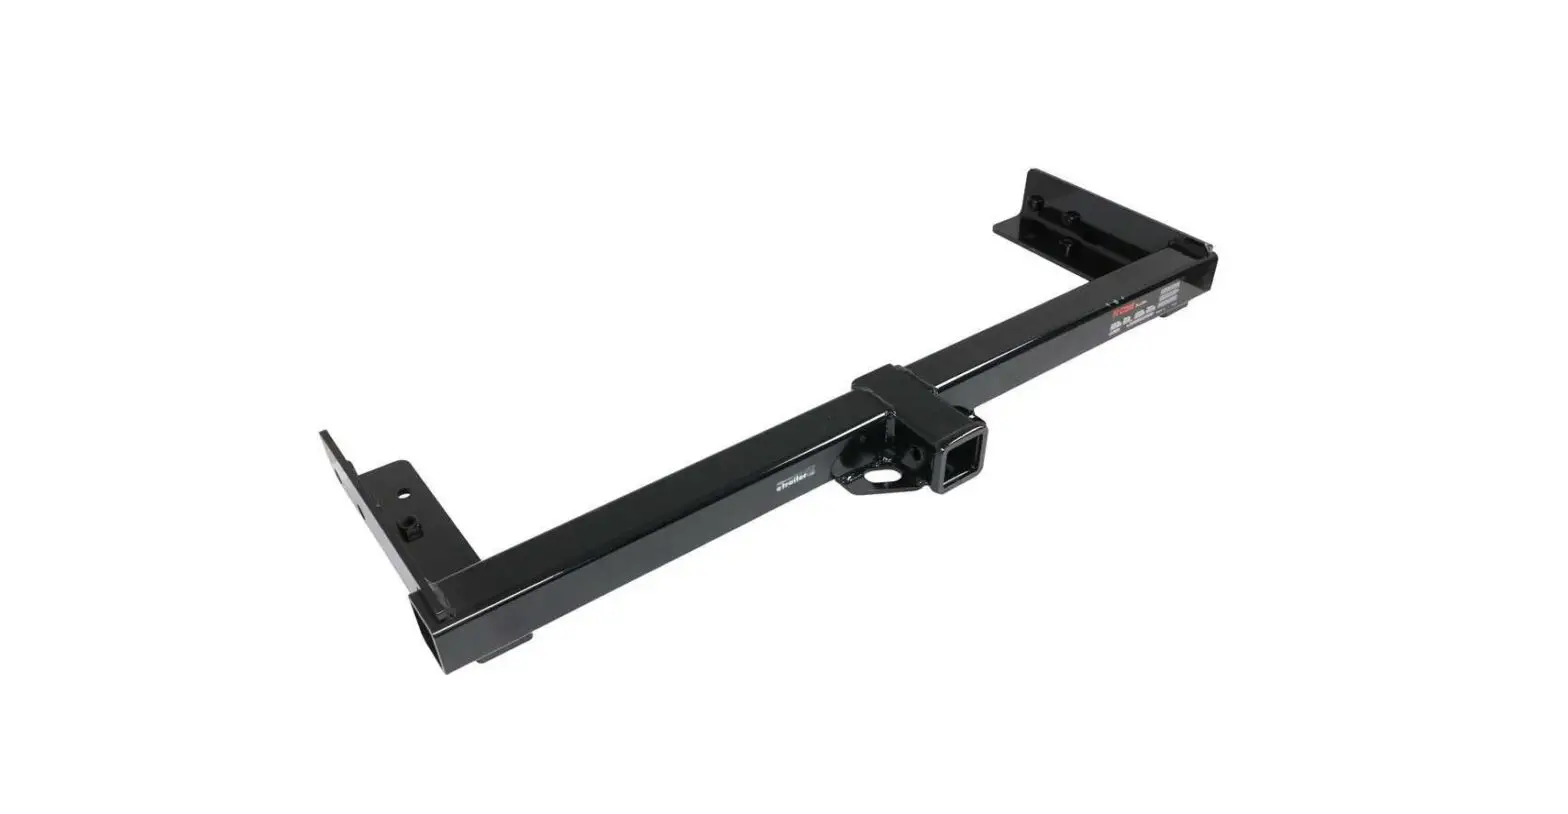
CURT 13507 Class III Trailer Hitch Instruction Manual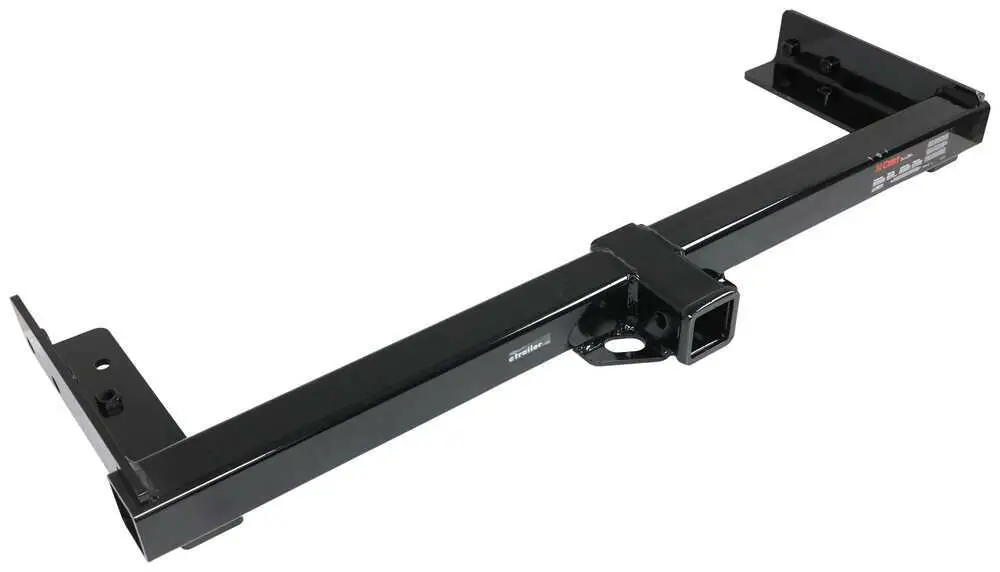
![]() WARNING
WARNING
Never exceed the vehicle manufacturer’s recommended towing capacity
NOTICE
Visit www.curtmfg.com for a full-color copy of this instruction manual, as well as helpful videos, guides and much more!
Before you begin installation, read all instructions thoroughly.
This installation requires:
- Temporary removal of bumper cover
Proper tools will improve the quality of installation and reduce the time required.
Periodic inspection of the trailer hitch should be performed to ensure all mounting hardware remains tight and structural components are secure.
To help prevent damage to the product or vehicle, refer to the specified torque specifications when securing hardware during the installation process.
SAFETY INSTRUCTIONS
Safety glasses should be worn at all times while installing this product.
Product Registration and Warranty
CURT stands behind our products with industry-leading warranties. To get copies of the product warranties, register your purchase or provide feedback, visit: warranty.curtgroup.com/surveys
Level of Difficulty
Difficult
Installation difficulty levels are based on time and effort involved and may vary depending on the installer level of expertise, condition of the vehicle and proper tools and equipment.
Weight Carrying Capacity
Gross trailer weight (GTW) | 7,500 lbs. |
Tongue weight (TW) | 750 lbs. |
Weight Distribution Capacity
Weight distribution (WD) | 7,500 lbs. |
| WD tongue weight (WDTW) | 750 lbs. |
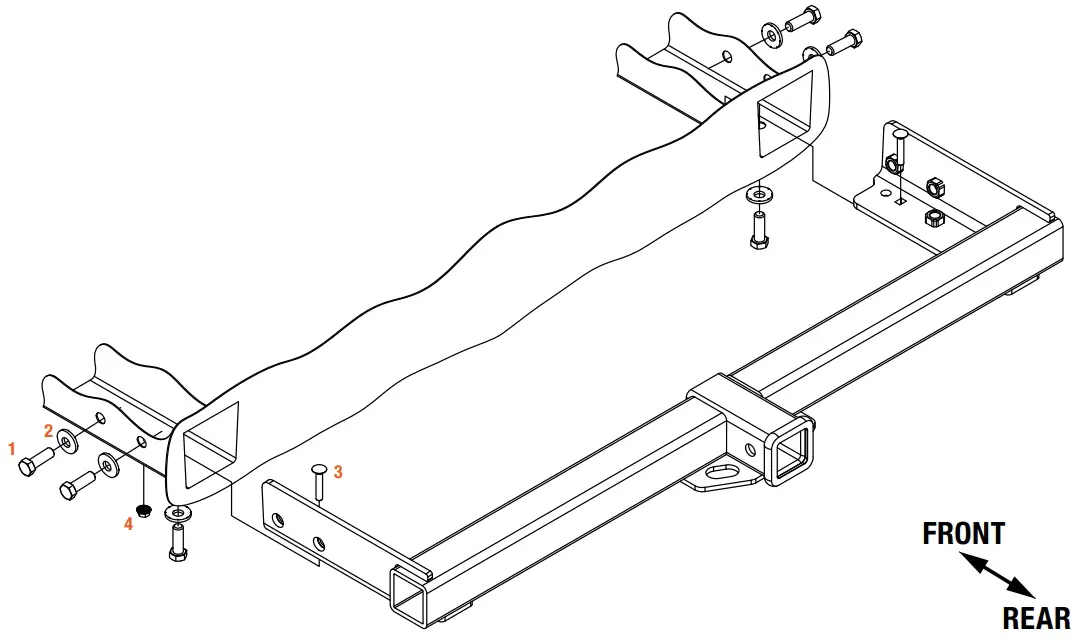
Parts List
| Item | Qty | Description |
| 1 | 6 | Hex bolt, 1/2″-13 x 1.5″ |
| 2 | 6 | Conical-toothed washer, 1/2” |
| 3 | 2 | Carriage bolt, 5/16″-18 x 1.75″ |
| 4 | 2 | Serrated-flange nut, 5/16″-18 |
Tools Required
| Ratchet | Socket, 10mm |
| Torque wrench | Socket, 13mm |
| Flathead screwdriver | Socket, 21mm |
| Torx bit, T-30 | Socket, 1/2” |
| Socket, 8mm | Socket, 3/4” |
* For a tools reference guide visit: curtmfg.com/trailer-hitch-installation
ASSEMBLY
Parts List | ||
Item | Qty | Description |
| 1 | 6 | Hex bolt, 1/2″-13 x 1.5″ |
| 2 | 6 | Conical-toothed washer, 1/2” |
| 3 | 2 | Carriage bolt, 5/16″-18 x 1.75″ |
| 4 | 2 | Serrated-flange nut, 5/16″-18 |
CONICAL TOOTHED WASHER ORIENTATION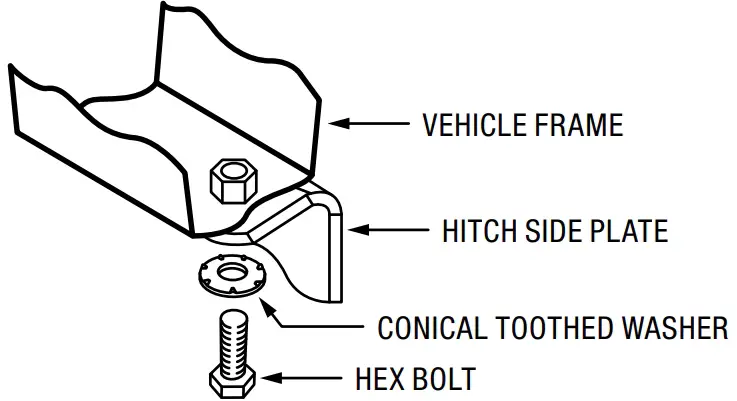
Step 1
Remove four bolts from the bottom of the bumper cover using a 10mm socket. Remove four bolts from each wheel well liner starting from the rear working up using an 8mm socket.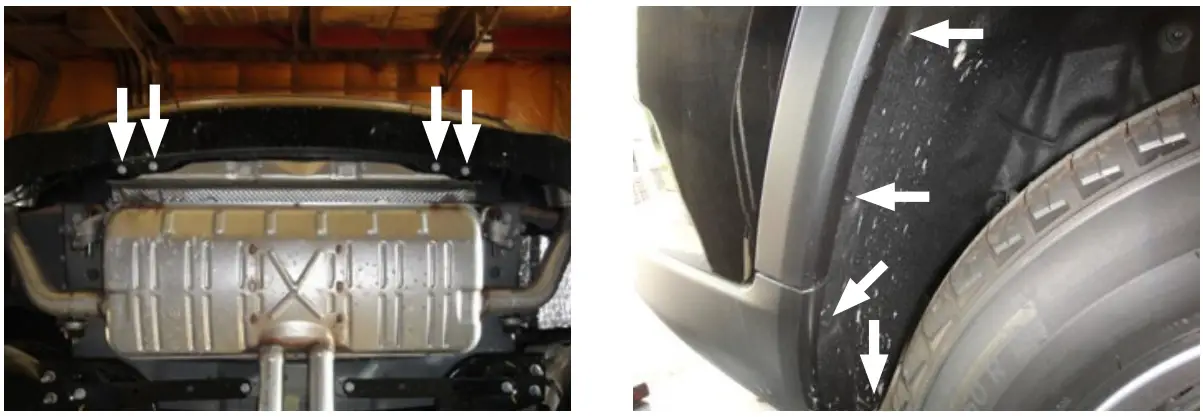
Step 2
Gently pull the wheel trim away from the vehicle, starting at the bottom and working up. Squeezing the clips behind the wheel liner may ease removal.
Remove the newly exposed bolt using a 10mm socket.
Repeat on the other side of the vehicle.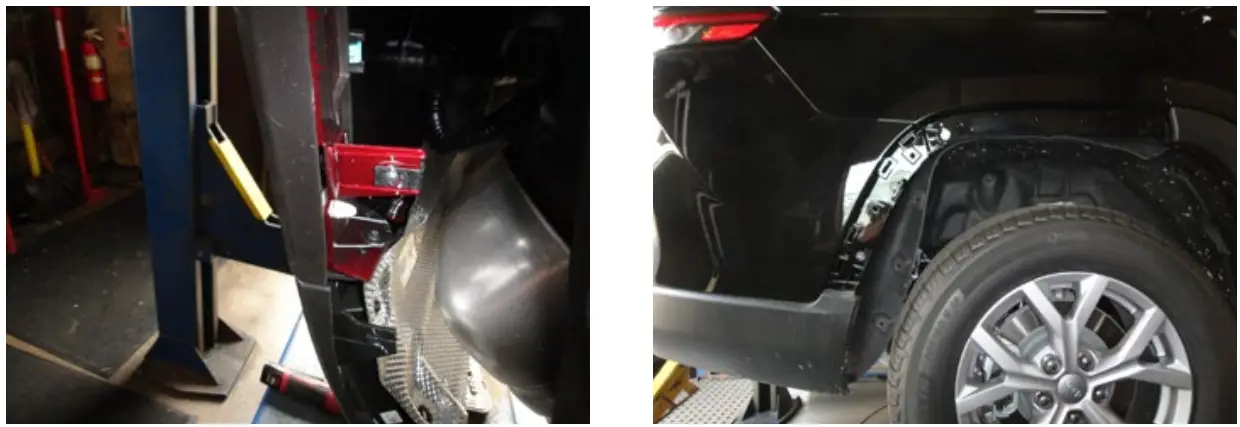
Step 3
Disconnect the electrical connector located to the rear of the tire behind the bumper cover on each side by pulling the tab on the vehicle side of the connector towards the front of the vehicle then pushing it down.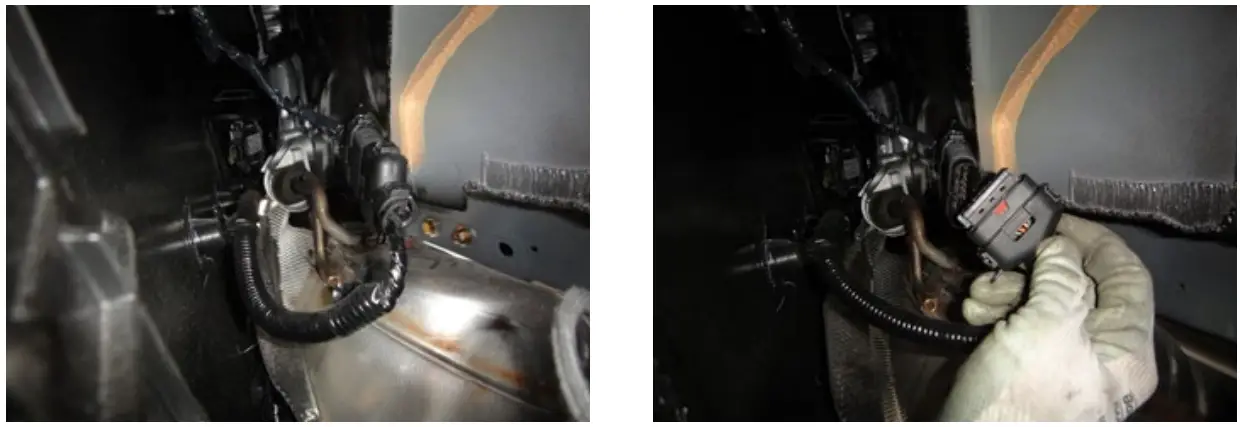
Step 4
With the rear lift gate open, use a flat head screwdriver to remove the two black plugs in the bumper cover and remove the bolts with a 10mm socket.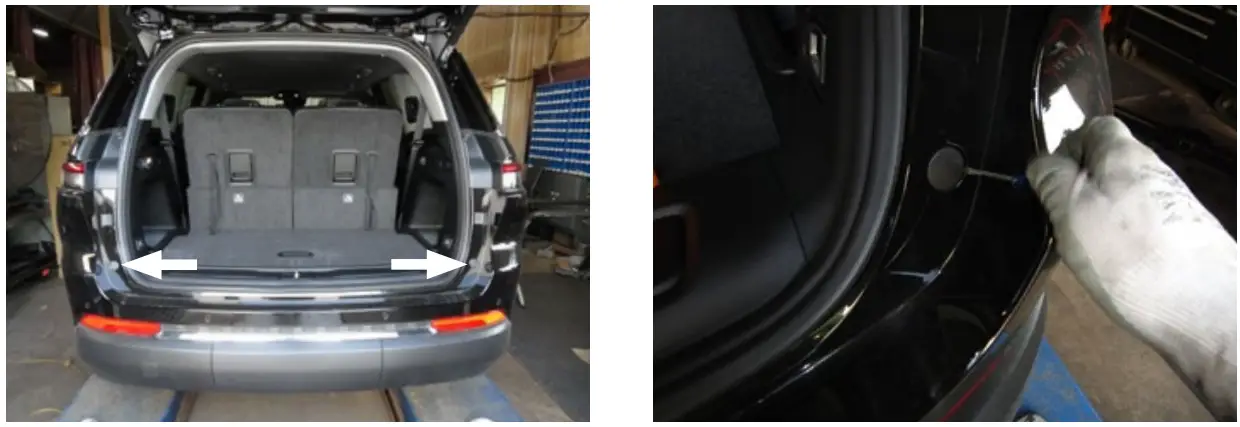
Step 5
Remove the taillight cover and remove the exposed bolt using a T-30 torx bit. Gently remove the taillight by pulling it straight rearward from the vehicle.
Set aside for reinstallation.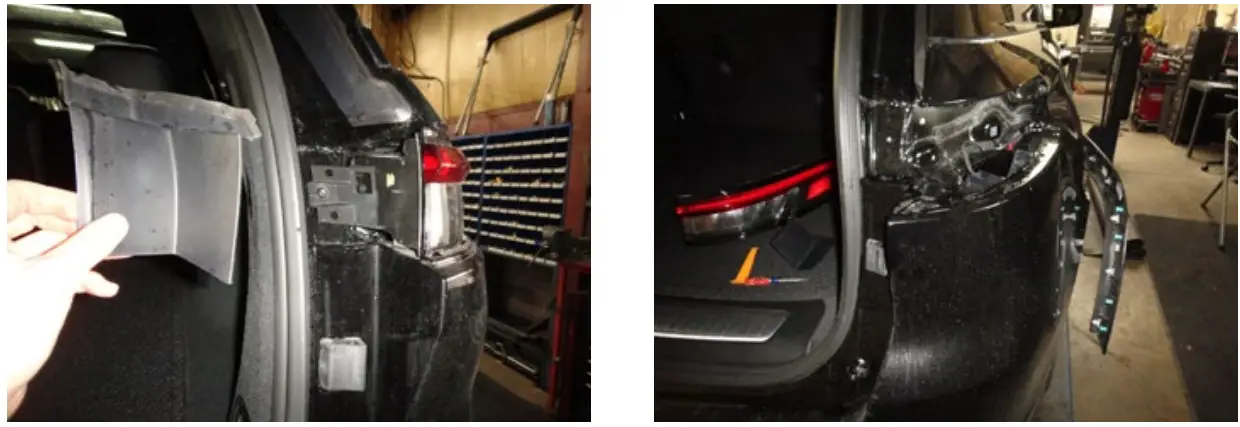
Step 6
Remove the bumper cover by gently pulling it away from the vehicle, starting at the wheel well and working towards the rear.
Set aside for reinstallation.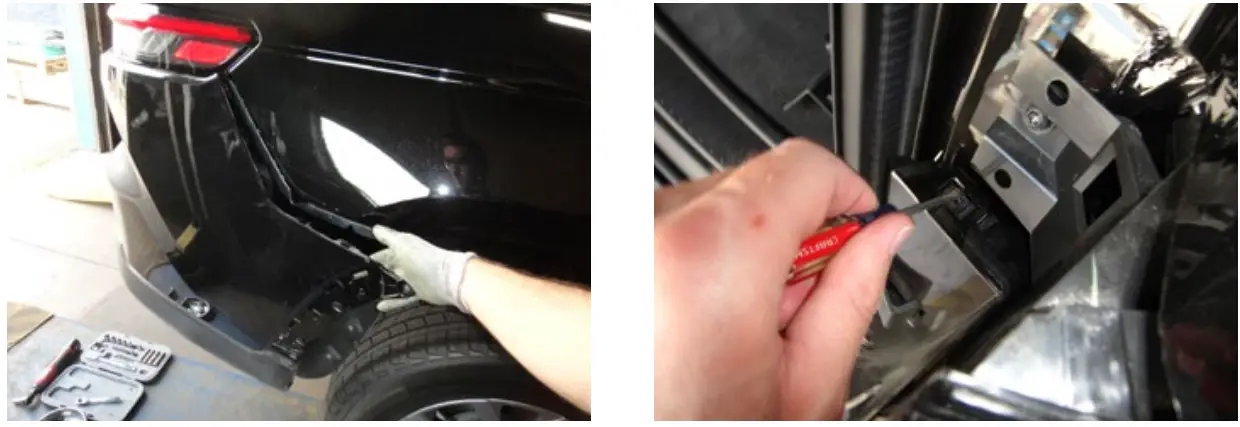
Step 7
Remove one bolt from each exhaust hanger on the bottom of the frame rail using 13mm socket.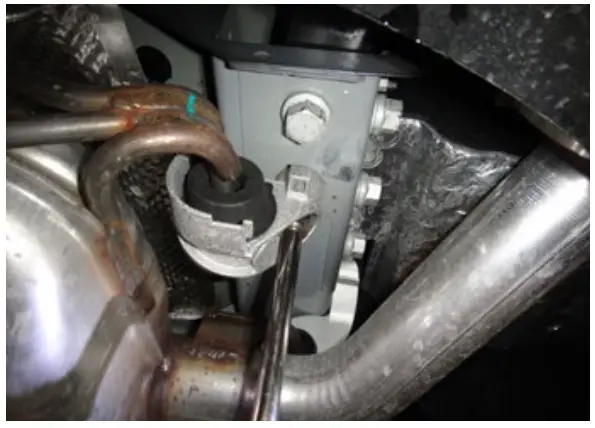
Step 8
Remove the rear bumper beam by removing two bolts from the outside and one bolt from the bottom of each frame rail using a 21mm socket. Return to the vehicle owner.
Step 9
Insert the hitch side plates into the end of the frame rails and loosely secure with supplied 1/2” bolts and conical toothed washers.
Insert 5/16” carriage bolts into the slots in the side plates by reaching in the end of the frame rail. Reinstall the exhaust using 5/16” serrated flange nuts.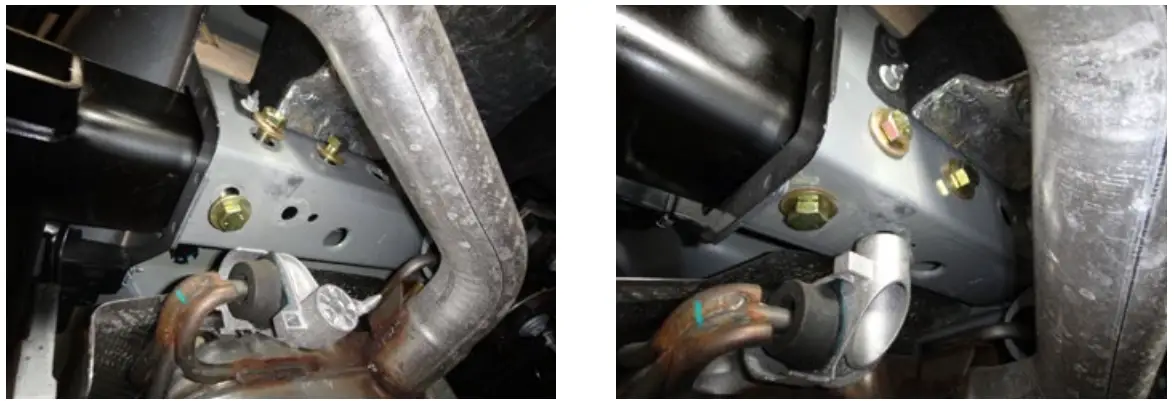
Step 10
Torque 1/2” hardware to 110 ft-lbs. Torque 5/16” hardware to 178 in-lbs.
Reinstall the bumper cover following steps 1 through 6 in reverse order.
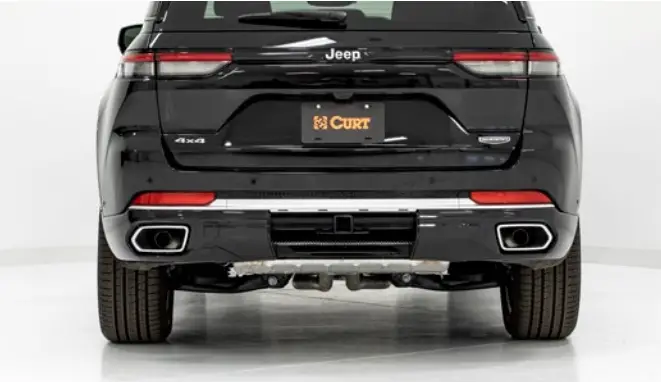
Final Installed Image

Support
PRODUCT SUPPORT: 877.287.8634
13507-INS-RA
04/05/2022
ECN9564