![]()
e 935
Instruction manual
Delivery includes
- e 935
- MZQ 800 microphone clamp
- pouch
- quick guide
- safety guide
Product overview
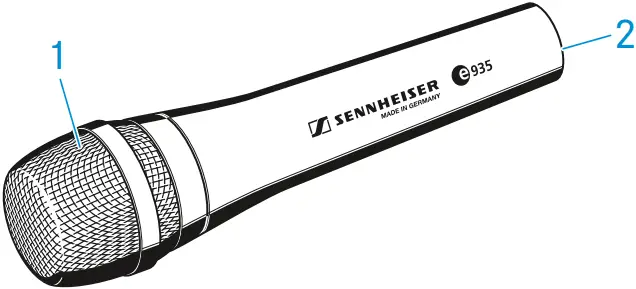
- Sound inlet basket
- XLR-3 connector
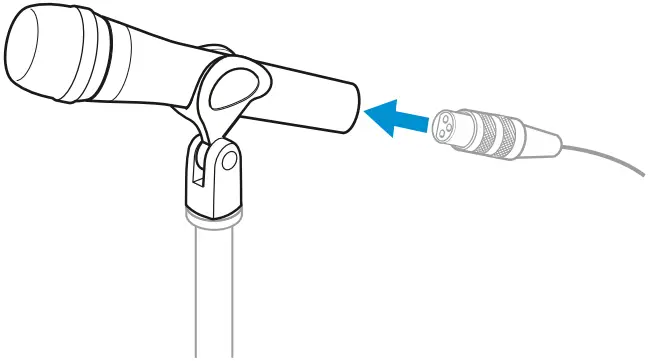
Installation
Attaching the microphone
- Screw the microphone clamp to a stand.
- Place the microphone with its back end into the microphone clamp.
- Orient the microphone together with the microphone clamp.

Connecting the microphone
- Connect the XLR-3 socket of the microphone cable (optional accessories) to the XLR-3 socket of the microphone.
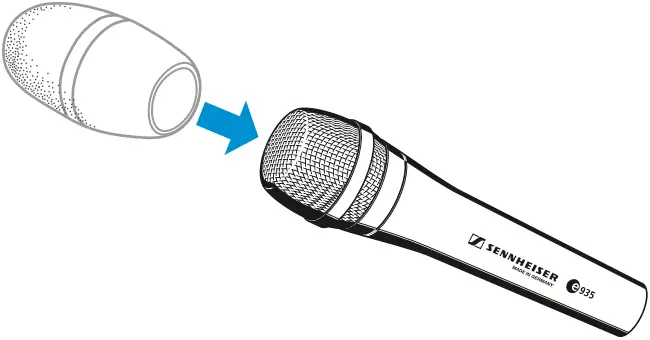
Using the windshield
- Place the MZW 4032 (optional accessories) windshield over the microphone head.
Operation
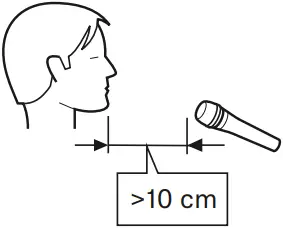
Holding the microphone
If you cover the microphone head during transmission, this will change the pick-up pattern of the microphone and consequently the sound.
- Only hold the microphone by its body.

Positioning the microphone
- It is vital to observe the following notes:
| Position | Resulting sound | Commentary |
| A | High proximity effect (large bass boost) Powerful, direct sound | Very little crosstalk from other sound sources |
| B | Less proximity effect (less bass boost) Some room ambience, natural, balanced sound | More crosstalk from other sound sources |
| C | Very little proximity effect (minimal bass boost) More room ambience, indirect sound | Higher crosstalk from other sound sources |
A B C


If sibilance occurs:
- Position the microphone slightly to the side and not directly in front of the mouth.
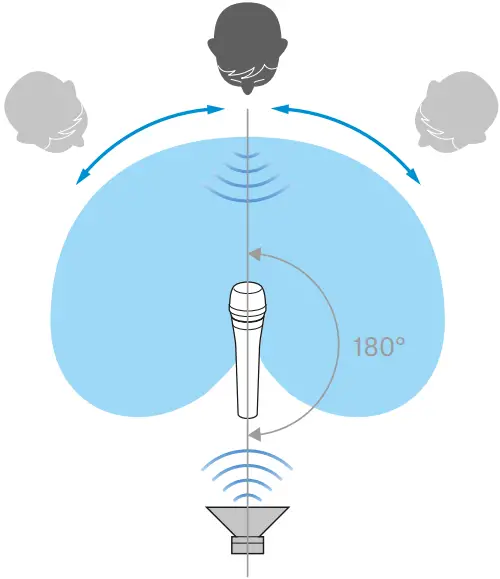
Positioning the monitor loudspeakers
- To prevent feedback and crosstalk, postion your monitor loudspeakers in the angle area of the highest cancellation of the microphone (approx. 180°).
Cleaning and maintaining the e 935
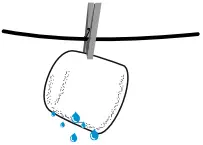
CAUTION
LIQUIDS CAN DAMAGE THE ELECTRONICS OF THE PRODUCT!
Liquids entering the housing of the product can cause a short-circuit and damage the electronics.
- Keep all liquids away from the product.
- Do not use any solvents or cleansing agents.
- Disconnect the products from the power supply system and remove rechargeable batteries and batteries before you begin cleaning.
- Clean all products only with a soft, dry cloth.
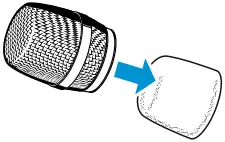
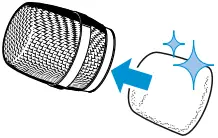
Cleaning the sound inlet basket of the microphone module
- Unscrew the sound inlet basket.
- Remove the foam insert from the sound inlet basket.
- Use a slightly damp cloth to clean the sound inlet basket from the inside and ouside.
- If necessary, clean the foam insert with a mild detergent or replace the foam insert.
- Dry the foam insert.
- Reinsert the foam insert.
- Replace the sound inlet basket on the microphone head and screw it tight.
 |  |  | |
 |  |  |  |
Specifications
| Transducer principle | dynamic |
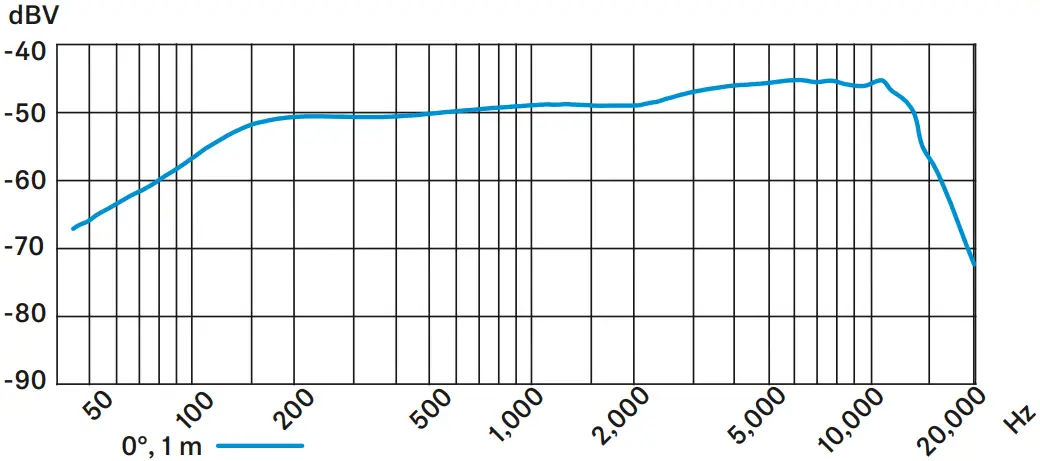
| Frequency response | 40 – 18,000 Hz |
| Pick-up pattern | cardioids |
| Sensitivity (free field, no load) | 2.8 mV/Pa |
| Nominal impedance (at 1 kHz) | 350 Ω |
| Min. terminating impedance | 1 kΩ |
| Connector | XLR-3 |
| Temperature range | 0 °C to +40 °C |
| Dimensions | ⌀ 47 x 151 mm |
| Weight | 355 g |
Polar pattern
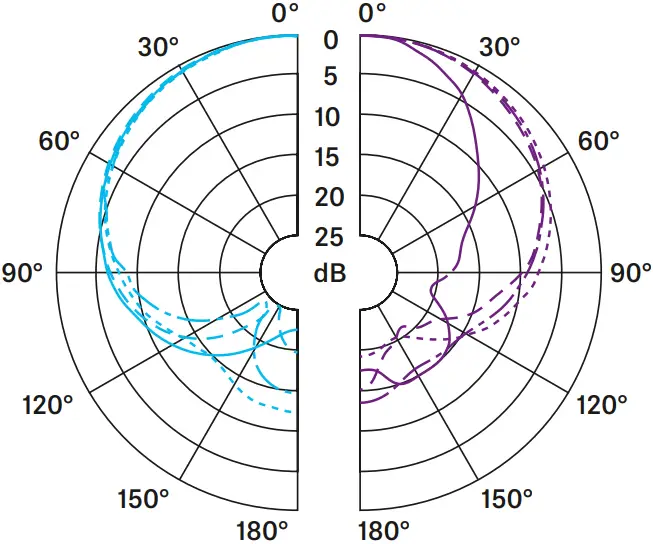
125 Hz ![]()
250 Hz ![]()
500 Hz ![]()
1,000 Hz ![]()
2,000 Hz ![]()
4,000 Hz ![]()
8,000 Hz ![]()
16,000 Hz ![]()
Frequency response
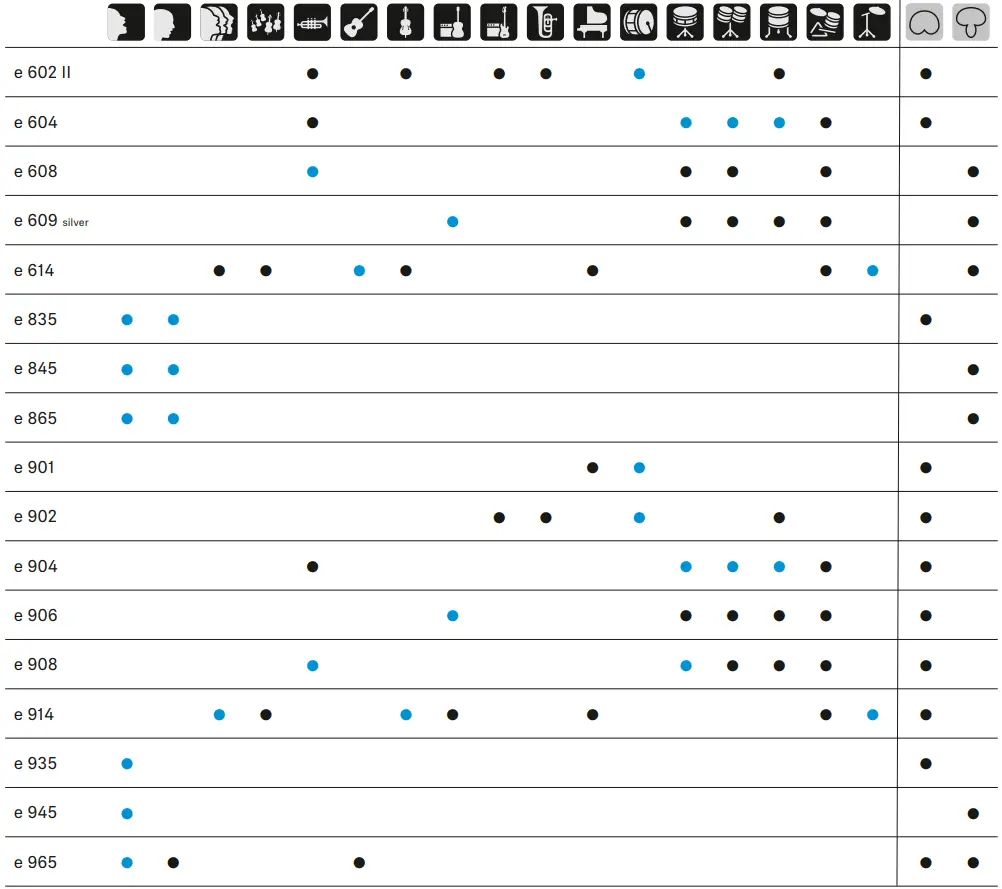
Overview of applications
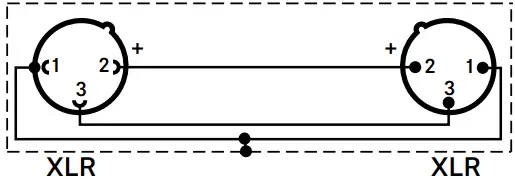
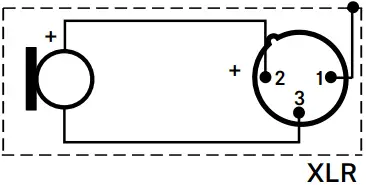
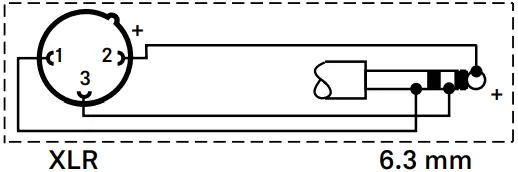
Connector assignment
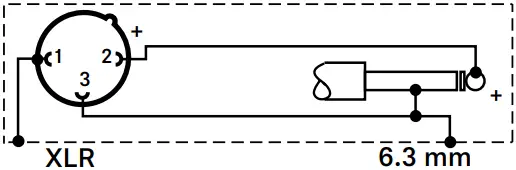 UNBALANCED
 BALANCED
Overview of applications
• Primary application
• Secondary application
![]()
e 935 |


