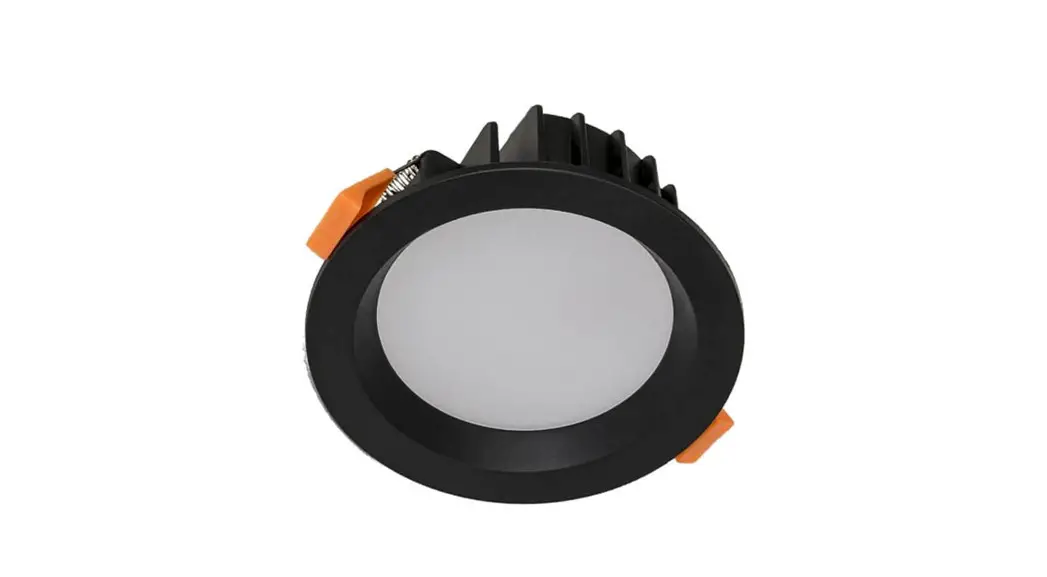
![]() Lighting HV5522T-BLK Polly + Gleam Recessed LED Downlight
Lighting HV5522T-BLK Polly + Gleam Recessed LED Downlight
Instruction Manual
Product Specification
| Model No. | HVSS22T-BLK | HVSS22T-WHT | HV5528T-BLK | HV5528T-WHT | I HVSS28D2W-BLK | I HVSS28D2W-WHT |
| Name | Polly | Gleam | ||||
| Material | Polycarbonate | Polycarbonate Face with Aluminium Body | ||||
| Colour | Black | White | Black | I White | I Black | I White |
| Cut Out | 90mm | 90mm | ||||
| IC Rating | IC-4 | IC-4 | ||||
| IP Rating | IP54 – Front of fitting only | IP54 – Front of fitting only | ||||
| Input Voltage | 240v AC | 240v AC | ||||
| Protection Class | 2 (No Earth Required) | 2 (No Earth Required) | ||||
| Lamp Base | Built-in LED | Built-in LED | ||||
| Lamp Wattage | lx 8w | lx 9w | ||||
| Colour Temp | TRI Colour – 3000k, 4000k, 5500k | TRI Colour – 3000k, 4000k, 5500k | Dim to Warm | |||
| Lumens | 6351m,9131m,841Im | 680lm, 7951m, 7451m | 6851m | |||
| CRI | > 80 | > 80 | ||||
| Dimmable | Yes – Triac Dimmable | Yes – Triac Dimmable | ||||
| Warranty | 3 Years Replacement | 3 Years Replacement* | ||||
Dimensions
| HV5822 Dimension | HV5822 Dimension |
 | 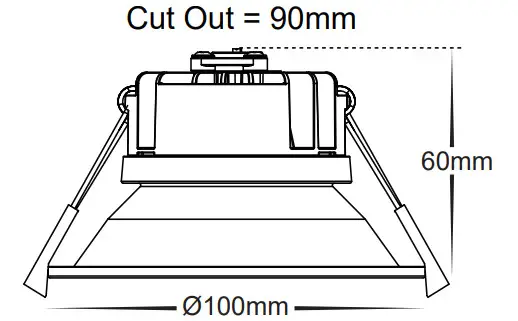 |
| HV5522 Installation Daigram | HV5522 Installation Daigram |
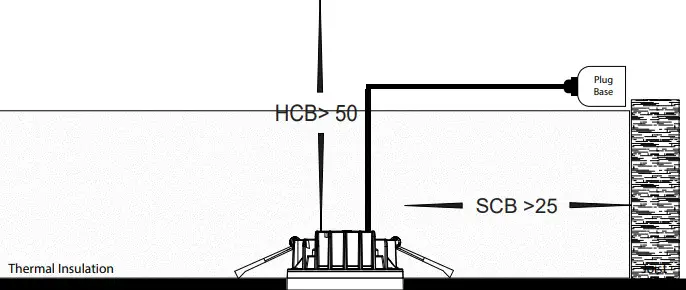 | 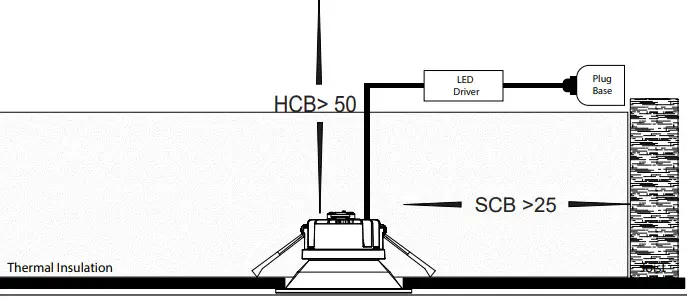 |
Important Safety Issues:
- A qualified electrician must install this product according to AS/NZS 3000.
- Ensure all electrical mains are disconnected before any installation.
- Modification of this product will void any warranty.
- Havit Lighting does not take responsibility for wrong installation, incorrect use, or use of installation material that does not belong to the system.
- All 316 stainless steel fittings must have regular cleaning maintenance to prevent any tea staining on the fitting. (Warranty does not cover Tea Staining) Only LED
- The fitting can be installed under insulation, LED Driver must not be covered to allow for ventilation.
- This fixture must not be installed with loose fill insulation such as macerated paper and wool. LED driver must be mounted above any insulation covering the fixture.
- These instructions may be updated at any time due to product improvements. Please visit the website for the most current installation instructions.
Steps for Installation:
- Make sure that the electrical circuit is free of voltage (master switch off)
- Cut out the hole using the dimensions in the table above making sure each hole is not under joists or
- Fitting is provided with flex and plug, Plug cable into plug base installed earlier.
- For TRI Colour Models, Fitting is preset to 3000k, to change the slide switch on the back of fitting to desired color temperature.
- Pull back springs on fitting and insert into
- Once the fitting is in the hole, release clips, These springs will hold the fitting in
- All connections must be carried out carefully, inspect all contacts before switching back on the electric circuit.
Must be installed by a licensed electrician
Contact Details:
143 Beauchamp Road Matraville NSW 2036 Australia
Tel: 02 9381 8300 Fax: 02 9666 8881 Email: [email protected] Web: www.havit.com.au
Warranty Terms & Conditions*
![]() https://havit.com.au/pages/warranty-terms-and-conditions
https://havit.com.au/pages/warranty-terms-and-conditions
Additional Information


