
![]()
Retevis RT-5R Falshlight Walkie-Talkies RADIO
 MORE OPTIONAL ACCESSORIES OF RETEVIS
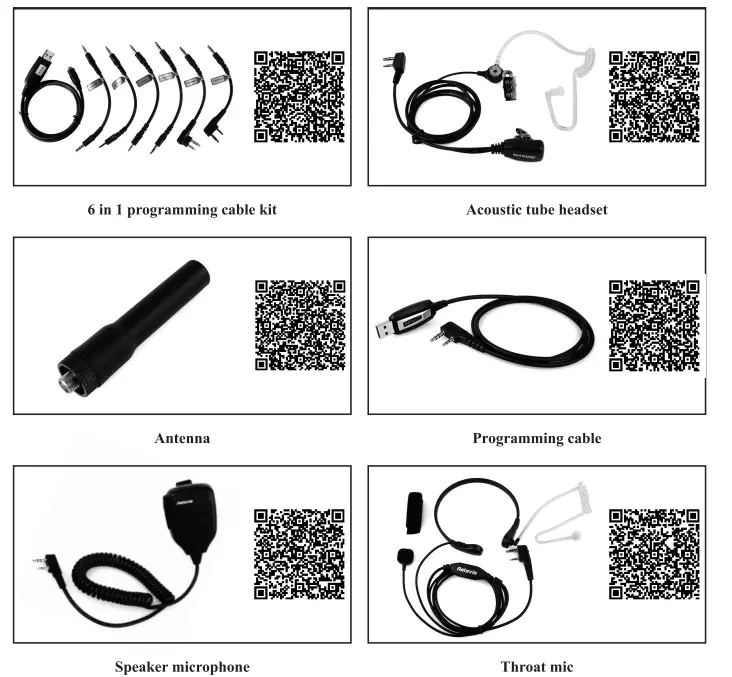
Note: For more information, please visit our website: www.rctevls.com
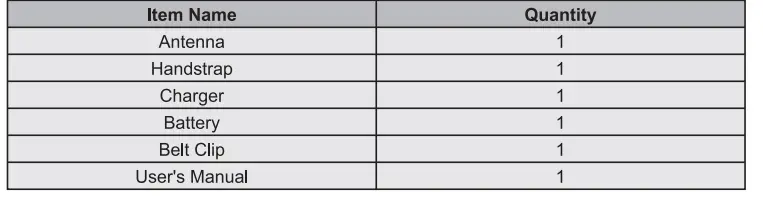
UNPACKING AND CHECKING EQUIPMENT
Carefully unpack the transceiver. We recommend that you identify the items listed in the following table before discarding the packing material. If any items are missing or have been damaged during
shipment, please contact the dealers immediately.
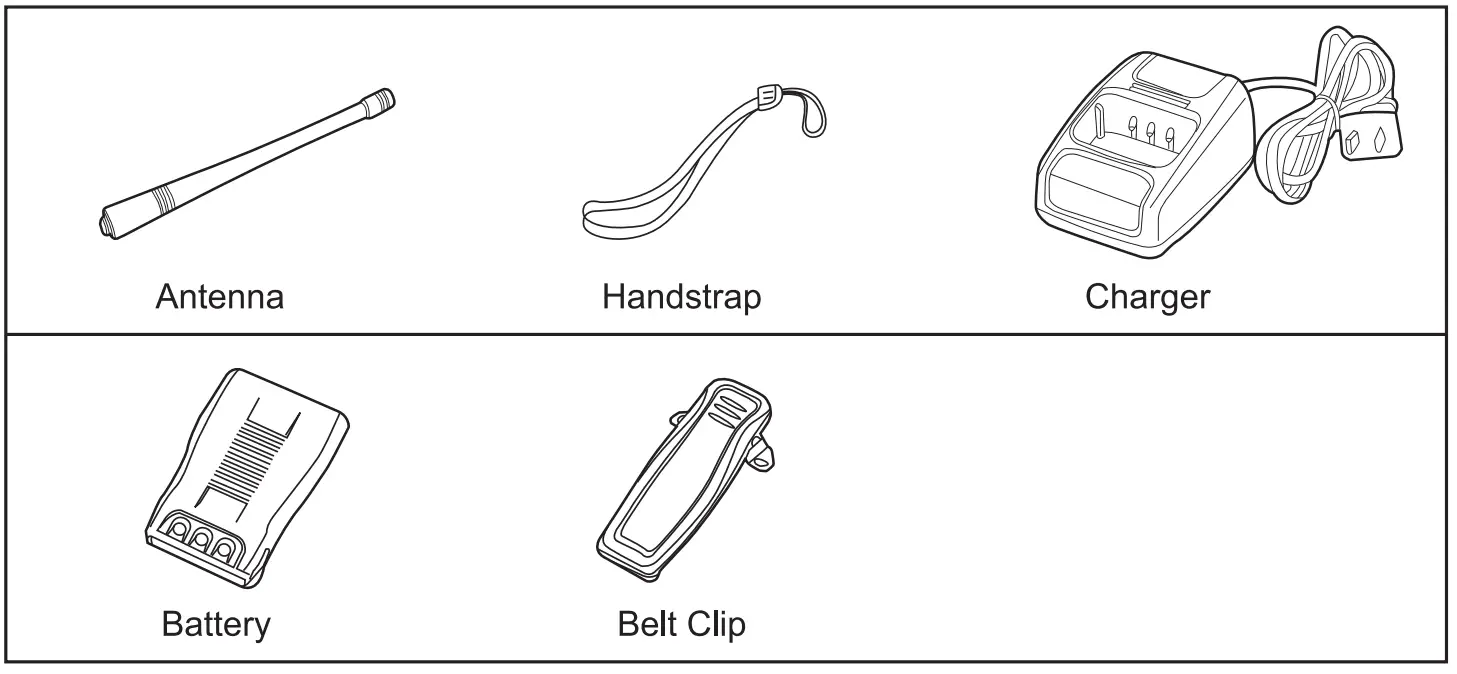
SUPPLIED ACCESSORIES
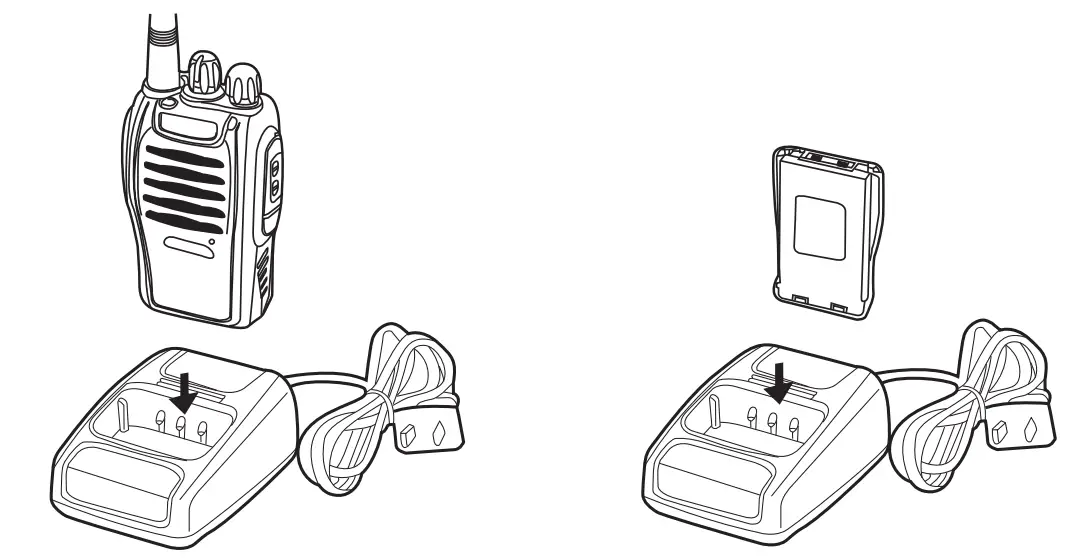
CHARGING THE LI-ION BATTERY PACK
Please charge the new battery pack before using it.
The new or stored (more than two months) battery pack, which can not reach its full capacity for the first charging. After 2 or 3 times charging and discharging, ii can reach full charge.
JUST SEE THE FOLLOWING INSTRUCTIONS
- Plug the adapter into an electric socket.
- Insert the transceiver or battery into the drop-in charging tray.
- Ensure that the battery’s contacts connect with the drop-in charging tray properly, while the charging is taking place, the light will glow red.
- After 3 hours charging, the LED indicator will light green which means the full charge. Now remove the battery or the transceiverfrom the drop-in charging tray.

Note:
Do not recharge the battery pack if it is fully charged. Doing so may cause the life of the battery pack to sliorten or the battery ., a pack may be damaged.
INSTALLING/REMOVING THE BATTERY PACK
The usage time of JL-11 Battery Pack is about 8 hours, which is based upon 5% transmit/5% receive/90% standby (standard duty cycle). See following images: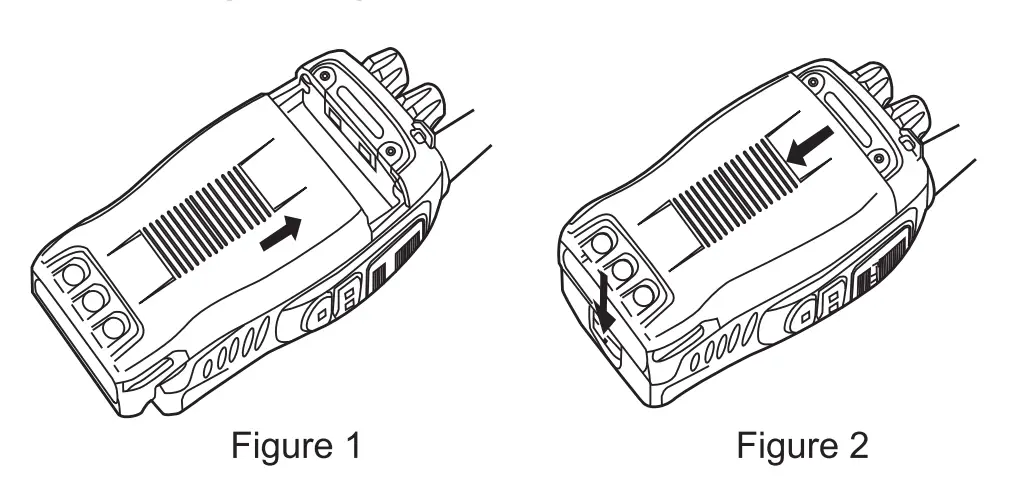 Caution:
- Do not short-circuit the terminals of the battery or throw the battery into the fire.
- Do nol disassemble the battery pack yourself.
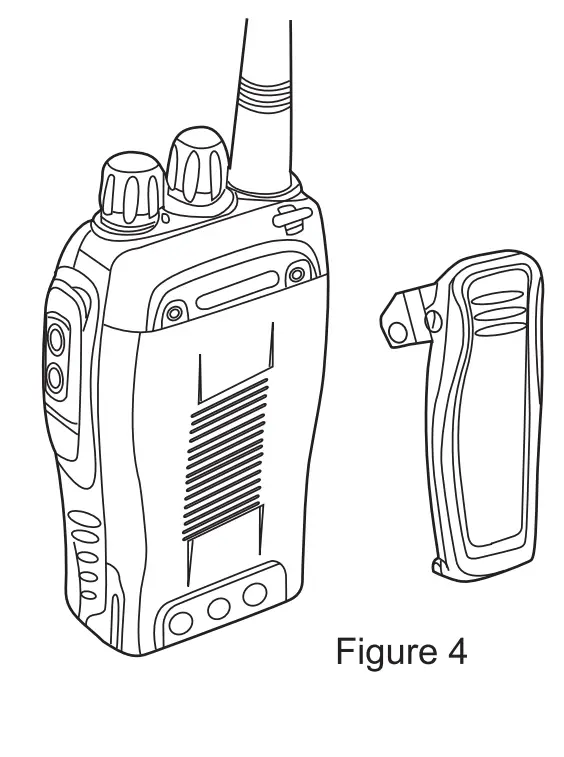
INSTALLING THE ANTENNA
Screw the antenna into the connector on the top of the transceiver by holding the antenna at its base and turning it clockwise until secure.
Note:
The antenna is neither a handle, a key ring retainer, nor a speaker, microphone attachment point. Using the antenna in these ways may damage the antenna and degrade your transceiver’s performance.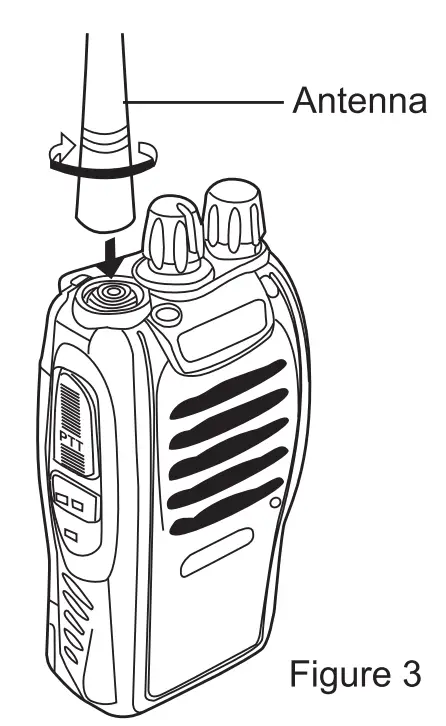
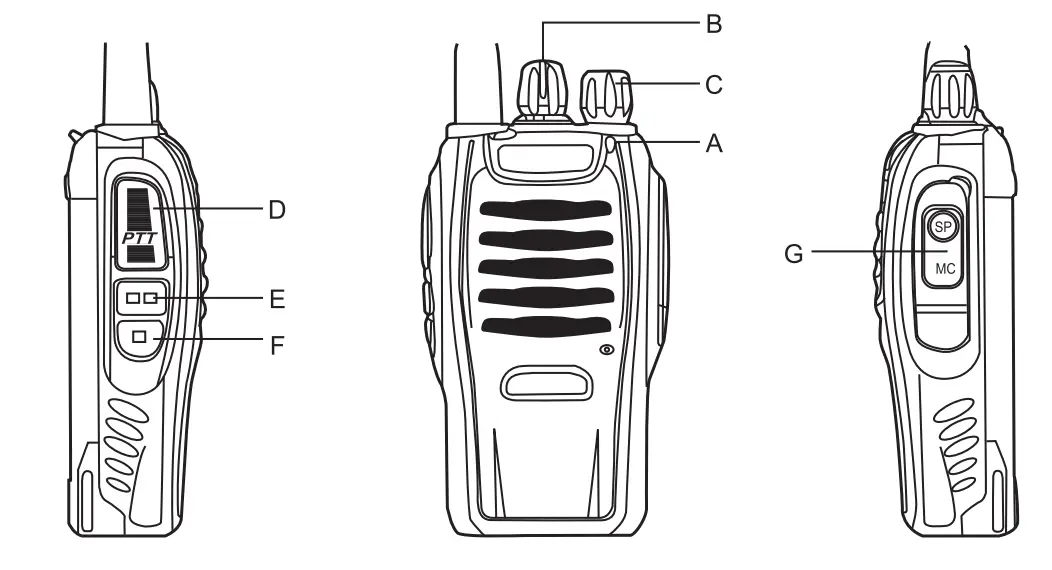
INSTALLING THE BELT CLIP
 If the belt clip is not installed, its mounting location may get hot during continuous transmission or under heated environment
Note:
If the belt clip is not installed, its mounting location may get hot during continuous transmission or under heated environment.
INSTALLING THE {OPTIONAL) SPEAKER/MICROPHONE
Insert the speaker/microphone plugs into the speaker/microphone jacks of the transceiver.
Note:
The transceiver is not fully water resistant when using speaker/microphone.
GETTING AC QUAINTED
- Led indicator—-The LED indicator lights continuously red when transmitting. And lights green when in reception condition.
- Channel Switch—Rotate it to select the channel. No.16 channel is the scanning channel.
- POWER SWITCHNOLUME CONTROL
Turn clockwise to switch ON the transceiver.
Tum counterclockwise fully to switch OFF the transceiver. Rotate to adjust the volume. - PTT (PUSH-TO-TALK) BUTTON
Press this button, then speak into the microphone to call a station. Release to receive a call. - MONITOR BUTTON
Press and hold (Squelch OFF) to hear the background noise;Release to return to normal operation. - FUNCTION KEY—-Just press to activate the torch function.
- SPEAKER/MICROPHONE JACKS
OPERATION
SWITCHING POWER ON/OFF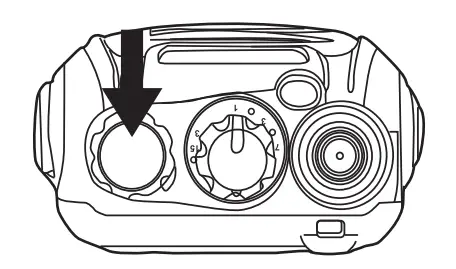
Turn the power switch/volume control clockwise. You will hear a beep and speech, indicating the transceiver is ON.
ADJUSTING THE VOLUME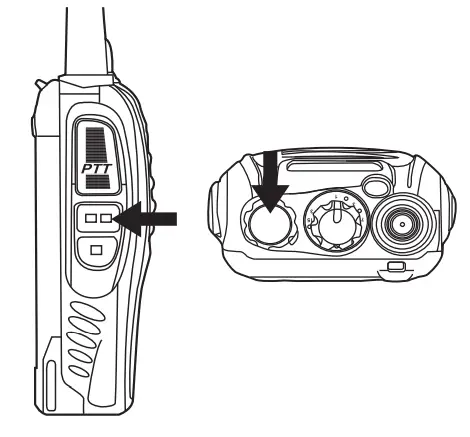
Hold Monitor button down to listen to audio level while rotating the Power switch volume control. Rotate clockwise to increase and counterclockwise to decrease volume.
SELECTING THE CHANNEL
Tum the channel switch to select your desired channel. NO.16 is Scanning Channel.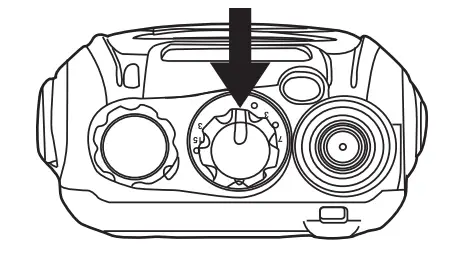
TRANSMITTING
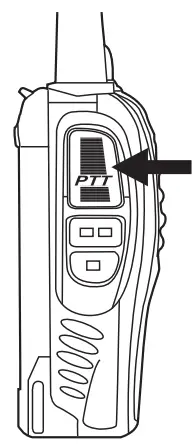
To transmit, press and hold [ PTT] and speak into the microphone in your normal tone of voice.
The LED indicator lights are continuously red when transmitting.
To maximize sound clarity at the receiving station, hold the transceiver 2 to 3 inches from the mouth and talk in normal tone of voice.
- Find the write line drive which your system corresponded to
- Click to install, successfully installation is ok.
WALKIE TALKIE WRITE FREQUENCY OPERATION PROCESS
SYSTEM REQUIREMENTS
Operating System :Windows98, Windows Me, Windows XP, Windows Vista, Windows?, Windows8
Hard Disk Space: At least 50MB of available .
The minimum memory: 64M
INSTALL THE WRITE FREQUENCY LINE DRIVER
- Find the write line drive which your system corresponded to
- Click to install, successfully installation is ok
WRITE FREQUENCY SOFTWARE INSTALLATION Programming cable readying
- USB Programming cable – need to install the driver before they write frequency
- Serial port Programming cable does not need to install the driver, it can directly write
Computer terminal preparations
- Open the?computer, run the computer operating system.
- Install the write frequency software which has been downloaded well or Install it From the programming software CD
- installed, and open the write frequency software programming interface
Walkie Talkie end preparations
- USB(or serial)Programming cable connect the computer end
- The USB Programming cable pin is connected with one end of the walkie talkie programming interface
- Ensure the walkie talkie under the condition of power, open it.
WRITE FREQUENCY SOFTWARE OPERATING PROCESS
- Find the software settings, open communication port, to ensure the communication port Option and computer connection port consistent (inconsistent will not read frequency) to solve the related problem
- In the menu to find reading frequency and click in the window that appears can reading frequency
- This process needs waitting for a while, after the completion of reading the progress bar shows the walkie talkie channels and frequencies that have been read into the current software
- Modify the walkie talkie channel and frequency data, and other functional parameter data
- Find the write frequency in the menu, click the appeared window to confirm, complete the progress bare
- if multiple walkie talkie needs the same frequency, frequency steps can be repeated to write.
RELATED PROBLEM SOLVING
When reading or writing frequency of walkie-talkie long time no response or a communication error?
- check the write frequency line to find if it is damaged
- check wether the write frequency line with computer serial port or walkie talkie interface is bad or loose
- Check to find whether the walkie talkie battery is low or out of power, if this ,please replace the battery or charging the battery
- Check whether the programming software is match with the current model
- Please check whether the write frequency software port settings are assigned to the computer USB port
- Please check whether the power is switched on the walkie talkie
- Whether to choose the corresponding drive system and the correct installation
When writing the frequency is completed, found two walkie talkie cannot normal call or receive
- Make sure whether the two walkie-talkie are in the same channel
- Determine the same channel at the receiving end CTCSS, CDS and the transmitter is not the same
- make sure whether the two walkie talkie’ volume is too low, if it is too low ,Tum on the volume
- please check whether the two walkie-talkies are open, or at low/no power status
- Check wether The walkie-talkie installed antenna
- check and confirm wether the communication distance is too far.
ADDITIONAL FUNCTIONS
SQUELCH LEVEL
The purpose of Squelch is to mute the speaker when no signals are present (Squelch OFF). With the squelch level correctly set, you will hear sound only while actually receiving signals (Squelch ON). The squelch level can be adjusted via program software.
TIME-OUT TIMER (TOT)
The purpose of the Time-out Timer is to prevent any caller from using a channel for an extended period of time which will cause thermal damage. The built-in Time-out Timer limits each transmission time to a certain time. The transmission time extends the certain time you set, an alert tone will sound.
SCAN
Scan is a useful function for hands-off monitoring of your favorite frequencies. When the transceiver is set as SCAN via software, turn the channel selector to channel 16, the transceiver will automatically detect the activities of scanning channel from 1 to 15 (A different channel can be set).
- The transceiver stops scanning at the frequency (or memory channel} where a signal is detected. It then continues or stops scanning.
- If there are less than 2 channels, it can not scan.
- On channel 16, press PTT and MONI key, it will turn on the SCAN, or turn off the SCAN.
- If the FM radio function is activated, it can not scan.
VOICE PROMPT
- Voice Prompt ON/OFF can be set via software.
- On channel 10, press PTT and MONI key, then switch on the transceiver to choose different voice prompt languages.
VOX(Voice Operated Transmission)
VOX eliminates the necessity of manually switching to the transmission Mode each time you want to transmit. The transceiver automatically switches to Transmission Mode when the VOX circuitry senses that you have begun speaking into the microphone. When you operate the VOX function, you must use an optional headset with microphone.
- When operating the VOX function, be sure to set the VOX Gain level which allows the transceiver to recognize the sound levels.
- If the microphone is too sensitive, the transceiver will begin transmitting when there is noise in the background.
- If it is not sensitive enough, it will not pick up your voice when youbegin speaking. Be sure to adjust the VOX Gain level to an appropriatesensitivity to allow smooth transmission. On channel 1-5, press and hold the MONI and PTT, then switch on the transceiver, thus activating the VOX functions ON/OFF.
EMERGENCY ALARM
On channel 11, press and hold the PTT and MONI, then switch the transceiver on, thus to activate the emergency alarm function ON/OFF. Also it can be set with program software. If the function is OFF, the other transceiver receives the signal, it is not able to alarm. Battery Saver
The battery saver function will decrease the amount of power used when a signal is not being received and no operations are being performed(no keys are being pressed, and no switches are being turned).
While the channel is not busy and no operation is performed for more than 10 seconds, Battery Saver turns ON.
When a signal is received or an operation is performed, Battery Saver turns OFF.
BATTERY LOW ALERT
Battery Low Alert reminds you of recharging.
When the battery power is very low, an alert tone will sound and the LED indicator will blink red. Please recharge or replace the battery pack.
MONITOR
When you are receiving and no signals present, the squelch function can mute the speaker, so you can not hear the background noise. If you want to switch the squelch function OFF, press and hold [MONI] button. It is very helpful when you want to adjust the volume level and receive the weak signals.
BUSY CHANNEL LOCK-OUT (BCL}
Busy Channel Lock-out function can be turned ON/OFF with program software on every channel.
When activated, BCL prevents you from interfering with other parties who may be using the same channel that you selected. Pressing the PTT switch while the channel is in use will cause your transceiver to emit an alert tone and transmission will be inhibited (you cannot transmit). Release the PTT switch to stop the tone and return to receive mode.
CTCSS/DCS
CTCSS (Continuous Tone Coded Squelch System)/ (Digital Coded Squelch) You may sometimes want to hear calls from only specific persons or groups. In this case, use the selective call which allows You to ignore unwanted calls from other persons who are using the same frequency.
CTCSS or DCS is a sub-audible tone and is selectable from among the 39 or 83 tone frequency listed.
Note:
CTCSS and DCS do not cause your conversation to be private and scrambled. It only relieves you from listening to unwanted conversations.
SPECIFICATIONS
Frequency Range | 400-470MHz |
RF Rated Power | SW |
Channel Capacity | 16 |
Operated Voltage | 3.7V |
Dimensions | 115mm x 60mm x 33mm |
Weight | 150g |
Note
All specifications are subject to change without notice.
TROUBLESHOOTING GUIDE
TROUBLES | GUIDE |
No Power | Check battery installation and/or replace batteries. Voltage Capacity Quickly Go Out. The Cattery life 1s over, replace new one. |
Couldn’t I communicate with other group members. | t ·/Je;gi ;ifJs t! : tm: r: uti 7d 6 grrhou,ng members. If the channel frequency and the crCss 1 : igl r i fy that your group members are |
Hear the voice from other groups. | Please CTCSS for the channel. At the same time, you to the CTCSS for all the radios in g ? Yn’t like this, you may apply for another |
| Please check whether the MIC is blocked by something. If so, Please return the radio to your authorized dealer for maintenance. Sometimes, your frequency is same as the frequency of other groups. |
Can’t turn on the radio and even it is turned on, it often shuts off automatically. |
Please check the battery contacts on the radio. If it is broken or twisted, please return the radio to your authorized dealer for maintenance |
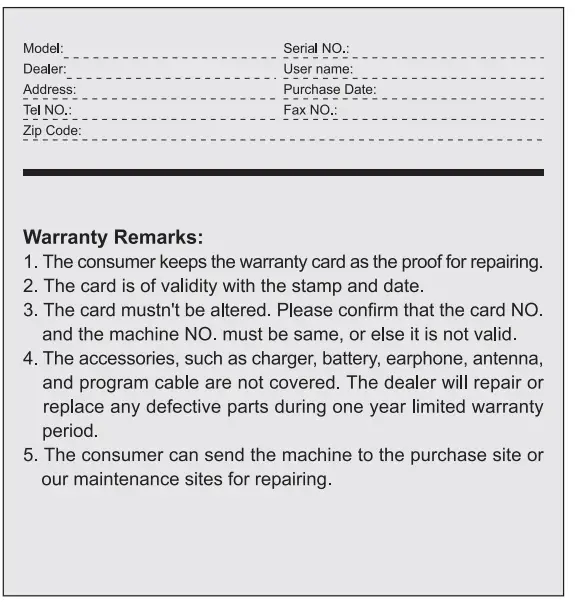
WARRANTY CARD
FAQS
However, you need to email us first and tell us the Voltage. And also, we can ship to all over the world except the remote area. You just email us before you order it, then, we will give you the solution and the price. Nothing is more important than our customer’s concerns,so if you have any problems, please email us freely, we will do our best to satisfy you. Angela at the always online store is waiting for you 🙂
The radio can be programmed for VHF:136Mils-174MHz (Rx/Tx).UHF:400MH.-520MHz (Rx/Tx) however you can block out unauthorized frequencies so if you are an amateur radio operator you should block the nonamateur frequencies and if being used for other services then block out the amateur bands. This can be done using the software.
Yes, we have the replacement, and here is the ASIN for your reference: B01DGMHDBW, B01D8IYP4M. If you need any information, please feel free to contact us via Amazon email, we are always here for you.
The output watt of RT5 two-way radio is 7W. Hope it can help you. If it doesn’t help, you may go to the product page, and find the “Sold by Retevis Direct” under “Add to Cart” on the right side of the product page, click on “Retevis Direct”, then click the button “Ask a question” to reach out to us, we are always here for you. We are a professional walkie-talkies manufacturer, if you have any questions about walkie-talkies, please contact us freely.
5 pack Retevis Rt 5 radio and 1 pack programming cable
You can program the radio on the chirp, download the software for MAC, then connect the radio, and choose the correct port with your PC. Using the receives rt-5r, it is the same with the RT5. If you have any questions about the programming, just feel free to contact us, we are always here for you.
Yes, they have been programmed to the same frequency and privacy code, so they can talk directly on the same channel. And, if you need, you can also program them via the keyboard without any tools. In addition, we provide a 2-year warranty and 30 days no reason to return; a 2-year warranty for the radio body and a 2-month warranty for accessories. Hope this can help you, if any questions, just feel free to contact us by Amazon email, we are glad to help you.
Yes, you can program them using the keypad
Yes, you need to open the VOX function, then, you can speak without the PTT button. Hope it is helpful to you.If you have any other questions, please email to our store freely, our main business is 2-way radio and 2-way radio accessories, we will try our best to help you
Yes
Retevis RT5 can compatible with a 2-Pin 3.5 mm headset plug just like on the headset that comes with it. Hope this can help you.If there any questions? need help, please contact us freely,we are glad to help you.
Yes, every radio has its charger in the package, here is the item including the package:5 x Retevis RT 5 2-way radio 5 x Antenna 5 x 1800 mAh Li-ion battery 5 x AC/DC adapter 5 x Desktop Charger(100V ~ 240V) 5 x Belt clip 5 x Hand Strip 5 x Headset 5 x English User’s manual 1 x Programming Cable If you have any questions, just contact us, we are always here for you.
5 pack Retevis RT 5 radio and 1 programming cable
No, the radio has been programmed to the same frequency when out of the box, but you still need to set on the same channel, and then it can work with others. If there are any questions, just feel free to contact us,we will do our best to help you.
This should answer your question fully. “GMRS use requires an FCC license, and licensees are permitted to transmit at up to 50 watts on GMRS frequencies, depending on the type of station, but 1 to 5 Watts is more common. Units are allowed to have detachable or external antennas.” Jerry
YES
We are a 7-acre property, with a 10,000 sq ft building and they work fine…
Please let me inform you that this radio Range up to 3.5 miles (6 km) depending on the environment and terrain; Our business is the 2-way radio and 2-way radio accessories.If you need it, please email to the always-online store. We will find the one suitable for you. If you have any other problems, please email always online store freely, our aim is to let customers have a happy online experience, and we will do our best to satisfy you. Angela at the always online store is waiting for you 🙂
If they are within 1-2 miles, they can work well.


