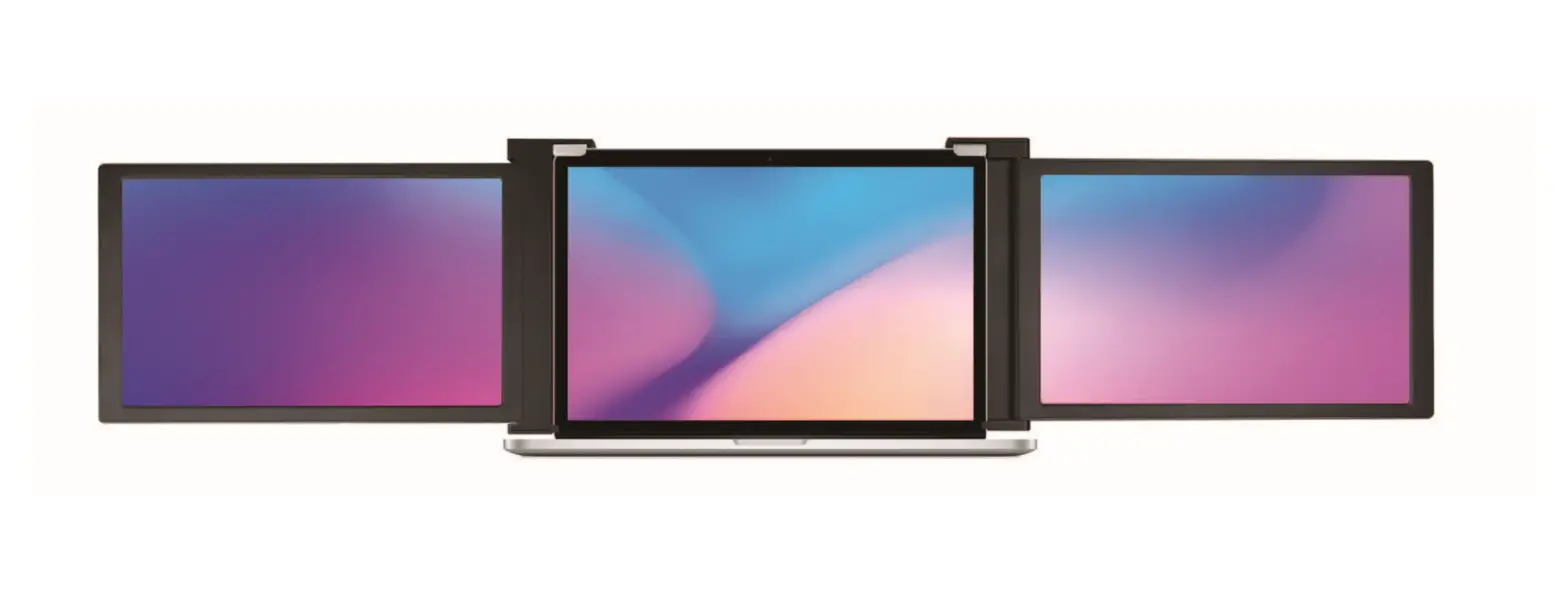

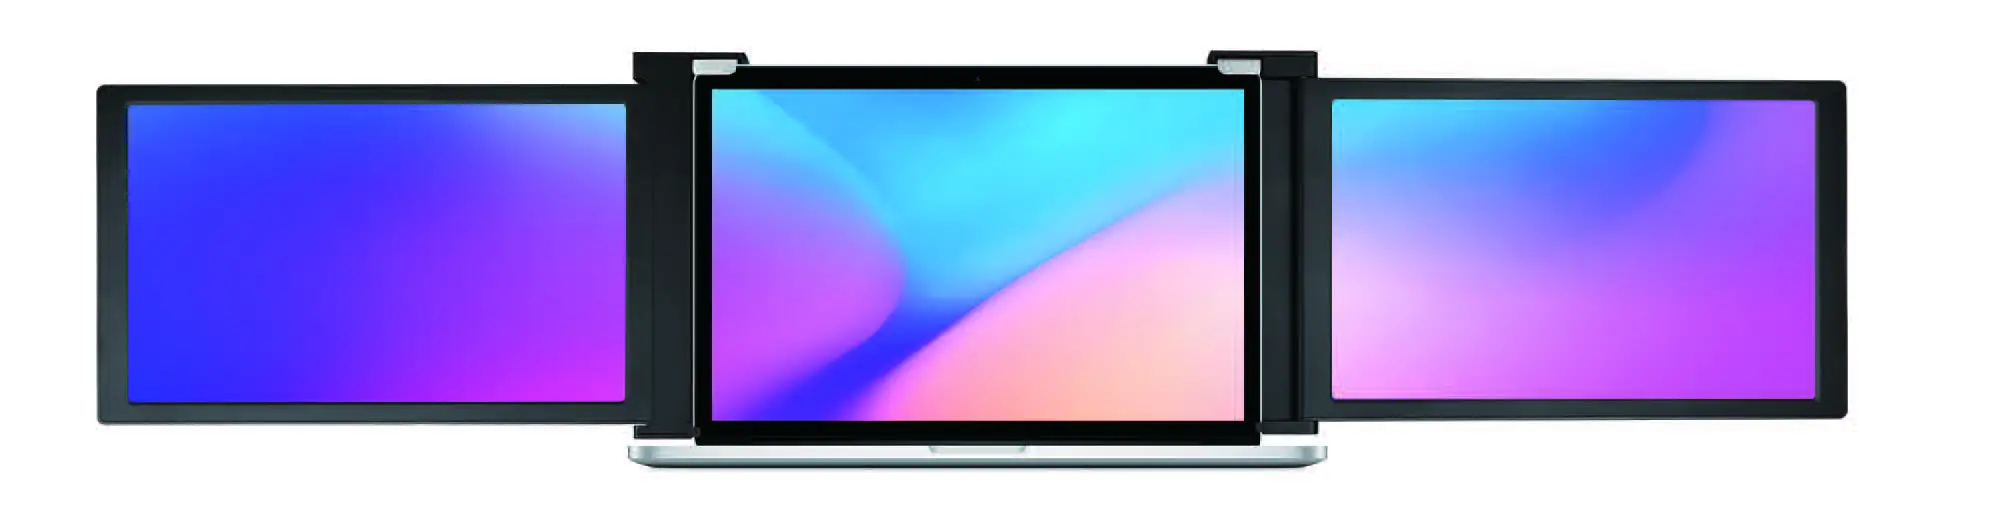
Eyoyo B08VJ1TZ6C Portable Tri-Screen for Laptop
WARNING Please handle the tri-screen with care and do not press the screens to avoid damage. Do not exceed its maximum turning angle showing as below:
Turning angle of screens
Left screen(0° – 235°)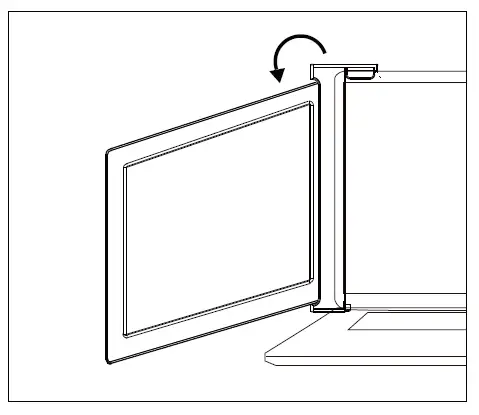
Right screen(0° – 180°)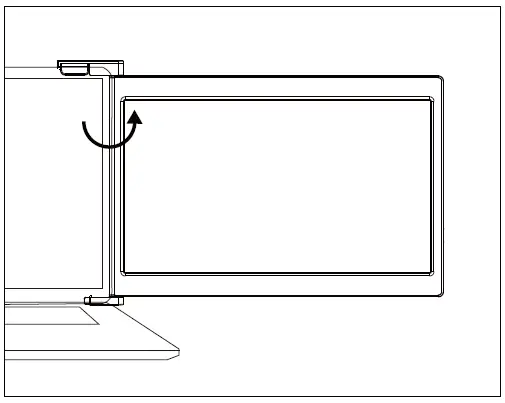
Parts Overview
Tri-Screen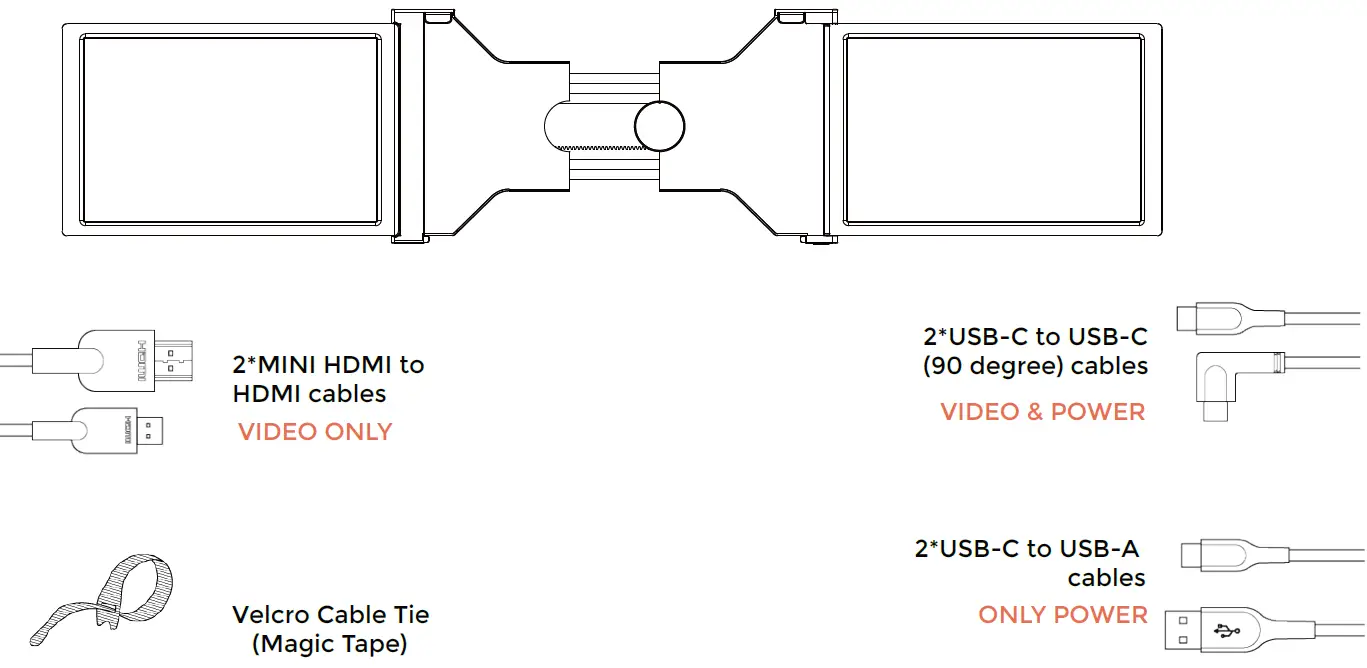
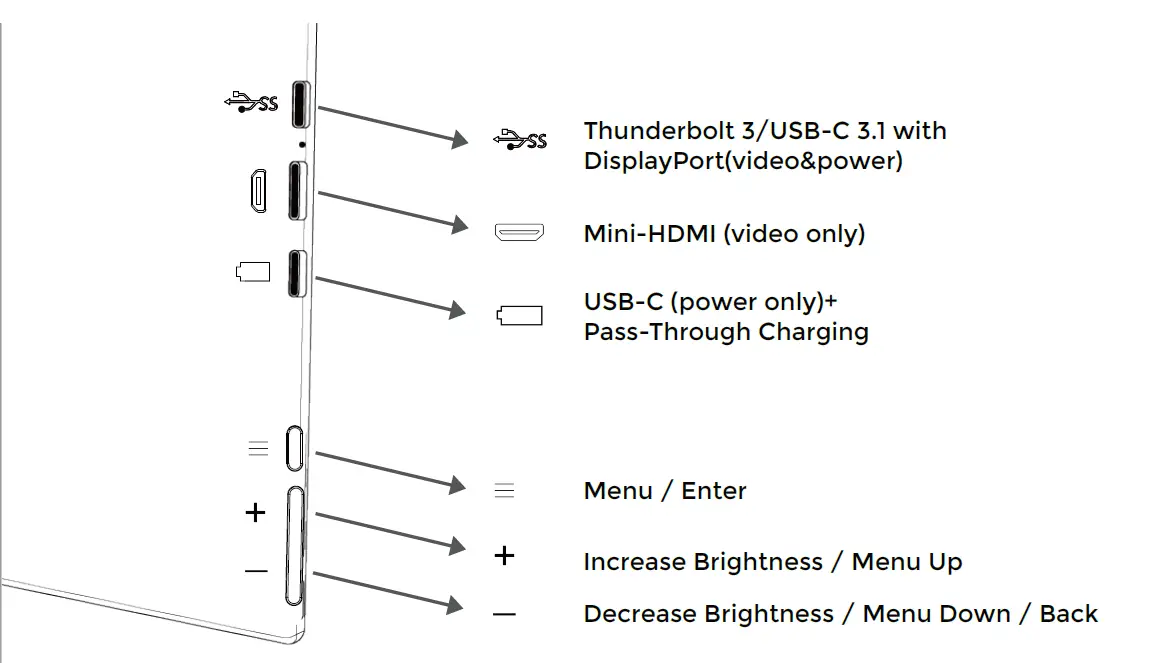
- Only display interface and button function, please check the actual machine for specific position of interfaces and buttons.
Inputs and Buttons 
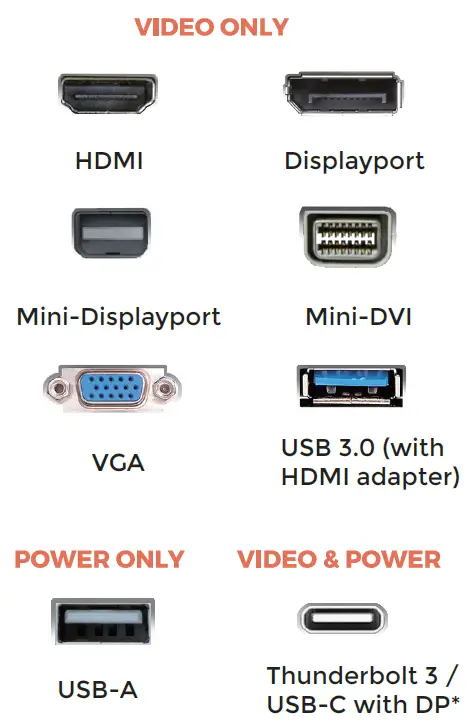
Choose your cables
- To determine which cables you will use, first identify your laptop’s ports using the pictures to the right or reference your laptop’s user manual.
- If your laptop has two Thunderbolt3 / USB-C with DP ports, the simplest way to use the tri-screen is with the two USB-C to USB-C cables provided.
- If your laptop does not have any Thunderbolt3 / USB-C with DP ports, you will need to use one USB-A to USB-C cable and one HDMI to Mini-HDMI cable for each screen.
- If your laptop does not have an HDMI port, then you can use any other video out ports shown to the right along with a simple HDMI adapter.
- Some laptops have USB-C ports that do not support DisplayPort over USB-C. Please reference your laptop’s user manual.

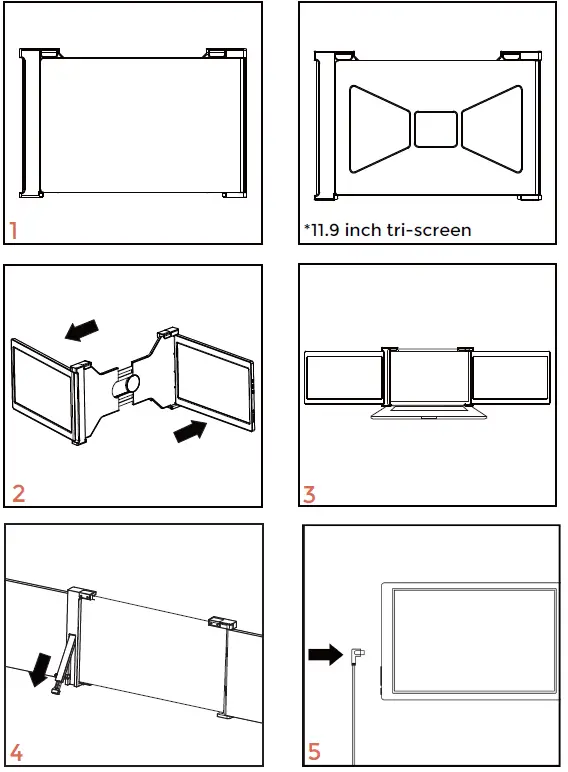
Set It Up
- Take the tri-screen out of the box.
- Open the two screens in the directions described in the figure.
- Place the bracket over the back of the screen and clamp, allowing the bracket to hug the edges and sit on top of the laptop screen.
- Take the holder for the back of tri-screen and rotating screw to adjust the length.
- Using the necessary cables (identified on the previous page), plug on end into the tri screen and the other into your laptop. See “Inputs and Buttons” on page 2 for an input diagram.

Laptop Display Configuration
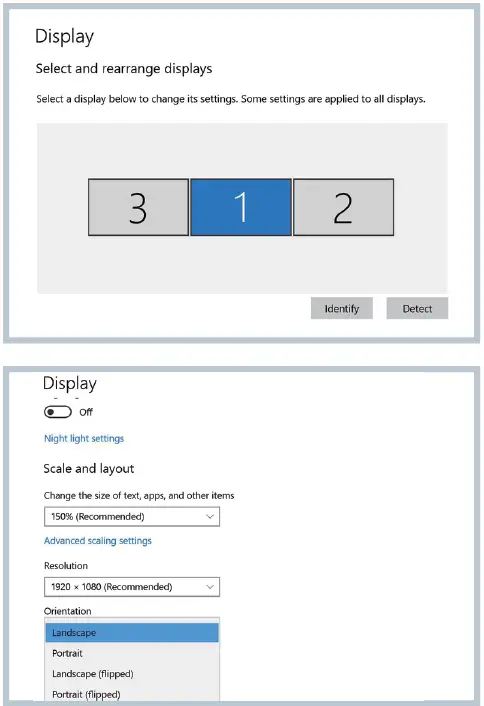
PC/WINDOWS
- Go to your Display Settings (Star Settings Sy >stem Display)
- Click and drag screens to configuration shown
- If you need to set different display modes for multiple screens, please click 1/2/3 (click the “Identify” button down the screen to find the corresponding screen) and select the one, then enter into the “Multiple displays” menu to set
- If any of the screens are upside down, click on the screen in the display menu. Then click on the “Orientation” dropdown menu and select “Landscape (flipped)”
- To increase the zoom, click the “Change the size of text, apps, and other items ” dropdown and select “150%”
- Keeping three displays sync can be configured in setting of graphic card. If there is any issue please consult local distributor.

- Please note the resolution of 10.1 inch is 1920*1200
- Keeping three displays sync can be configured in setting of graphic card. If there is any issue please consult local distributor.
Laptop Display Configuration
MAC
- Open “System Preferences”
- Select “Displays” from the menu
- Click “Arrangement” from display menu
- Click and drag screens to configuration shown
- If any of the screens are upside down, click on the Display menu on that screen and select “180 degrees” from the dropdown
- To increase the zoom, click the “Scaled” radio button.

- Please note the resolution of 10.1 inch is 1920*1200

OSD Function Introduction
- Press the ” “ Menu button to activate the OSD menu
- Press “+” button to choose your settings
- Press Menu “ ” button to confirm
- Press “-” button to return to previous page

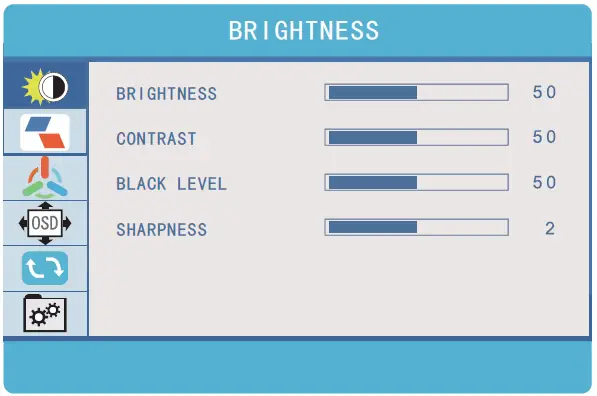
OSD Setting
Brightness
- Brightness:
The adjusting range is from 0 to 100. - Contrast:
The adjusting range is from 0 to 100. - Black Level:
The adjusting range is from 0 to 100. - Sharpness:
The adjusting range is from 0 to 100.

Image
Brightness:
ECO: Preset display settings for various modes (Standard/ Game/ Movie/ Text/ FPS/ RTS Modes)
DCR: Select ON or OFF to enable or disable dynamic contrast ratio function
Aspect: Adjusts the aspect ratio to 4:3/ WIDE 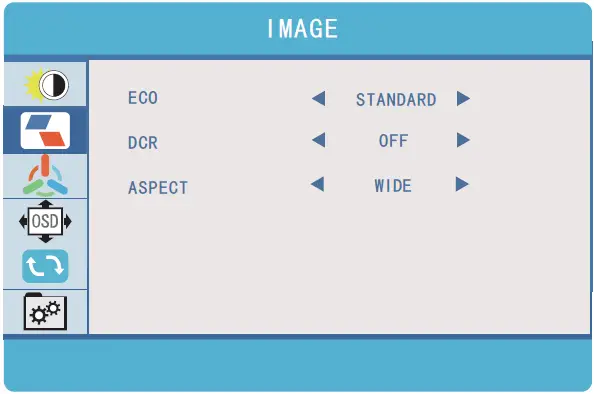
OSD Setting
Color Temp
Color Temp: Enables the adjustment of each
individual RGB color, or select a Warm or Cool preset level
Red: The adjusting range is from 0 to 100 Green: The adjusting range is from 0 to 100 Blue: The adjusting range is from 0 to 100 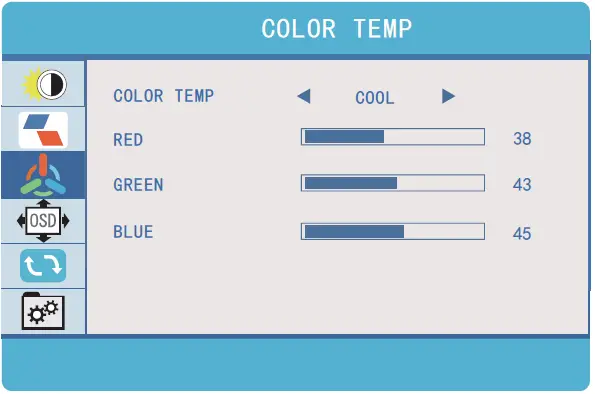 OSD Setting
Language: Select OSD language. The selections are: English, French, German, Simplified Chinese, Italian, Spanish, Portuguese, Turkish, Polish, Nederlands, Japanese, Korean OSD Timer:
Sets time-out for monitor settings menu (10-60 seconds)
Transparency:
Sets transparency of monitor settings menus 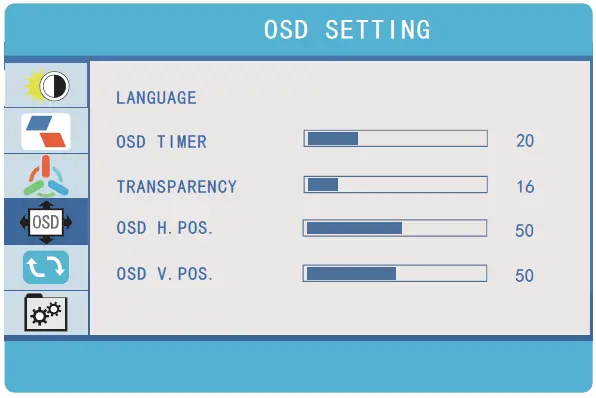
OSD Setting
Reset:
Selects REST to revert all settings to the factory default mode 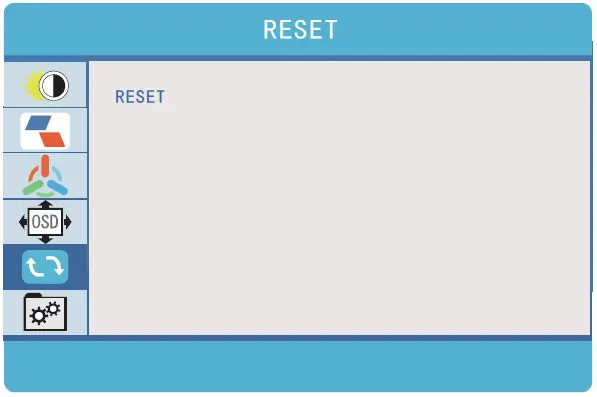
MISC.
Signal Source:
Contains two signal sources Type C and HDMI Low
Blue Light:
Decreases blue light content in display
HDR MODE:
Enables HDR (High Dynamic Range) if connected to a compatible device Contains three modes (off/ auto/ 2084)
Tech Specs
| Screen size | 10.1 inch | 11.6 inch | 11.9 inch | 13.3 inch |
| Adaptive for laptop panel | Length < 328mm Thickness < 7mm | Length < 372mm Thickness < 7mm | Length < 417mm Thickness < 7mm | |
| Resolution | 1920*1200 | 1920*1080 | ||
| Aspect ratio | 16 : 10 | 16 : 9 | ||
| Backlight type | W-LED | |||
| Power | 5V 2A (Per screen) | |||
| HDR | HDR 10 | |||
| Speaker | NA | |||
| Mini HDMI | 1920*1200@60HZ | 1920*1080@60HZ | ||
| Type-C 3.1/Thunderbolt 3 | 1920*1200@60HZ | 1920*1080@60HZ | ||
| Type-C | Only for power | |||
| Language | English, French, German, Simplified Chinese, Italian, Spanish, Portuguese, Turkish, Polish, Nederlands, Japanese, Korean | |||
| Dimension | 286x182x25mm | 318x215x25mm | 357x233x25mm | |
| Tri-screen weight | 837g | 1.15kg | 1.17kg | 1.3kg |


