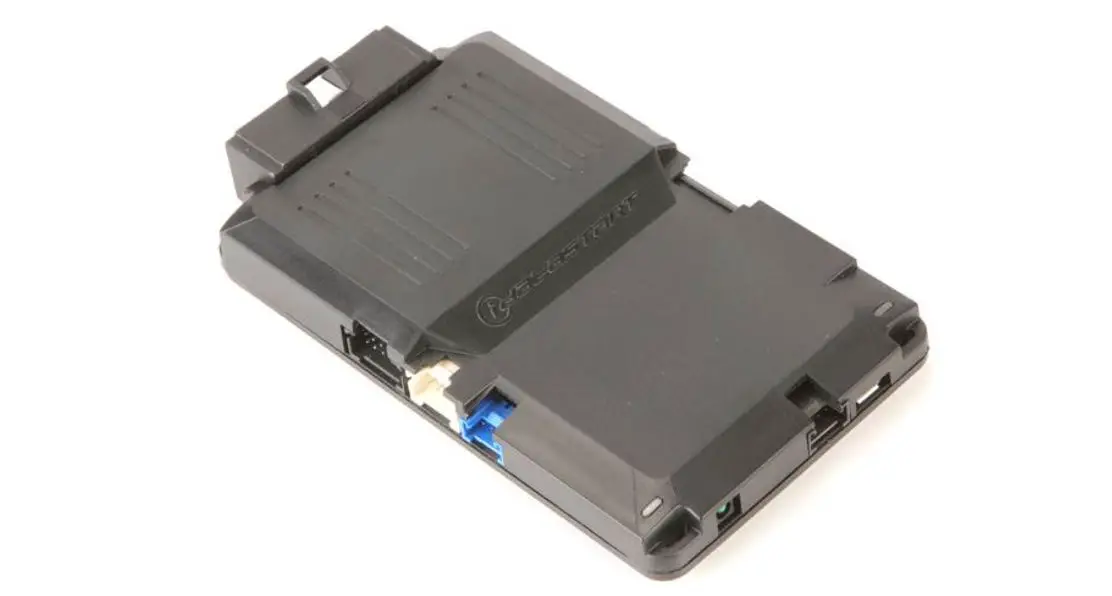
idataSTarT CMHCXA0 Digital Remote Start System
TERMS OF USE
Automotive Data Solutions Inc. ADS products are strictly intended for installation by Certified Technicians who are employed by a registered business specialized in the installation of automotive aftermarket electronics products. Prior to beginning installation of an ADS product in a vehicle, it is the Certified Technician’s responsibility to review the most current Product Guide, Install Guide and vehicle-specific notes available in Weblink. ADS is not responsible for any damages whatsoever, including but not limited to any consequential damages, incidental damages, damages for loss of time, loss of earnings, loss of profit, commercial loss, loss of economic opportunity and the like that may or may not have resulted from the use, misuse, improper installation or operation of its products. ADS reserves itself the right to suspend any Weblink account without notice and decline to offer technical support to non-Certified Technicians, non-compliant Certified Technicians or end users.
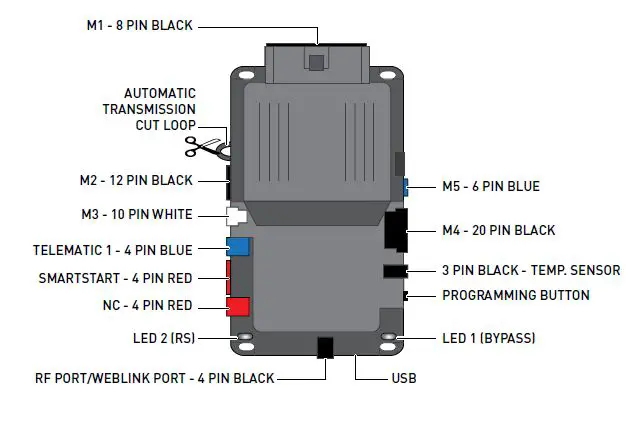
MODULE CONNECTORS
FIRST GENERATION HCx HCX-192
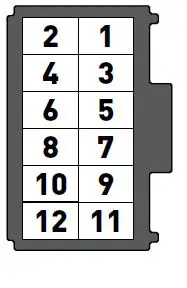
SECOND GENERATION HCx HCA-320
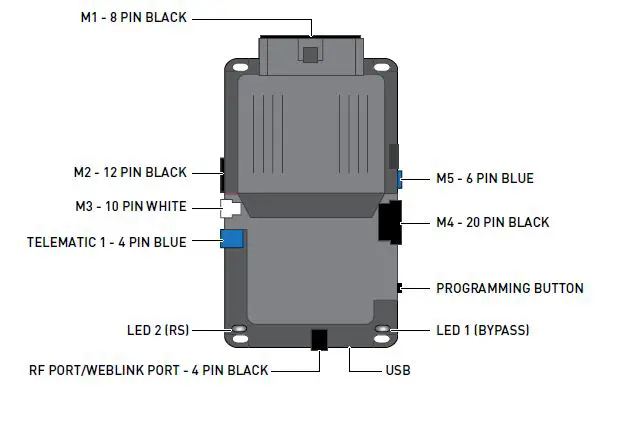
M1
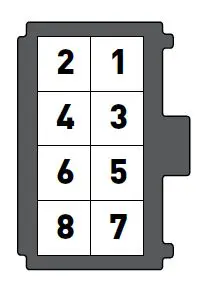
- ORANGE: ACCESSORY+
- RED :POWER 30A
- PURPLE: STARTER +
- PINK/WHITE :PROG. RELAY #4 – IGNITION 2 (+) (DEFAULT)
- PINK :IGNITION
- WHITE : PROG. RELAY #5 (10A) – PARKING LIGHTS (+) (DEFAUL
- RED: POWER 30A
- BLACK :GROUND
M2
- GREEN:BLACK DOT LOCK (-) OUTPUT02 BLUE
- BLACK DOT: UNLOCK (-) OUTPUT
- RED/WHITE:BLACK DOT TRUNK RELEASE (-) OUTPUT
- GREEN/WHITE:BLACK DOT ARM (-) OUTPUT
- GREEN/BLACK;BLACK DOT DISARM (-) OUTPUT
- BLUE/WHITE;BLACK DOT GWR (-) OUTPUT
- EMPTY
- WHITE/PURPLE:BLACK DOT POC 1 – 2ND UNLOCK OTHER DOORS (-) OUTPUT
- PURPLE/BLACK;BLACK DOT POC 2 – RAP SHUTDOWN (-) OUTPUT
- WHITE/BLACK:BLACK DOT POC 3 – HORN (-) OUTPUT
- BROWN/BLACK:BLACK DOT POC 4 – STARTER KILL (-) OUTPUT
- WHITE:BLACK DOT PARKING LIGHTS (-) OUTPUT
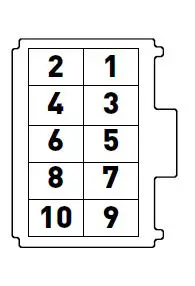
M3
 BROWN:SILVER DOT – BRAKE (+) INPUT
- BLACK/WHITE:SILVER DOT – E-BRAKE (-) INPUT
- PURPLE:SILVER DOT – DOOR (+) INPUT
- GREEN:SILVER DOT – DOOR (-) INPUT
- PURPLE/WHITE;SILVER DOT – TACH (-) INPUT
- WHITE/BLUE:SILVER DOT – X-TRIGGER (-) INPUT
- GRAY:SILVER DOT – HOOD (-) INPUT
- BLUE:SILVER DOT – TRUNK (-) INPUT
- GRAY/BLACK
 BROWN:SILVER DOT – BRAKE (+) INPUT
M4
 FUNCTIONS DEFINED BY FIRMWARE
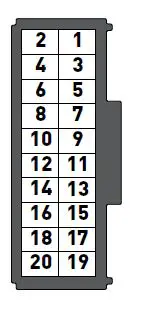
M5
 FUNCTIONS DEFINED BY FIRMWARE.
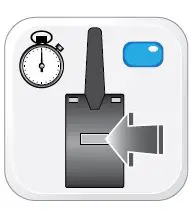
TACH PROGRAMMING PROCEDURE
 START vehicle for 15 seconds.
  Press and hold the brake pedal.
  Press and release the module’s programming button OR if the remotes are already programmed to the vehicle, press and hold the start button of the remote for 2.5 seconds.
 Wait, LED 2 will fl ash GREEN.
 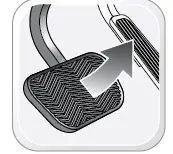 Release the brake pedal.
  Module Programming Procedure completed.
MODULE DIAGNOSTICS
| MODULE STATUS DURING |
LED 2* LED 1** |
LED STATUS |
DIAGNOSTIC | |
| MODULE PROGRAMMING | Flashing RED | Missing/wrong information from firmware or vehicle. See firmware specific diagnostics, or contact technical support. | ||
| Solid RED | Module waiting for more vehicle information. Programming incomplete. | |||
| Flashing GREEN | Additional steps required to complete programming. Refer to install guide. | |||
| Solid GREEN then OFF | Module programming completed successfully. | |||
| OFF | No activity or module already programmed. | |||
| RED flash | No firmware on module. Connect to Weblink and flash device. | |||
| Contact technical support. | ||||
| ORANGE flashes | Module programming not completed. | |||
| ORANGE flashes | Contact technical support. | |||
| ORANGE flashes | Contact technical support. | |||
| ORANGE flashes | Loop not cut. Ensure loop is cut for automatic transmission. Reset and re-learn. | |||
| ORANGE flashes | Loop not cut. Ensure loop is cut for automatic transmission. Reset and re-learn. | |||
| ORANGE flashes | Boot loader update failed. Contact technical support. | |||
| ORANGE flashes | T harness detection does not match install type selection in Weblink. | |||
| TACH PROGRAMMING | Solid RED | Tach learn in progress. | ||
| GREEN flash | Tach signal programmed in analog. | |||
| GREEN flashes | Tach signal programmed in data. | |||
| 3 RED flashes | No tach signal detected | |||
| RED flashes | System is in valet mode. Turn off valet mode to program tach. | |||
| RED flashes | Engine sensing set for assumed start. No tach programming required. | |||
| ORANGE flashes | Engine sensing not configured properly. Contact technical support. | |||
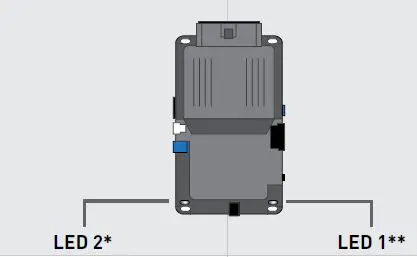
* LED 2 (RS) displays generic diagnostic codes specific to the remote start module. Orange LED flashes may appear red.** LED 1 (Bypass) displays diagnostic codes specific to the firmware loaded on the module. Visit the programming diagnostics page for more information.
| MODULE STATUS DURING: |
LED 2* LED 1** |
LED STATUS |
DIAGNOSTIC | |
| REMOTE START SEQUENCE | Flashing rapid RED | Remote start shutdown sequence. | ||
| Flashing slow RED | Remote start shutdown error code. Contact technical support. | |||
| Solid RED | Remote start crank delay. | |||
| Flashing rapid GREEN | Remote start cycle in progress. Working correctly. | |||
| GREEN flash | Remote start initiated successfully. | |||
| GREEN flashes | Idle mode cycle in progress. | |||
| GREEN flashes | Turbo mode cycle in progress. | |||
| Flashing GREEN | Remote start cycle in progress. Displays vehicle platform during runtime. | |||
| Rapid GREEN flashing | Secure takeover initiated. Waiting to complete takeover after brake press. | |||
| TRANSMITTER PROGRAMMING | Solid RED | Remote programming in progress, waiting for remote pairing. | ||
| GREEN flash | Remote programmed. | |||
| RED flashes | Shutdown remote starter before attempting remote programming. | |||
| RED flashes | Engine must be off before attempting remote programming. | |||
| RED flashes | System must be unlocked/disarmed before attempting remote programming. | |||
|
|
RED flashes |
Module must be learned to the vehicle before attempting remote programming. | ||
* LED 2 (RS) displays generic diagnostic codes specifi c to the remote start module. Orange LED fl ashes may appear red. ** LED 1 Bypass displays diagnostic codes specifi c to the fi rmware loaded on the module.
REMOTE STARTER ERROR CODES
| REMOTE STARTER ERROR CODES: NOTES | PARKING LIGHT FLASHES | DIAGNOSTIC |
| WARNING The following applies only when the parking lights are connected and supported by the system.
After a remote starter failure, the parking lights will flash three 3x times followed by the error code. | 3 + 1 | Tach is not programmed OR engine is already running. |
| 3 + 2 | Key is in ignition ON position. | |
| 3 + 3 | Door is open. | |
| 3 + 4 | Trunk is open. | |
| 3 + 5 | Foot brake is ON. | |
| 3 + 6 | Hood is open. | |
| 3 + 7 | Loop is not cut. | |
| 3 + 8 | No tach detected. | |
| 3 + 9 | Vehicle movement detected (VSS). | |
| 3 + 10 | System is in Valet Mode. | |
| 3 + 11 | CAN communication failure | |
| 3 + 12 | RS not synchronized. Start vehicle with OEM key for 15 sec before trying a new RS sequence. | |
| 3 + 13 | Bypass problem. | |
| 3 + 14 | Idle mode or takeover is not available on this vehicle. | |
| 3 + 15 | Overheat protection. |
| REMOTE STARTER SHUTDOWN ERROR CODES NOTES | PARKING LIGHT FLASHES | DIAGNOSTIC |
| WARNING The following applies only when the parking lights are connected and supported by the system.If the engine shuts down after a remote starter sequence use the query command from a compatible aftermarket remote to display the shutdown error code. The parking lights will flash four 4x times followed by the error code. | 4 + 1 | Engine tach signal was lost. |
| 4 + 2 | Emergency brake signal was lost. | |
| 4 + 3 | Foot brake ON detected. | |
| 4 + 4 | Hood open detected. | |
| 4 + 5 | Tach over rev detected. | |
| 4 + 6 | Glow plug timeout error. | |
| 4 + 7 | Vehicle movement detected (VSS). | |
| 4 + 8 | Check engine light ON. | |
| 4 + 9 | Low fuel level. | |
| 4 + 10 | Open door detected. | |
| 4 + 11 | CAN communication failure during RS sequence. | |
| 4 + 12 | RS not synchronized. Start vehicle with OEM key for 15 sec before trying a new RS sequence. | |
| 4 + 13 | Bypass problem. | |
| 4 + 14 | Idle mode or takeover is not available on this vehicle. | |
| 4 + 15 | Overheat protection. |
ALARM ERROR CODES
| ALARM ERROR CODES: NOTES | PARKING LIGHT FLASHES | ANTENNA LED FLASHES | DIAGNOSTIC |
| WARNING The following applies only when the parking lights are connected and supported by the system. If the alarm has been triggered, the parking lights will flash five 5x times followed by the alarm activation event.
The alarm event code is also displayed in a repeating pattern on the antenna’s LED when the alarm is triggered, until unlock is received. | 5 + 1 | 1 | Shock sensor triggered |
| 5 + 2 | 2 | Door open | |
| 5 + 3 | 3 | Trunk open | |
| 5 + 4 | 4 | Hood open | |
| 5 + 5 | 5 | Zone 2 input triggered | |
| 5 + 6 | 6 | Foot brake ON | |
| 5 + 7 | 7 | Ignition ON | |
| 5 + 8 | 8 | Motion detected | |
| 5 + 9 | 9 | Tilt detected | |
| 5 + 10 | 10 | Warn away input triggered |

The following procedure resets the module programming to the vehicle. It does not reset any settings confi gured online.

Disconnect all connectors from module except the M1 BLACK 8-pin connector and the M4 BLACK 20-pin connector.
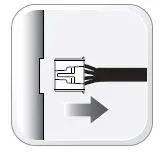
Disconnect the M1 BLACK 8-pin connector and the M4 BLACK 20-pin connector. 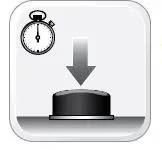 PRESS AND HOLD the module’s programming button while connecting the M1 BLACK 8-pin connector and the M4 BLACK 20-pin connector.
Wait, LED 1 will flash RED. RELEASE programming button. 
LED 1 will turn RED for 2 seconds. 
Module RESET completed. 
Reconnect all connectors. 
Repeat programming procedure.
Failure to follow procedure may result with a DTC or a CHECK ENGINE error message.
CHECKLIST WITH AFTERMARKET KEY FOB
| CHECKLIST – WITH AFTERMARKET KEYFOB | |||||
| 1 | WARNING: Vehicle engine will start many times. Test in a well ventilated area. | 9 | Press the START/STOP button once 1x on the aftermarket keyfob to shut down vehicle. | ||
| 2 | Close all vehicle doors, hood and trunk. |
| Question 7: Does the vehicle shut down? | ||
| 3 | Press the LOCK button once [1x] on the aftermarket keyfob. | YES: Go to next step. NO: Repeat step. If problem persists, press the brake pedal once 1x to shut down the vehicle and call technical support. | |||
|
| Question 1: Do the doors lock? | ||||
| YES: Go to next step. | |||||
| NO: Verify the remote programming, the RF connections and the wired door lock/unlock connections as illustrated in the wiring diagram, if applicable. Repeat the test and call technical support, if the problem persists. | 10 | RAP and auto light shutdown test | |||
|
| Question 8: Did the radio, interior controls and headlights turn off within 60 seconds after remote start shutdown? | ||||
| 4 | Press the UNLOCK button once [1x] on the aftermarket keyfob. | YES: Go to next step. | |||
|
| Question 2: Do the doors unlock? | NO: Verify the RAP SHUTDOWN connections as illustrated in the wiring diagram. Repeat the test and call technical support if the problem persists. | |||
| YES: Go to next step. | |||||
| NO: Verify the remote programming, the RF connections and the wired door lock/unlock connections as illustrated in the wiring diagram, if applicable. Repeat the test and call technical support, if the problem persists. | 11 | Open hood. | |||
| 12 | If not already installed, affix the mandatory orange warning sticker under the hood and proceed to next step. | ||||
| 5 | Press the TRUNK release button once [1x] on the aftermarket keyfob if supported. | 13 | Press the START/STOP button once [1x] on the aftermarket keyfob to remote start vehicle. | ||
|
| Question 3: Does the trunk or hatch open/unlock? |
o o | Question 9: Does the vehicle remote start? | ||
| YES: Close trunk or hatch and go to next step. | YES: The vehicle is not equipped with a factory hood pin. Install a mandatory aftermarket hood switch, then repeat the test. | ||||
| NO: Verify the remote programming, the RF connections and the wired trunk/hatch connections as illustrated in the wiring diagram, if applicable. Repeat the test and call technical support, if the problem persists. | |||||
| NO: Go to next step. | |||||
| 14 | Close hood. | ||||
| 6 | Press the AUX 1 button once [1x] on the aftermarket keyfob if supported. | 15 | Enter vehicle and close the doors. | ||
|
| Question 4: Does the driver side sliding door open? | 16 | Press the START/STOP button once [1x] on the aftermarket keyfob to remote start vehicle. | ||
| YES: Press the AUX 1 button once [1x] to close the driver sliding door and go to next step. | 17 | Wait for the vehicle to start. | |||
| NO: Verify the remote programming and the RF connections. Repeat the test and call technical support, if the problem persists. | 18 | Press brake pedal. | |||
| o
o | Question 10: Does the vehicle shut down? | ||||
| 7 | Press the AUX 2 button once 1x on the aftermarket keyfob if supported. | YES: Go to next step. | |||
|
| Question 5: Does the passenger side sliding door open? | NO: The module does NOT detect the brake pedal signal. Press the START/STOP button once [1x] on the aftermarket keyfob to shut down vehicle, check connection as illustrated in the wiring diagram, if applicable, and call technical support. | |||
| YES: Press the AUX 2 button once [1x] to close the passenger sliding door and go to next step. | |||||
| NO: Verify the remote programming and the RF connections. Repeat the test and call technical support, if the problem persists. | |||||
| 19 | Exit vehicle. | ||||
| 8 | Press the START/STOP button once 1x on the aftermarket keyfob to remote start vehicle. | 20 | Installation checklist completed. | ||
|
| Question 6: Does the vehicle remote start? | ||||
| YES: Go to next step. | |||||
| NO: Verify the remote programming, the RF connections and check the remote start error codes. Repeat the test and call technical support, if the problem persists. | |||||
INSTALLATION CHECKLIST
| CHECKLIST WITH OEM KEYFOB | |
| 1 | WARNING: Vehicle engine will start many times. Test in a well ventilated area. |
| 2 | Close all vehicle doors, hood and trunk. |
| 3 | Press LOCK button three times 3x rapidly on the OEM keyfob to remote start vehicle. |
|
| Question 1: Does the vehicle remote start? |
| YES: Go to next step. | |
| NO: The module doesn’t detect OEM remote lock button from the vehicle communication network. Check all connections, repeat the test and call technical support, if the problem persists. | |
| 4 | Press LOCK button three times 3x rapidly on the OEM keyfob to shut down vehicle. |
|
| Question 2: Does the vehicle shut down? |
| YES: Go to next step. | |
| NO: Repeat step. If the problem persists, press on the brake pedal once 1x to shut down the vehicle and call technical support. | |
| 5 | RAP Shutdown test |
|
| Question 3: Did the radio, interior controls, and headlights turn off within 60 seconds after remote start shutdown? |
| YES: Go to next step. | |
| NO: Verify the RAP SHUTDOWN connections as illustrated in the wiring diagram. Repeat the test and call technical support, if the problem persists. | |
| 6 | Open hood. |
| 7 | If not already installed, affix the mandatory orange warning sticker under the hood and proceed to next step. |
| 8 | Press LOCK button three times 3x rapidly on the OEM keyfob to remote start vehicle. |
|
| Question 4: Does the vehicle remote start? |
| YES: The vehicle is not equipped with a factory hood pin. Install a mandatory aftermarket hood switch, then repeat the test. | |
| NO: Go to next step. | |
| 9 | Close hood. |
| 10 | Enter vehicle and close the doors. |
| 11 | Press LOCK button three times [3x] rapidly on the OEM keyfob to remote start vehicle. |
| 12 | Wait for the vehicle to start. |
| 13 | Press brake pedal. |
|
| Question 5: Does the vehicle shut down? |
| YES: Go to next step. | |
| NO: The module does NOT detect the brake pedal signal. Press LOCK button three times [3x] rapidly on the OEM keyfob to shut down, check the brake connection as illustrated in the wiring diagram, if applicable, and call technical support. | |
| 14 | Exit vehicle. |
| 15 | Installation checklist completed. |
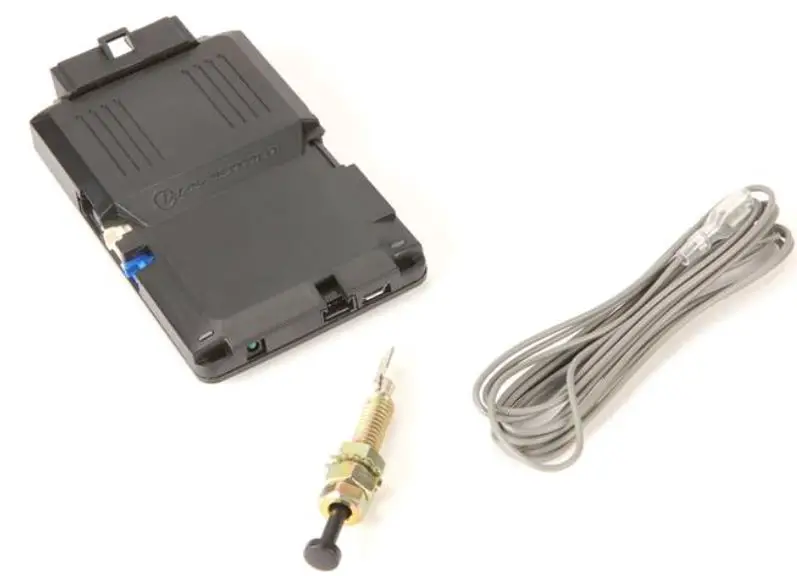
COMPATIBLE ACCESSORIES
WEBLINK CABLE required accessory sold separately

WEBLINK MOBILE accessory sold separately)

RF KIT sold separately

TELEMATIC KIT accessory sold separately

SMARTSTART with 1st generation HCx HCX 192 accessory sold separately

SMARTSTART with 2nd generation HCx HCA-320 accessories sold separately

REMOTE PROGRAMMING PROCEDURE
WARNING
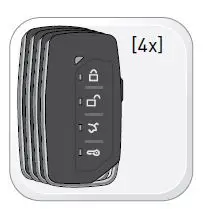
Complete the module programming procedure and tach programming procedure before programming the remotes. A maximum of four 4x remotes per system.
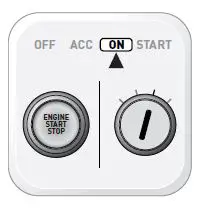
Set ignition to ON position.
Press and release the antenna button, then press and hold the antenna button. The antenna’s leds will turn solid BLUE.

Parking Light will fl ash once 1x
Press once 1x on the LOCK button of each remote.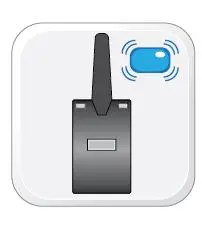
The antenna’s leds will fl ash BLUE once [1x] for each successful pairing.
Release the antenna button. The antenna’s leds will turn OFF.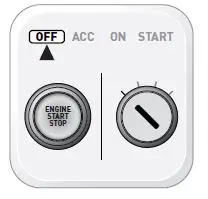
Set ignition to OFF position. Remote Programming Procedure completed.
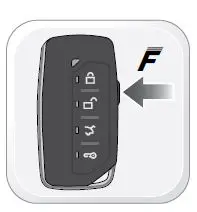
To program an additional remote as second vehicle mode: Follow steps 1 to 4. Press twice 2x on the “F” button then press once [1x] on the LOCK button of the remote. Follow steps 6 to 9.
 Please visit www.idataguides.com
 NOTE
NOTE
In Valet Mode, the Remote starter is not functional. Keyless entry, Lock and Unlock will remain functional.
 Time restriction. Complete next step within 7 seconds.
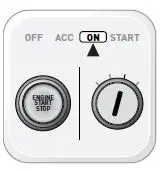
Cycle ignition ON twice 2x OFF/ON rapidly.
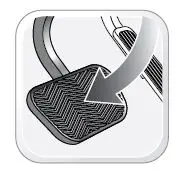
Press and release the BRAKE pedal three times 3x.
 Valet Mode Programming Procedure completed.
 To exit valet mode: repeat steps 1 to 5.
Parking Light will fl ash once [1x] then will fl ash twice 2x.
Set ignition to OFF position.


