![]()
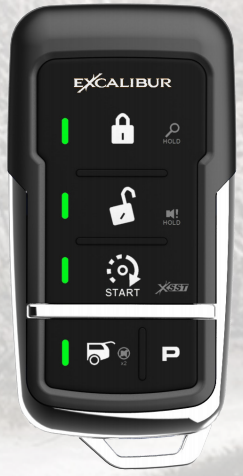
5-Button 2-Way LED Remote Start Systems
QUICK START OPERATION GUIDE
Visit www.CarAlarm.com today
To Download your complete operation guide and learn more about system upgrades & other features!
PROGRAMMING REMOTES TO THE SYSTEM (UP TO 4) BEFORE YOU BEGIN: Have all remotes for the system at hand.
- Turn the ignition key “ON” (do not start).
- Press the valet button 5 times within 5 seconds of step 1.
– The siren/horn will briefly sound - Press & release the “lock” button on each transmitter one after the other.
– 1-button models press the “start” button.
– The siren/horn will chirp once for each transmitter.
– NOTE: When the first remote is learned all previous remotes are erased. - Turn the ignition key “OFF”.
– NOTE: The system will exit at any time after 10 seconds of no activity.

excalibur.video/programming-remotes
This device complies with part 15 of the FCC Rules. Operation is subject to the following two conditions:
- This device may not cause harmful interference, and
- This device must accept any interference received, including interference that may cause undesired operation.
This equipment has been tested and found to comply with the limits for a Class B digital device, pursuant to part 15 of the FCC Rules. These limits are designed to provide reasonable protection against harmful interference in a residential installation. This equipment generates, uses, and can radiate radio frequency energy and, if not installed and used in accordance with the instructions, may cause harmful interference to radio communications. However, there is no guarantee that interference will not occur in a particular installation. If this equipment does cause harmful interference to radio or television reception, which can be determined by turning the equipment off and on, the user is encouraged to try to correct the interference by one or more of the following measures: Reorient or relocate the receiving antenna., Increase the separation between the equipment and receiver., Connect the equipment into an outlet on a circuit different from that to which the receiver is connected., Consult the dealer or an experienced radio/TV technician for help., Warning! Changes or modifications made to this equipment not expressly approved by the party responsible for compliance could void the user’s authority to operate the equipment
NOTE: The manufacturer is not responsible for any radio or TV interference caused by unauthorized modifications to this equipment. Such modifications could void the user’s authority to operate the equipment.
| REPLACING YOUR REMOTE BATTERY | ||
| STEPS | REMOTE PART# | BATTERY (QTY) |
| 1511 | CR2025 (2) |
| 1412 & 1418 | CR2032 (1) | |
SECURITY, KEYLESS ENTRY, & CONVENIENCE FUNCTIONS
| FUNCTION | BUTTON(S) | LED CONFIRMATION | L . |
| Lock & Arm | Security enabled systems will flash the status LED. | ||
| Lock Only | Ideal for occupied vehicles, RV’s, etc. | ||
| Unlock & Disarm | If only the driver’s door unlocks, press again to unlock all. | ||
| Silent Arm/Disarm | The system will toggle Arm/Disarm each time | ||
| Disable Sensor | 1 Beep After Lock/Arm | Sensors are disabled until Lock/Arm | |
| Trunk/Hatch Release | By default, the system will also disarm/unlock | ||
| Panic | Alarm Tone | Doors will Lock or Unlock before panic. |
REMOTE START FUNCTIONS (ONLY AVAILABLE FOR SOME MODELS – OPTIONAL REMOTE STARTER MAY BE REQUIRED)
| FUNCTION | BUTTON(S) | LED CONFIRMATION | NOTE |
| Engine Start/Stop | Remote LED’s will flash to indicate remaning run time. 4 = 76-100%, 3 = 51-75%, 2 = 26-50%, 1 =1-15°,:. The controller will beep when only 1 minute is remaining as an expiration warning. | ||
| Run Time Extender | All 4 LED’s will flash | All 4 LEDs will flash to indicate restarting of the run timer (only allowed once per remote start cycle). | |
| Low Battery & Low/ Hi Temp Auto-Start | 1 Beep | Auto-start will activate a max of once per 2 hours and cancels when the ignition key is turned ON. See your installer or the full manual for threshold settings. | |
| Cabin Temperature | 1-4 LEDs Flash + Melody | 4. Over 90F ,3= 61-90F, 2= 31-60E1 =Under 30F. | |
| Remote Valet | Melody | This disables remote start and the security system. The status LED will turn on. Repeat this process or press the valet button once to exit valet mode. | |
| FUNCTION | VALET BUTTON | NOTE | |
| Pit Stop Mode | Press 2x w/ Engine On For More Than 10 Sec. (6x for XL mode) | This will leave the engine running for the programmed run time (XL mode runs for 12 hours) so you can take your keys with you to run errands. | |
MANUAL TRANSMISSION RESERVATION MODE
This must be performed before you can remote start a manual transmission vehicle to ensure the car is in neutral & maximum safety. Consult your installer for more information.
- With the engine running by key (more than 10 seconds), hold the brake pedal & place the transmission in neutral.
- Apply the parking brake and release the brake pedal.
- Send the remote start command via your remote. The remote start should engage (LED flashing).
- Take the ignition key out of the switch (the engine should stay running).
- Exit the vehicle and lock your doors with the remote. The engine will turn off.
WINDOW-MOUNT ANTENNA/RECEIVER

OTHER 2-WAY CONTROLLER FUNCTIONS
| FUNCTION | BUTTON(S) | LED CONFIRMATION | NOTE |
| Status Update | This confirms the current Lock/Unlock status of the system/vehicle. | ||
| CAR 2 Mode* | To control the 2nd vehicle. Repeat to return to CAR 1 mode (111 + 1 Beep). | ||
| Low Car Battery Alert | – | 4 Beeps | Alerts when the battery level is below 11.5v for over 30 seconds. |
| Out Of Range | – | All LED’s Flash | When command response is not received |
| CH3/AUX1 – Write Function In Function Column | |||
| CC114/AUX2 – Write Function In Function | |||
|
| CH5/AUX3 – Write Function In Function Column | ||
| AUX4 – Write Function In Function Column |
*TIP: If your system stops responding to your remote, make sure you aren’t accidentally in the wrong “Car” profile.
2-WAY OPTIONS
| FEATURE | PROCEDURE |
| Beep Volume | Hold |
| Button Lock | Hold |
TROUBLESHOOTING TIP: If the remote start won’t activate, the system may be in valet mode (Status LED ON). Press the valet button once to exit.
Scan to register & download the full operation guide at CarAlarm.com!

TROUBLESHOOTING TIP: If the remote start won’t activate, the system may be in valet mode (Status LED ON). Press the valet button once to exit.
Problems? Questions?
Contact Customer Service:
800-554-4053 (toll free) |
+1-770-942-9876 (outside USA)
![]() /omegard
/omegard
![]() /c/omegard
/c/omegard
Your System Model:(Installer, write system model above)
Scan to register & download the full operation guide at CarAlarm.com!

Copyright 2019 Omega Research & Development Technologies, Inc. QOM_5BUTLED2WAY_20200731


