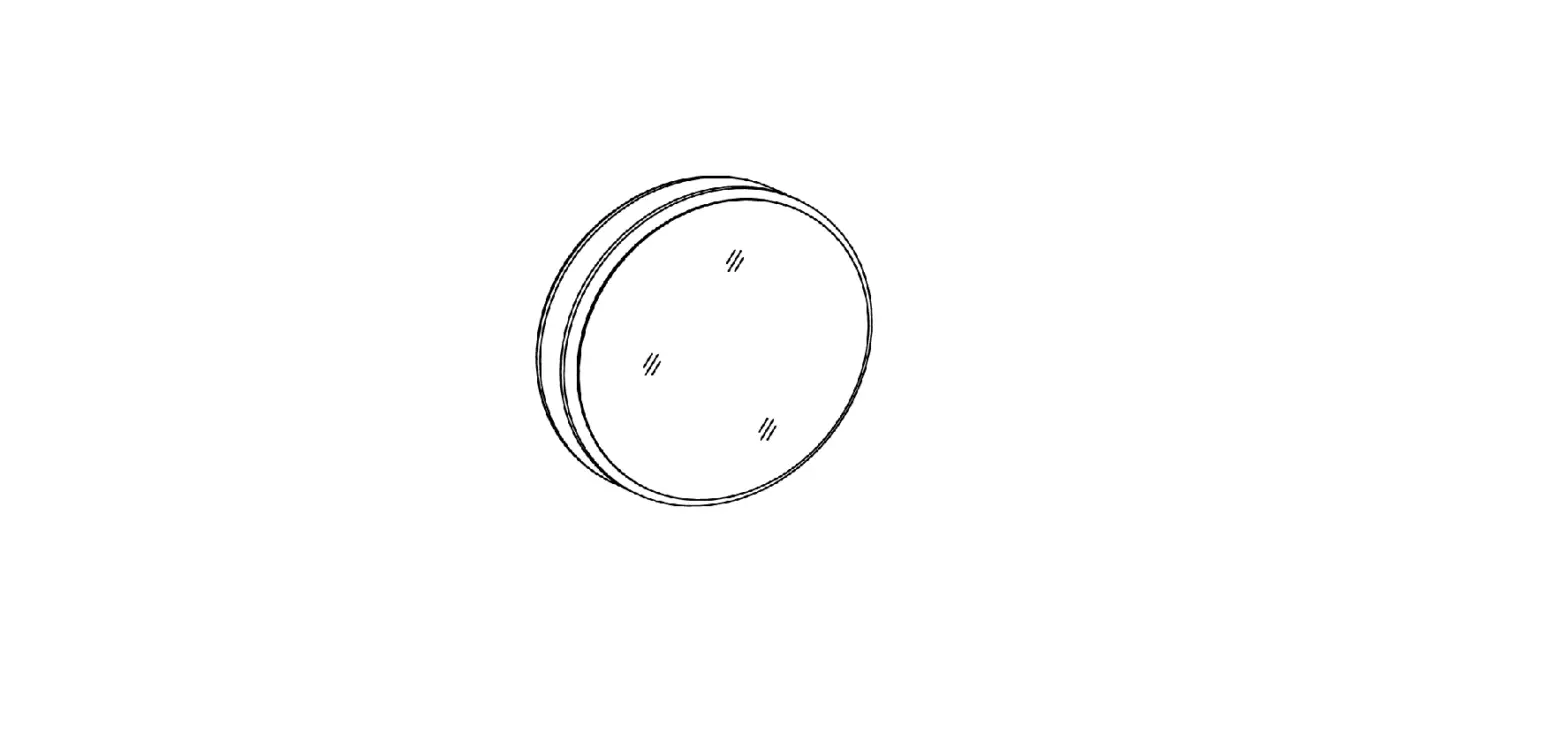
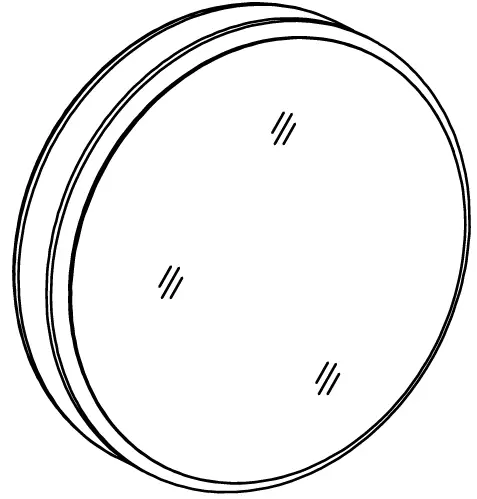
Schneider LUNE D2W Bathroom Mirror
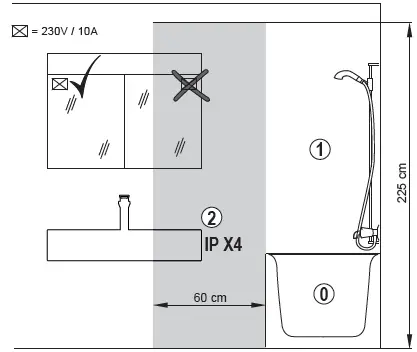
WARNING: Electric installation work may only be carried out by approved specialists according to the local regulations. Liability will only be accepted by us when our products are installed by qualified engineers. The light sources incorporated in this product should only be replaced by the manufacturer, or by another similarly well-qualified person. Rooms with bath or shower have to be protected with a residual-current-operated protective device (RCD) FI (RCD) I Δ n = 30mA. Volume 2 min. protection IP X4. Volume 2 no socket admitted.
 The product is controlled after current guidelines.
 The product must be disposed of separately from normal household waste.
 Indoor installation only.
 The light sources and electronic components are replaceable by a qualified person in accordance with Article 4 of EU Regulation 2019/2020.
- This mirror cabinet contains light sources with the energy efficiency class:

 The product is controlled after current guidelines.
 The product must be disposed of separately from normal household waste.
 Indoor installation only.
 The light sources and electronic components are replaceable by a qualified person in accordance with Article 4 of EU Regulation 2019/2020.
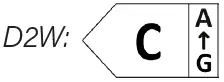
DIMENSION
Scope of delivery
| Scope of delivery | 73cm |
| Mirror cabinet | 1 |
| Suspension plate | 1 |
| Set of screws | 1 |
Assembling instructions
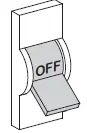
- Turn off the electricity before beginning.
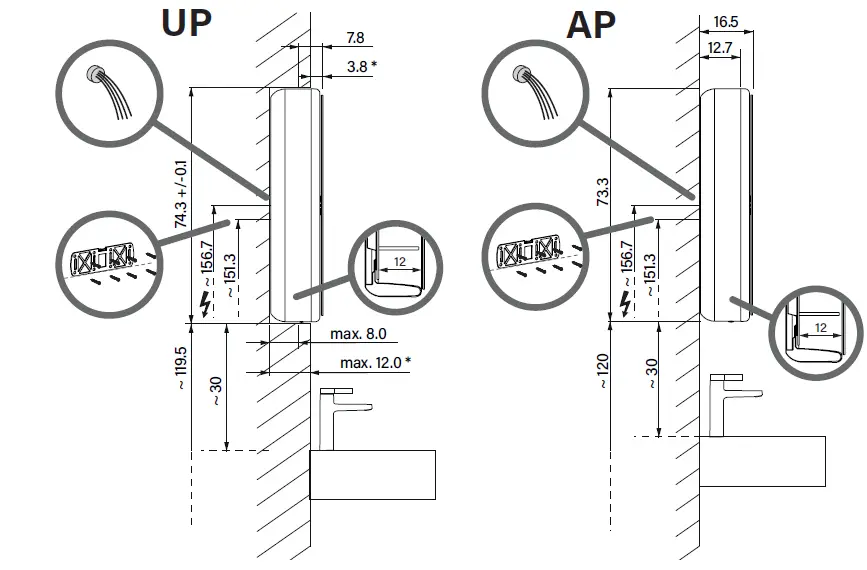
Installation depth with concealed button
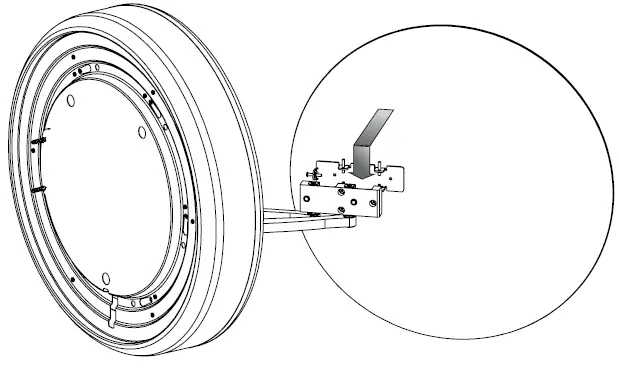
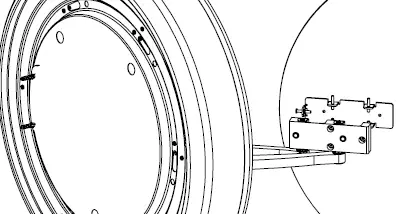
Disassembly

- Do not remove the protective film until installation is complete.
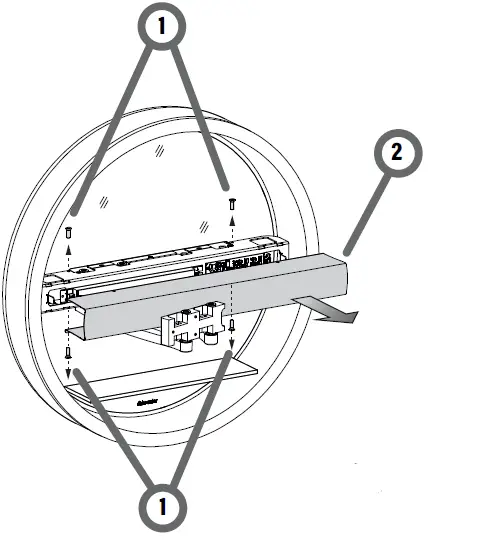
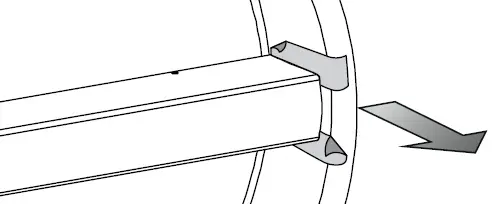
- WARNING: Point the swivel arm forward.

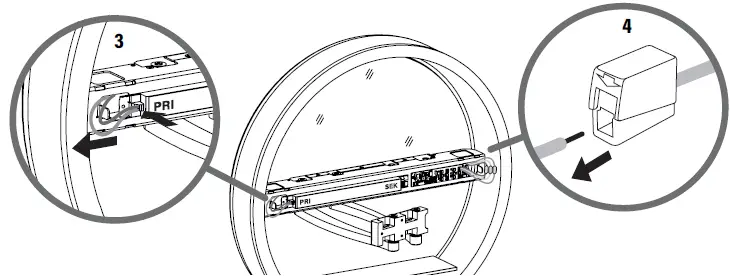
- Disconnect the cables to the button, converter and controller.

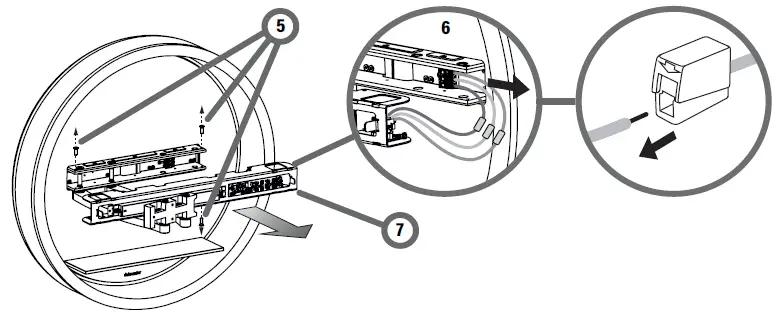
- Disconnect the cable to the socket from the cable clamp.

- Detach the suspension plate from the cabinet housing.
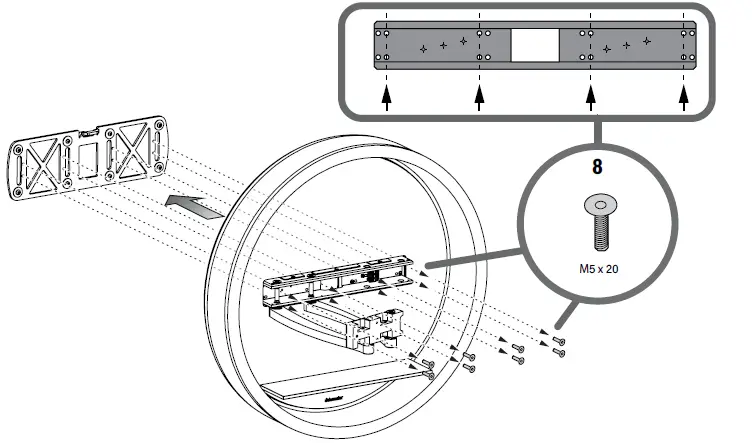
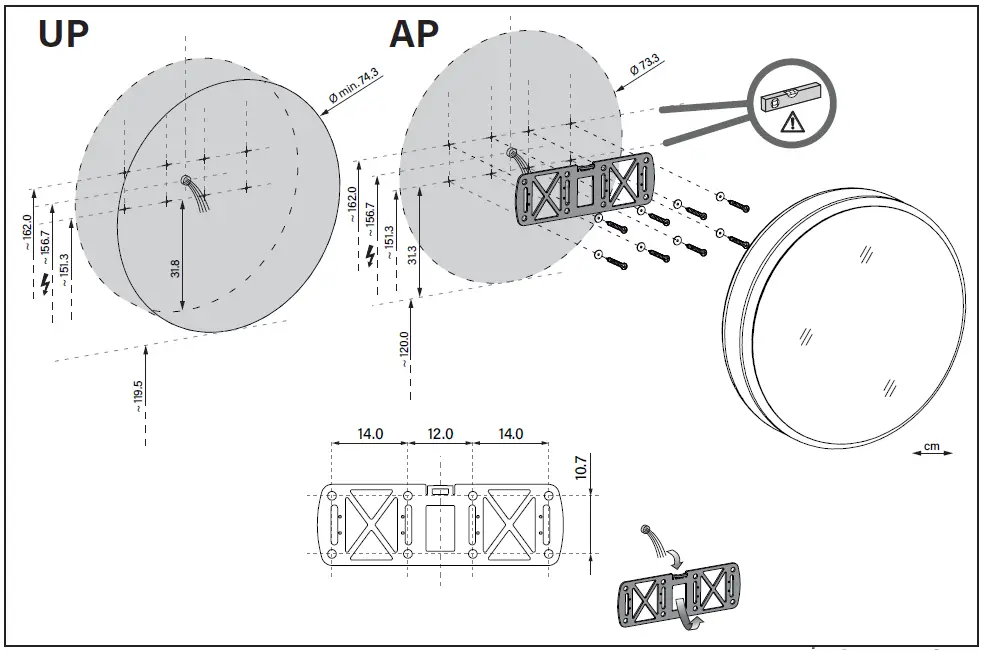
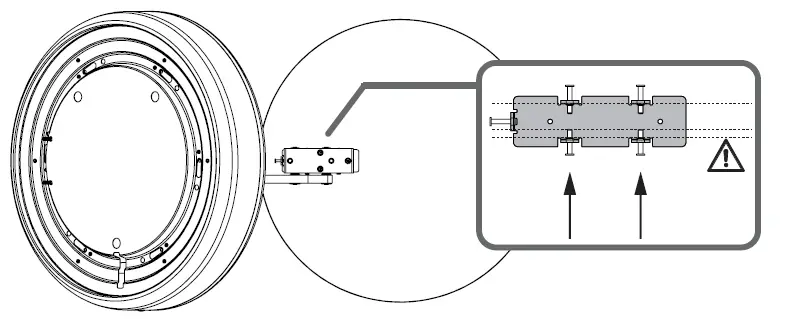
Suspension
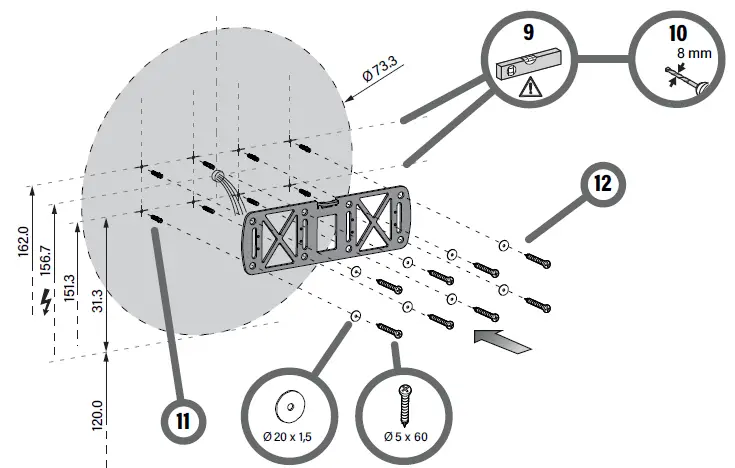
WARNING: Ensure that the suspension rail is in a horizontal position! The cabinet position cannot be corrected subsequently!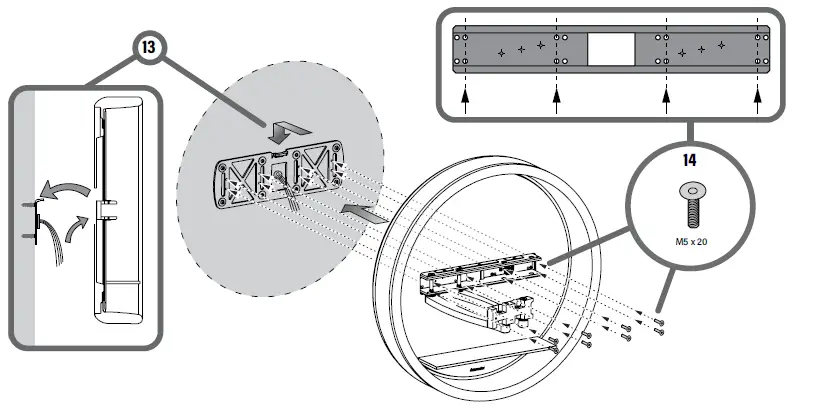
Wiring
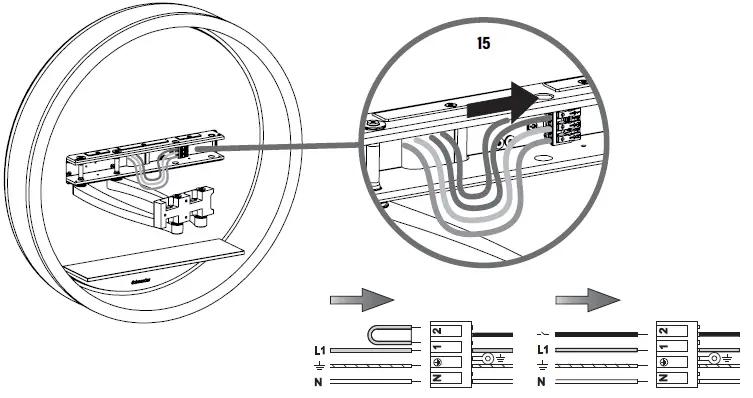
WARNING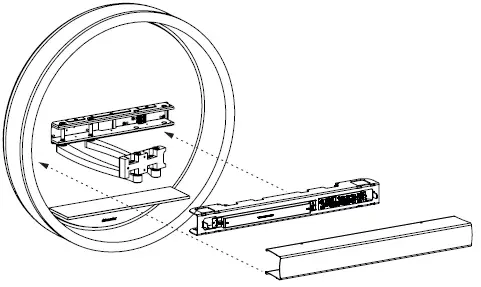
- After wiring, reassemble in reverse order!
Mirror door assembly

- Unscrew all the adjusting bolts a little.

- Hang the mirror on the upper adjusting bolts.

- Slightly screw in the upper and then the lower adjusting bolts to secure the mirror. Do not tighten!
Adjustment mirror door
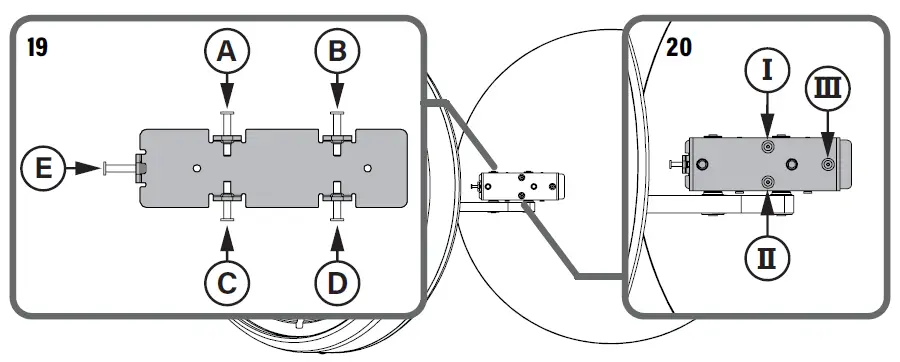
Adjustment
- Screw in bolt A, do not tighten (bolts must not collide with swivel arm)
- Screw in bolt D to raise mirror
- Screw in bolts B & C, do not tighten
- Close mirror door & check. Repeat steps 1-3 until the height of the mirror door is correct!
- Loosen bolts A & B slightly (mirror can be moved sideways)
- Close mirror door, hold and lift slightly, slide sideways into position
- Open the mirror door carefully
- Screw in bolt E as far as it will go, check
- Adjust definitive door height with bolts A & B (steps 1-3)
- If door height is correct, tighten bolts C & D slightly.
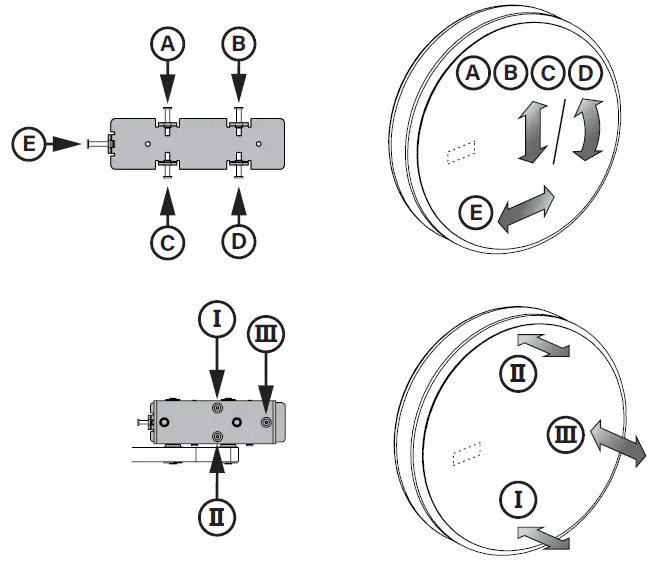
- Adjust the door inclination:
- Bolt I: Mirror lower edge inwards / outwards
- Bolt II: Mirror lower edge inwards / outwards
- Bolt III: Mirror side edge inwards / outwards
- Close & check the mirror door. Repeat steps 11 – 14 until the inclination of the mirror door is correct!
- Tighten bolts C & D firmly (they must not collide with swivel arm)!
Information
- Do not tighten the system too much to prevent a distorted mirror image!

- Remove the protective film after installation is complete.
Alterations are reserved 694.423 03.23/
ADDRESS: W. Schneider+Co. AG, Büntenrietstrasse 12, 8890 Flums


