
V I V O MOUNT-VP01W White Projector Ceiling Mount

ASSEMBLY VIDEO AVAILABLE:
Follow along step-by-step with our video walk through by scanning the QR code with your mobile device or by following the product link: vivo-us.com/products/mount-vp01b
[email protected] |309-278-5303 |www.vivo-us.com
Contact Us First!
DO NOT RETURN ITEM
Our friendly product support team is here to help!![]() PERSONABLE CUSTOMER SUPPORT 7AM – 7PM Monday-Friday
PERSONABLE CUSTOMER SUPPORT 7AM – 7PM Monday-Friday
![]() Give us a Call: 309-278-5303
Give us a Call: 309-278-5303
![]() Chat Us: www.vivo-us.com
Chat Us: www.vivo-us.com
![]() Email Us: [email protected]
Email Us: [email protected]
We’re Here for You!
Our customer-minded support team is here for YOU,
Monday-Friday 7am-7pm CST.
We offer immediate assistance with rapid response times from customer service agents and product technicians to help you every step of the way! Missing a Part?
If any parts are received damaged / defective OR you are missing a part, please reach out to us within 30 days of product delivery to have it replaced at no cost. We are happy to replace parts to ensure you have a fully functioning product.
PRE-ASSEMBLY | BEFORE YOU BEGIN
![]() If you do not understand these directions, or if you have any doubts about the safety of the installation, please call a qualified technician. Check carefully to make sure there are no missing or defective parts. Improper installation may cause damage or serious injury. Do not use this product for any purpose that is not explicitly specified in this manual. Do not exceed weight capacity. We cannot be liable for damage or injury caused by improper mounting, incorrect assembly or inappropriate use.
If you do not understand these directions, or if you have any doubts about the safety of the installation, please call a qualified technician. Check carefully to make sure there are no missing or defective parts. Improper installation may cause damage or serious injury. Do not use this product for any purpose that is not explicitly specified in this manual. Do not exceed weight capacity. We cannot be liable for damage or injury caused by improper mounting, incorrect assembly or inappropriate use.
WARNING: CHOKING HAZARD
SMALL PARTS – NOT FOR CHILDREN UNDER 3 YEARS. ADULT SUPERVISION IS REQUIRED.
TIPOVER WARNING
SERIOUS OR FATAL CRUSHING INJURIES CAN OCCUR FROM TIPOVER. TO HELP PREVENT TIPOVER:
- NEVER ALLOW CHILDREN TO CLIMB, STAND, HANG, OR PLAY ON ANY PART OF TV OR TV CART.
- USE TIPOVER RESTRAINT OR ANCHOR STAND TO WALL
USE OF TIPOVER RESTRAINTS MAY ONLY REDUCE, BUT NOT ELIMINATE RISK OF TIPOVER.
WEIGHT CAPACITY
DO NOT EXCEED WEIGHT CAPACITY. Failure to do so may result in serious injury.![]() 30lbs (13.61kg
30lbs (13.61kg
![]() Product Warranty
Product Warranty
For the most up to date details on your product’s warranty, please visit the product’s listing on our website or reach out to customer support. vivo-us.com/products/mount-vp01b
![]() Returns | Product Didn’t Work Out?
Returns | Product Didn’t Work Out?
We offer a hassle-free 30 day return on all products. Contact customer support at 309-278-5303 or [email protected]. Please note: For items ordered in error or no longer needed, the return shipping charges will be at the buyer’s expense.
TOOLS NEEDED:
- Phillips Screwdriver

- Drill

- DIFFICULTY LEVEL


PACKAGE CONTENTS
Please consult the parts list below and ensure you have everything you need to assemble your product. If parts are missing or damaged, please contact us.
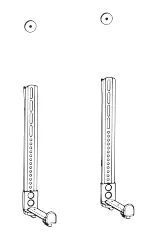
- A (x1) Ceiling Mount

- B (x1) Mounting Bracket

- M-A (x4) M3x8mm Screw

- M-B (x4) M4x10mm Screw

- M-C (x4) M5x10mm Screw

- M-D (x4) M6x10mm Screw

- M-E (x4) M3 OD-10 Washer

- M-F (x4) M4 OD-10 Washer

- M-G (x4) M5 OD-12 Washer

- M-H (x4) M6 OD-12 Washer

- M-I (x2) M5x12mm Screw

- M-J (x2) M5 OD-10 Washer

- M-K (x2) M5 OD-10 Plastic Washer

- W-A (x4) ST6x56mm Screw

- W-B (x4) Concrete Anchor

- W-C (x4) M6 OD-16 Washer

- T-A (x1) 4mm Allen Wrench


NOTE: SOME HARDWARE INCLUDED MAY NOT BE USED
| WASHER SPECIFICATION KEY | |
| M | Compatible Screw Size |
| OD | Outside Diameter |
DO NOT INSTALL INTO DRYWALL ALONE. VERIFY YOUR CEILING CONSTRUCTION. USE WOOD STUDS TO MOUNT. We include mounting for brick and concrete If unsure, please contact us at vivo-us.com, email at [email protected], or call us at 309-278-5303 |
ASSEMBLY STEPS
STEP 1: Cable Management
OPTION A: Above Ceiling Cable Management
If cables will be hidden above the ceiling, route cables through large opening in Ceiling Mount (A).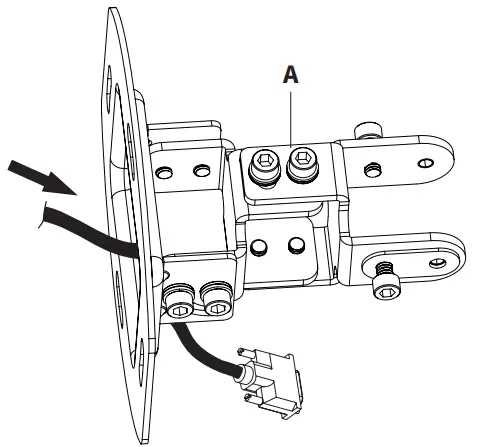
OPTION B: Below Ceiling Cable Management
If cables are located below ceiling, route cables through the side of Ceiling Mount (A).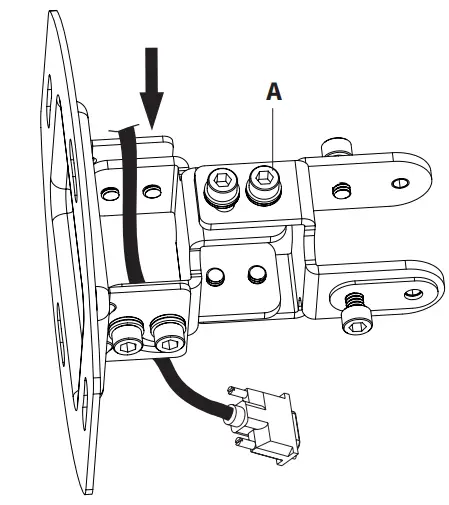
 |
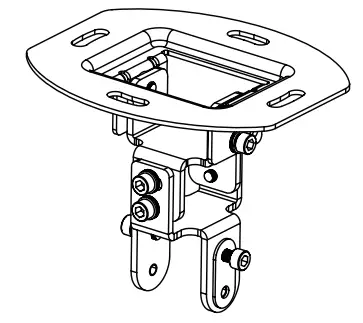
| A Ceiling Mount |
STEP 2: Installing the Ceiling Mount
OPTION A: Wood Ceiling Joist Installation
Align holes in Ceiling Mount (A) with wood ceiling joist and mark drilling locations. Use of a stud finder is recommended for finished ceilings. Drill 55mm (2.2”) deep holes using 4.5mm or 3/16” drill bit. Secure Ceiling Mount (A) to stud using ST6x56mm Screws (W-A) with M6 OD-16 Washers (W-C). Do not use Concrete Anchors (W-B).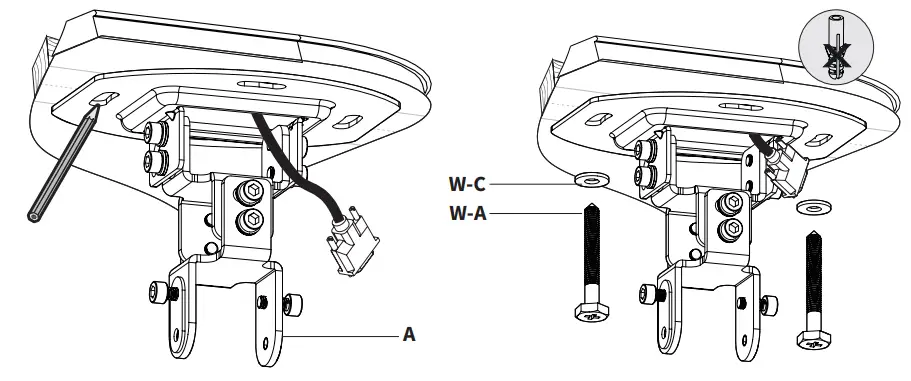
OPTION B: Concrete Ceiling Installation
Mark drilling locations in ceiling. Drill 60mm (2.4”) deep holes using 10mm or 3/8” drill bit. Press Concrete Anchors (W-B) into drilled holes, and secure Ceiling Mount (A) to ceiling using ST6x56mm Screws (W-A) and M6 OD-16 Washers (W-C).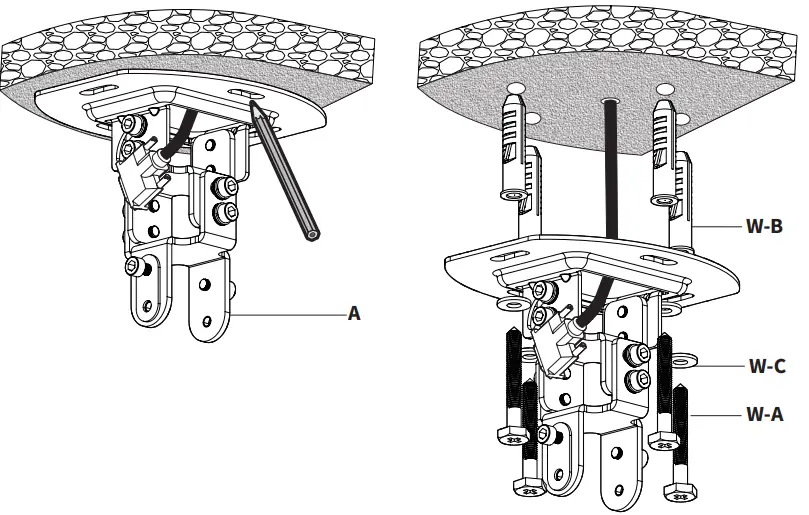
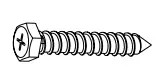
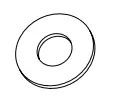
| W-A ST6x56mm Screw | W-B Concrete Anchor | W-C M6 OD-16 Washer |
STEP 3: Securing the Projector
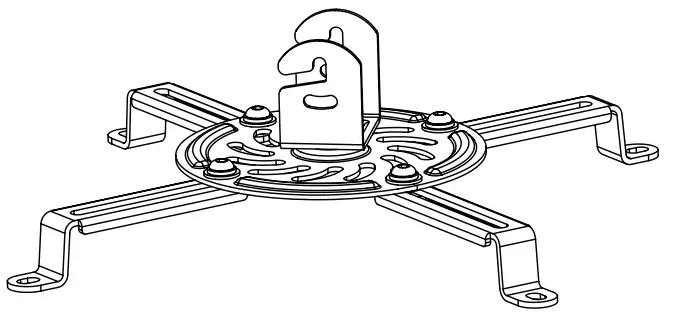
Align arms on Mounting Bracket (B) with mounting holes in projector, and secure to projector using Screws (M-A through M-D) and Washers (M-E through M-H) most appropriate for your projector. If your projector has 3 mounting holes, simply remove one of the arms.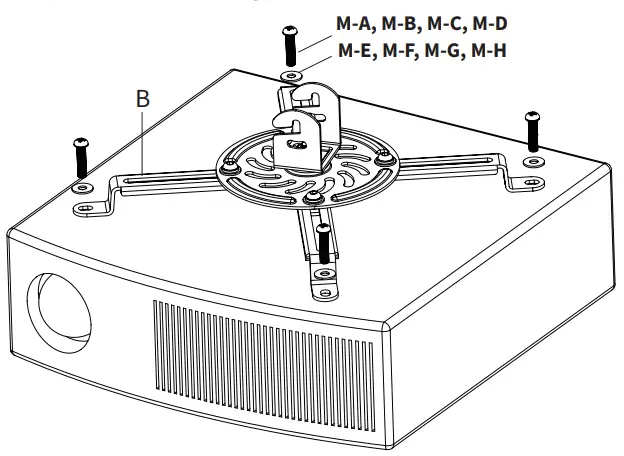
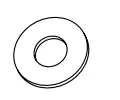
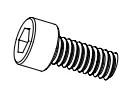
 | 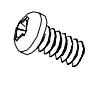 |  | 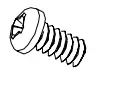 |  |  |  | |
| M-A M3x8mm Screw | M-B M4x10mm Screw | M-C M5x10mm Screw | M-D M6x10mm Screw | M-E M3 OD-10 Washer | M-F M4 OD-10 Washer | M-G M5 OD-12 Washer | M-H M6 OD-12 Washer |
STEP 4: Assembling the Mount
Hang Mounting Bracket (B) with projector over pre-installed screws on Ceiling Mount (A), making sure plastic oval washers are between the plate and mount.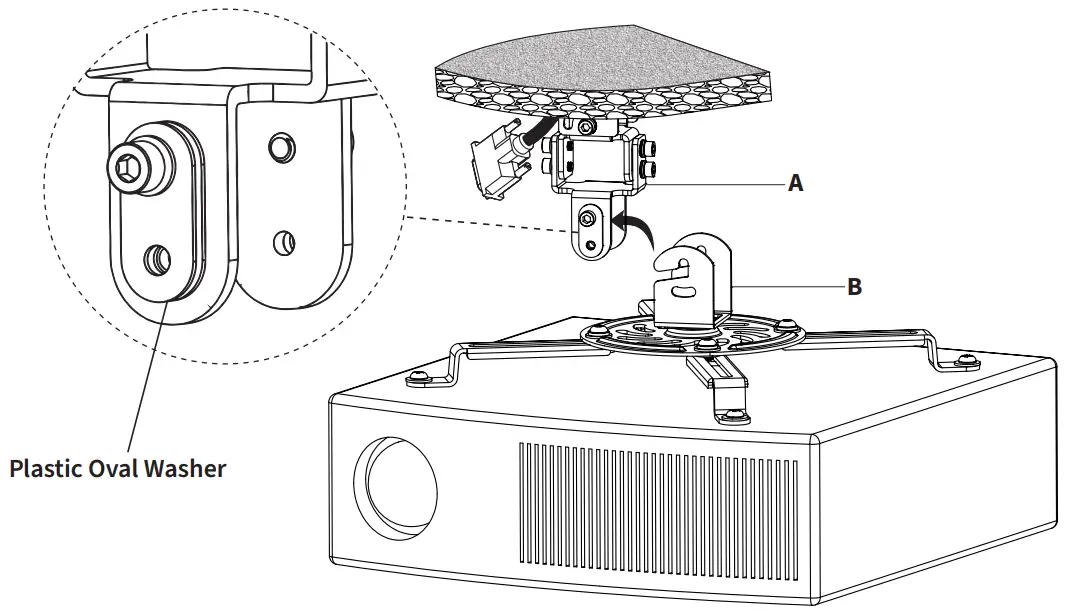
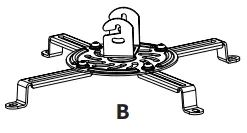 |
| B Mounting Bracket |
STEP 5: Securing the Mount
Secure Mounting Bracket (B) using M5x12mm Screws (M-I), M5 OD-10 Washers (M-J) and M5 OD10 Plastic Washers (M-K). Tighten with 4mm Allen Wrench (T-A).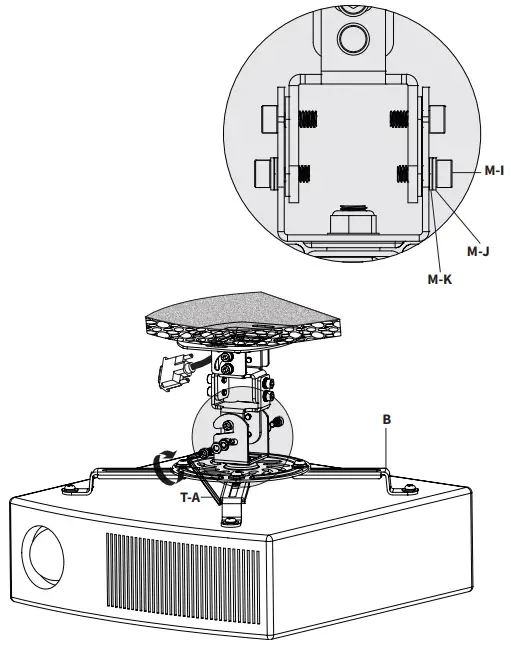
| M-I M5x12mm Screw | M-J M5 OD-10 Washer | M-K M5 OD-10 Plastic Washer |
STEP 6: Positioning the Mount
Adjust angle and rotation of projector using 4mm Allen Wrench (T-A).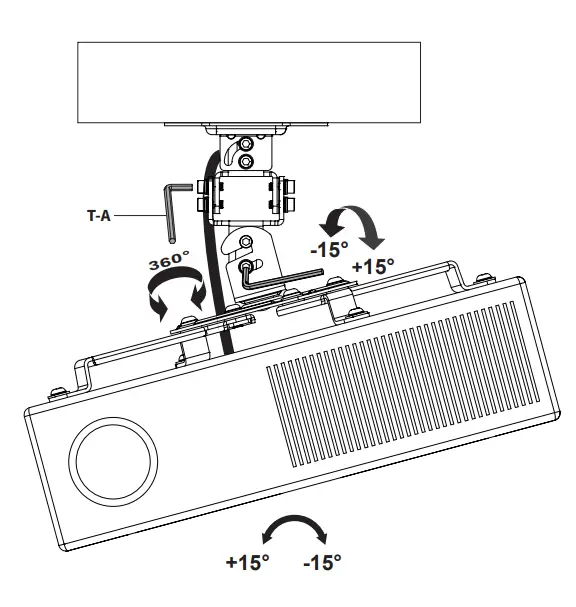
 |
| T-A 4mm Allen Wrench |
CHECK OUT OTHER GREAT PRODUCTS FROM

EXPLORE MORE AT VIVO-US.COM
We offer a wide array of home & office products to fit your needs. From height adjustable desks to monitor mounts to keyboard trays and more!
SPEAKER MOUNTS & STANDS
Whether you’re mounting a sound bar or surround sound system, we’ve got a mounting solution to fit your needs.
HEIGHT ADJUSTABLE DESKS
We offer electric & manual crank standing desks, corner frames, desk & top combos, and more!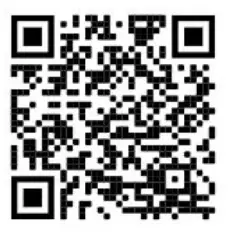
MONITOR MOUNTS
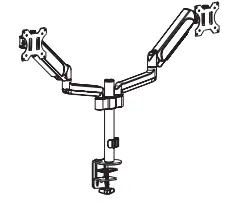
From single monitor mounts to hex mount, gromment or clampons, we’ve got a mounting solution for your setup.
WHO WE ARE
![]() VIVO is more than a brand of ergonomic office furniture. We are a team of creative and innovative individuals working together to offer high quality, affordable ergonomic solutions. We think and work outside of the box to serve you, our customer, to the best of our abilitiy.
VIVO is more than a brand of ergonomic office furniture. We are a team of creative and innovative individuals working together to offer high quality, affordable ergonomic solutions. We think and work outside of the box to serve you, our customer, to the best of our abilitiy.
 Need Assistance?
We Would Love to Help!
 Personable Customer Support | Mon-Fri 7am-7pm We offer immediate assistance with rapid response times from customer service agents and product technicians to help you every step of the way!
![]() Call Us: 309-278-5303
Call Us: 309-278-5303
Average Resolution Time: 5m 4s
 Chat Us: www.vivo-us.com
Average Resolution Time: < 15m
![]() Email Us: [email protected]
Email Us: [email protected]
Average Resolution Time: 1HR 8M
23% within < 15m
38% within < 30m
61% within < 1hr
83% within <2hr
92% within < 3hr
LOVE YOUR NEW VIVO SETUP?
Ready to share that new amazing setup? Want to brag about that amazing new ergonomic solution?
Tag us in your photo!
 VIVO-us
 @vivo_us
FOR MORE GREAT VIVO PRODUCTS, CHECK OUT OUR WEBSITE AT: WWW.VIVO-US.COM
References
 Register a .US.COM domain today!
 VIVO - Desks, Monitor Mounting, and More Home & Office Solutions – VIVO - desk solutions, screen mounting, and more
-
Adjustable Ceiling Mount for Regular and Mini Projectors – VIVO - desk solutions, screen mounting, and more
-
VIVO - Desks, Monitor Mounting, and More Home & Office Solutions – VIVO - desk solutions, screen mounting, and more


