![]()
Installation Instructions Nassau
K A-240-30
Single-Handle Pull-Out Kitchen Faucet
Thank you for selecting Lulani. To ensure that your installation proceeds smoothly, please read these instructions carefully before you begin.
Parts Included
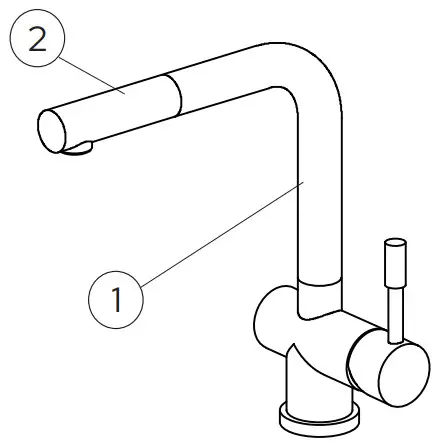
- Faucet
- Spray head
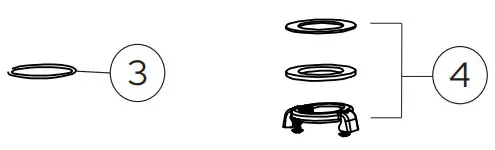
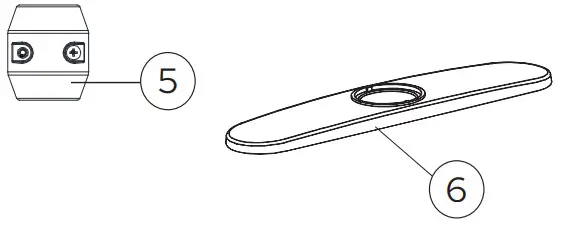
- Above sink hardware: rubber O-ring
- Below sink hardware: rubber washer, metal washer, mounting nut
- Counterweight
- Escutcheon (8″ Baseplate)
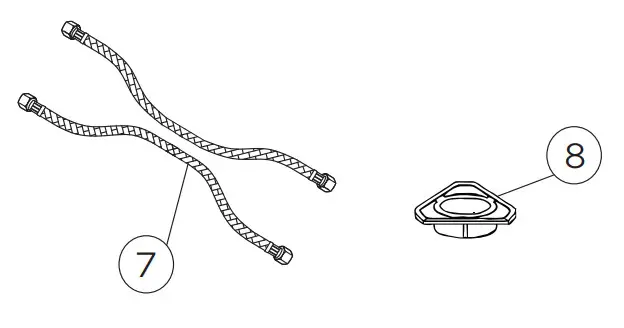
- Water supply lines
- (optional) Stability Collar
 |  |
 |  |
*Optional: Try out our Stability Collar for additional security which may be necessary for thinner sinks, like those made with Stainless Steel. Install under
the sink, between the rubber washer and metal washer.
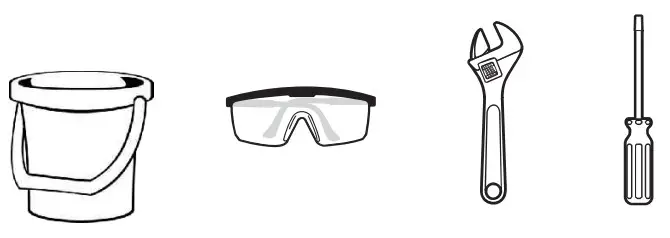
Recommended Tools (not included)
- Adjustable Wrench
- Phillips Screwdriver
- Safety Goggles
- Flashlight
- Bucket
- Measuring Tape
- Plumber’s Putty
- Channel Locks
- Allen Key
Caution: Tips for removal of old faucet
Always turn off the water supply before removing the existing faucet or replacing any part of the faucet. Open the faucet handle to relieve water pressure and ensure that water is completely shut off.
Maintenance
Your new faucet is designed for years of trouble-free performance. Keep it looking new by cleaning it periodically with a soft cloth. Avoid abrasive cleaners, steel wool, and harsh chemicals as these will dull the finish and void your warranty.
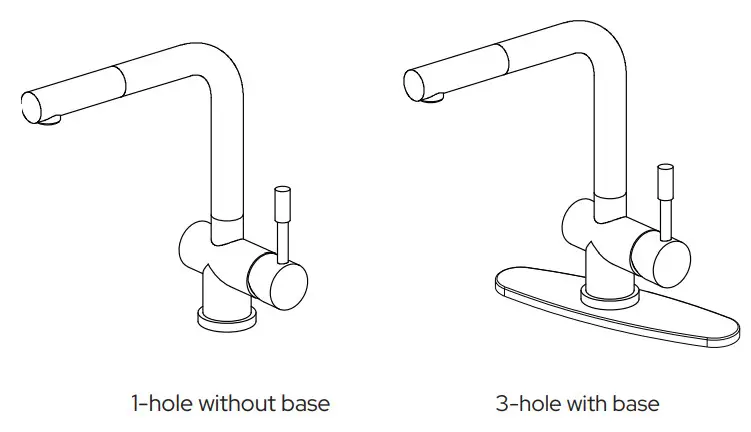
Step 1
Your faucet will arrive without the base attached. If you want to use the 3-hole base plate, simply slide the faucet threads through the hole of the base plate.
Determine what type of base you’ll need for installation. Does your sink have 1 hole or 3 holes? If your sink has more than 1 hole and you want to cover up the additional holes, consider using the provided base plate. Optional accessories like soap dispensers can also be used in the additional holes.
Note that the sinkhole should be 1 ” in diameter.
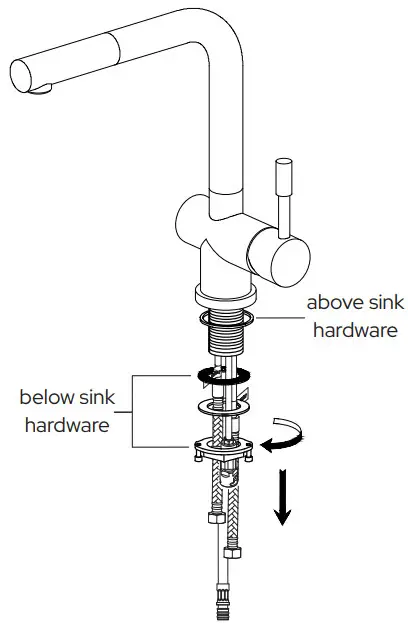
Step 2
Remove the below sink hardware (rubber and metal washers and mounting nut) from the base by hand twisting off.
Note that the above sink hardware (rubber o-ring) needs to stay above the mounting surface.
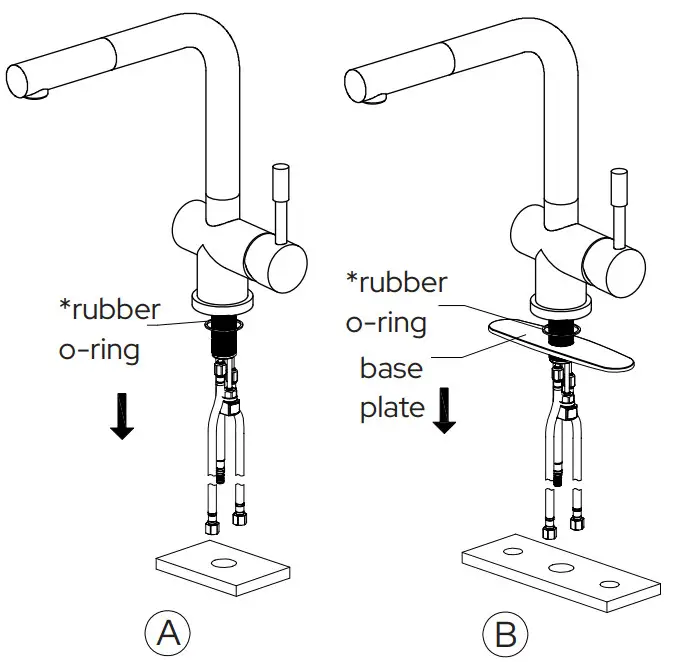
Step 3
A. For 1-hole installation, insert the faucet through the hole on the sink.
B. For 3-hole installation, insert the faucet into the base plate and then through the hole on the sink.
*Note: Make sure that the rubber o-ring stays above the mounting surface for 1-hole installation or between the faucet and base plate for 3-hole installation.
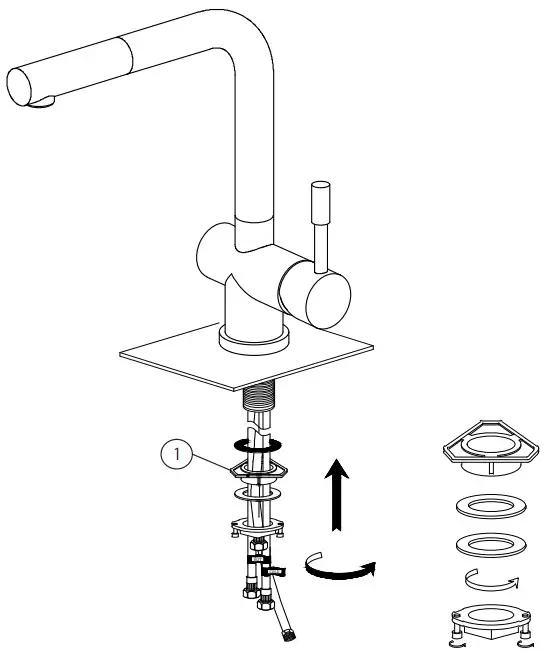
Step 4
Secure the faucet by firmly hand tightening the rubber washer, metal washer, and mounting nut back on the faucet threads underneath the sink. Tighten the screws on the mounting nut with a Phillips screwdriver.
Note: The optional Stability Collar (1) has been added as a reference in the image. This can be used for thinner sinks to add additional strength. If used, insert between the rubber and metal washers.
 Step 5
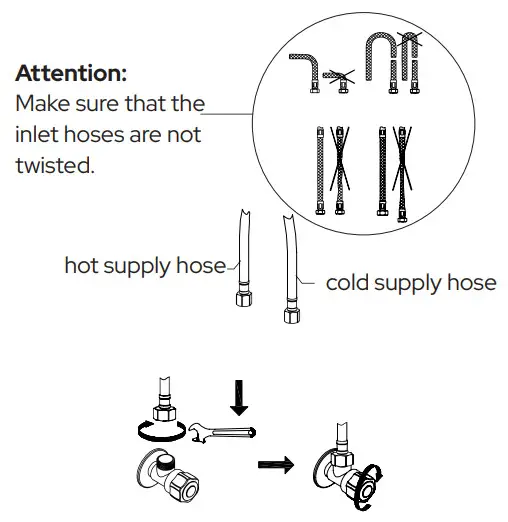
Install the spray hose to the outlet hoses. The outlet will connect by inserting the threads and hand twisting.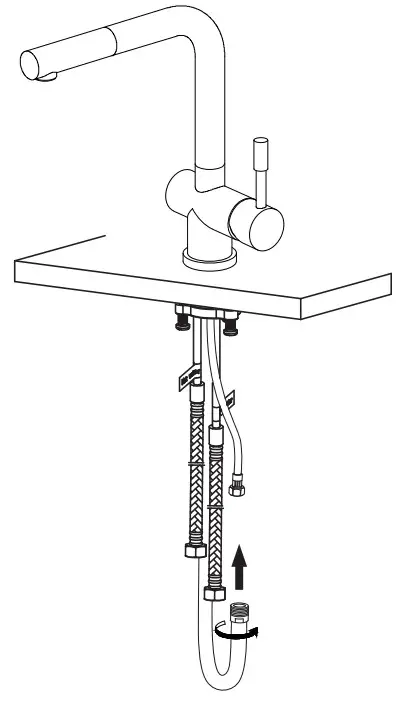 Step 6
Connect the water supply lines to the hot and cold water valves. Tighten with an adjustable wrench. Do not overtighten.
Step 7
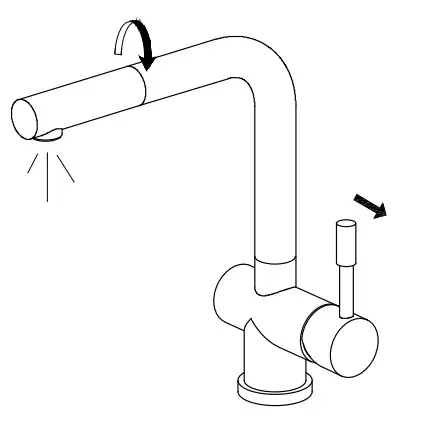
The faucet should be flushed for possible debris prior to use. Remove the nozzle head by hand twisting off. Turn the faucet handle all the way on, turn on the hot and cold water supply and flush water lines for one minute. Re-install the nozzle head by hand twisting back on.
 Step 8
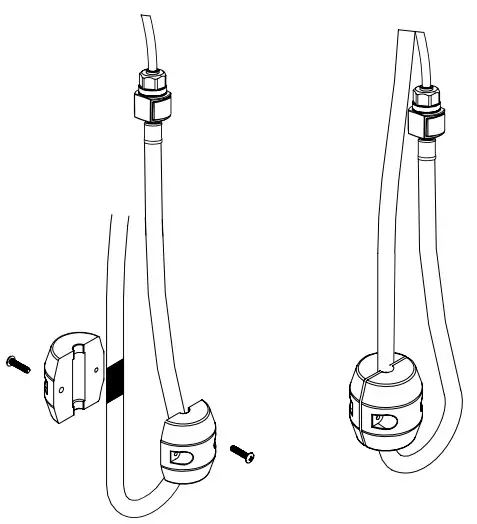
Attach the counterweight to the spray hose by screwing together. Turn the water valves back on and then turn on the faucet. Run the water flow for 15 seconds to clean up the lines and check for any leaks.
Congratulations! You’ve successfully finished installing your new faucet. For troubleshooting questions or concerns, please reference the Owner’s Manual or visit our website at www.lulani.com.
We value your opinion! Don’t forget to leave us a review.


