
adidas C-21 Bike
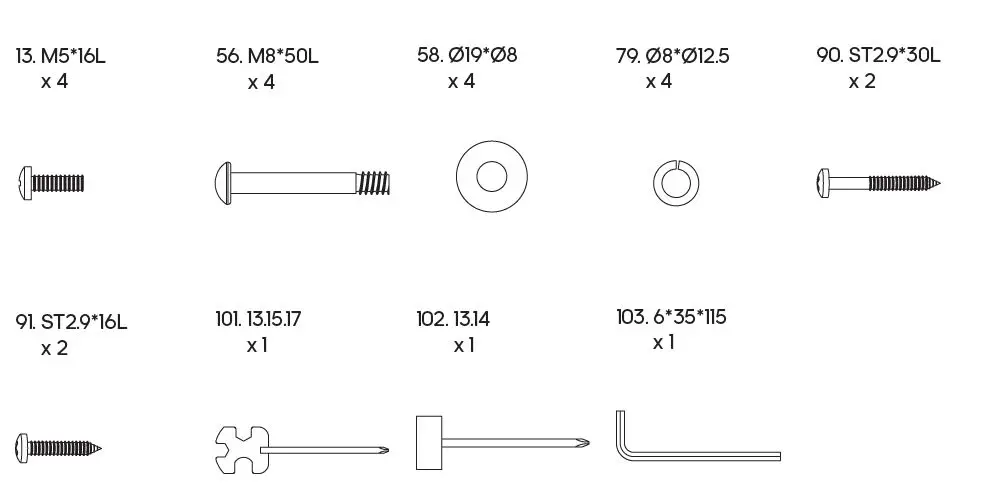
HARDWARE PACK
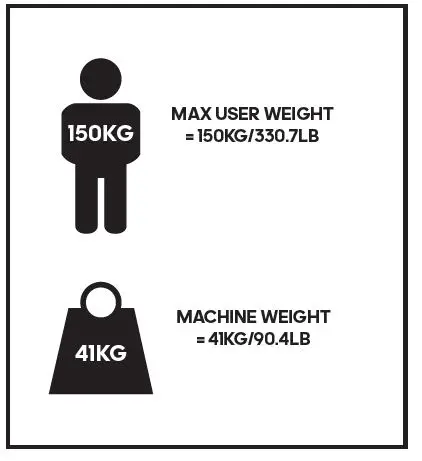
WEIGHT GUIDE
PARTS LIST
| NO. | PART DESCRIPTION | QTY | NO. | PART DESCRIPTION | QTY | NO. | PART DESCRIPTION | QTY | |||
| 1 | Console | 1 | 38 | Wave washer Ø10.2*Ø13*0.3T | 1 | 75 | Sensor bracket | 1 | |||
| 2 | Screw M5*10L | 10 | 39 | Bearing 6000 2ZZ | 2 | 76 | Left Pedal | 1 | |||
| 3 | Console plate | 1 | 40 | Idler wheel | 1 | 77 | Upright | 1 | |||
| 4 | Upper console cover | 1 | 41 | Flat washer Ø6*Ø14*1T | 1 | 78 | Screw M8*P1.25*20L | 5 | |||
| 5 | End cap | 2 | 42 | Screw M6*10L | 1 | 79 | Spring washer Ø8.0*2.5T | 15 | |||
| 6 | Seat | 1 | 43 | Plastic washer | 1 | 80 | Semicircle washer Ø8*Ø19*2T | 5 | |||
| 7 | Sliding seat | 1 | 44 | Nut 3/8″-26*7T | 2 | 81 | Upper cable | 1 | |||
| 8 | Slider fixed bolt | 1 | 45 | Hex nut 3/8″-26*4.5T | 2 | 82 | Lower cable | 1 | |||
| 9 | Upper slider cover | 1 | 46 | Wave washer Ø12.5*Ø18*1.5T | 1 | 83 | Hex screw M8*P1.25*20L | 6 | |||
| 10 | Seat post | 1 | 47 | C shape clasp Ø12 | 3 | 84 | Upright cover | 1 | |||
| 11 | Knob | 1 | 48 | Front Stabilizer | 1 | 85 | Batteries box holder | 1 | |||
| 12 | Lower slider cover | 1 | 49 | Bearing 6901 | 1 | 86 | AA Battery | 7 | |||
| 13 | Screw M5*16L | 6 | 50 | Flywheel Ø280*32W 7KG | 1 | 87 | Batteries box cover | 1 | |||
| 14 | Screw M5*10 | 1 | 51 | Bearing 6001 | 1 | 88 | Screw ST3.5*16L | 1 | |||
| 15 | Water bottle holder | 1 | 52 | Self-generating sets | 1 | 89 | Lower cover of console | 1 | |||
| 16 | Main cover (R) | 1 | 53 | Rear stabilizer end cap | 2 | 90 | Screw ST2.9*30L | 2 | |||
| 17 | Light straps | 2 | 54 | Screw ST4.8*1.4*20L | 8 | 91 | Screw ST2.9*16L | 2 | |||
| 18 | 170 Crank (R) | 1 | 55 | Rear stabilizer | 1 | 92 | Handlebar | 1 | |||
| 19 | Right Pedal | 1 | 56 | Screw M8*P1.25*50L*S25L | 4 | 93 | Pulse grip | 2 | |||
| 20 | Crank cover | 2 | 57 | Nylon Nut M8 | 1 | 94 | Screw ST2.9*20L | 4 | |||
| 21 | Nut | 2 | 58 | Flat washer Ø8*Ø19*2T | 11 | 95 | Pulse wire | 2 | |||
| 22 | Light PCB | 1 | 59 | Front stabilizer cover | 1 | 96 | Front stabilizer end cap R | 1 | |||
| 23 | Plastic insert | 2 | 60 | Rear stabilizer cover | 1 | 97 | Front stabilizer end cap L | 1 | |||
| 24 | Screw ST3.9*16L | 4 | 61 | Frame | 1 | 98 | Screw ST3.9*50L | 6 | |||
| 25 | Belt 450J6 | 1 | 62 | Motor | 1 | 99 | Main cover (L) | 1 | |||
| 63 | Flat washer Ø5.5*Ø12*2T | 2 | |||||||||
| 26 | Axle | 1 | 100 | Crank (L) | 1 | ||||||
| 27 | Hex screw M6*P1.0*16L | 4 | 64 | Hex screw M5*P0.8*12L | 2 | 101 | Harpoon wrench 13.15.17 | 1 | |||
| 28 | Nylon nut M6*5.5T | 4 | 65 | Pulley | 1 | 102 | Socket wrench 13.14 | 1 | |||
| 29 | Spring washer Ø6.1*1.6T | 4 | 66 | Bearing 6004 2RS | 2 | 103 | Hex wrench 6mm*35mm*115mm | 1 | |||
| 30 | Magnetic sets | 1 | 67 | Sleeve | 1 | 104 | Battery connected wire | 1 | |||
| 31 | Hex screw M8*55L*S25L | 1 | 68 | Seat post cover | 1 | 105 | MCB connected wire | 1 | |||
| 32 | Flat washer Ø8*Ø19*2T | 1 | 69 | Knob with pulling pin | 1 | 106 | Light connected wire | 1 | |||
| 33 | Nylon nut M8 | 1 | 70 | Wave washer Ø20.5*Ø30*0.3T | 1 | ||||||
| 107 | Screw M5*12L | 2 | |||||||||
| 34 | Spring | 1 | 71 | C shape clasp Ø18.5*Ø22.5*1T | 2 | ||||||
| 108 | End Cap | 2 | |||||||||
| 35 | Idler shaft | 1 | 72 | Flat washer Ø20.3*Ø30*0.5T | 1 | ||||||
| 109 | Screw M3* 10L | 2 | |||||||||
| 36 | Hex screw M8*20L | 1 | 73 | Sensor | 1 | ||||||
| 110 | Magnetic ring Ø31*Ø19*13 | 2 | |||||||||
| 37 | Idler spring | 1 | 74 | Control board | 1 | ||||||
CONSOLE
- LEVEL/SPEED DISPLAY
- STOP/TIME/WATT DISPLAY
- CALORIE DISPLAY
- PULSE DISPLAY
- TIME DISPLAY
- SPEED DISPLAY
- RESET Press to reset all values, and hold to restart.
- RECOVERY
Test heart rate recovery; Once complete, press again to revert. - DOWN (-)
Adjust function value down. - ENTER
Confirm value of each function. - DISTANCE DISPLAY
- USER PROFILE DISPLAY
- RPM DISPLAY Revolutions per minute.
- PAUSE/STOP
Press this button to either pause or stop the machine. - START
Will commence program. - UP (+)
Adjust function value up. - MODE
Select or switch values of each function. Can be as confirmation.
COMPUTER PROGRAMS
USER PROFILES (U1–U4)
When user pedals, the console will power on with a long beep sound, the wheel diameter 78 will be displayed, and then the console will display U1.
- Use (+)/(-) to change between user profile U1, U2, U3 and U4, press MODE to confirm your selection.
- Set your gender (male is the default) using (+)/(-), and then press MODE to confirm.
- Set your age (25 years is the default) using (+)/(-), and then press MODE to confirm.
- Set your height (160cm is the default) using (+)/(-), and then press MODE to confirm.
- Set your weight (50kg is the default) using (+)/(-), and then press MODE to confirm.
- Finally, press MODE again into main menu.
- Press (+)/(-) to select exercise mode, and press START to work out; Hold RESET ( ) to restart, and revert to user interface.
QUICK START FUNCTION
Hold RESET to restart console, U1 displayed, then press START to enter MANUAL mode PO directly. Resistance level (24 levels) can be adjusted at any time during exercise by pressing (+)/(-) according to individual needs.
MANUAL MODE (PO)
In main menu, press (+)/(-) to choose MANUAL mode PO, and press START to work out, all values of TIME/SPEED/DISTANCE/CALORIES will count up from zero. User can adjust TIME/DISTANCE/CALORIES/PULSE values, revert to main menu, press (+)/(-) to select PO, then press MODE to confirm, and press MODE again to highlight time, press (+)/(-) to adjust,and press MODE to switch other values ,all settings completed, press START to workout, all setting values will count down.
PRESET PROGRAM MODE (P1–P12)
In main menu, press (+)/(-) to select the PRESET PROGRAM MODE (P1–P12), and press START to exercise. User can select the 12 programs (P1–P12) to exercise according to individual needs; Also press (+)/(-) to change the program resistance level at any time during exercise.
HEART RATE CONTROL (P13)
In main menu, press (+)/(-) to select HEART RATE CONTROL P13, and press MODE to confirm; Press MODE again, highlight PULSE, press (+)/(-) to select 55%, 75%, 90%, or TAG; If select TAG, press MODE to confirm, then use (+)/(-) to adjust value, press the START for workout. THR is the users preferred TARGET HEART RATE to work out, this can be altered before the exercise is started.
Maximum heart rate is worked out at 220–age = MHR. This is the maximum heart rate (MHR) should be. You can then work out at 55%, 75% or 90% of this. For example 220–25 (user age) = 195MHR, you can select 107, 146 or 175 before workout. Console will record the TARGET HEART RATE and allow user to work out within this,the resistance level will automatically be adjusted according to the heart rate.
NOTE: Heart Rate Chest Strap included. Reading will appear in PULSE window when turned on. Wear the device against skin just below chest. Adjust straps and make sure the battery door is facing inwards. Accurate readings may not be given if chest skin is too dry or if chest hair is too dense. Adjust accordingly. The battery (CR2032 x 1) will last for up to 10 months if used 1 hour per day. When changing the battery please note the plus side should be facing upwards.
WATT MODE (P14)
In main menu, press (+)/(-) to select WATT MODE P14, and press MODE to confirm; Press MODE again, highlight WATT, press (+)/(-) to adjust WATT value, and press START to work out. WATT can be adjusted at any time during exercise by pressing (+)/(-) according to individual needs; If WATT does not change, then resistance level will be adjusted according to speed.
RECOVERY MODE
At any time during workout, RECOVERY can be pressed to record recovery level. Press RECOVERY, place both hands on the PULSE SENSORS (located in the handle bars), console will count down from 60 seconds and display the pulse. After the console has counted down for 60 seconds, RECOVERY LEVEL F1–F6 will be given.
NOTE: Do not remove your hands from pulse sensors or the reading will not be given during testing. The pulse monitor is a guide for reference only and not for medical use or monitoring.
BLUETOOTH AUDIO
The user can play music through the machines integrated speakers by pairing their mobile phone via Bluetooth to the console. Switch on mobile phone Bluetooth, search for connection device “adidas”, connect it and music will begin.
MPH (ML) TO KPH (KM) CONVERSION
In the user setting mode (U1–U4), hold RECOVERY to enter conversion mode, then press (+)/(-) to select between KM or ML. Press MODE to confirm and exit.
AUTOMATIC POWER ON AND SHUT DOWN
When the user starts to exercise, the console will power on; When the equipment is inactive for approximately 2 minutes, it will automatically shut down.
NOTE: Keep moisture away from console.
FCC WARNING
NOTE: THIS EQUIPMENT HAS BEEN TESTED AND FOUND TO COMPLY WITH THE LIMITS FOR A CLASS B DIGITAL DEVICE, PURSUANT TO PART 15 OF THE FCC RULES. THESE LIMITS ARE DESIGNED TO PROVIDE REASONABLE PROTECTION AGAINST HARMFUL INTERFERENCE IN A RESIDENTIAL INSTALLATION. THIS EQUIPMENT GENERATES, USES AND CAN RADIATE RADIO FREQUENCY ENERGY AND, IF NOT INSTALLED AND USED IN ACCORDANCE WITH THE INSTRUCTIONS, MAY CAUSE HARMFUL INTERFERENCE TO RADIO COMMUNICATIONS. HOWEVER, THERE IS NO GUARANTEE THAT INTERFERENCE WILL NOT OCCUR IN A PARTICULAR INSTALLATION.
IF THIS EQUIPMENT DOES CAUSE HARMFUL INTERFERENCE TO RADIO OR TELEVISION RECEPTION, WHICH CAN BE DETERMINED BY TURNING THE EQUIPMENT OFF AND ON, THE USER IS ENCOURAGED TO TRY TO CORRECT THE INTERFERENCE BY ONE OR MORE OF THE FOLLOWING MEASURES:
- REORIENT OR RELOCATE THE RECEIVING ANTENNA.
- INCREASE THE SEPARATION BETWEEN THE EQUIPMENT AND RECEIVER.
- CONNECT THE EQUIPMENT INTO AN OUTLET ON A CIRCUIT DIFFERENT FROM THAT TO WHICH THE RECEIVER IS CONNECTED.
- CONSULT THE DEALER OR AN EXPERIENCED RADIO/TV TECHNICIAN FOR HELP.
FCC& IC RADIATION EXPOSURE STATEMENT:
THIS EQUIPMENT COMPLIES WITH FCC AND CANADA RADIATION EXPOSURE LIMITS SET FORTH FOR AN UNCONTROLLED ENVIRONMENT.
THIS TRANSMITTER MUST NOT BE CO-LOCATED OR OPERATING IN CONJUNCTION WITH ANY OTHER ANTENNA OR TRANSMITTER.


