 AC Triac RF + Push Dimmer
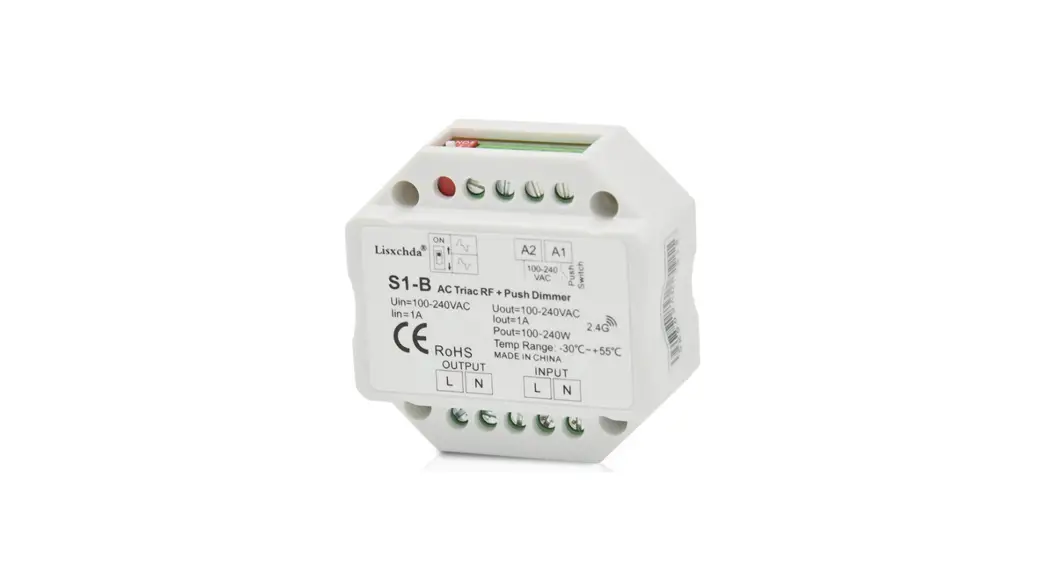
Model No.: S1-B
RF dimming/Leading edge or trailing edge/Min brightness settable/Push Dim/Wall junction box mounting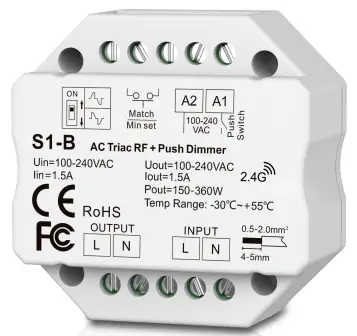
Features
- RF + Push AC phase-cut dimmer, 1 channel output.
- To dim and switch single color dimmable LED lamps, traditional incandescent, and halogen lights.
- 256 levels 0-100% dimming smoothly without any flash.
- Leading edge dimming or trailing edge dimming is set by a dip switch.
- Min brightness can be set by key.
- Light on/off fade time 3s selectable. RF 2.4G single zone or multiple zones dimming remote control
- Compatibility with
- Connect with external push switch to achieve on/off and 0-100% dimming function.
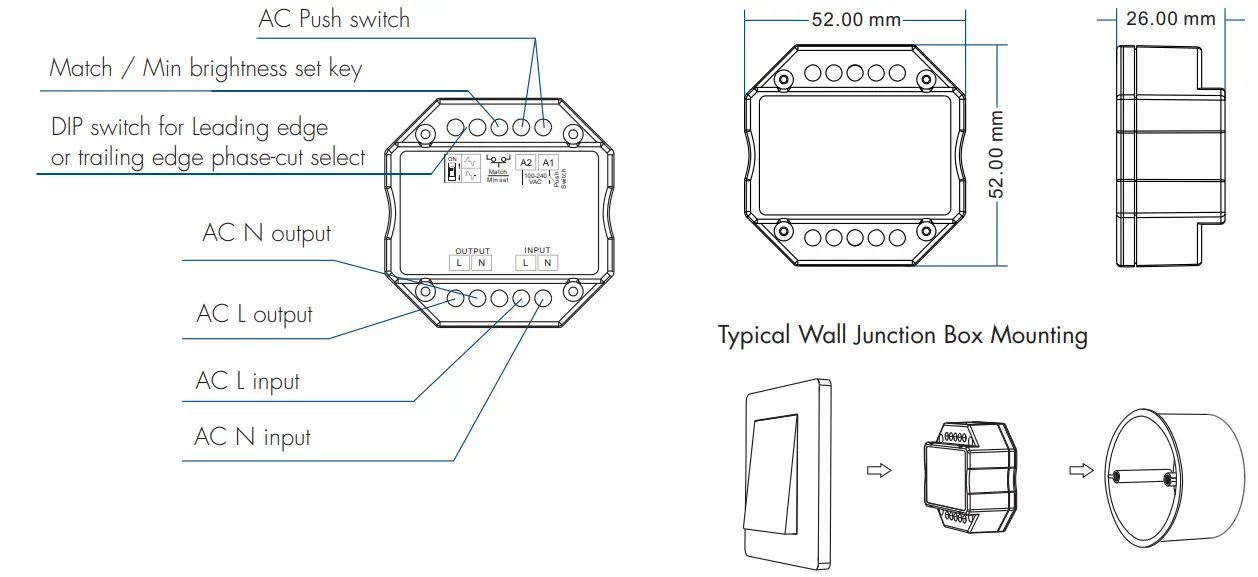
- Easy to be placed in a standard wall junction box behind a push switch.
- Over-heat / Over-load protection, recover automatically.
![]()
Technical Parameters
Input and Output
| Input voltage | AC100-240V |
| Output voltage | AC100-240V |
| Output current | Max 1.5A |
| Output power | 150-360W |
Safety and EMC
| EMC standard (EMC) | ETSI EN 301 489-1 V2.2.3 ETSI EN 301 489-17 V3.2.4 |
| Safety standard(LVD) | EN 62368-1:2020+A11:2020 |
| Radio Equipment(RED) | ETSI EN 300 328 V2.2.2 |
| Certification | CE,EMC,LVD,RED |
Warranty
| Warranty | 5 years |
Dimming data
| Input signal | RF 2.4GHz + Push Dim |
| RF Control distance | 30m(Barrier-free space) |
| Dimming level | 256 levels |
| Dimming range | 0 -100% |
Environment
| Operation temperature | Ta: -30 OC ~ +55 OC |
| Case temperature (Max.) | T c: +85 OC |
| IP rating | IP20 |
| Weight | Net weight | 61g |
| Weight unit(g) | 48g | Gross weight |
Compatible Load Types
| Load Type | Maximum Load | Remarks |
| Dimmable LED lamps | 200W @ 220V 1 00W @ 1 1 OV | Due to the variety of LED lamp designs, the maximum number of LED lamps is further dependent on power factor results when connected to a dimmer. |
| Triac Dimmable LED drivers | 200W @ 220V 100W @ 1 1 OV | The maximum permitted number of drivers is 200W divided by driver nameplate power rating, and make sure the surge current is no more than 2 times 65A. |
| Incandescent lighting, HV Halogen lamps | 400W @ 220V 200W @ 110V |
Mechanical Structures and Installations
Wiring diagram
![]() Caution: Please carefully ensure all wire connections and polarities are correct and secure before applying power, otherwise this controller will be damaged.
Caution: Please carefully ensure all wire connections and polarities are correct and secure before applying power, otherwise this controller will be damaged.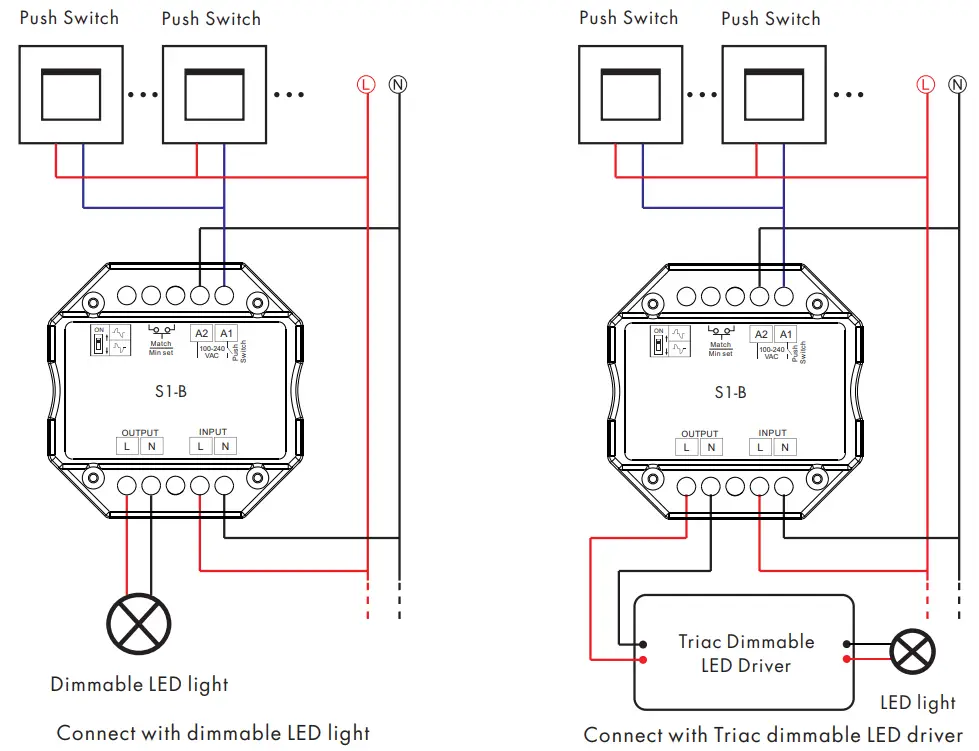
Note: When calculating the maximum number of load lamps or drivers, the input power or input current parameters of a single lamp or driver must be used, the output power parameters can not be used.
In addition, the maximum surge current of the dimmer is 65A, and the sum of the surge current of multiple dimmable LED drivers should not exceed 2 times. otherwise, the product will be overloaded and damaged.
Leading edge or trailing edge dimming setting
Select leading edge(forward-phase) dimmer or trailing edge(reverse-phase) dimmer according to dimmable LED light or driver. 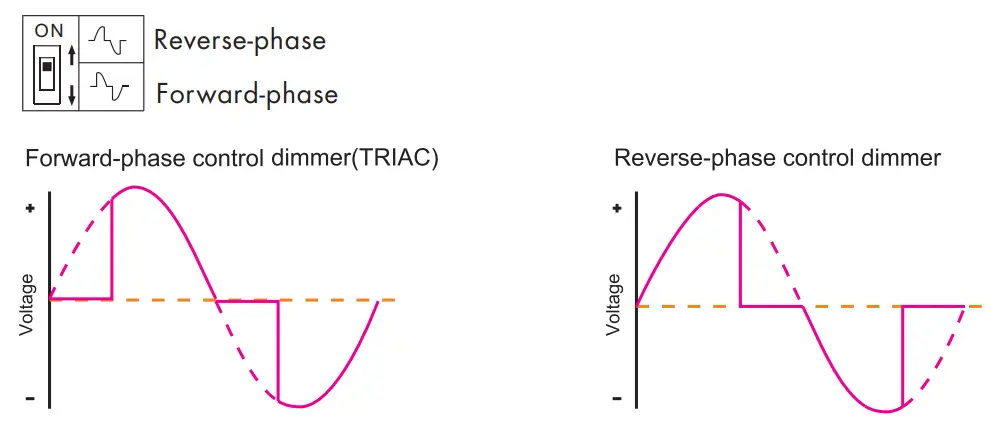
Caution: before powering on, you must confirm the selection of dip switch.
Min brightness setting
Long press Min set key for 2s, the light blink 2 times, ready for min brightness set, then short press Min set key 1-6 times, to get 6 min brightness: 5%, 10%, 15%, 20%, 25% or 30%, the light will output the current min brightness immediately, Long press Min set key for 2s or wait for 8s, quit min brightness set, the light will output 100% brightness automatically.
Light on/off fade time
Long press match key 5s, then short press match key 3 times, the light on/off time will be set to 3s, the indicator light blink 3 times.
Long press match key 10s, restore factory default parameter, the light on/off time also restore to 0.5s.
Match Remote Control (two match ways)
The end users can choose the suitable match/delete ways. Two options are offered for selection:
| Use the controller’s Match key | Use Power Restart |
| Match: Short press the match key, and immediately press the on/off key (single zone remote) or zone key (multiple zones remote) of the remote. | Match: Switch off the power, then switch on the power, repeat again, and immediately short press the on/off key (single zone remote) or zone key (multiple zones remote) 3 times on the remote. The light blinks 3 times means the match is successful. |
| Delete: Press and hold the match key for 5s to delete all matches, The light blinks 5 times means all matched remotes were deleted. | Delete: Switch off the power, then switch on the power, repeat again, and immediately short press the on/off key (single zone remote) or zone key (multiple zones remote) 5 times on the remote. The light blinks 5 times means all matched remotes were deleted. |
Application notes
1. All the receivers in the same zone.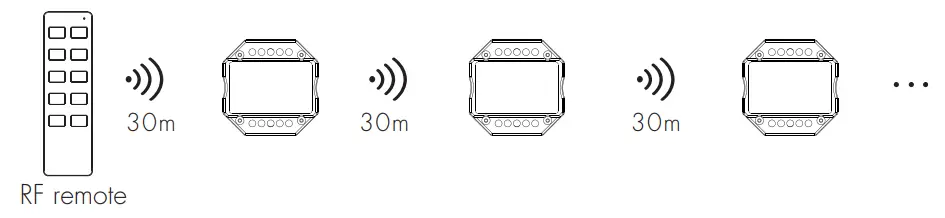
Auto-transmitting: One receiver can transmit the signals from the remote to another receiver within 30m, as long as there is a receiver within 30m, the remote control distance can be extended.
Auto-synchronization: Multiple receivers within 30m distance can work synchronously when they are controlled by the same remote.
Receiver placement may offer up to 30m communication distance. Metals and other metal materials will reduce the range.
Strong signal sources such as WiFi routers and microwave ovens will affect the range.
We recommend for indoor applications that receiver placements should be no further apart than15m.
2. Each receiver(one or more) in a different zone, like zone 1, 2, 3 or 4.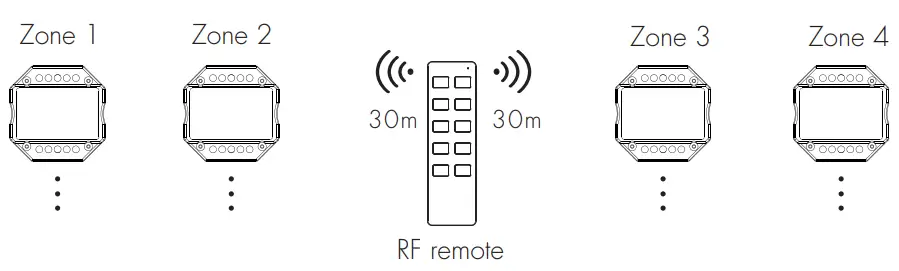
Push Dim Function
- Short press:
Turn on or off the light. - Long press (1-6s):
Press and hold to step-less dimming,
With every other long press, the light level goes to the opposite direction. - Dimming memory:
Light returns to the previous dimming level when switched off and on again, even at power failure.
Malfunctions analysis & troubleshooting
| Malfunctions | Causes | Troubleshooting |
| No light | 1.No power. 2. Wrong connection or insecurity. | 1. Check the power. 2. Check the connection. |
| No response from the remote | 1 . The battery has no power. 2. Beyond controllable distance. 3. The controller did not match the remote. | 1 . Replace the battery. 2. Reduce remote distance. 3. Re-match the remote. |


 Zigbee + Rf + Push Dimmer User Manual")


