eVolo EVC7001 Electric Vehicle Charging Point User Manual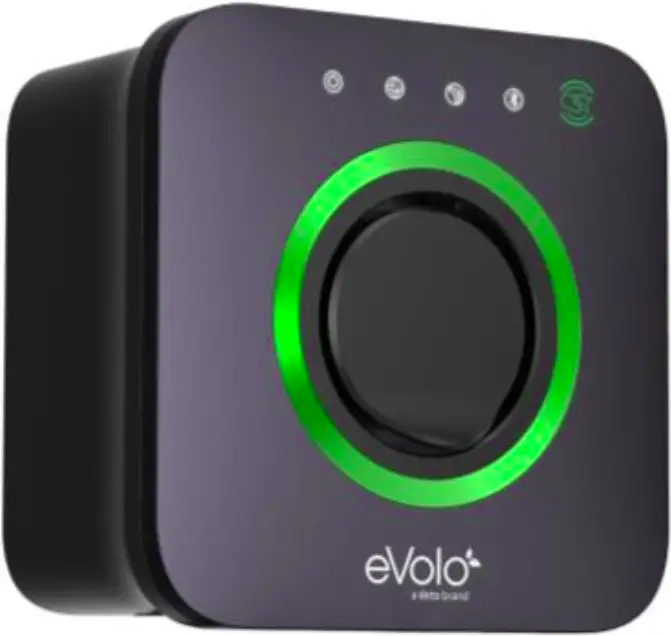
Overview
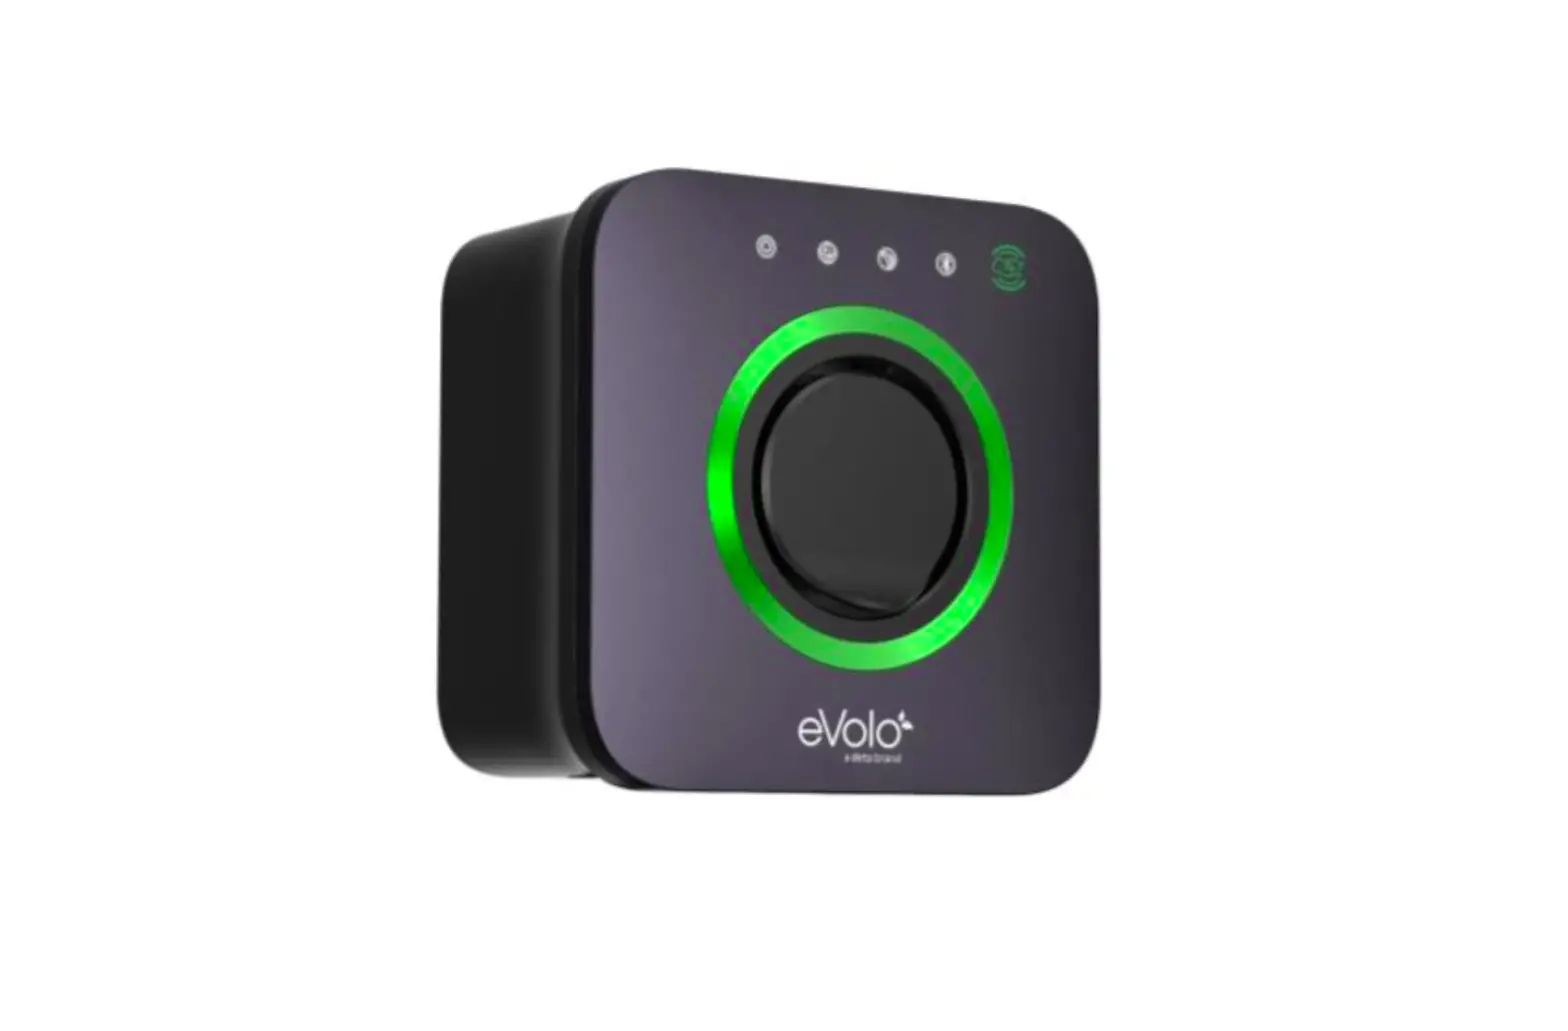
Description
The eVolo AC charge point is designed to charge electric vehicles (hereinafter called ”EV”s) at your property.
Your eVolo EV charge point is a connected product (as required by the Smart Regulations) and requires an internet connection.
The charge point operates via a smart phone APP which is available for multiple users to download and use. Intended Use
The eVolo AC charge point is intended for charging EVs only. It is suitable for both indoor and outdoor use.
This product must be installed commissioned by an eVolo approved installer.
The end user should register on the eVolo website by scanning the web QR code on the side of the charge point before being prompted to download the user APP.
Safety Instructions
CAUTION – Operation
During the charge session the plug is locked into the charge point, do not disconnect the charging handle. There is a risk of damage to the cradle of the charge point. Stop charging before disconnecting the plug
The images and illustrations depicted in this manual may differ slightly from the actual product.
- Read and follow all warnings and instructions before installing and operating the charger.
- Children should be supervised when around this equipment.
- Do not insert fingers or foreign objects into the electric vehicle connector.
- Do not use the equipment if any flexible power cord or EV cable is frayed, broken or otherwise damaged, or fails to operate.
- Do not operate the equipment outside its operating temperature range of -30 to 50 °C.
- Handle the equipment with care during transportation and installation. The mounting base must be installed on a flat surface and not twisted; do not use excessive force to pull when connecting the charge point to the base; do not step on the equipment, to prevent damage to it or any components.
- For use with and for charging Electric Vehicles only.
- If using the eVolo/Autel Charge APP to control your charge points at a single site, all charge points must be the same make
WARNING This device is intended only for charging vehicles.
![]() CAUTION To avoid a risk of fire or electric shock, this product must be installed and connected to a permanent fixed installation. Ventilation not required during charging.
CAUTION To avoid a risk of fire or electric shock, this product must be installed and connected to a permanent fixed installation. Ventilation not required during charging.
![]() CAUTION The cable between the charge point and the EV should not be extended
CAUTION The cable between the charge point and the EV should not be extended
![]() CAUTION Risk of electric shock. Do not remove cover or attempt to open the enclosure. No user serviceable parts inside. Refer servicing to qualified service personnel.
CAUTION Risk of electric shock. Do not remove cover or attempt to open the enclosure. No user serviceable parts inside. Refer servicing to qualified service personnel.
DANGER
If you use the equipment in any other way than described in this manual or other related documents, possible death, injury and damage to property can occur. For use with and for charging Electric Vehicles only. Use the equipment only as intended.
![]() CAUTION
CAUTION
Use of the EV charge point may affect the operation of or impair any medical or implantable electronic devices, such as an implantable cardiac pacemaker or an implantable cardiovascular defibrillator. Before using the EV charge point, check with your electronic device manufacturer regarding the effects that charging an EV may have on such electronic devices.
User Setup
Step 1
Scan the website QR code on the side of the charge point (marked 1 in the diagram) or visit www.evolo-uk.com to register your charger and activate your warranty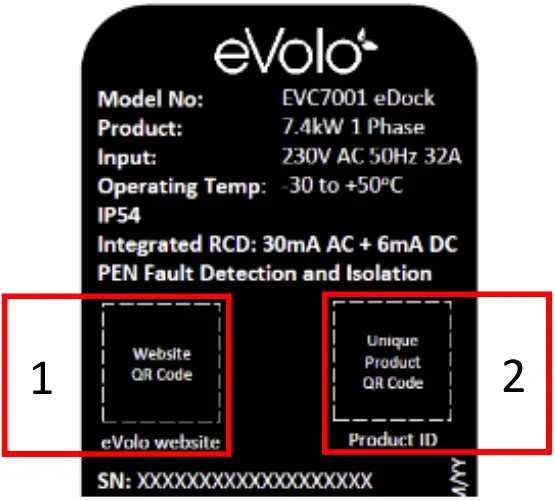
Step 2
After registering your charge point, follow the link on the eVolo website to download the Autel® Charge APP
Step 3
After downloading and opening the Autel® Charge APP, follow the instructions below to create an account, by selecting Register
- Use a valid email address or mobile phone number
- A verification code will be sent to the email address or mobile phone number used
- Enter this code when prompted to complete registration
Step 4
- Add the Charge Point to the APP by selecting the ‘Charger’ option under the ‘Me’ tab
- Select ‘Add’ to pair the charge point
- Scan the Product ID QR code. The product ID QR code and pin code details can be found on page 3 in this manual. The Product ID QR code can also be located on the side of the charge point (2)
Step 5
- Link the charge point to the your mobile device using the Bluetooth connection Select ‘Connect via Bluetooth’
Step 6
Connect the charge point to the internet
- If the charge point is connected to the internet using a cable to your router, the network details will appear under ‘Current Network’ – no further action required Select ‘Skip’ to exit the Wi-Fi Connection page
To setup a Wi-Fi internet connection
- Select the required Wi-Fi network that appears on the screen
- Enter the correct Wi-Fi password and select ‘OK’ to save the Wi-Fi connection into the charge point
Step 7
The Charger Point Settings can be reviewed and changed in the following menu
- Select the ‘Me’ tab
| Setting | Action |
| Personal Information (optional) |
|
| Charger |
|
| Charger Name | The serial number of the charge point will appear here by default·
|
| Charger Location |
|
| Wi-Fi Connection |
|
| Charge via Card | Add additional eVolo RFID cards or modify the Card Nameof existing linked cards |
| Max Charge Current |
|
| Autostart | This allows the charge point to automatically start charging the car as soon as the charging cable is plugged into the EV·
|
| Set Price | This feature is used to manually track the cost of the electricity (£/kWh) charged by the energy supplier·
|
| Schedule | Schedule is used to set the start and stop charging times. Default setting: On·
|
| Randomised Delay | The Charge Point Regulations requires that this product has a randomised time delay to start charging. The charge point must be able to automatically delay charging up to 10mins from either manually starting or scheduled start time·
|
| Home Charger Sharing(Primary User only) | This feature allows you to setup your charger as a public commercial charger and bill users·
|
| Share with Family (Primary User only) | This feature allows for additional family members to use the charge point·
|
| Charger Info |
|
| Firmware Update | The charge point will check for the latest firmware and automatically update·
|
| Reboot Charger | This feature is used to perform a reboot by turning the charger off and then on·
|
| Factory Reset | This feature will erase all setting stored within the charger to factory default incuding those commisioned by the installer·
|
| Installation Mode (Primary User only) | This feature is only recommended to be accessed by an eVolo approved installer·
|
| Unlink | Removes the charge point from your account |
| Press Back(<) to return to the Me menu | |
Charge CardThe feature allows additional eVolo RFID cards to be added
- Select ‘Charge Card’
- Select ‘Add’
- Enter the card number printed on the rear of the card or scan it by selecting the scan icon
- The linked cards can be managed and customized within the Charge Card menu
My EV / Vehicle
The feature allows to setup the Make and Model of the EV
- Select ‘Vehicle’
- Select ‘Add’
- Select the Make, Model and Year
- Enter the following optional parameters:
- Nominated Battery Capacity, License Plate, DC/Connector Type, DC/Max Power
- Select ‘Add’
- Confirm the details before selecting ‘OK’ to save these setting
Payments
The Autel Charge APP can be set up to allow payment at Autel public charging
points
- Details do not need to be entered for the eDock and eVoom for home charging
Charge History
Energy usage for charging your EV can be viewed here
FAQ
Answers to frequently asked questions can be found here
Feedback
Live chat for the Autel® APP support, or contact the eVolo Technical Support
Settings
User changeable settings include:
- Set: language
- Set: currency
- Set: miles/km
- Clear cache
- Switch notifications ‘Off’
- Logout from the APP: slide switch
About
- Check for software updates
Autel® Privacy Policy - Autel® User Agreement
![]() All system messages/notifcations will appear on the message icon presented in the top right of the screen. Select this icon to view all messages.
All system messages/notifcations will appear on the message icon presented in the top right of the screen. Select this icon to view all messages.
Charging Your EV
Charging Options
Your charge point has different options on how to start charging:
- Using the APP start/stop feature
- Using the Charging Schedule within the APP which allows the user to schedule charging times
- Using the RFID feature (EVC7007 eVoom model only)*
- RFID feature can be enabled for the EVC7001 eDock model via the eVolo website
How to Charge your EV via APP
Start charging
- Connect the charging cable by inserting the connector in the EV and the plug into the charge point socket
- Open the Autel® APP and select Charger tab
- Select Start
Stop charging
- Open the Autel® APP and select Charger tab
- Select Stop
There may be a few seconds delay before the charge point operates - Remove the charging handle from the charger socket outlet and the EV charge port
There may be a few seconds delay before the charge point operates
NOTE
Ensure your EV is charging. The charging LED on the charger should flash green. If you suspect the vehicle is not charging properly, try reconnecting the charging cable or contact customer support for further assistance.
How to Charge your EV via RFID Card (EVC 7007 eVoom model only)
Start charging
- 1. Insert the charging cable into the vehicle
connector on your EV and the charge point
socket outlet
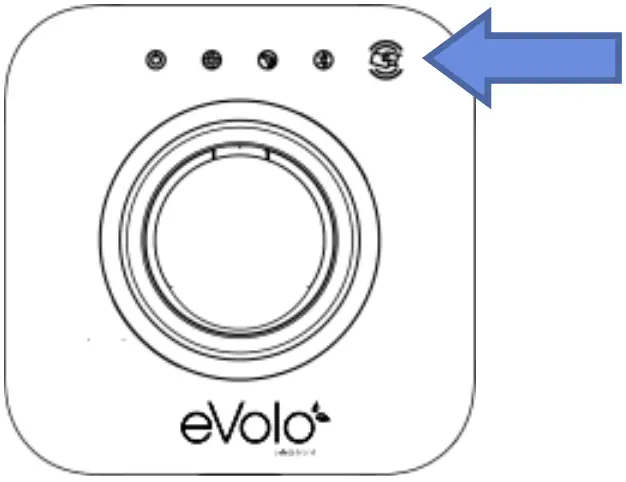
2. Tap RFID card against logo
Stop charging
- 1. Tap RFID card against logo
- Remove the charging handle from the charger socket outlet and the EV charge port
There may be a few seconds delay before the charge point operates
- RFID feature can be enabled for the EVC7001 eDock model via the eVolo website.
How to Charge your EV via Charging Schedule
If you have set up a charging schedule in the Charge app, the charger will initiate a charge session automatically as scheduled. (Scheduled charging case)
Points to note when charging
- When the ‘Randomized Delay’ function is enabled, charging will begin following a delay. The delay will be displayed by the APP upon starting a charge session.
- If the ‘Autostart’ function is enabled in the Charge app, the charger will automatically start charging once the charging cable is connected. The ‘Schedule’ overrides this function.
LED Indicators
| LED Description | Description |
| Power LED |
|
| Internet Connection LED |
|
| Charging LED |
|
| Bluetooth Connection LED |
|
Trouble Shooting – User
| Issue | Resolution | |
| 1 | The charge session does not start as scheduled |
|
| 2 | Power failure |
|
| 3 | Over-heating |
|
| 4 | Residual current detected |
|
| 5 | Bluetooth communication failure |
|
| 6 | Update failure via Bluetooth |
|
| 7 | Internet connection goes down |
|
Product Specification
| Specification | |
| AC Charging Output | Maximum 7.4 kW |
| Input supply | 230V AC 50 Hz 32A single phase |
| Input terminals | Live/L1, Neutral/N, Protective Earth/PE |
| Earthing systems | TNC-S or TT |
| Connector Type | Untethered Type 2 Socket |
| Indications | 4 LEDs multicolored |
| Metering | Built in meter IC ± 2 % (accuracy) |
| Integrated RCD | AC 30mA + DC 6 mA |
| Protection |
|
| Connectivity |
|
| Communication Protocols | OCPP 1.6J |
| Mounting | Wall-mounted or floor using an optional pedestal |
| Enclosure Ratings | IP54, IK10, indoor or outdoor installation |
| Operating Temperature |
|
| Storage Temperature |
|
| Safety and Compliance |
|
| Codes and Standards | UKCA, CE (TUV) |
| Load management |
|
Statement of Compliance
Statement of Compliance
Deta Electrical Company Limited declares under its sole responsibility that this charge point meets (model number on front cover) meets The Electric Vehicles (Smart Charge Points) Regulations 2021 The software version can be identified on the Autel® Charge APP
Sign for and on behalf of Deta Electrical Company Limited
Warranty
Warranty EVC7001: eDock 2 Years (extendable)*
EVC7007: eVoom 3 Years (extendable)*
- To register your eVolo charge point, including the option to extend the warranty, and for full warranty terms and conditions, visit
eVolo charge points must be installed and commissioned by an eVolo approved installer in accordance with the warranty terms and conditions, else the warranty will be void.
Disclaimer
All information, specifications and illustrations in this manual are based on the latest information available at the time of printing. eVolo is a brand of Deta Electrical Co. Ltd.
Deta Electrical Company Limited reserves the right to make changes at any time without notice. While information in this manual has been carefully checked for accuracy, no guarantee is given for the completeness and correctness of the contents, including but not limited to the product specifications, functions, and illustrations.
Deta Electrical Company Limited will not be liable for any direct, special, incidental, indirect damages or any economic consequential damages (including the loss of profits).
See www.eVolo-uk.com for full detail of Terms of Business

Deta Electrical Company Limited
UK: Panattoni Park Luton Road Chalton Bedfordshire LU4 9TT
EU: Unit 16 Ashbourne Ind. Est. Ashbourne Co. Meath A84 W972
Technical Helpline: +44(0)1582 544 548
eVolo.uk


 Charging User Manual")


