![]() INSTALLATION INSTRUCTIONS
INSTALLATION INSTRUCTIONS
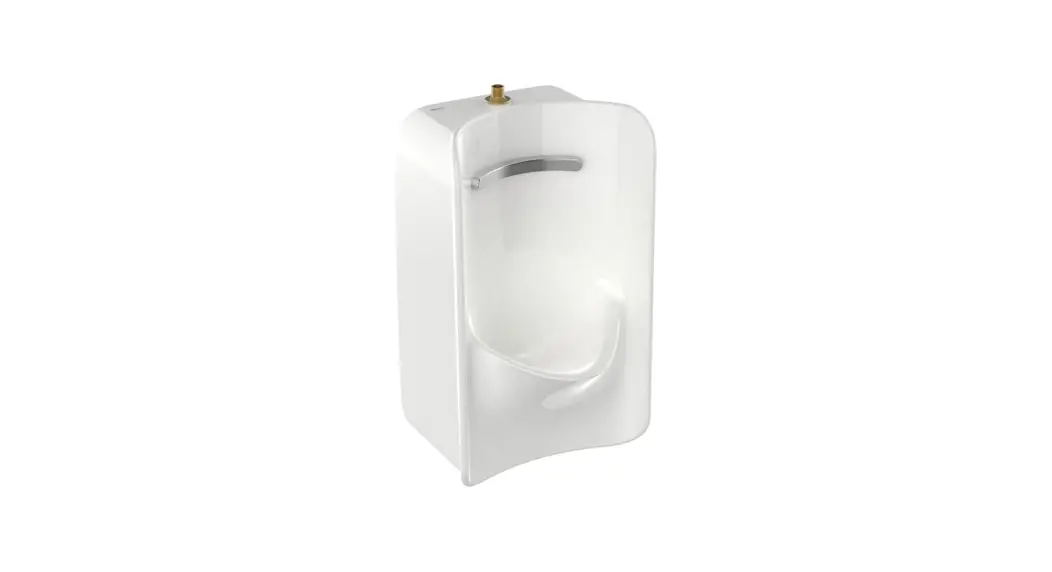
Greenbrook Urinal
6516 Top Spud & 6517 Back Spud Series
6516 Top Spud Greenbrook Urinal
Thank you for selecting American Standard – the benchmark of fine quality for over 100 years. To ensure this product is installed properly, please read these instructions carefully before you begin. (Certain installations may require professional help.) Also be sure your installation conforms to local codes.
BEFORE YOU BEGIN![]() CAUTION: PRODUCT IS FRAGILE.TO AVOID BREAKAGE AND POSSIBLE INJURY HANDLE WITH CARE!
CAUTION: PRODUCT IS FRAGILE.TO AVOID BREAKAGE AND POSSIBLE INJURY HANDLE WITH CARE!
NOTES:
- Pictures may not exactly define contour of china and components.
- Observe all local plumbing and building codes.
- Refer to local codes and manufacturer’s instructions for flush valve requirements.
- Carefully inspect the new urinal for damage.
- Fixture dimensions are nominal and conform to tolerances by ASME Standard A112.19.2.
- Site preparation may require additional tools and hardware.
RECOMMENDED TOOLS AND MATERIALS
Safety Glasses
Tape Measure
Adjustable Wrench
Pencil
Hole Cutting Equipment
Thread Sealant
1/4″ Ratchet
Blade Screwdriver
Levels
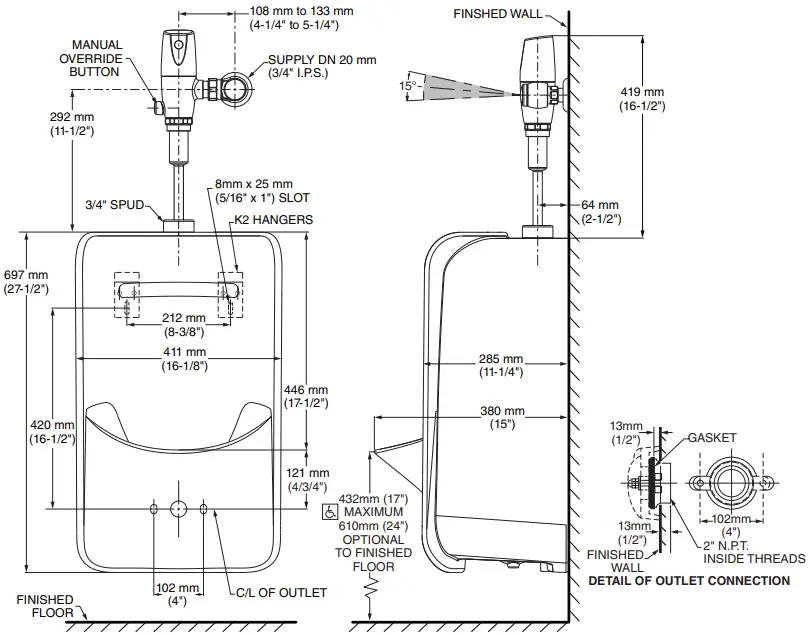
6516 Top Spud
6517 Back Spud
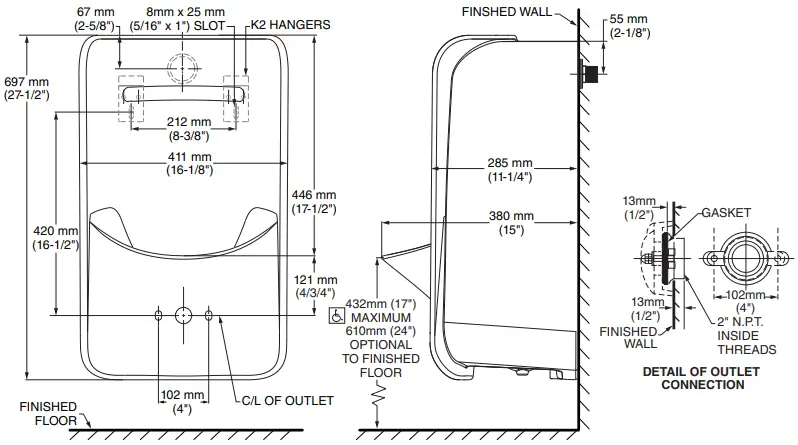
PREPARATION
a. Turn the water supply OFF.
b. Install or relocate the supply tubing and waste pipe as necessary to conform to the roughing in dimensions.
c. Install the shut off valve.
d. Install adequate support framing for the wall hangers as needed.
e. Determine the position of the waste pipe nipple. When establishing the nipple length, take into account the length of the urinal outlet spud and the distance the female collar will thread onto the waste pipe nipple.
NOTE: Add a little extra length to the nipple to allow for gasket space.
INSTALL THE URINAL
![]() CAUTION: RISK OF PERSONAL INJURY OR PRODUCT DAMAGE.
CAUTION: RISK OF PERSONAL INJURY OR PRODUCT DAMAGE.
HANDLE WITH CARE. VITREOUS CHINA CAN BREAK OR CHIP IF THE PRODUCT IS HANDLED CARELESSLY.![]() CAUTION: RISK OF PRODUCT DAMAGE. DO NOT OVERTIGHTEN THE BOLTS.
CAUTION: RISK OF PRODUCT DAMAGE. DO NOT OVERTIGHTEN THE BOLTS.
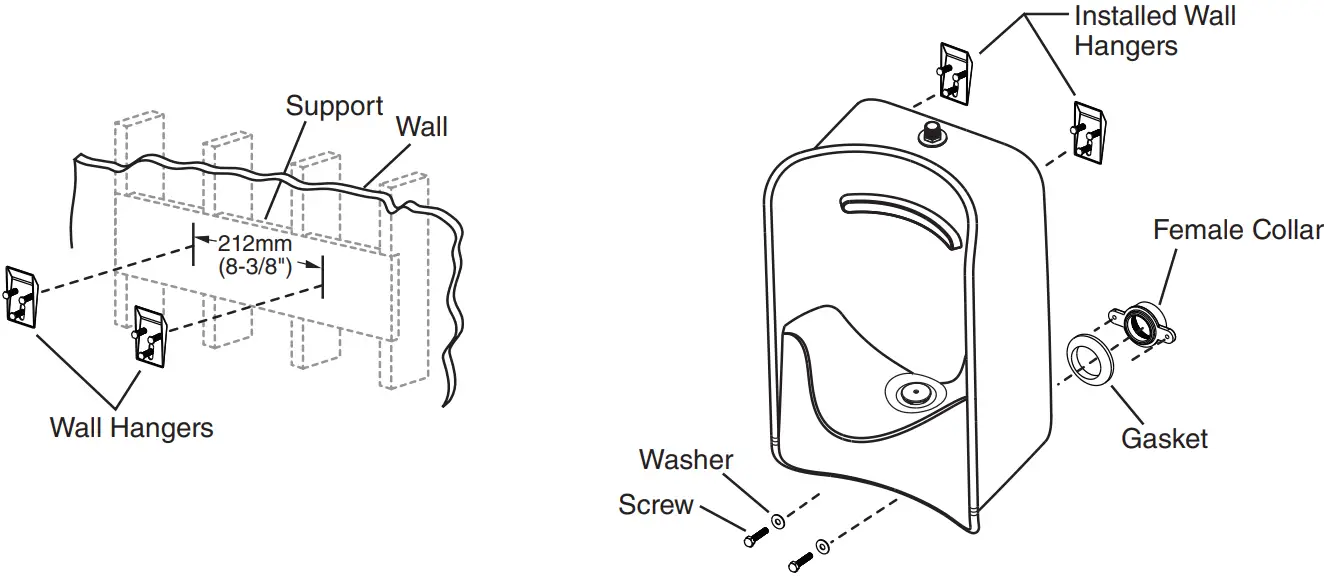
a. Install the wall hangers according to the roughing in illustration.
b. Apply thread sealant tape to the pipe threads and install the female collar to the waste pipe.
c. Place the gasket onto the female collar with the beveled surface facing away from the collar.
d. Carefully position the urinal on the wall hangers.
e. Secure the urinal to the female collar using the screws and washers provided.
COMPLETE THE INSTALLATION
a. Install the flush valve according to the manufacturer’s instructions.
b. Connect the water supply and complete the waste pipe connections.
c. Turn on the water supply.
d. Flush and check the entire installation for leaks.
NOTE: In the event of splashing, adjust the “angle stop” as needed.
CARE & CLEANING
Wash with mild soapy water and rinse thoroughly. Dry with a soft cloth. Avoid detergents, disinfectants or cleaning products in aerosol cans as they may damage fittings.
STRAINER CARE
Clean urinal with care when a strainer is attached. To prevent damage to the strainer finish, please do not use abrasive cleaning materials or scouring pads to clean the strainer surface. The use of chlorine bleach (hypochlorite) is not recommended. However, if bleach must be used, limit the concentration to less than 5%, taking care to rinse the surfaces completely after cleaning.
For warranty information please follow this link: https://www.americanstandard-us.com/support/warranty
| In the United States: American Standard Brands 30 Knightsbridge Rd., Suite 301 Piscataway, NJ 08854 Attention: Director of Customer Care For residents of the United States, warranty information may also be obtained by calling the following toll free number: (855) 815-0004 www.americanstandard.com | In Canada: LIXIL Canada Inc. 5900 Avebury Rd. Mississauga, Ontario Canada L5R 3M3 Toll Free: (855) 836-9615 www.americanstandard.ca | In Mexico: American Standard B&K Mexico S. de R.L. de C.V. Via Morelos #330 Col. Santa Clara Ecatepec 55540 Edo. Mexico Toll Free: 800-839-1200 www.americanstandard.com.mx |
 Product names listed herein are trademarks of AS America Inc.
© AS America Inc. 2022![]() PART OF LIXIL
PART OF LIXIL
7302379-100 Rev. 3 8/22


