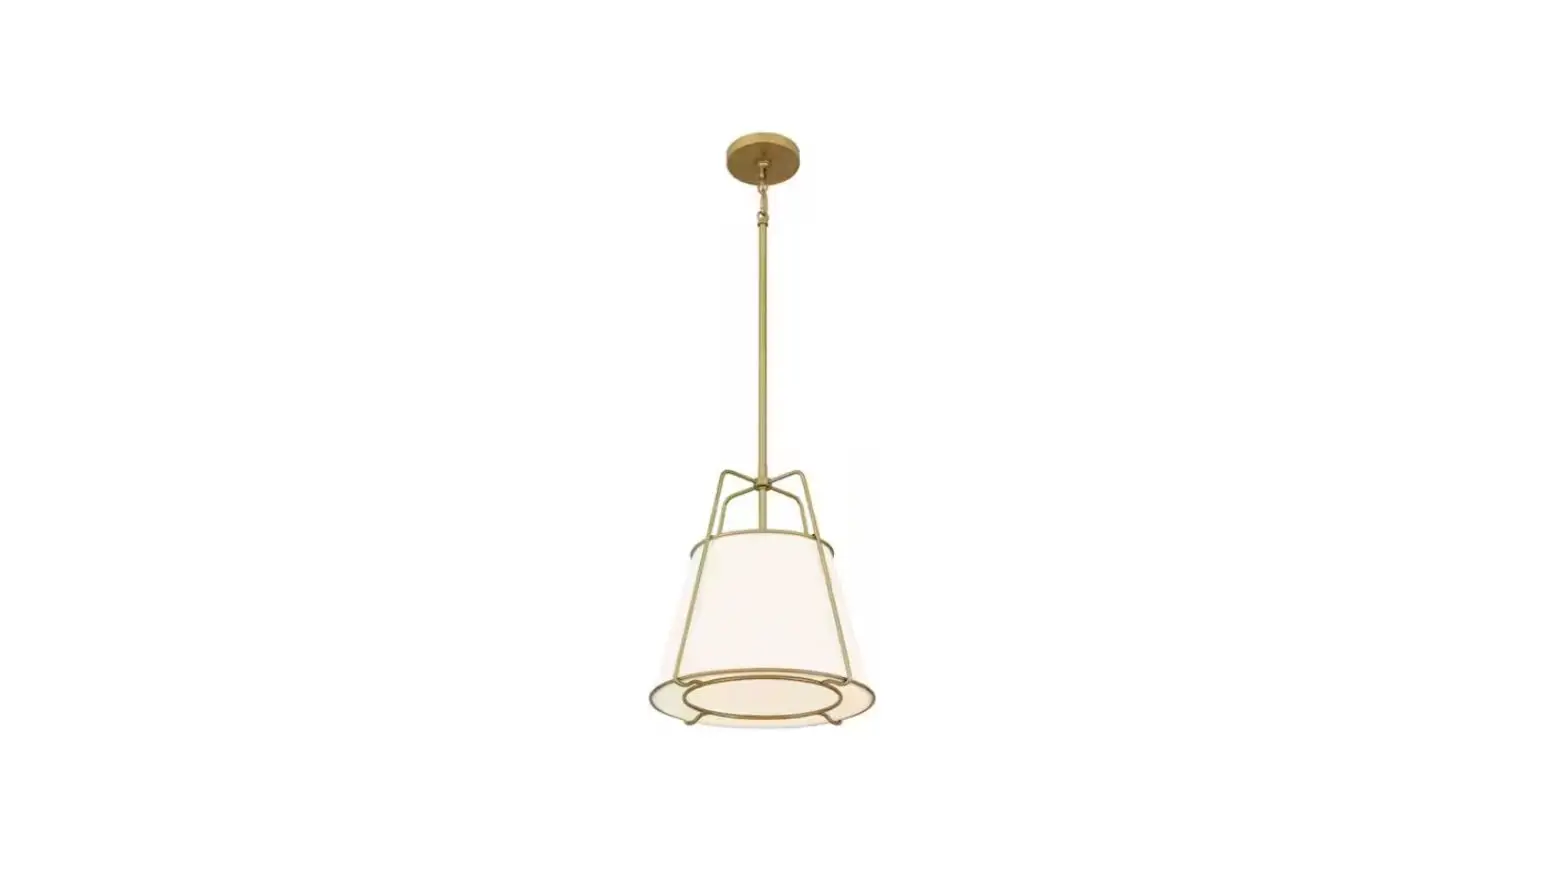
HOME DECORATORS COLLECTION HDY19558P 2 Light Pendant Instruction Manual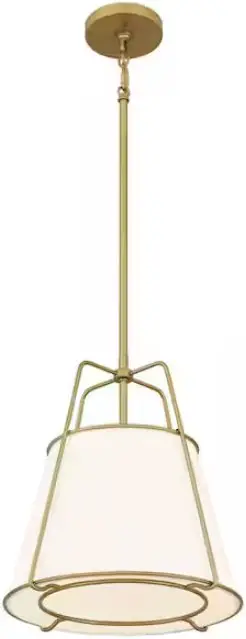
Safety Information
READ AND SAVE THESE INSTRUCTIONS.
- For your protection and safety, carefully read and understand the information provided in this manual completely before attempting to assemble, install, or operate this product. Failure to do so could lead to electrical shock, fire, or other injuries that could be hazardous or even fatal.
- Before touching any wire, use a voltage tester to make sure it is not live.
- When replacing fuses, turn off the main power first. Make sure your hands and feet are dry, and place one hand behind your back to prevent electricity from making a complete circuit through your chest. Touch the plug fuse only by its insulated rim. Remove the cartridge fuses with a fuse puller.
- Use tools with insulated handles and ladders made of wood or fiberglass.
- To protect children, place a safety cover over any unused outlets.
![]() DANGER: Before starting installation of this fixture or removal of a previous fixture, disconnect the power by turning off the circuit breaker, removing the fuse at the fuse box, or tripping the breaker that controls that circuit. Tape a sign to the panel warning others to leave the circuit alone while you work.
DANGER: Before starting installation of this fixture or removal of a previous fixture, disconnect the power by turning off the circuit breaker, removing the fuse at the fuse box, or tripping the breaker that controls that circuit. Tape a sign to the panel warning others to leave the circuit alone while you work.
![]() CAUTION: CONSULT A QUALIFIED ELECTRICIAN IF YOU HAVE ANY ELECTRICAL QUESTIONS. If you have any non-electrical questions about this fixture, please call our Customer Service Team at 1-800-986-3460 or visit HOMEDEPOT.COM/HOMEDECORATORS. Please reference the model and item numbers.
CAUTION: CONSULT A QUALIFIED ELECTRICIAN IF YOU HAVE ANY ELECTRICAL QUESTIONS. If you have any non-electrical questions about this fixture, please call our Customer Service Team at 1-800-986-3460 or visit HOMEDEPOT.COM/HOMEDECORATORS. Please reference the model and item numbers.
Pre-Installation
PLANNING INSTALLATION
- Read all instructions before installing.
- To avoid damaging this product, place it on a soft, non-abrasive surface, such as carpet or cardboard.
 IMPORTANT: Inspect the wire insulation for any cuts, abrasions, or exposed copper that may have occurred during shipping. If there is a defect in the wire, do not attempt installation. Please call the Customer Service Team at 1-800-986-3460.
 NOTE: This product requires two 60W maximum medium base (E26) type “A” or 9W maximum medium base (E26) self-ballasted LED bulbs (sold separately).
TOOLS RECOMMENDED (NOT INCLUDED)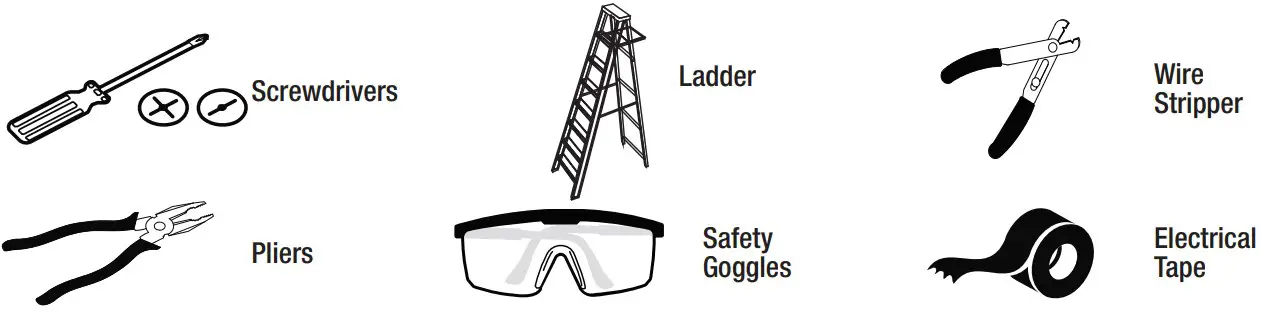
HARDWARE INCLUDED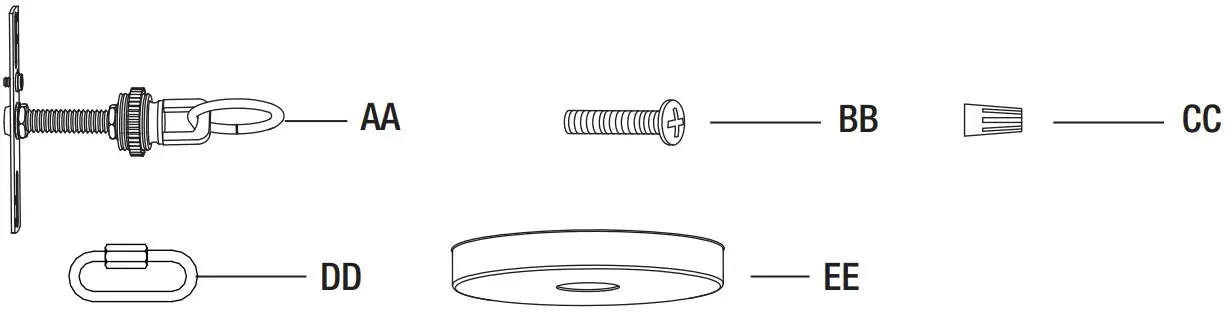
NOTE: Hardware is not shown to actual size.
| Part | Description | Quantity |
| AA | Crossbar assembly | 1 |
| BB | Outlet box screw | 2 |
| CC | Wire connector | 3 |
| DD | Quick link | 1 |
| EE | Ceiling canopy | 1 |
PACKAGE CONTENTS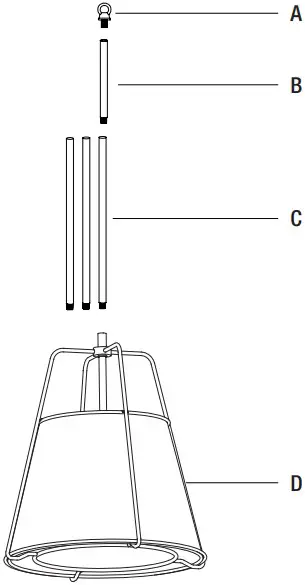
| Part | Description | Quantity |
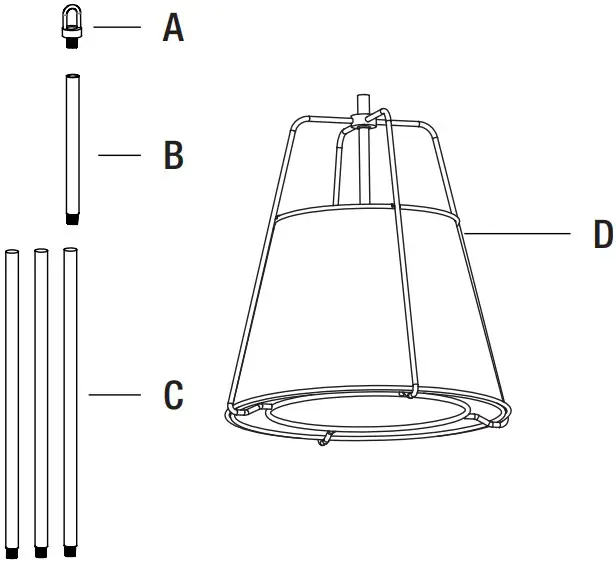
| A | Fixture loop | 1 |
| B | 6 in. rod | 1 |
| C | 12 in. rod | 3 |
| D | Fixture body | 1 |
Installation
Installing the crossbar assembly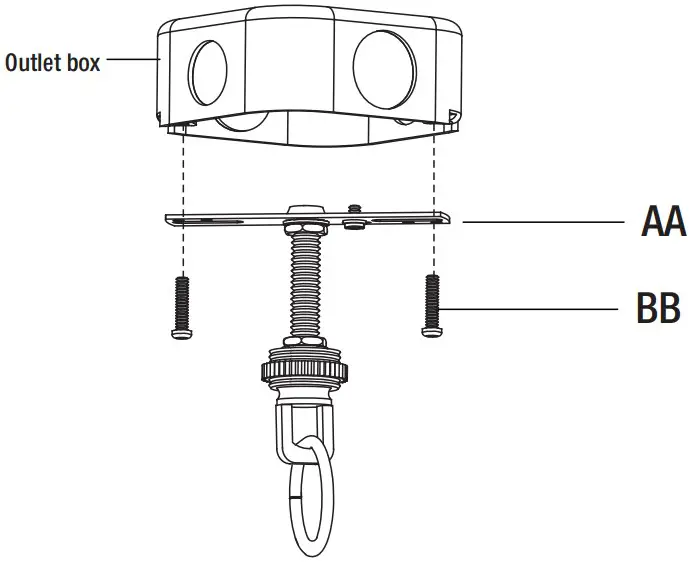
- Secure the crossbar assembly (AA) to the outlet box (not included) with the outlet box screws (BB). Tighten until snug
NOTE: The preassembled mounting threaded tube on the crossbar should protrude outward.
Testing the ceiling canopy fit to the crossbar assembly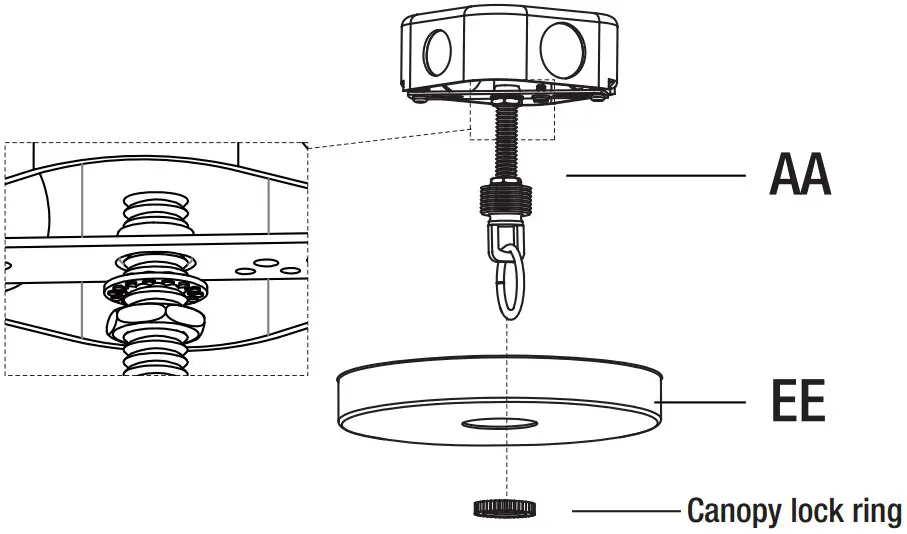
- Remove the pre-assembled canopy lock ring from the crossbar assembly (AA).
- Temporarily attach the ceiling canopy (EE) to the pre-assembled nipple on the crossbar assembly (AA).
- Secure with the canopy lock ring.
NOTE: If the ceiling canopy is not snug against the ceiling, remove it from the crossbar assembly and adjust the length of the pre-assembled threaded tube by unscrewing the pre-assembled hex nut.
Screw the threaded tube in or out of the crossbar until the correct length is achieved. Then, reattach the ceiling canopy.
Installing the rods and the fixture loop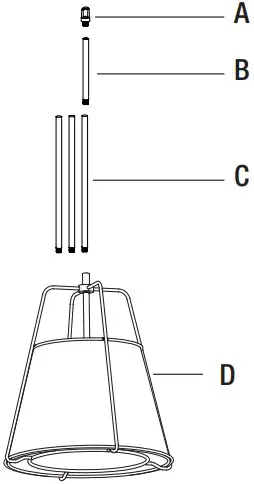
- Choose desired hanging length for the light fixture.
- Assemble the rods (B/C) to the desired length.
- Pass the supply wires and the ground wires through the rod assembly.
- Attach the rod assembly to the fixture body (D). Hand-tighten until snug.
- Thread the fixture loop (A) to the uppermost rod. Hand-tighten until snug.
- Hint:
- Assemble one rod at a time.
- Pass the ground wire through the rod first.
- Then, pass the supply wire through the rod.
- Thread the rod by hand until snug.
- Suggested rod length to hang fixture 30 inches above table top:
- 8 ft. ceiling (1) 6 in. rods + (1) 12 in. rods
- 9 ft. ceiling (1) 6 in. rods + (2) 12 in. rods
- 10 ft. ceiling (1) 6 in. rods + (3) 12 in. rods
Assembling the fixture body to the outlet box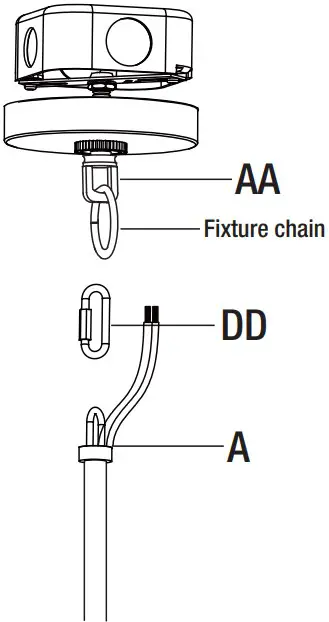
- Connect the fixture loop (A) to the fixture chain pre-assembled to crossbar assembly (AA) using the quick link (DD).
- Confirm that the mounting height is acceptable. Refer to Step 3 if changes are required.
NOTE: To make the next step easier, cut the supply wire and ground wire 24 inches from the fixture loop.
Pulling the supply wires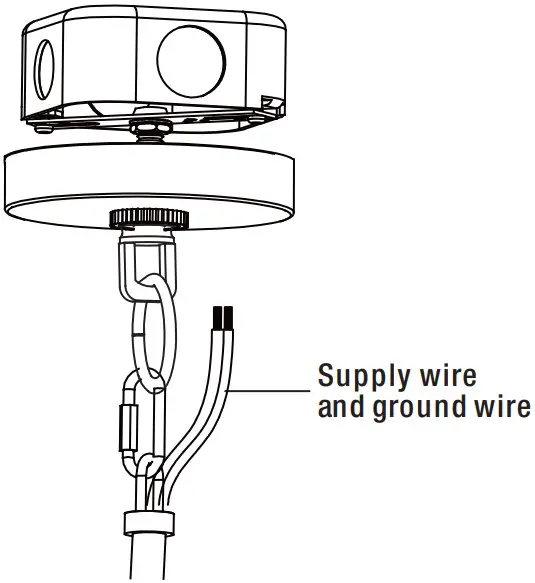
- Push the ends of the supply wires and ground wire up through the canopy chain loop and into the outlet box. The remaining slack wire will be pushed into the box in Step 7.
Trimming the excess fixture wire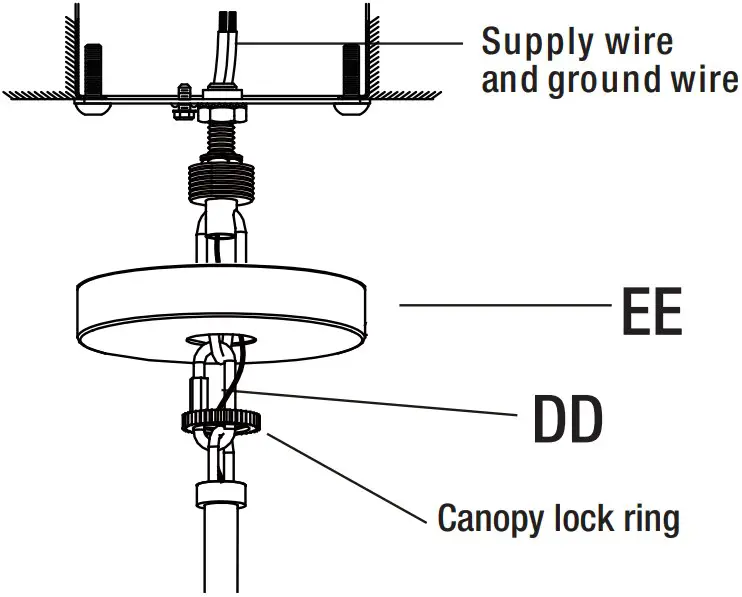
- Unthread the canopy lock ring.
- Slide the canopy lock ring and the ceiling canopy (EE) down the quick link (DD).
- Push all slack fixture wire through canopy chain loop and into the outlet box.
- Trim excess fixture wire leaving a minimum of 6 inches hanging out of the outlet box.
- Separate the smooth side and ribbed side of the supply wire to about 3 inches from the end.
- Using wire strippers (not supplied), strip each wire 1/2 inch from the end.
Making the electrical connections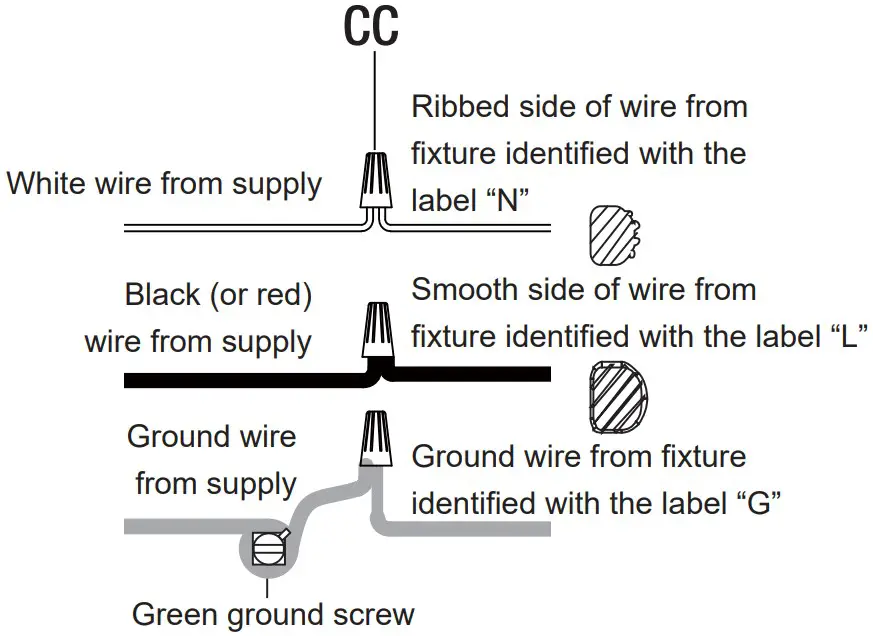
* Use wire connectors (CC) to connect the wires.
- Ground wire:
- Wrap the supply ground wire around the green ground screw on the crossbar assembly (AA), no less than 2 in. from the end of the wire. Tighten ground screw.
- Connect the fixture ground wire to the supply ground wire with a wire connector (CC).
- Supply wire:
- Connect the house white wire to the fixture supply wire (ribbed sided) identified with the label “N. ”
- Connect the house black (or red) wire to the fixture supply wire (smooth side) identified with the label “L.”
- Wrap each connection with approved electrical tape and carefully insert all of the connected wires into the outlet box.
Installing the ceiling canopy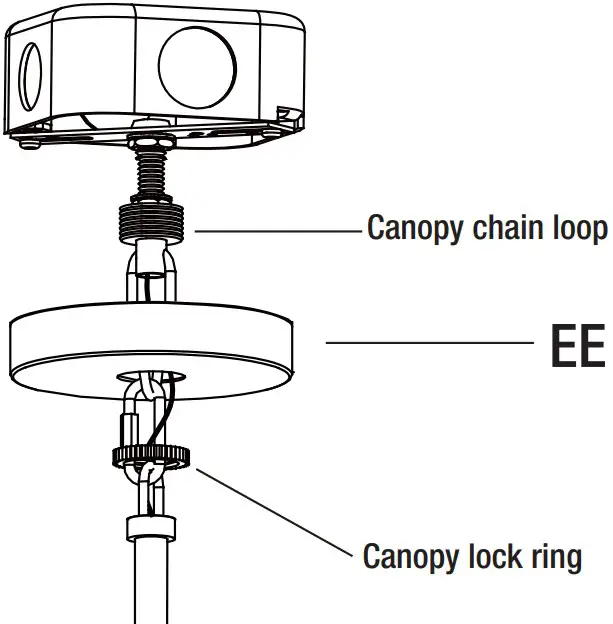
- Attach the ceiling canopy (EE) back over the canopy chain loop.
- Secure with the canopy lock ring
Installing the light bulbs
- Install the correct bulbs (not included) referring to fixture markings and/or labels for maximum wattage.
NOTE: Uses two 60W maximum medium base (E26) type “A” or 9W maximum medium base (E26) self-ballasted LED bulbs (sold separately
Care and Cleaning
- Do not use any cleaners with chemicals, solvents, or harsh abrasives. Use only a dry, soft cloth to dust or wipe carefully.
- To clean the fixture, disconnect power by turning off the circuit breaker or by removing the fuse at the fuse box, and use a dry or slightly dampened, clean cloth to wipe the exterior surface of the fixture.
Troubleshooting
| Problem | Possible Cause | Solution |
| The light(s) will not turn on. | The bulb is burned out. |
|
| The power is off. |
| |
| There is a faulty switch. |
| |
| There is a faulty wire connection. |
| |
| The fuse blows or the circuit breaker trips when the light is turned on. | There are crossed wires, or the power wire is grounding out. |
|
Service Parts
MODEL: HDY19558P / HDY19558P2 / HDY19558P3
| Part | Description |
| AA | Crossbar assembly |
| BB | Outlet box screw |
| CC | Wire connector |
| DD | Quick link |
| EE | Ceiling canopy |
| A | Fixture loop |
| B | 6 in. rod |
| C | 12 in. rod |
| D | Fixture body |
Warranty
FIVE (5) YEAR WARRANTY
WHAT IS COVERED
The manufacturer warrants this fixture to be free from defects in materials and workmanship for a period of five (5) years from the date of purchase. This warranty applies only to the original consumer purchaser and only to products used in normal use and service. If this product is found to be defective, the manufacturer’s only obligation and your exclusive remedy, is the repair or replacement of the product at the manufacturer’s discretion, provided that the product has not been damaged through misuse, abuse, accident, modifications, alteration, neglect, or mishandling. This warranty shall not apply to any product that is found to have been improperly installed, set up, or used in any way not in accordance with the instructions supplied with the product. This warranty shall not apply to a failure of the product as a result of an accident, misuse, abuse, negligence, alteration, faulty installation, or any other failure not relating to faulty material or workmanship.
This warranty shall not apply to the finish on any portion of the product, such as surface and/or weathering, as this is considered normal wear and tea
WHAT IS NOT COVERED
The manufacturer does not warrant and specifically disclaims any warranty, whether expressed or implied, of fitness for a particular purpose, other than the warranty contained herein. The manufacturer specifically disclaims any liability andshall not be liable for any consequential or incidental loss or damage, including but not limited to any labor/expense costs involved in the replacement or repair of said product.
Contact the Customer Service Team at 1-800-986-3460 or visit HOMEDEPOT.COM/HOMEDECORATORS
Questions, problems, missing parts? Before returning to the store, call Home Decorators Collection Customer Service 8 a.m. – 7 p.m., EST, Monday – Friday, 9 a.m. – 6 p.m., EST, Saturday
1-800-986-3460
HOMEDEPOT.COM/HOMEDECORATORS