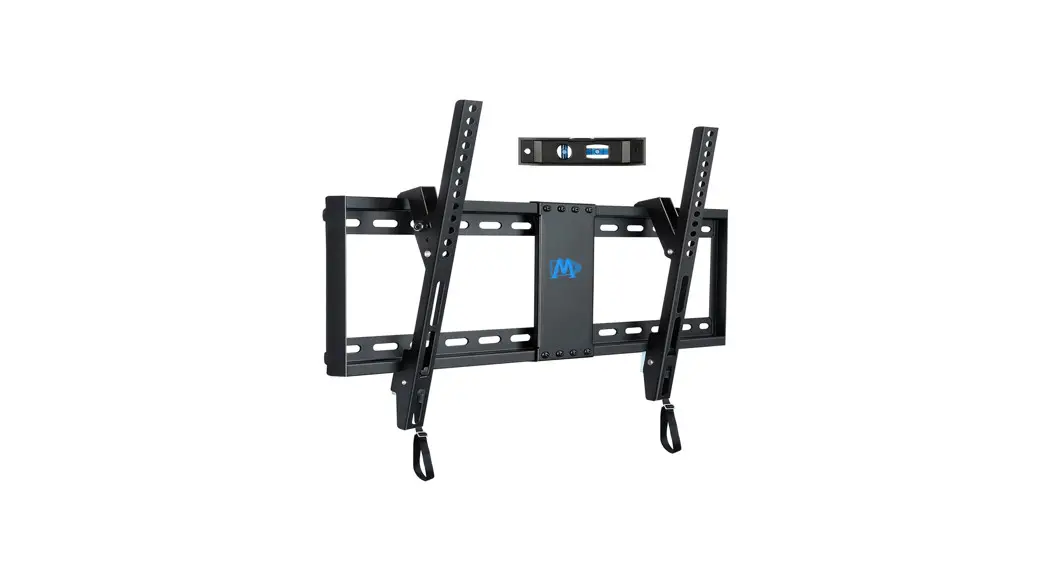
![]() MD2268-LK Tilt TV Wall Mount
MD2268-LK Tilt TV Wall Mount
Instruction Manual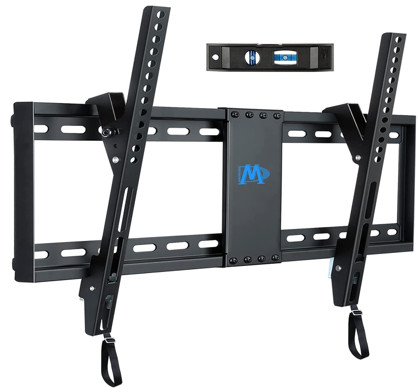
MD2268-LK Tilt TV Wall Mount
Before getting started, let’s make sure this mount is perfect for you!
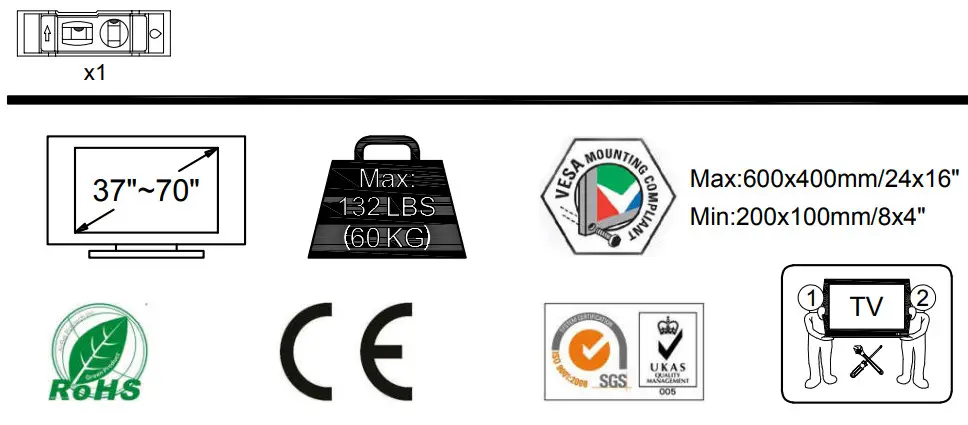
| 1. Is your TV VESA equal to/greater than 200x100mm/8×4″ and equal to/less than 600x400mm/24×16″? | 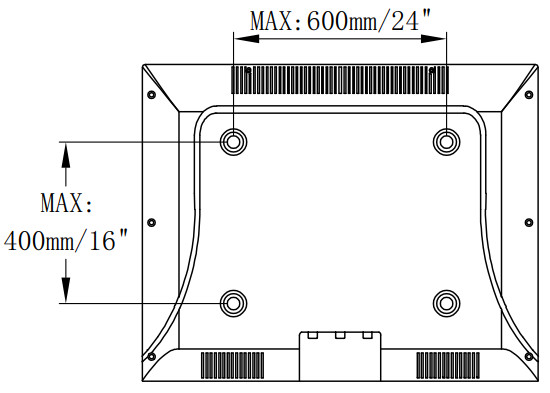 Yes — Perfect! Yes — Perfect!No — This mount is NOT compatible. |
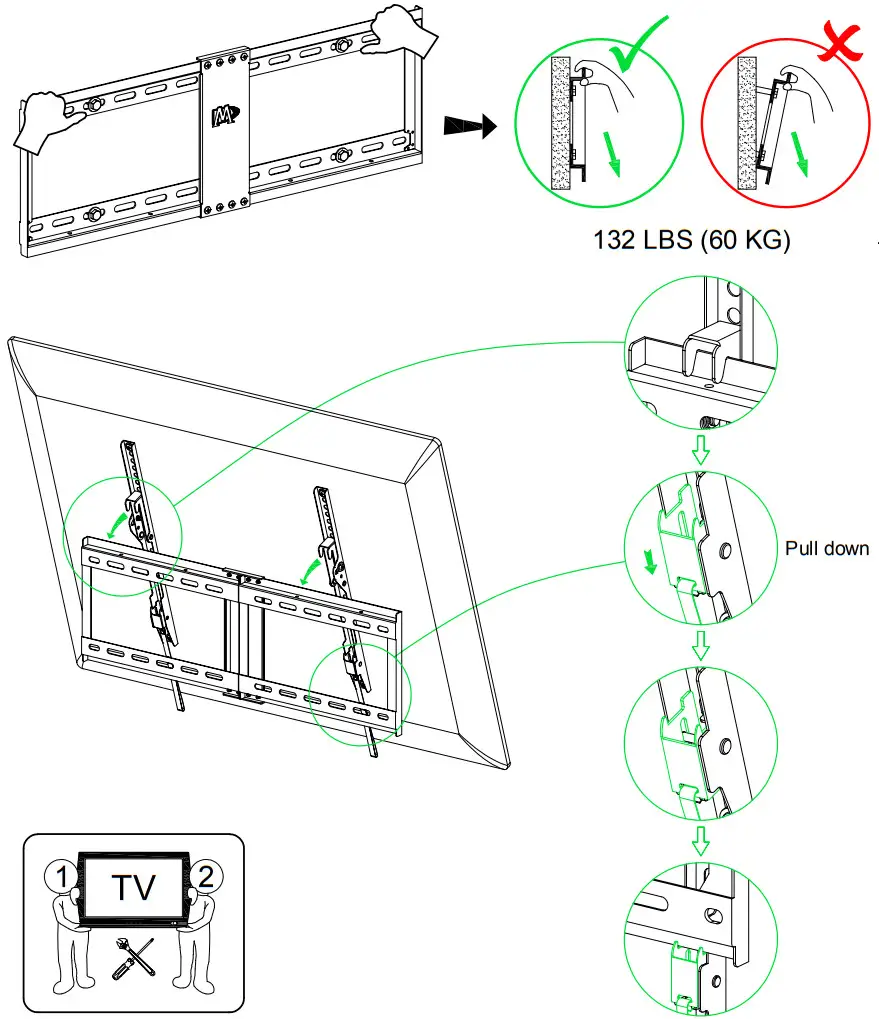
| 2. Does your TV (including accessories) weigh less than 132 LBS (60 KG)? | 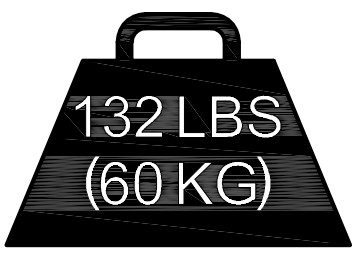 Yes — Perfect! Yes — Perfect!No — This mount is NOT compatible. |
| 3. What is your wall made of? | CAUTION: DO NOT install into drywall alone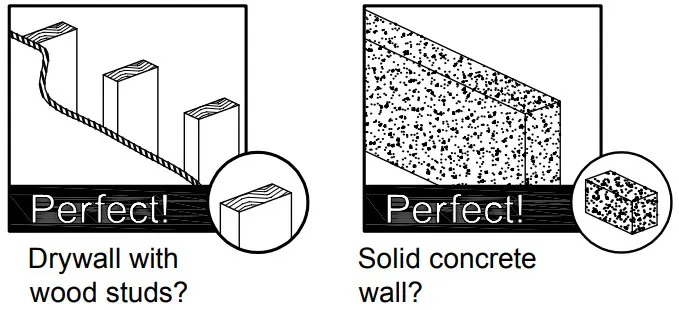 |
| 4. Installation Tools (Not Included) | 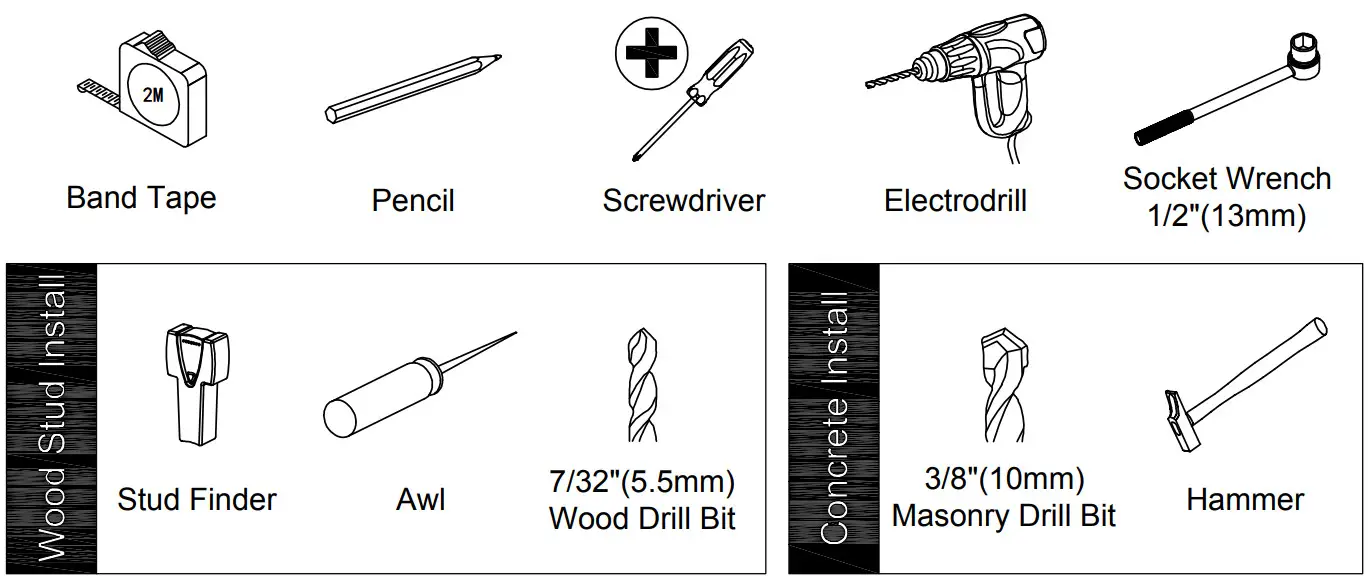 |
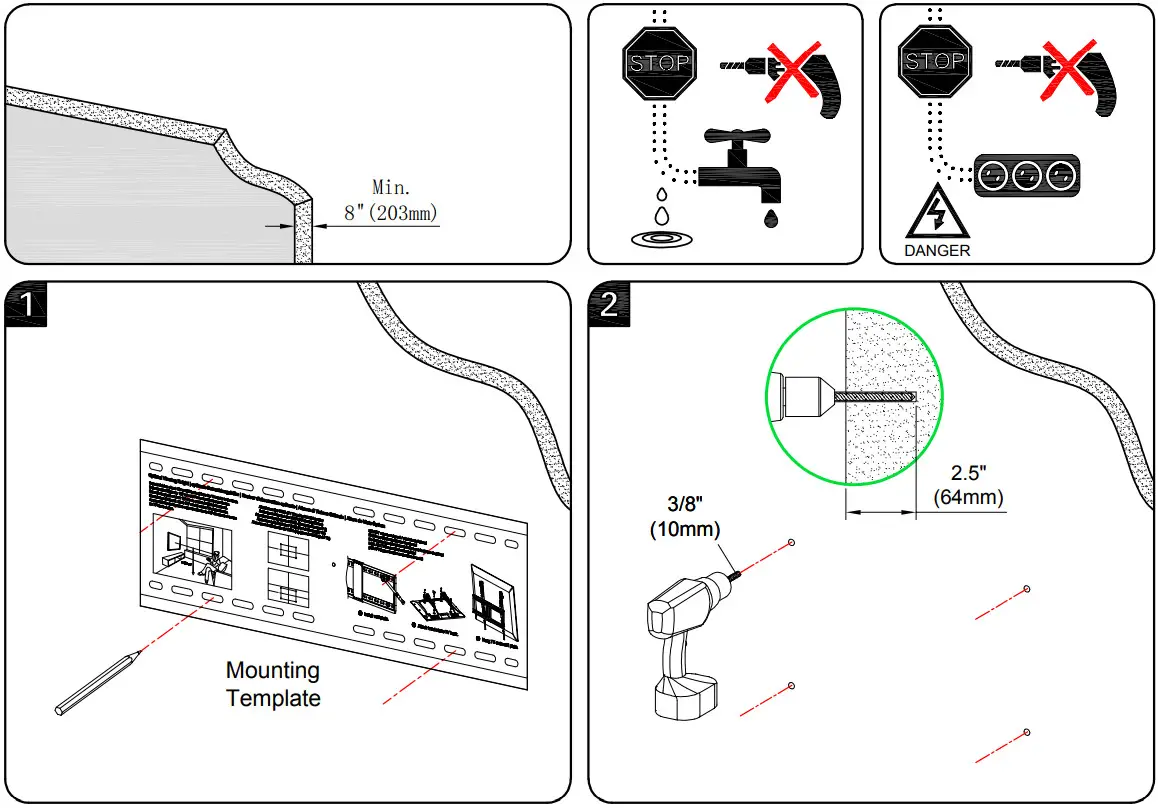
| 5. Safety Caution | Please read this instruction carefully before installation. ● This product is designed for use in wood stud and solid concrete wall. – DO NOT install into drywall alone. ● The wall must be capable of supporting five times the weight of the TV and mount combined. ● Do not apply this product to any purpose not indicated by Mounting Dream. ● Incorrect installation may result in product damage or body injury. Mounting Dream shall bear no responsibility for any damage or injury resulted from incorrect installation, incorrect assembly or misuse. |
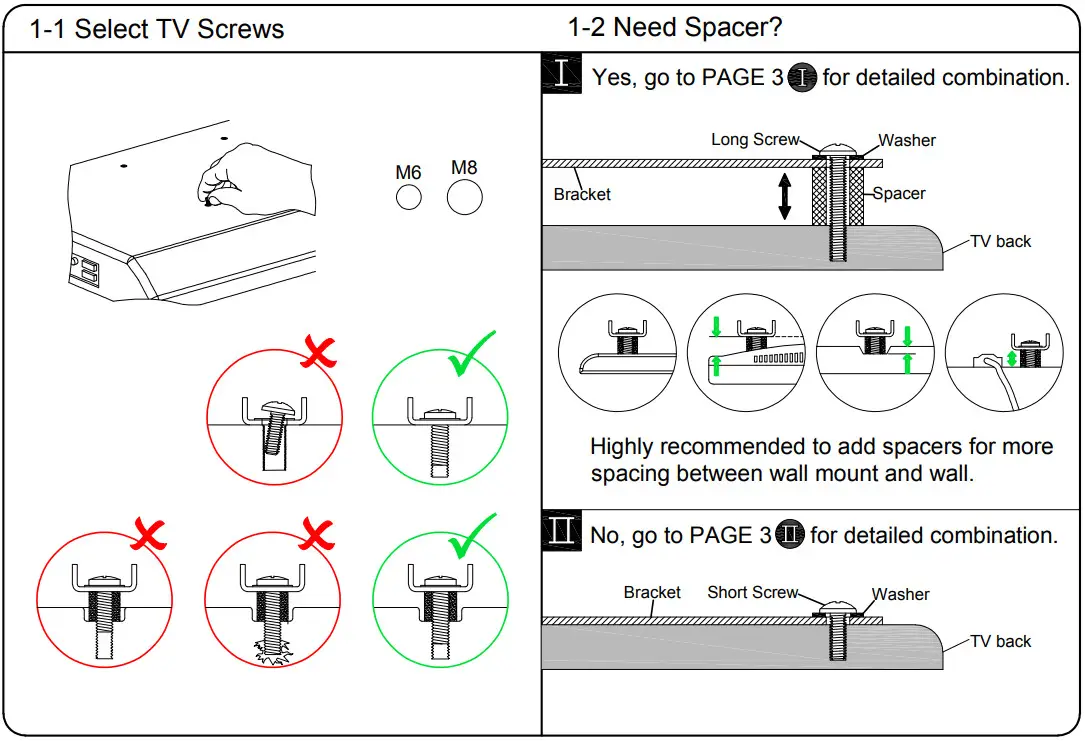
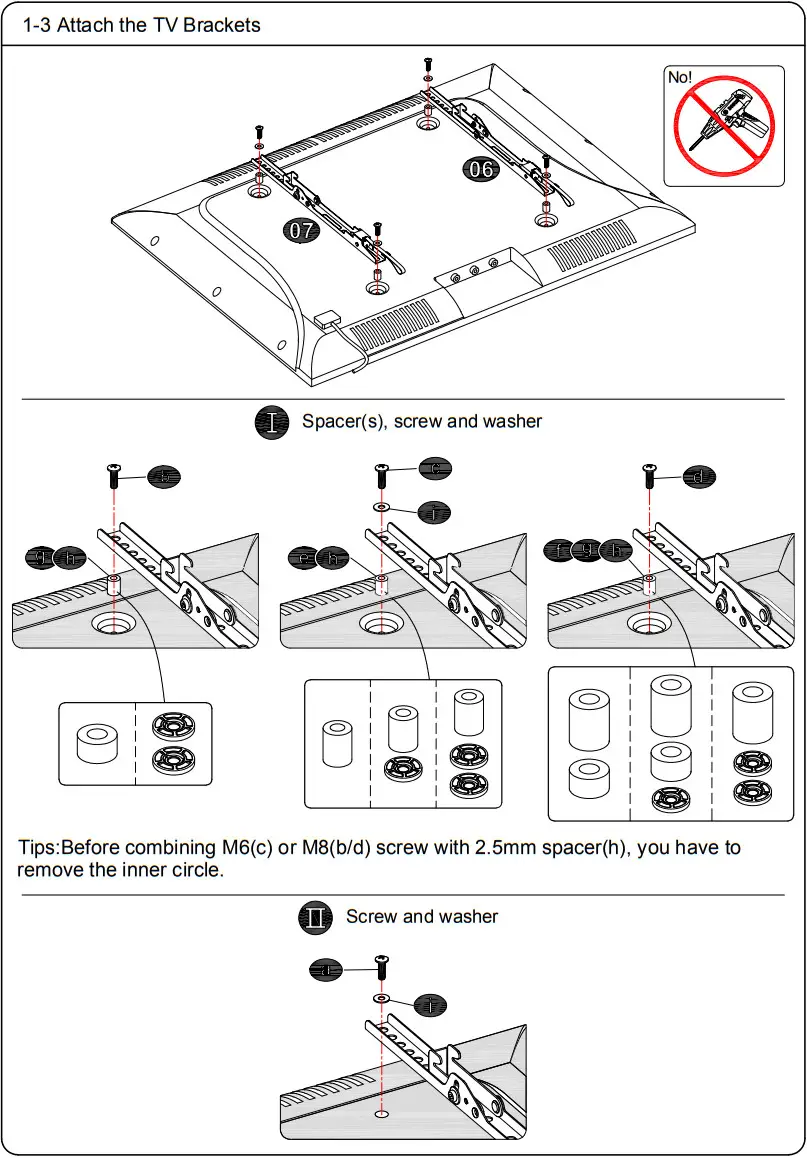
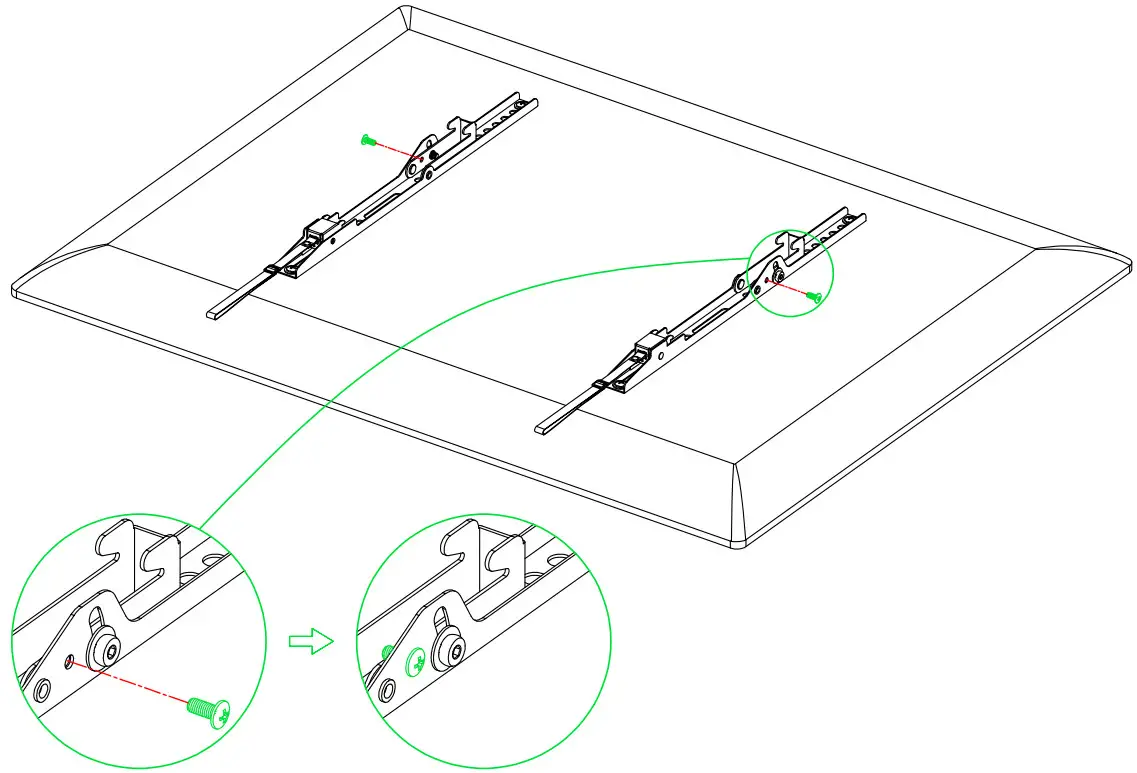
STEP 1 Attach Brackets to TV
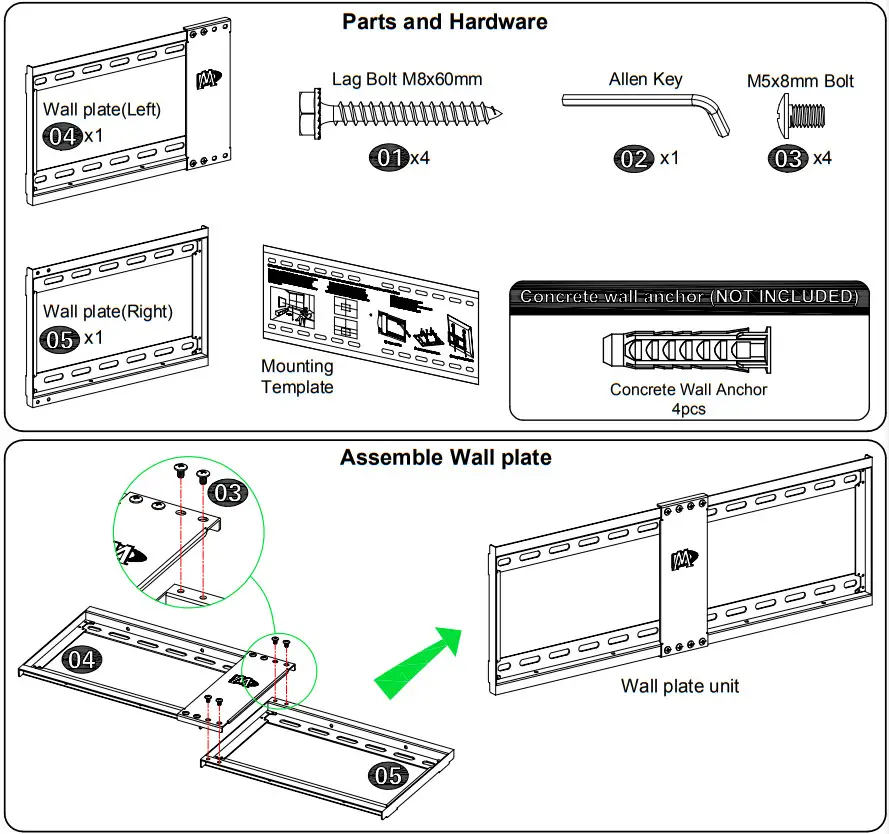
Parts and Hardware![]() WARNING:This product contains small items that could be a choking hazard if swallowed. Before starting assembly, verify all parts are included and undamaged.
WARNING:This product contains small items that could be a choking hazard if swallowed. Before starting assembly, verify all parts are included and undamaged.
NOTE: Not all hardware included will be used.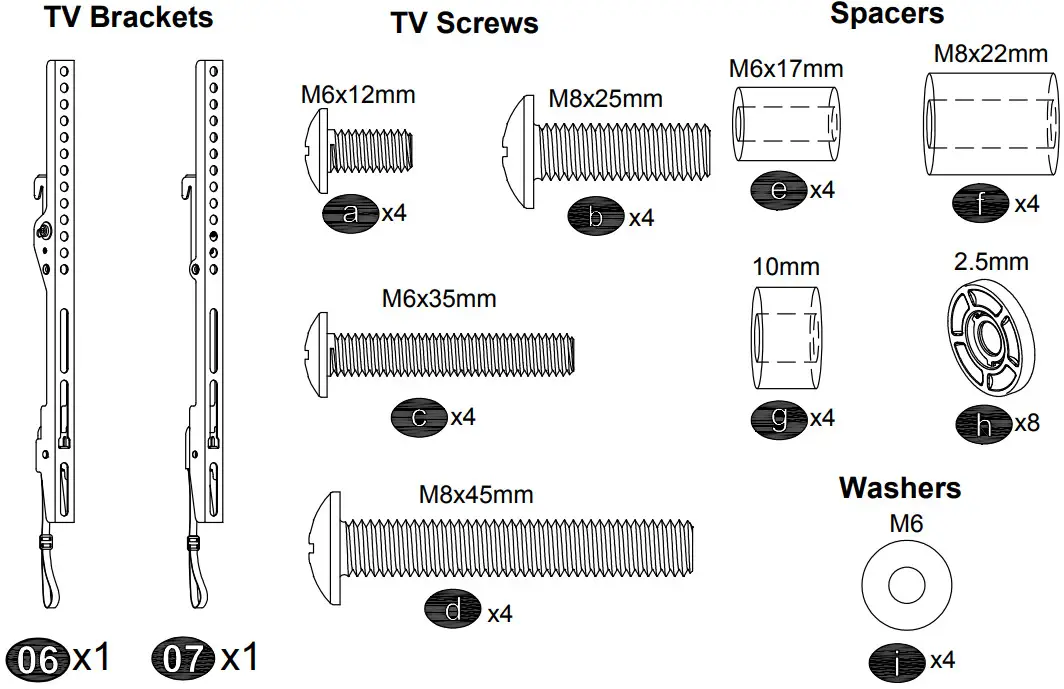
STEP 2 Attach Wall Plate to Wall
![]() For wood stud installation, follow STEP 2A
For wood stud installation, follow STEP 2A![]() For concrete installation, follow STEP 2B on PAGE 6
For concrete installation, follow STEP 2B on PAGE 6
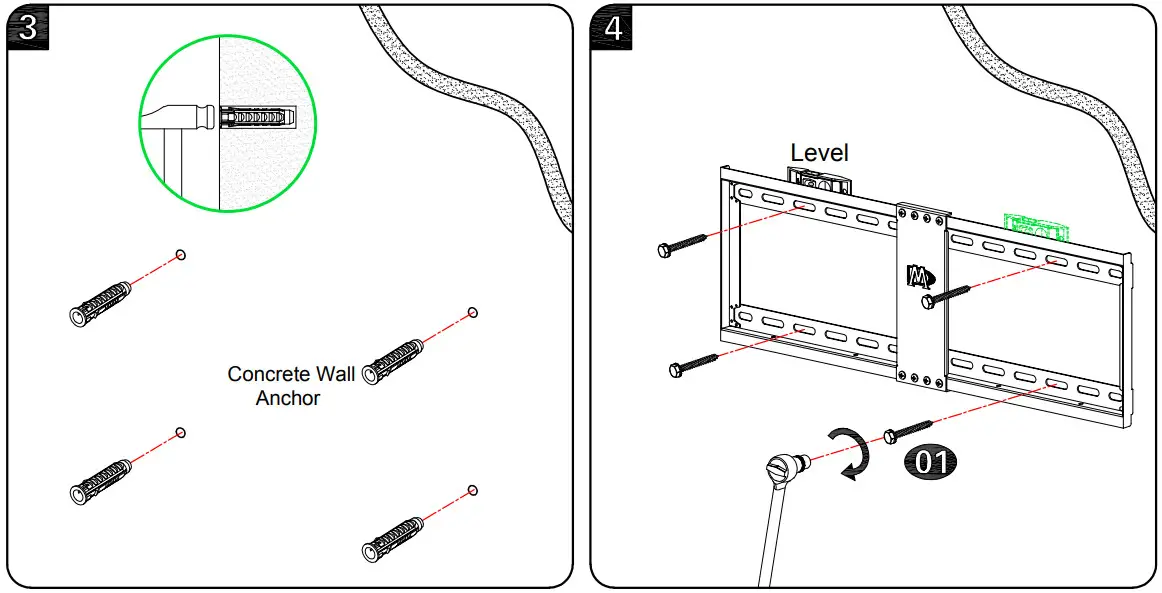
STEP 2A: Wood Stud Installations
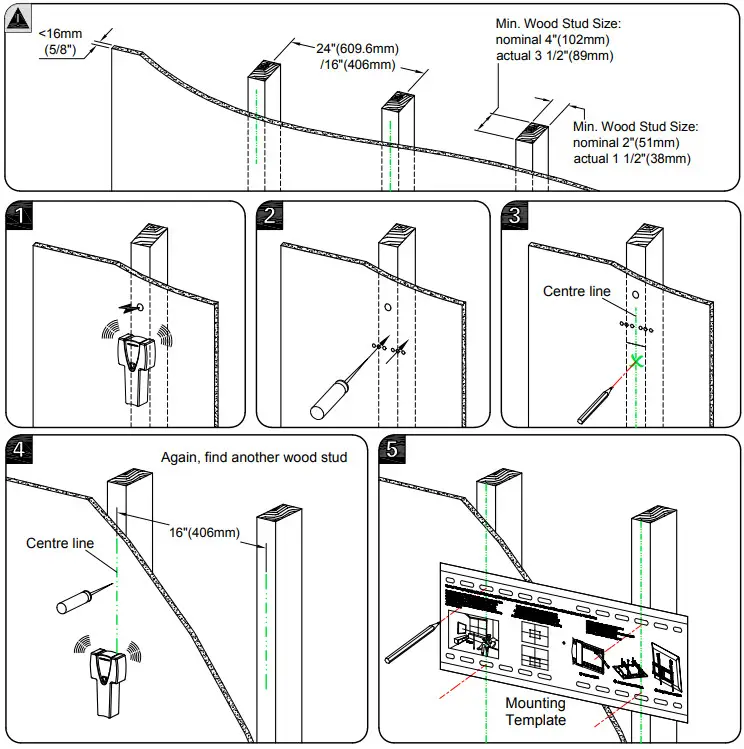
![]() CAUTION: To avoid potential personal injury or property damage:
CAUTION: To avoid potential personal injury or property damage:
All 4 lag bolts 01 MUST BE firmly tightened to prevent unwanted movement of the wall plate assembly. Ensure the wall plate assembly is securely fastened to the wall before continuing on to the next step.
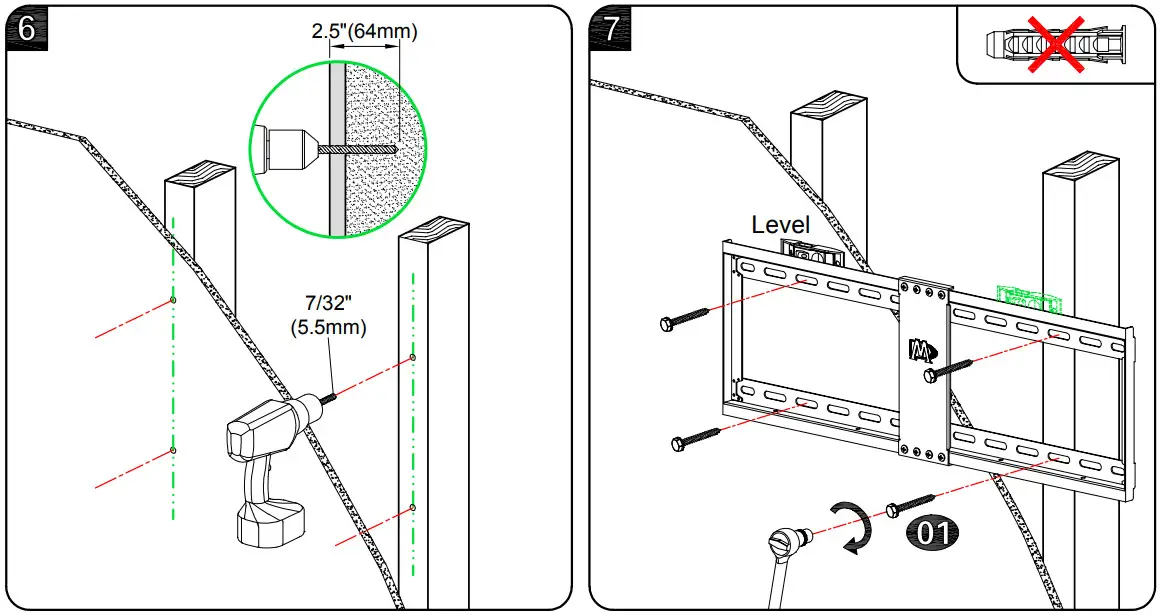
STEP 2B: Solid Concrete Wall Installation
![]() CAUTION: To avoid potential personal injury or property damage:
CAUTION: To avoid potential personal injury or property damage:
All 4 lag bolts 01 MUST BE firmly tightened to prevent unwanted movement of the wall plate assembly. Ensure the wall plate assembly is securely fastened to the wall before continuing on to the next step.
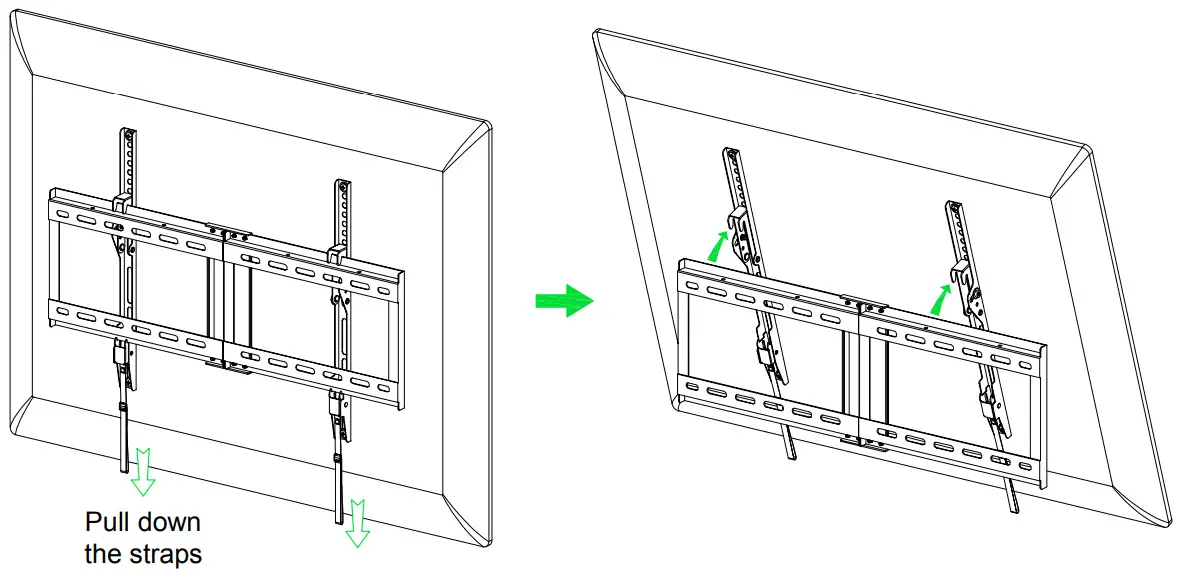
STEP 3 Hang and Secure TV to Wall Plate
Before hanging TV, please conduct “wall plate installation integrity test” first.
STEP 4 Adjustments
![]() Tilting angle adjustment (0°/-8°):
Tilting angle adjustment (0°/-8°):
Pull TV to your desired angle then fasten 2 tilting bolts with Allen key 02.

Option: To keep TV in vertical position, please use two pins to insert the holes on two brackets respectively (as shown in below image).
STEP 5 Take Down the TV from the Mount
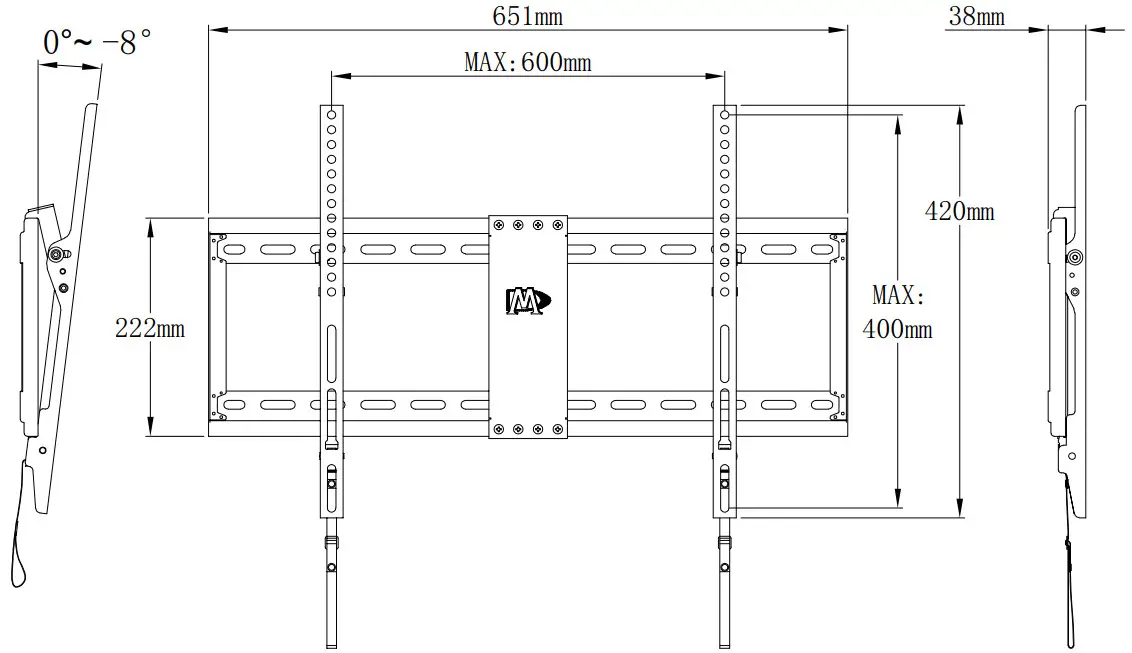
Product dimensions:
![]()


