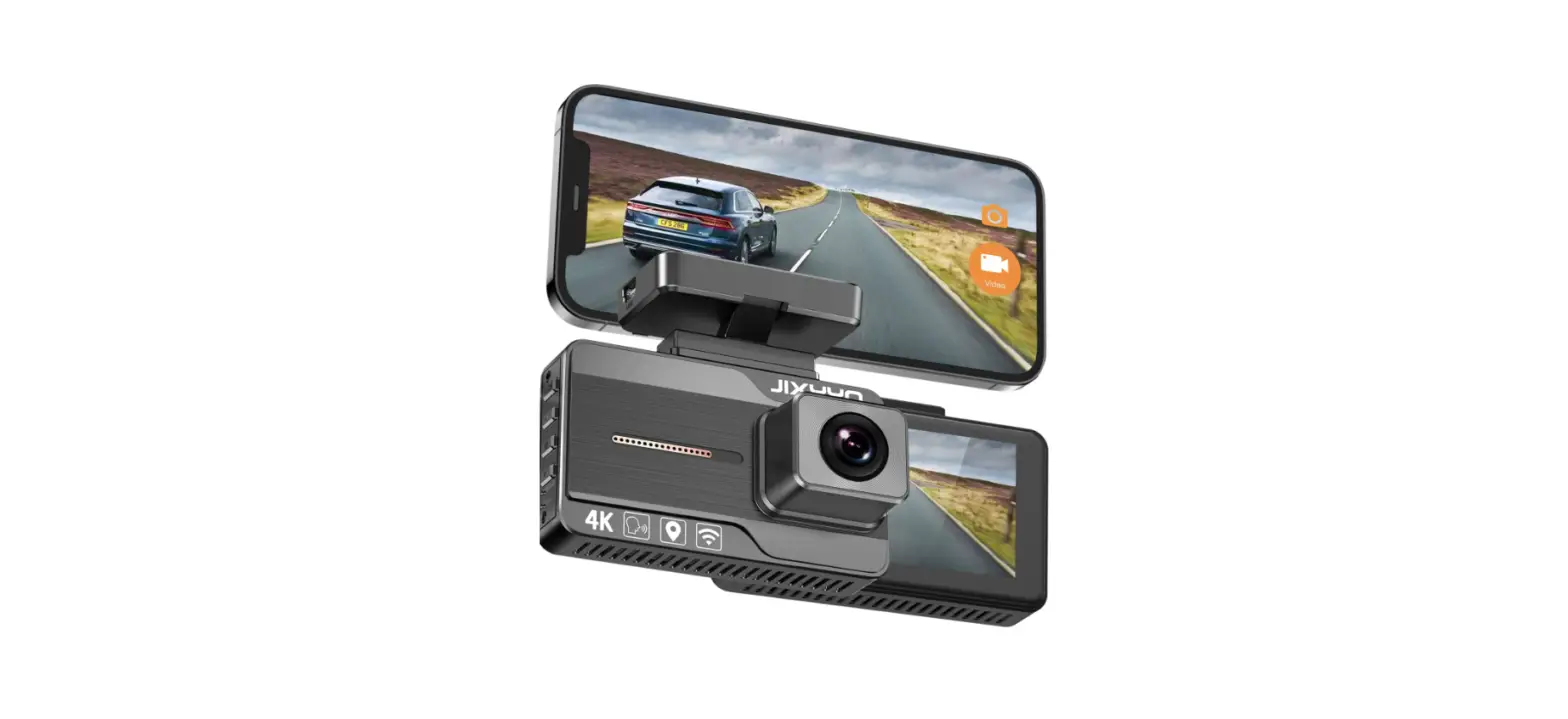
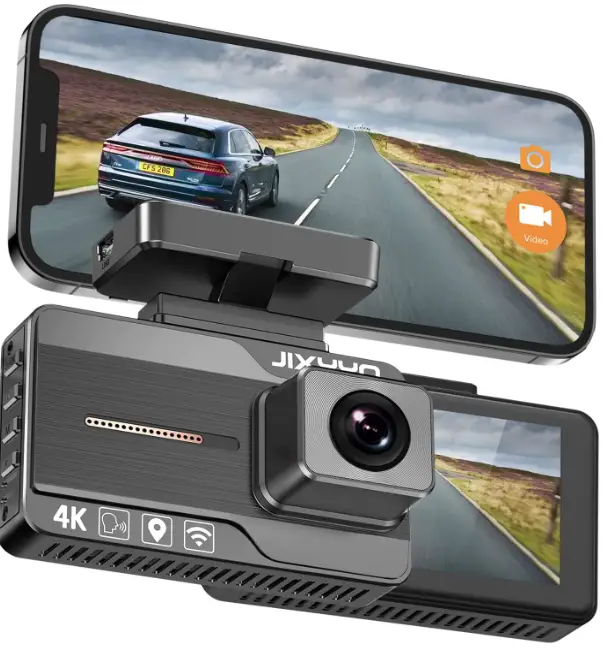
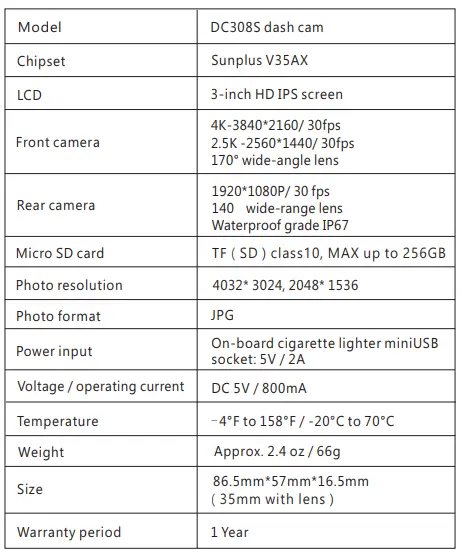
 JIXYYO DC-306S Dual Dash Camera for Cars
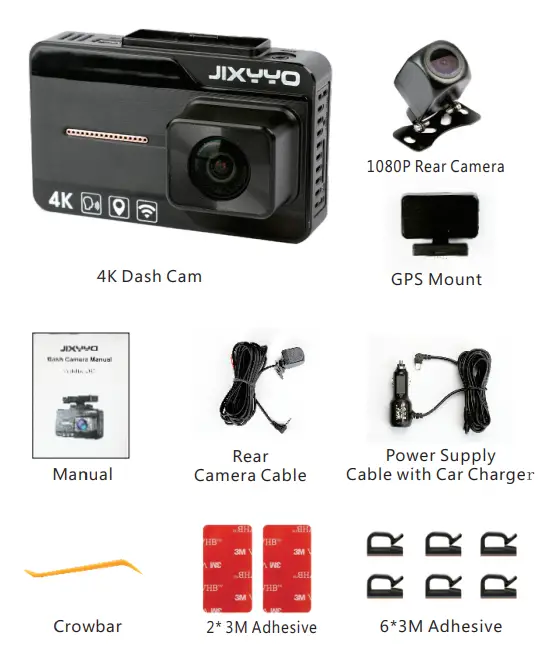
Package Contents
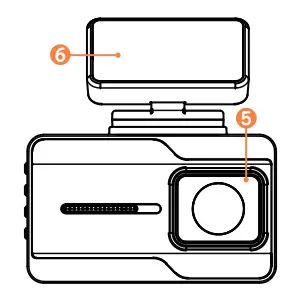
At a Glance
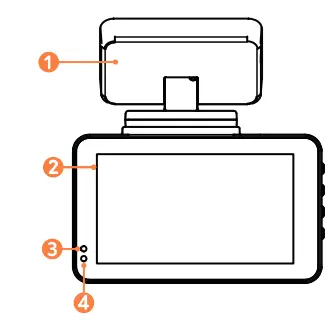
- The GPS mount
- LCD display
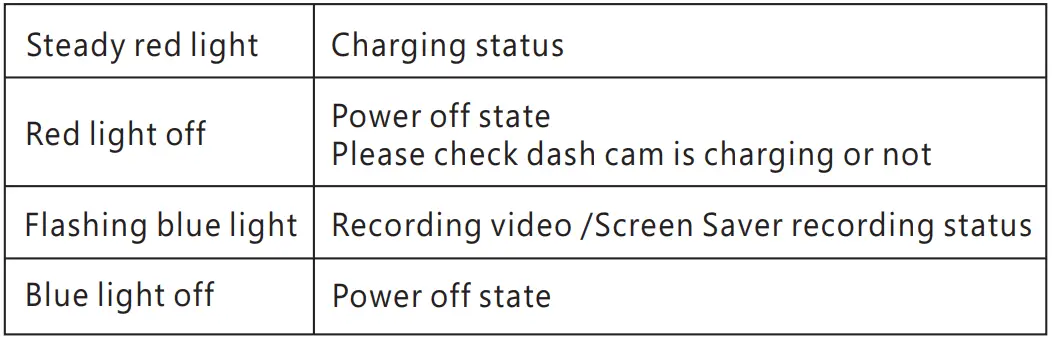
- Charging instruction LED
- Status indicator LED
- Lens
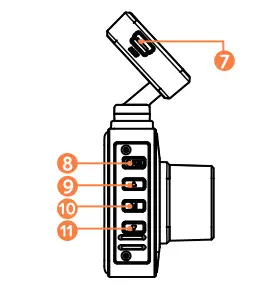
- 3M glue

- Power supply port for GPS
- Power Button/OK button
- UP button
- Menu button
- Down button

- Microphone hole
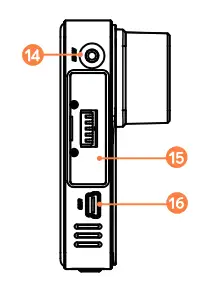
- TF slot

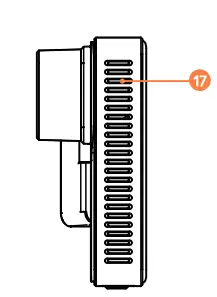
- Rear camera jack
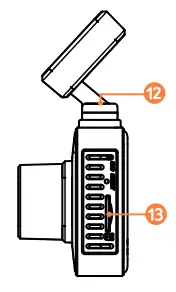
- GPS port
- USB power supply port(reserve)


- Speaker
LED Indication
Screen Overview
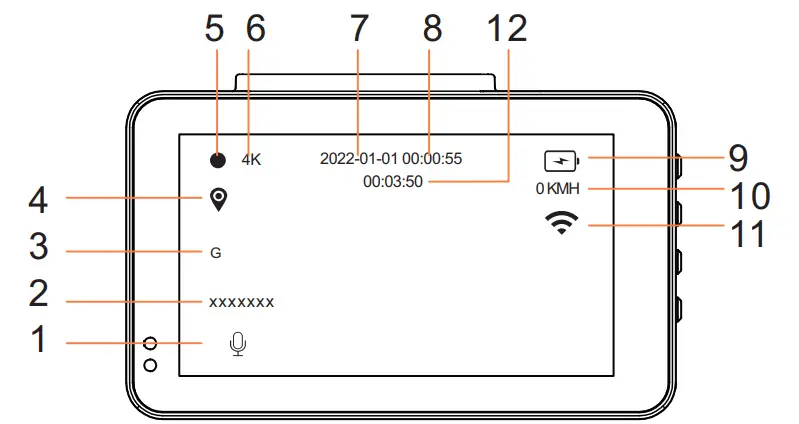
- Microphone
- Gravity induction
- Video status
- Date display
- Battery capacity / Power status
- License plate
- GPS status
- Resolution
- Time display
- Current travel speed
- WIFI status
- Video time / Card full remaining video time
Insert a Memory Card
Do not remove or insert micro SD / TF card when the
dash cam is powered on, as it may damage the card.
To inatall
Insert a microSD / TF card with the gold contacts facing the len side of the DashCam. Push the card until it clicks into place. Make sure the dash cam is powered off, otherwise the card may be damaged.
To remove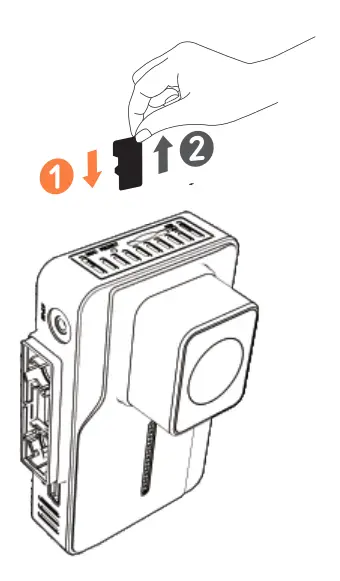
- To remove the card, gently push its top edge inward until it clicks, and
- Then pull it out of the slot.
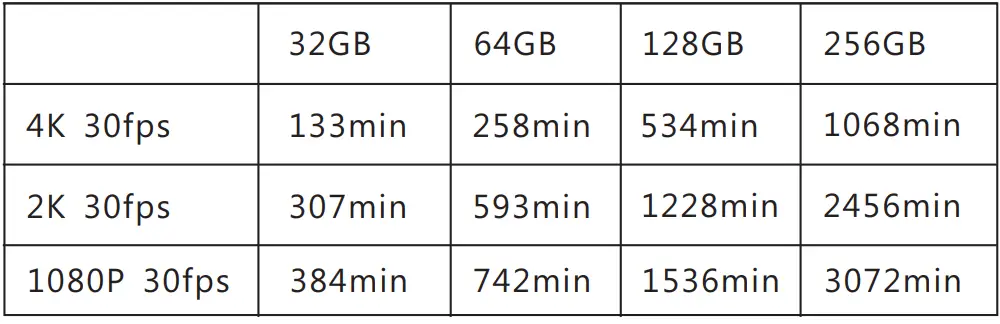
- For reliable operation, use a Class 10 micro SD / TF card.
- For a 32GB / 64GB / 128GB/256G card, format it before use.
- It is recommended to format the card per 10 days.

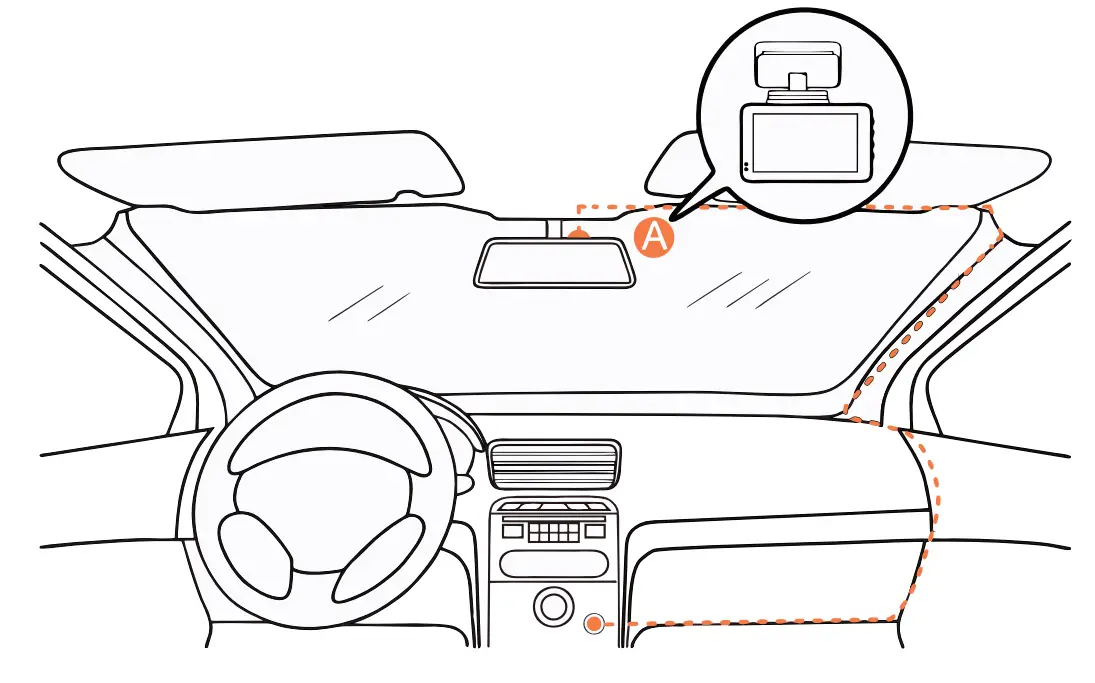
Install Your Dashcam
- Attach Dashcam to the mount
Choose a location on the windshield near the lower right corner of the mirror. Attach the dash cam to the windshield with 3M stickers as shown in the picture.

Note
- Never install this product while driving.
- DO NOT touch the lens with your fingers. Finger grease may be left on the lens and will result in unclear videos.
- Install this dashcam near the rear-view mirror to obtain the best field-of-view. DO NOT install in a location that will obstruct your view when driving.
- Make sure that the lens is within the wiping range of the windscreen wiper to ensure a clear view even when it rains.
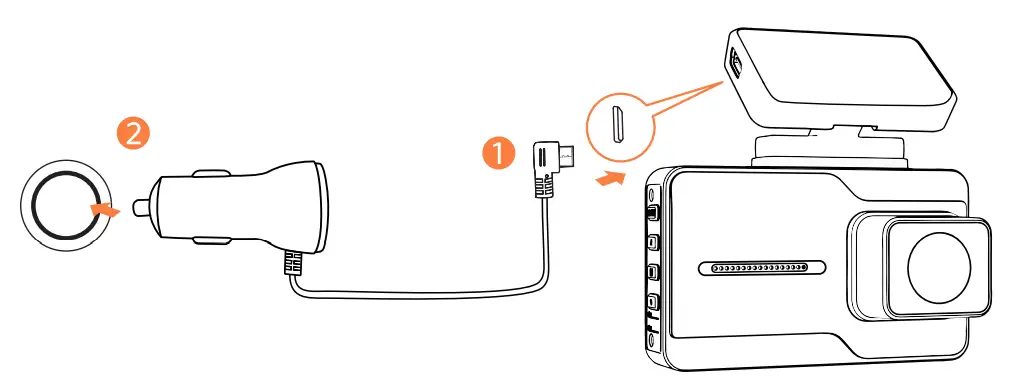
Install the front camera
- Step 1: Connect the car charger and Dashcam by using the charging cable. Plug the other end of the car charger to your vehicle’s cigarette lighter socket.

- Step 2: Carefully route the power cable around the windscreen and tuck it under the trim.

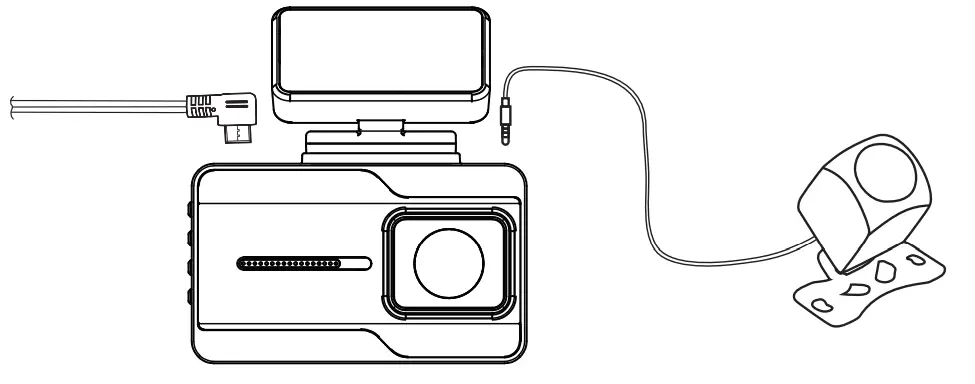
Install the front camera
- Connect the rear camera to the rear cam port on the device through the rear camera cable, carefully route the cable and tuck it under the trim.

- Step2:
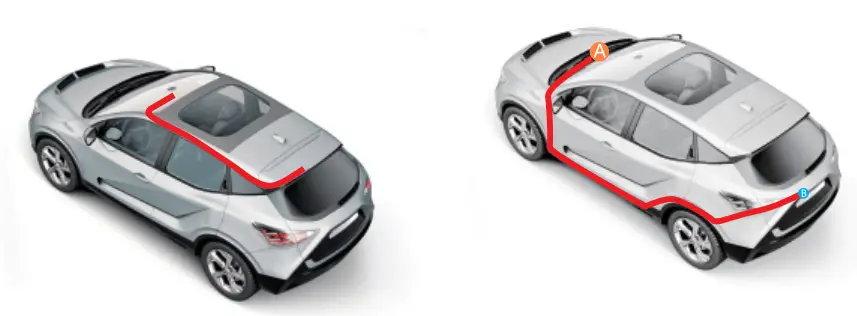
Mount the rear camera inside the vehicle
As shown left: Attach the rear camera with the tape provided or drill 2 holes in the panel and attach with two screws to the cloth of the headliner, carefully route the cables and tuck them under the trim panel.
Mount the rear camera outside the vehicle
As shown right: The device passes the rear camera cable, carefully route the cable and tuck it under the trim.
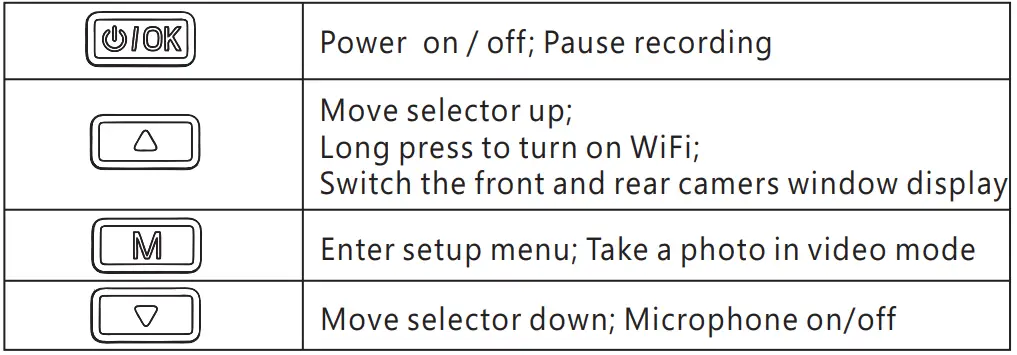
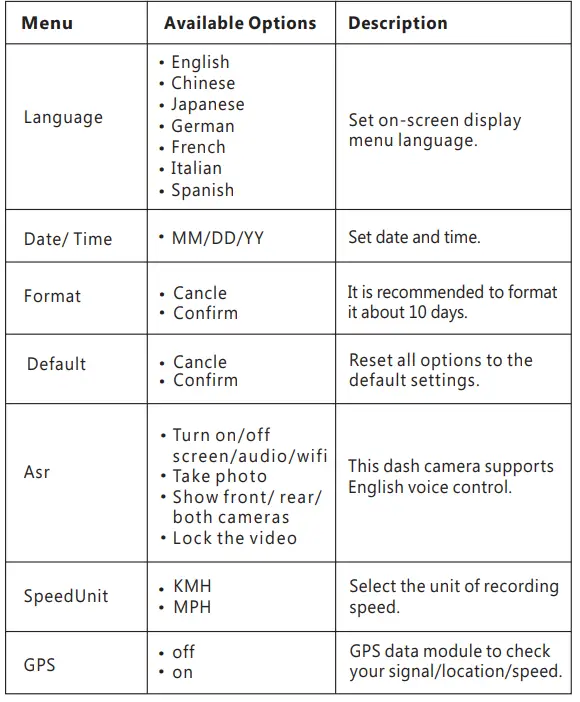
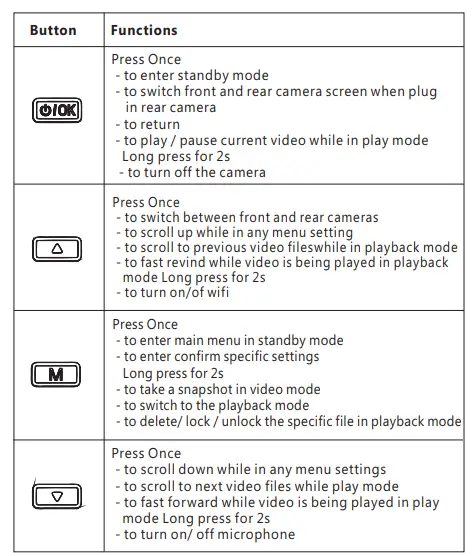
Button Functions  System Setup
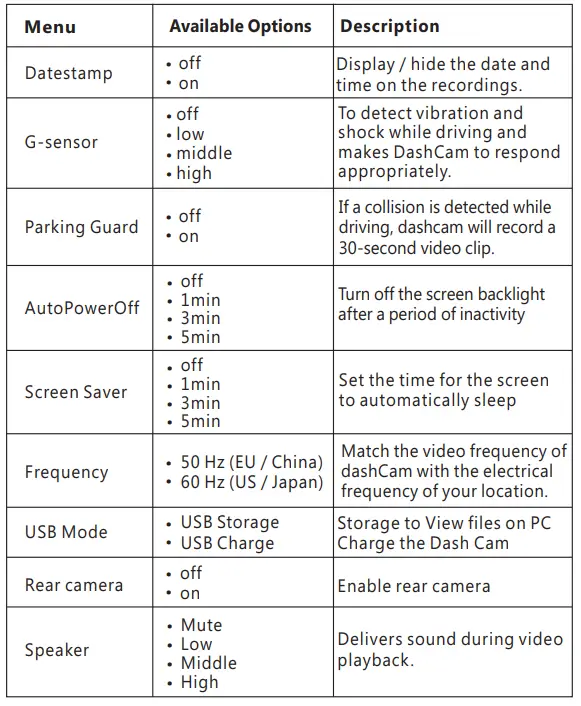
 System Setup
Tap to stop recording, click
  to enter the menu settings
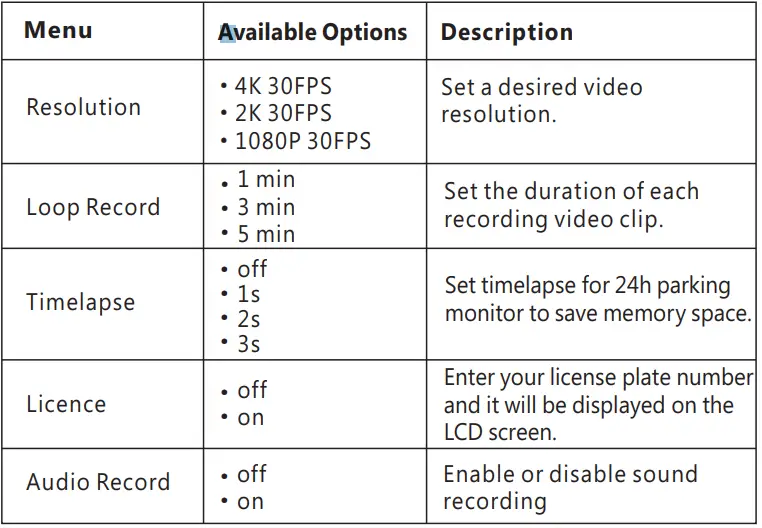
View Files on the Dashcam
- Click
 to enter standby mode.
 - Long press
 twice to go to the Playlist.
 - Go to Normal Video / Emergency File to view all saved videos.


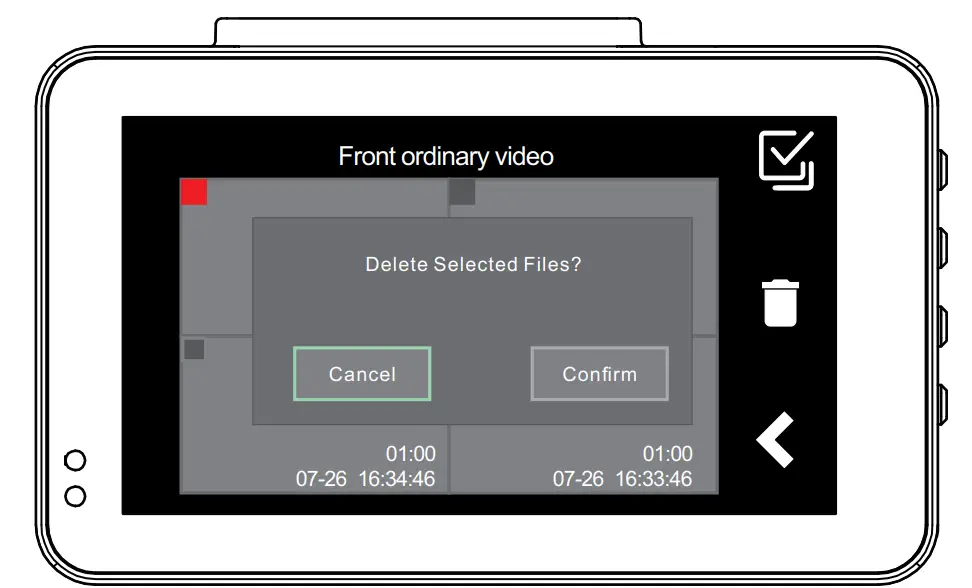
Delete Files on the Dashcam
- Long press selects the file to delete, and then click to confirm the file.
- Long press , to confirm the deletion.

Check Dashcam with Smartphone

Before using the wifi function, please use the QR code below to install the”RoadCam” APP program on your smartphone or tablet device.
How to Connect dashcam with Smartphone?
- Click the button to make the driving recorder in the standby state.
- When the machine is on standby, long press
 the button to turn on or off the wifi.
 - After turning on the wifi, the dashcam will display the WIFI information, the WIFI name begins with: SBC_ * * * * * * *, password default: 12345678
- Take the mobile device as close as possible to the dashcam, turn on the wifi settings and find the hot spot name of the device and enter the password connection.
- Enter the APP: RoadCam can operate the dashcam and preview images and videos on the mobile device.
 the button to turn on or off the wifi.
Check Dashcam with Computer
How to view files on the computer?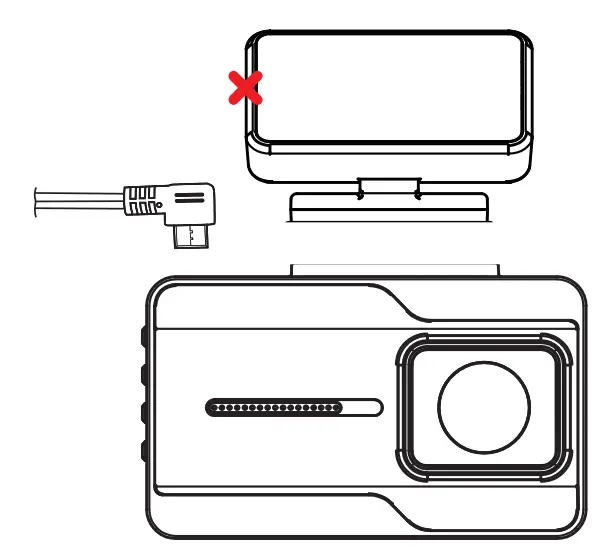
- Select “USB MODE” in the settings, and switch to “USB STORAGE”.
- Make sure to connect the correct interface when connecting the hardware.
When successfully connected, the dashcam stops recording.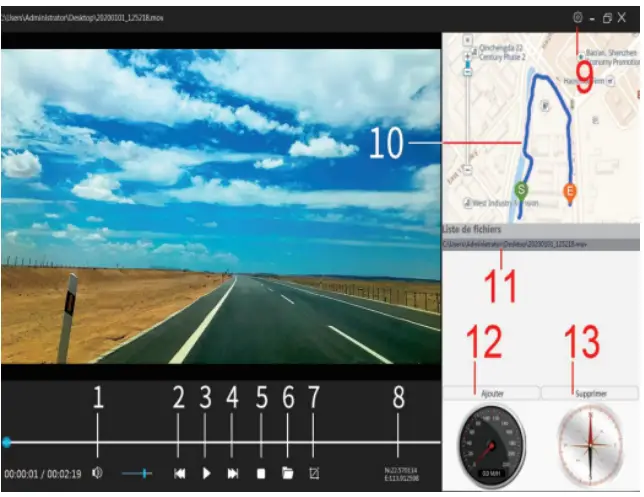
- Volume
- Last video
- Start/pause
- Next video
- Stop
- Folder
- screenshot
- latitude N / longitude E
- Setting
- Track
- Video files
- Add video files
- Delete video files
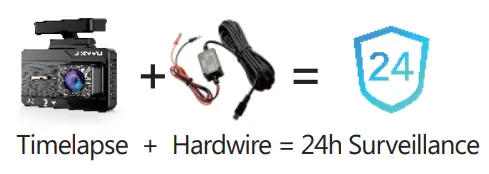
24h Parking Monitor & Timelapse
Note:
- Hardwire kit is required for 24h Surveillance. You can purchase separately or contact us.
- Activate the time-lapse video and 24h parking monitor at the same time by turning on the “Timelapse” in the menu.
- Make sure to connect the correct interface when connecting the hardware.

If someone hits your car and the impact reaches the set G-sensor level, then the camera will stop the timelapse video> Startto record a 30-second continuous video, save and lock that video in the UV folder > Return to recording the timelapse 1 fps.
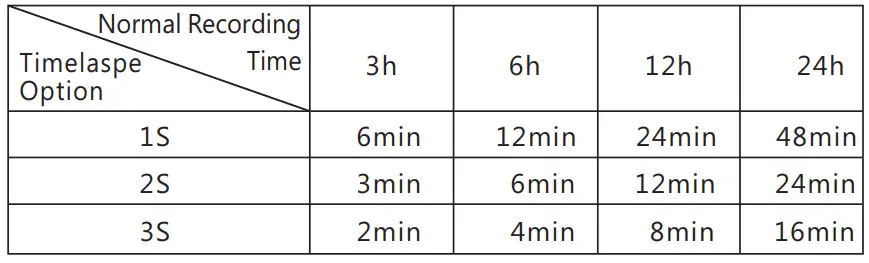
- Timelapse Recording Time = Normal Recording Time / (30FPS x Timelapse Option

Special Function
 Notice
 Notice
This product complies with the radio interference requirements of the European Community.
Operating Frequency Range: 2400-2483.5 MHz; Max Output Power: 15 dBm This product is designed and manufactured with high quality materials and components, which can
This symbol means the product must not be discarded as household waste, and should be delivered to an appropriate collection facility for recycling. Follow local rules and never dispose of the product and rechargeable batteries with normal household waste. Correct disposal of old products and rechargeable batteries helps prevent negative consequences for the environment and human health. Removal of the built-in battery invalidates the warranty and may destroy the product. Always bring your product to a professional to remove the built-in battery
FCC Statement
This device complies with Part 15 of the FCC Rules. Operation is subject to the following two conditions:
- This device may not cause harmful interference, and
- This device must accept any interference received, including interference that may cause undesired operation.
Warning: Changes or modifications not expressly approved by the party responsible for compliance could void the user’s authority to operate the equipment.
Customer service
12-month limited warranty
Lifetime technical support
[email protected]
+1(209) 227 2359
FAQS
Do I still need to use a hardware kit for 24h parking monitoring?
If you want to use the parking monitoring function, the dedicated hardwire kit is required. After installing the hardwire kit, turn on the “Time-Lapse” in the menu, you can record normally for 24h parking monitoring.
How to swap the front rear camera on display?
Make sure you have connected the rear camera first. In the“video mode” of the dash cam, short press the “UP” button to switch the LCD display front camera screen/rear camera screen/front and rear camera screen to display on the split screen at the same time
How to see the accompanying GPS track?
- Unplug the GPS bracket from the dash cam, select “USB MODE” in the settings, and switch to “USB STORAGE”.
- Install the Super Gps Player player on the computer. After the camera is connected to the computer disk mode, you can view the GPS track on the computer.
Worry about the memory card is full?
Continuous loop recording allows overwriting the old unlocked files.
Can use a smartphone to check 2 cams at the same time?
No. Each dash cam has its own WiFi ID. Which WiFi you are connected to on your phone, the video of the corresponding phone will be displayed in.
Can you remotely view live video from your iPhone?
The wifi range is 50FT. You can view remotely from the camera to your phone if you are within that 50FT range and no obstruction in the middle.
PS: This is NOT an IP dash cam. It is just a dash cam with wifi feature so you can download and view your videos by staying close the camera.
You can view the GPS track by playing the video on the computer, provided that your driving recorder has the GPS turned on when you are using it.
The default setting is to start looping continuous recording. When the dash cam is charging, it will keep loop-recording in 1-min video unless you manually choose to stop recording.
“1. To enable 24 hours parking monitor, you must connect the dash cam hardwire kit.
2. After connecting the hardwire, turn on the “”””Time-Lapse”””” in the dashcam menu.
3. Timelapse + Hardwire = 24h parking monitor
After completing the above two steps, when your car is turned off, the dash cam will start 24-hour parking monitoring, and, it will continue to record video and audio whether someone approaches the vehicle.
If you don’t want to record while parking, just turn off the timelapse.”
It is a good ask.
Regardless of whether there is a hard-wired kit or not, as long as you turn on “Parking guard”, when a collision is detected while parking, it will automatically record and save 30s of urgent video.
A power bank can be used to connect the dash cam, but it’s best to buy a hard-wired kit to connect the dash cam directly to the car battery so the dash cam won’t lose power.


