
Colordowell 4908M Paper Cutter

FOREWORD
Thank you for your choice of our Precise Paper Cutting Machine series. We will provide you with good quality and reliable post-sale service. On the basis of original products, our research and develop engineers combined advantages of products at home and abroad, and finally developed new model of Precise Paper Cutting Machine. It owes hlgh technology, preclse constructlon deslgnation, and elegant appearance, with the securitycontrol part and cutting precision improved.It can be broadly used in printing centers and offices. It is the most ideal cutting machine which well complies with office automation system.
Warning:This kind machine is allowed to cut printed paper or books or soft leathers only. It is forbidden to cut any metal sheets or other hard objects do harm to the machine quality with kind machine.
 Children must not operate this machine.
 Do not reach beneath the blade
 Do not extract or transport the blade without protection
 Do not cut hard material or material which may splinter
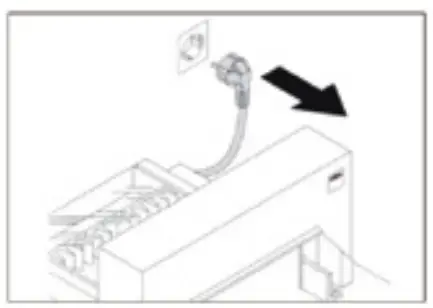
![]() Must use socket with ground wire connected
Must use socket with ground wire connected
Note:In order to have more usage information of Numerical-controlled Paper Cutting Machine, you have to read this specification carefully first.This will help you improve your working efficiency, realize the machine’s property, have the best cutting effects. This will also be good for the maintenance of the machine, and can prolong service life of the machine.
SAFETY CAUTIONS
According to relevant standards, to avoid accident and accidental injury, only professional operators are allowed to use this machine (children or non-professional operators are forbidden to operate). When you use or maintain these machines, please pay high attention to safety cautions below:
- SETTLEMENT POSITION
The welght of this kind machine is is heavy ,Please put it balanced and in a clean place. - POWER
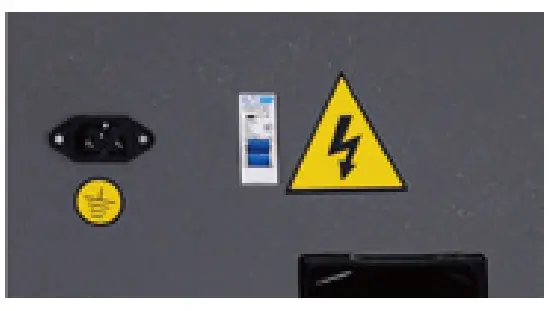
Please connect with the power source correctly in accordance with the speclficatlon. and the machine will run irregularly if the voltage is too high or too low. We suggest you use alternating current (AC) power source with steady voltage to improve your working efficiency. - GROUND CONNECTION
For safety you should use electric supply socket with ground wire connected. - SUPERCHARGE
Please don’t connect many electrical products on ane electric supply socket, because supercharge may cause a fire or an electric shock. - CLEANNESS
Before you clean or maintain the machines, you must cut off the electric source and pull out the electric supply socket. - WATERPROOF
Prevent water or other liquid flow into inner machine. - Children or non-professional person must not operate this machine.
- Do not reach beneath the blade.
- Do not reach cut.
- Do not cut hard material or materials which may splinter.

- Must use socket with ground wire connected.
- Air safety switch, non-professional person is not allowed to open. It is much dangerous.
- Under normal usage , add right amount lubricating oil to transmission parts and screw mandrel to ensure the machine running properly.

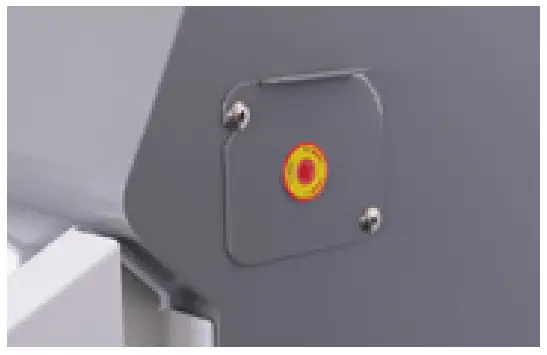
- Emergency stop which is used in emergency situation should be pressed after dealing with emergency.

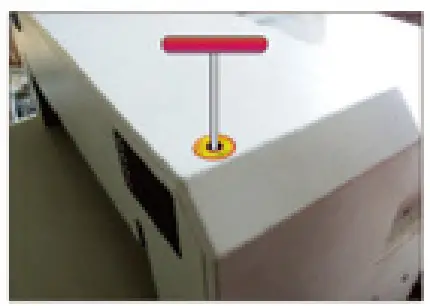
- Test to running the machine with one piece 80gsm paper. If the paper can’t be cut completely, please fine adjust the spin blade depth(adjustable depth range 5mm) It can be set and adjusted as picture shows for numerical-control series.
- If for the program-control series, it can be set and adjusted on the control panel.


SAFETY CAUTIONS BEFORE INSTALLATION
Open the machine and check
When you open the package of the machine, firstly you should check the machine and relevant accessorles. Please contact the seller or our company if there is any damage or shortage.
| Main unit one set | Machine chassis one set | Specification one piece |
| Tooling one set | Rubber under chassis four pleces | Certificate one piece |
| Screw stem two pleces | Screw stem two pleces | Specification one piece |
Settlement of the machine
- Open the wooden crate, take out the machine casing, and discharge four M8 screws on the base plate of the main machine;
- The machine casing needs to assembly, and the screws should be fixed firmly;
- The main unit should be put on the machine casing correctly;
- Check all parts of the machine, and clean them;
- Turn on the power to electrify to test running.


Operating environment
- The machine should be placed in clean working environment, keep away from direct sunlight and wind;
- Temperature of the operating environment: 10-30°C, cannot higher\ than 32°C;
- Humidity level of the operating environment: 50-80%:
- Working power source of the machine: 110V±10%; 60HZ; 1.3KW;
- Connect the ground wire correctly.
Special suggestions
- Remember, only one professional operator is allowed to work on themachine;
- When you cut, you should operate buttons by both of your hands;
- Please dan’t disassemble the safety covering;When you put your hands or other things into the cutting area,you must cut the power first;
- When you change knife blades, you should firmly comply with the blade changing instruction;
- You are not allowed to re-equlp the Inner constructlon and circult of the machine by yourself.
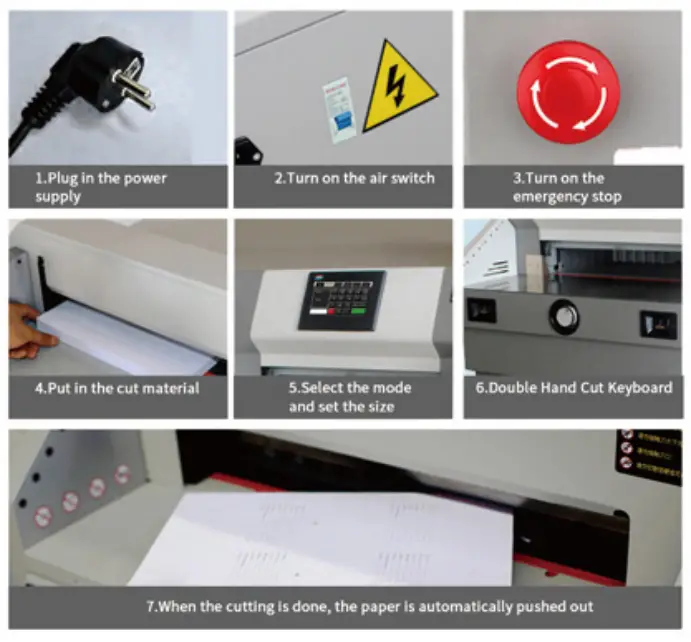
Operating figure
- Turn on the power, open air switch and rotate the emergency stop to make machine get into power-up state.
- Then press RESET , the paper pusher gets running.
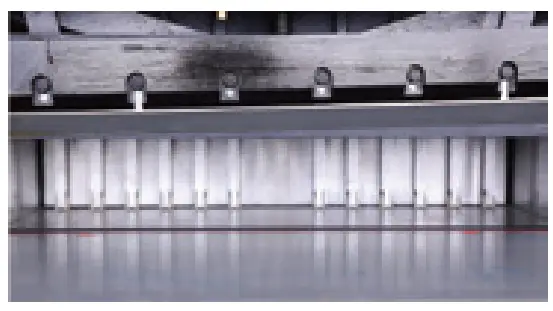
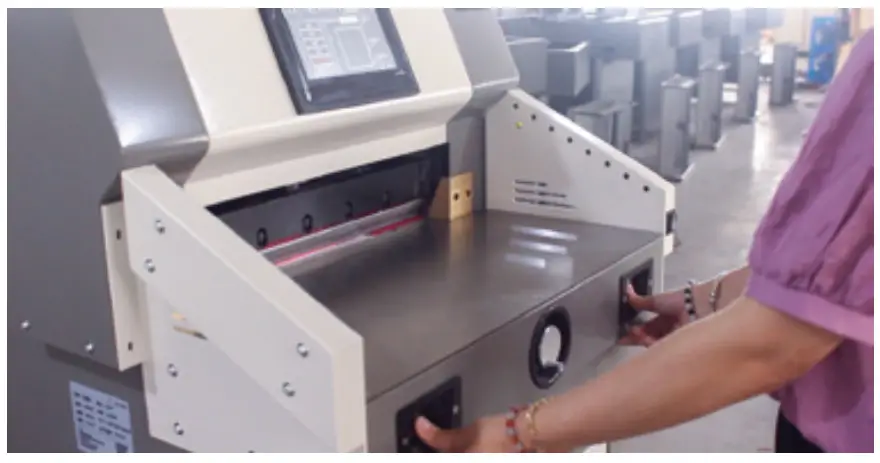
- Proper operation is like this: Stand in the middle front of the machine, face to machine, control the buttons with your left and right fingers, shown in the picture.

BRIEF INTRODUCTION OF THE PAPER-CUTTING MACHINE
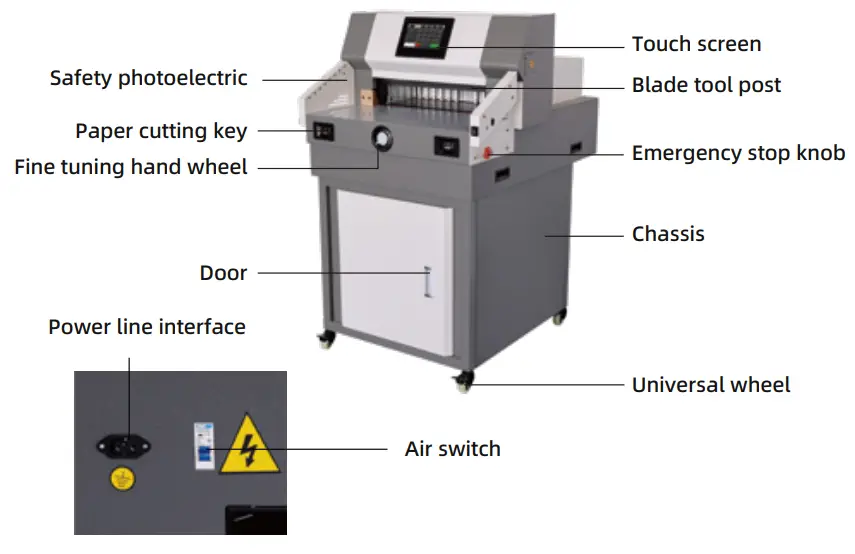
Parts description
Performance characteristics
- CE standard design, front and rear safety protection design, in line with product safety requirements;
- Heavy casting structure design, ensure the machine running smoothly, durable;
- Independent paper pressing, paper cutting structure design device;
- Inclined knife cutting technology, smooth and easy cutting, suitable for thick paper cutting;
- Cutting tool fine-tuning depth technical device;
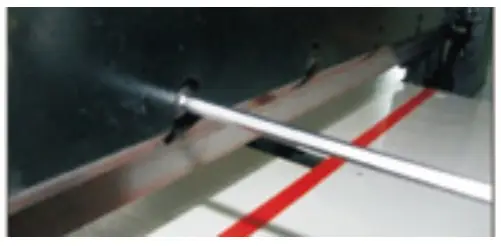
- Cutting indicating line identification, infrared laser indicating line, clear and clear;
Mode of cutting
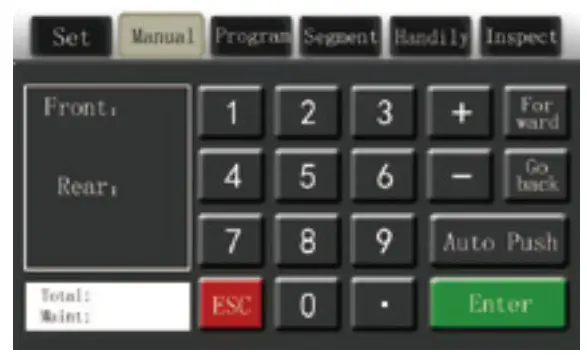
- Manual mode

♦ After entering the required cutting size, press “OK” and complete.
♦ press the cutting button with both hands at the same time to complete the cutting.
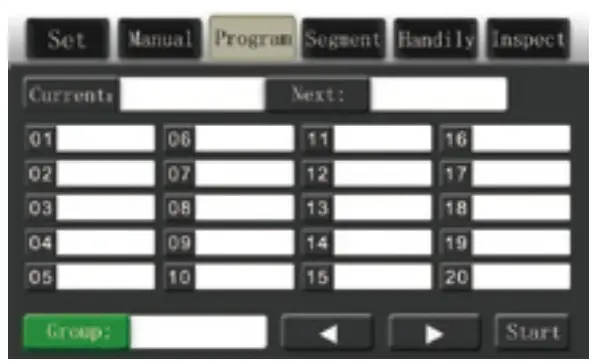
♦ If you want to automatically push the book after the cutting is completed, click “Auto Push the Book” and the button turns red, indicating it is open; otherwise, it is not open. - rogram controlled mode

♦ Click the programmed into automatic mode (pictured) program for 1-100 a total of 100 group, each group in 127, a total of 1200 knife size
♦Starting from 01, according to the size of serial number input to cut, then stored in the red button
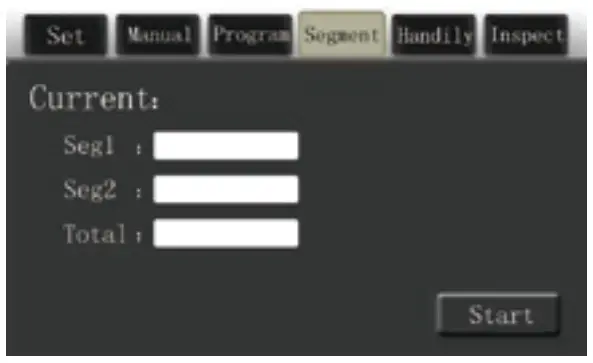
♦ According to the operation with both hands holding the cutting, completed the first knife cutting, pushing paper automatically pushed to the next dimension, and so on - Segmented mode
♦ Press the “segmentation” button on the touch screen to enter the segmented mode.
♦ Divide one for the length of the first cut, divide two for the length of the second cut, and the total size is the total length of the book.
♦ Input the data you want to cut as needed (as shown in thfigure), and click the red store button to cut 10mm for the first cut, 20mm for the second cut, and 10mm for the third cut - handily mode
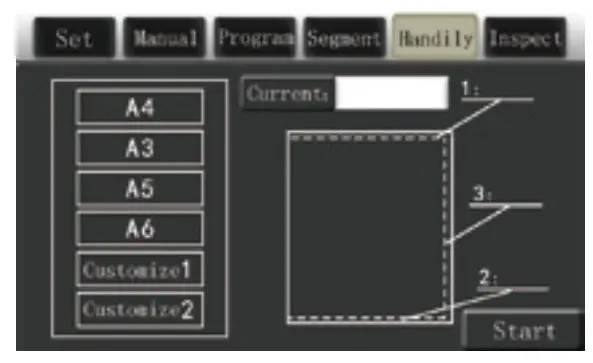
♦ Press the button on the touch screen is convenient cut into convenient book model
♦ According to cutting the size of book, enter the knife, the knife, on the side, the cutting size of the trilateral, press the red button to store, click the run button
♦ Hold down the cutting key with both hands at the same time to cut the book. Move the book to be cut according to the order of cutting the top first, then the bottom, and finally the side. After the cutting is finished, the book will be automatically finished.
Note: Each time you input data, you must add a digit of 0 to accurately express the data. For example, if you want to cut 460mm paper, you need to input 4600. Press “OK”, if 460 becomes 46mm.
Press ![]() on the screen to enter Settings mode (as shown)
on the screen to enter Settings mode (as shown)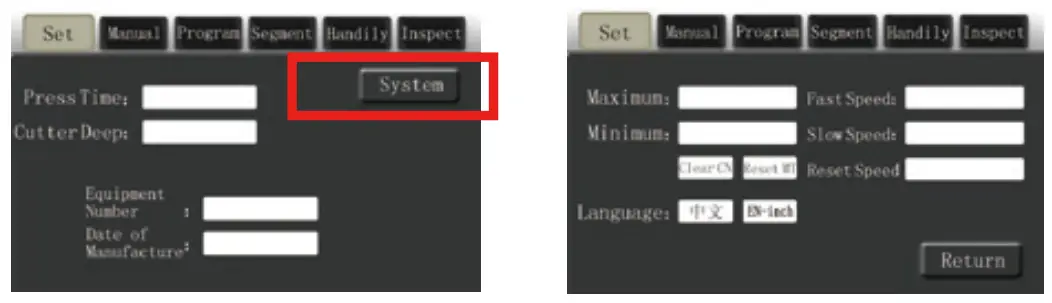
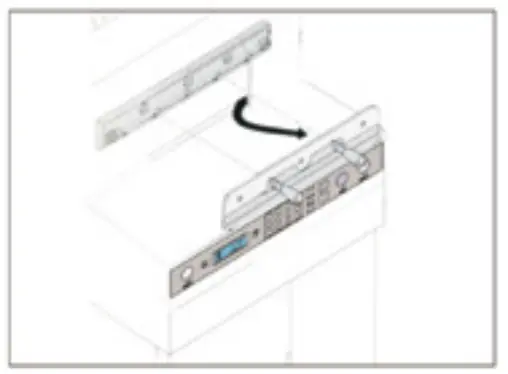
Parts description
| Model | 4908M |
| Max. Cutting Width(mm) | 490 |
| Min. Cutting Width(mm) | 40 |
| Cutting Thickness | 80 |
| Paper Pressing Structure | Automation |
| Paper Pushing Mode | Automation |
| Display mode | Seven inch touch screen |
| Safety Protection | Infrared photoelectric protection |
| Power Supply | 110V ±10% 60HZ 1.3 kw |
| Machine Size(H*D*W) | 768x960x1230mm |
| Net Weight | 160kg |
BASIC OPERATION AND ADJUSTMENT
Basic Operations
- Before starting the preparation work, check whether there are other items on the machine, tidy up clean;
- Plug the power plug into the socket of AC110V;
- Turn the electrical protection switch to “ON” position, and the cutting line of the knife light is bright, indicating that it enters the normal working state;
- Push into the cut paper or book, placed on the left side and the ruler level;
- Rotate push paper hand wheel, adjust to the size of the need to cut, the book and push paper baffle against the flat;
- Press the cutting button with both hands, and the paper press starts to press the paper automatically.
- If any size problem is found, release the cutting button with both hands and press the RESET button.
- The cutter and the paper press will return automatically.

Size ajusting
- If the cut size is not same as show size, please turn off the machine. Then tum on the machine and press the reset button.

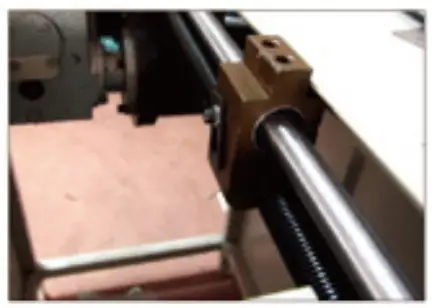
- If the problem is not solved by above operation. Please do more as following operation. Cut off the power, remove the back plate which is under pusher. Then check whether there is any things blocking in the driving screw rod.
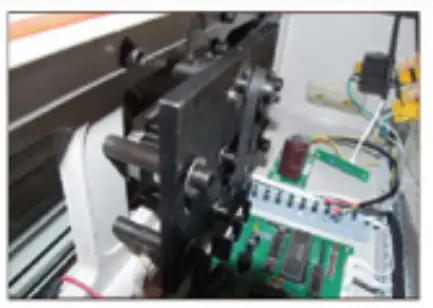
- Check whether stepping motor is normal, removie front cover plate, check whether synchronous pulley and synchronous belt is fixed normally.
- Adjust the support chip in the nut, move it forwards and backwards until the show size is matching with cut size. Then tighten the screw.
Cutting Blade Adjustment
- First of all, fine adjust the cutting blade depthT adjust depth range about 5mm)or change the side of cutting stick.

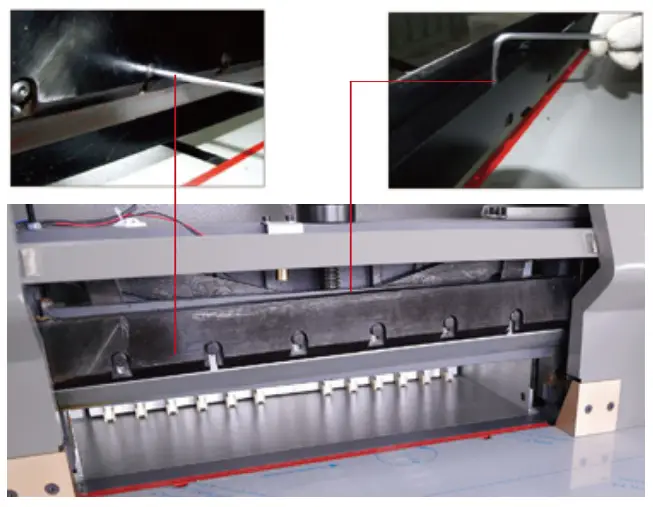
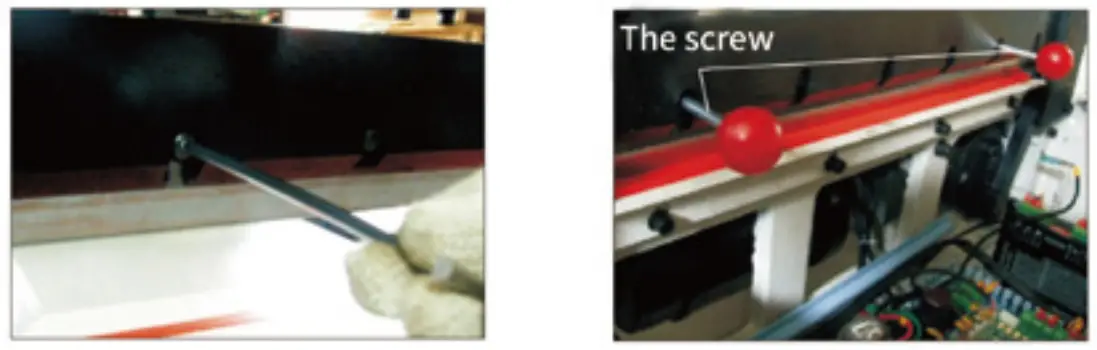
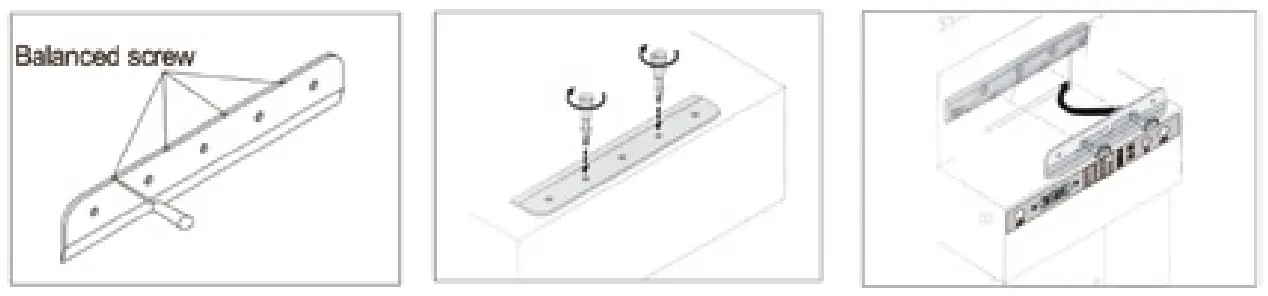
- If the last paper still can not be cut completely after fine adjustment the cutting blade depth. Adjust the balanced screw of cutting blade depth once more. Unscrew the screwsof two side from upper cover. Then remove the upper cover.

- Disassemble 7 retaining M6 screws on the blade camier which fixed blade.Adjust the depth of blade to make the paper cut completely until the blade cuts into the cutting stick about 0.3-0.5 mm;

- Tighten up the fasten screws on blade camier. Cover up and make it fasten. Choose one piece of paper to have a trial cut. If it can not be cut completely, you can re-adjust according to the above processes.
Blade replacement (please follow the steps carefully)
- Open the upper cover;
- Loosen and remove the locking screws with openings on the tool holder, screw the two disassembly screws into the opening screw holes in a clockwise direction and fix and lock them;

- Remove the other locking screws on the tool rest;

- Turn the two disassembly screws counterclockwise for half a circle and then take out the blade downward. Put the blade in the knife box with gloves or cloth to avoid scratches.

- Be more careful when taking a new blade out. The blade cutter point must not be to the body.
- When you install the blade, you should screw up the screw stems. Set the blade on the blade carrier, use screw strip to fasten and fix up, then adjust according to cutting depth adjustment method;

- Blade sharpening needs to be done in a professional factory, so that to ensure the quality.
- Note: Dull blade can’t cut paper correctly. Also, blade will become dull if it always cuts thick paper or pasteboard. If cutting quality and accuracy can’t meet required standard, the blade needs to be changed. Your work will go smoothly if you always have one replacement on hand.
- When you need to change blade, you must operate according to the steps of blade change instruction.
Note: To avoid any injury, you must be the most careful when you change the blade.
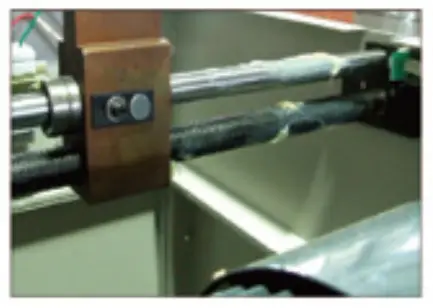
Cutting stick adjustment
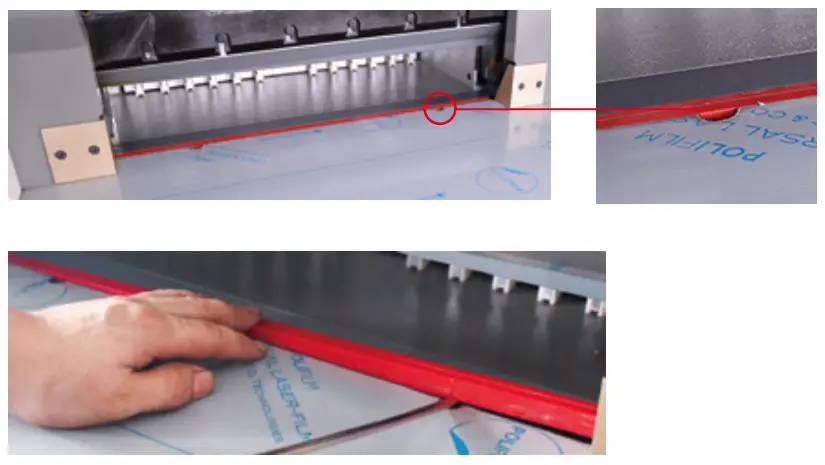
- One cutting stick can be used with 4 surfaces; and each surface can be cut in two times.
- One time can be cut many cuts. When slash on the shim is too deep, you should adjust or change cutting stick;
- Knife shim can be took out by screw, and should be assembled onto the cutting desk flatly when it needs to be set back;
- Knife shim should lean to the left side, then re-push the front brace plate;
Note: when the blade is replaced, the blade itself must also be adjusted. If the blade eat too deep, not only “easy to damage the blade, but also make the blade accelerated wear.
LUBRICATION AND MAINTENANCE
Lubrication
The machine should open the cover plate, check and clean, tighten the parts and lubricate the moving parts once a month.Please be careful to avoid lubricating oil on electrical circuits or electronic components when refueling.To avoid breakdowns.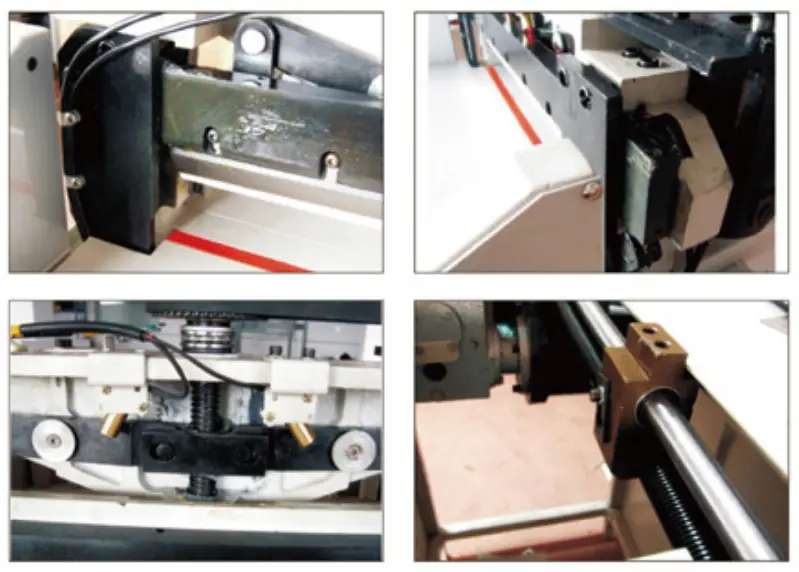
Maintenance
- When the machine is running, foreign objects are forbidden to put on the machine, because if hard objects come under the blade, the blade will be damaged. There should be no staple pin in the book, which is coming to the cutting area, to avoid damaging the blade.
- After everyday work, you should wipe the machine, remove junk, wax the blade to protect it, and cut the power.
FIGURE
COMMON ERRORAND ELIMINATION
| Error | Phenomena | Elimination method |
| No power source display | Indicating light is off |
|
| Incomplete cutting | Paper can’t be cut completely |
|
| Too deep cutting | Slash on the knife strip it too deep | The knife position is too low. Revolve the screw of adjusting blade depth on the blade upward to have the knife position higher. |
| Dull blade | Paper can’t be cut completely or cutting becomes difficult |
|
| Capacitor of electrical motor damaged | The knife work up and down slowly or powerlessly | Change Capacitor |
| Irregular papercutting or too big difference | The cut paper has one side wide and the other side narrow, or has big deviation on dimensions | Loose tighten screw, and use a ruler to adjust the angle between measuring scale and paper pushing plate |
| The knife can’t reset or works up and down continuously | The button is invalid. The blade works up and down without stopping |
|


