SIP DECT Phone
SSP-8210-SMK / SSP-8110-SMK;
SMT-8210-SMK / SMT-8110-SMK;
SSP-8210-SMKG / SSP-8110-SMKG;
SMT-8210-SMKG / SMT-8110-SMKG
QIG
V 1.02
For single Ethernet models
1 Overview
This phone is a full-feature telephone that provides voice communication. Read this QIG carefully to learn how to operate this product and take advantage of its features.
Package Contents
When unpacking the phone, ensure all the following items are present and undamaged. If anything appears to be missing or broken, contact your dealer for a replacement.
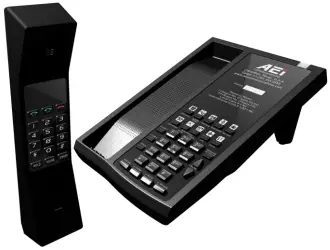
- Base Unit
- Cordless Handset
- Stand
- Battery
- AC Adaptor
- RJ-45 Cable
- Quick Installation Guide (This document)
2 Product Description
The following contains important information to help you familiarize with the functions of the VoIP phone.
Front View
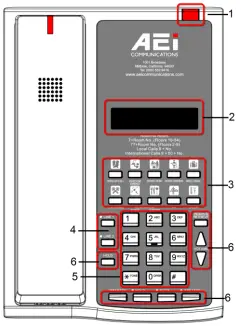
1. Base unit keys
| Name | Description | |
| 1 | Message waiting indicator | To indicate an incoming call or unread messages. |
| 2 | Display screen | To display calls and status information. |
| 3 | Speed dial keys | Press to dial the preset number. |
| 4 | LINE 1 / LINE 2 | To indicate a line been used as the following status: – Idle: No LED indication. – Pre-dialing a call: Green LED. – In call: Red LED. – In on-hold call: Blinking red LED. |
| 5 | Alphanumerical keys | Press these keys to enter phone numbers and texts. |
| 6 | Function keys | |
| HOLD | Press to put an active call on hold. | |
| REDIAL | Press to call the last number dialed. | |
| CONF | Press to activate the three-way conference call. | |
| MUTE | Press to mute a call. | |
| SPEAKER | Press to activate the speakerphone for hands free conversations. | |
| MESSAGE | Press to retrieve voice messages. | |
| VOLUME | Press to increase or decrease the volume of the ringer tone or speakerphone. | |
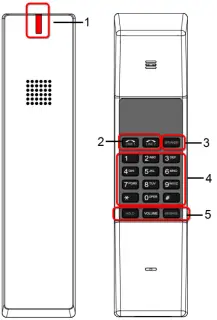
2 Handset keys
| Name | Description | |
| 1 | Message waiting indicator | To indicate an incoming call or unread messages. |
| 2 | LINE 1 / LINE 2 | To indicate a line been used as the following status: – Idle: No LED indication. – In call: Red LED. – In on-hold call: Blinking red LED. |
| 3 | SPEAKER | Press to activate the speakerphone for hands free conversations. |
| 4 | Alphanumerical keys | Press these keys to enter phone numbers and texts. |
| 5 | Function keys | |
| MESSAGE | Press to retrieve voice messages. | |
| HOLD | Press to put an active call on hold. | |
| VOLUME | Press to increase or decrease the volume of the ringer tone, handset, or speakerphone. | |
Back View
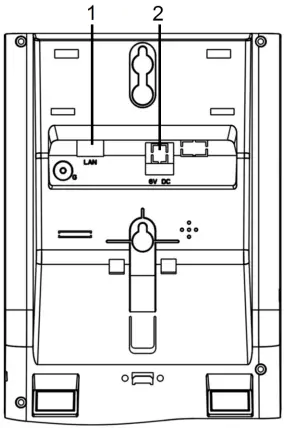
NO. | Name | Description |
1 | LAN port | Connects to HUB, ADSL, or Switch(PSE) |
2 | DC 6V Power jack | Connects to AC power adapter. (Optional. While base unit is not powered via a PSE) |
3 | Handset jack | Connects to handset. |
Connecting the Phone
The following illustration shows how to connect the power and LAN ports of VoIP phone.
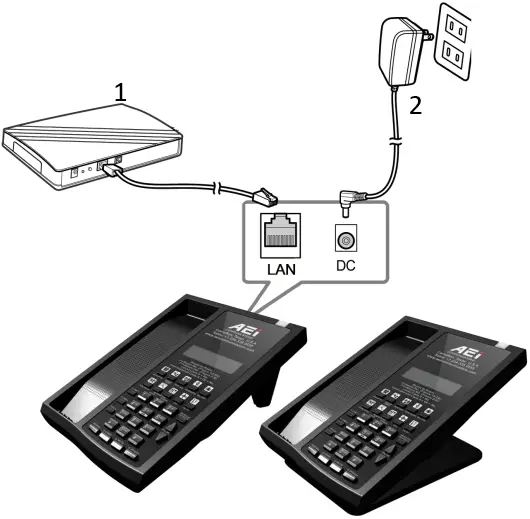
- PSE
- Power Outlet
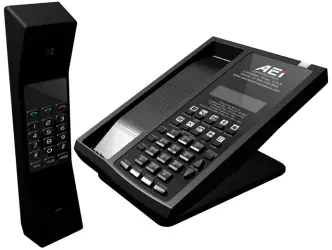
The following illustration shows how to install the phone and stand.
- Stand
- Base Unit
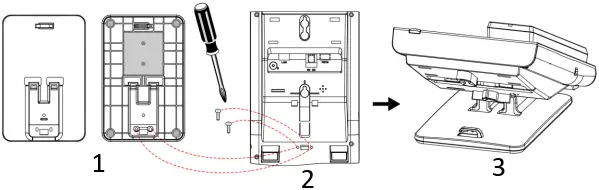
- Stand (Bottom Side face upwards)
- Base Unit
- Desktop & Stand assembled View
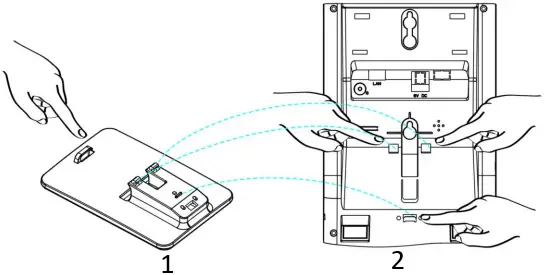
The following illustration shows how to install the handset and battery.
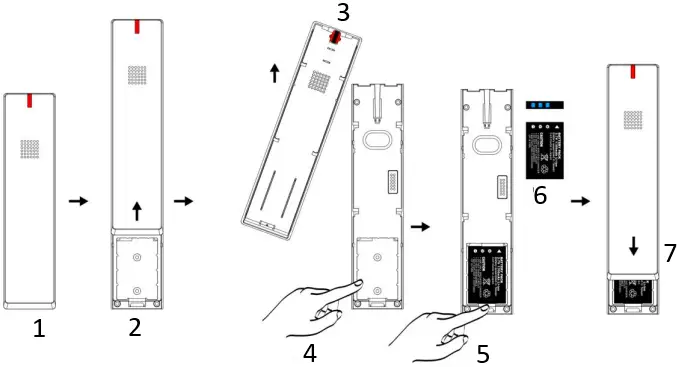
- HIS Unit
- H/S Top Cover Push upwards
- Remove H/S Top Cover away
- Battery Room
- Installed the Battery
- Battery
- H/S Top Cover Push downwards
3 Operation
Answering a Call
An incoming call is indicated by a ringing tone and a flashing indicator at the top of both handset and base units. You can answer the call by doing one of the followings:
- Pick up the handset to answer the call.
- Press the Line (Line1/Line2) key on the base or handset to answer the call.
Making a Call
Dialing with the Keypad
- Enter the telephone number with the alphanumerical keypad.
- After entering the number you want to call, press the # key to force dialing or wait for 4 seconds before the number is dialed automatically.
Using the Speed dial keys
You can use the 10 pre-assigned speed dial hotkeys, to configure the most commonly dialed numbers. Use the function to dial a number quickly, instead of keying in a complete number.
To call a number using speed dialing, follow the steps below:
- Press the speed dial hotkey that has been pre-assigned to the phone number and the call will start automatically.
Call Options
While a call is in progress, a number of additional options are available.
Using the Speaker Phone
For hands free operation, you can use the built-in speaker to talk on the phone. To use the speakerphone, follow the steps below:
- While talking on the phone, press the SPEAKER key on the phone to enable the Speakerphone function.
- Press SPEAKER key again to terminate the call.
Putting a Call on Hold
You may want to put a call on hold temporarily while doing some work or attending to a second incoming or outgoing call. To put a call on hold, do one of the following:
- Press the HOLD key on the phone to put the call on hold.
- When you receive a second call, press the next available LINE key to attend to the new call, and the first call will be put on hold automatically.
Charging the Handset Battery
You would need to charge the handset battery before using the handset.
- Install the battery into the handset.
- Place the handset onto the base unit and base unit will start to charge the handset automatically.
- The charging indicator lights up in red during charging progress. The LED goes off after the handset battery is fully charged.
Checking Voice Messages
If the message waiting indicator at top of handset or base unit lights up in red, it indicates that there are one or more new messages in voicemail box.
- Press the MESSAGE key on the phone to retrieve voice messages.
(An external ITSP or PBX must support voice message feature. And you need to set a voice message code before using the voice mail feature.)
5 Support
To configure through the web browser, do the following:
- Ensure the phone is powered up and connected to a DCHP network.
- Press MUTE*112*113#, the IP address is displayed on the LCD screen.
- Open your browser (such as Internet Explorer, Firefox, etc.) and type in the web address of the phone. For example, if the IP address you obtain in step 4 above is 192.168.1.2, enter the web address: http://192.168.1.2:8000.
- When the Web login front page is displayed. Enter the user name and the password and click Login. The administrator’s user name and password are “admin” and “1234” respectively.
For technological support, please email to [email protected].


