thermaltake Pacific TOUGH CLM360 DDC Hard Collapsible Tube Water Cooling Kit Instruction Manual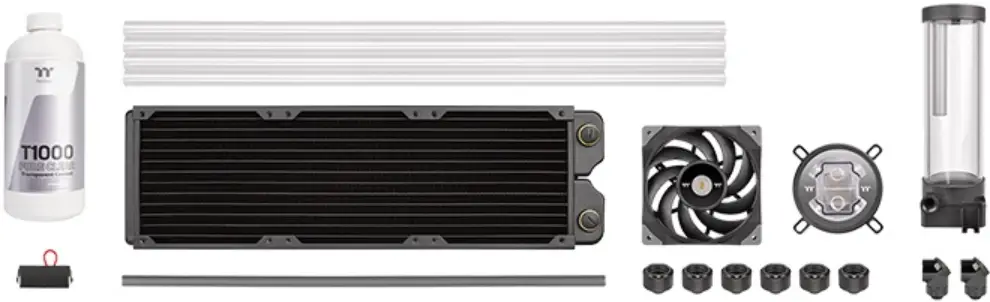
This product is intended for installation only by expert users. Please consult with a qualified technician for installation. Improper installation may result in damage to your equipment. Before you start using this product please follow these basic guidelines:
- Please carefully read the manual before beginning the installation process !
- It is strongly recommended to use market proven pre-mix coolant, such as Thermaltake Coolant.
- Please remove your graphics card from your motherboard to ensure the safest process and in order to prevent any possible damages to your CPU and motherboard.
- DO NOT USE any kind of alcohol or alcohol derivatives with this reservoir or the acrylic tube may crack and fail ! Do not clean it using alcohol either !

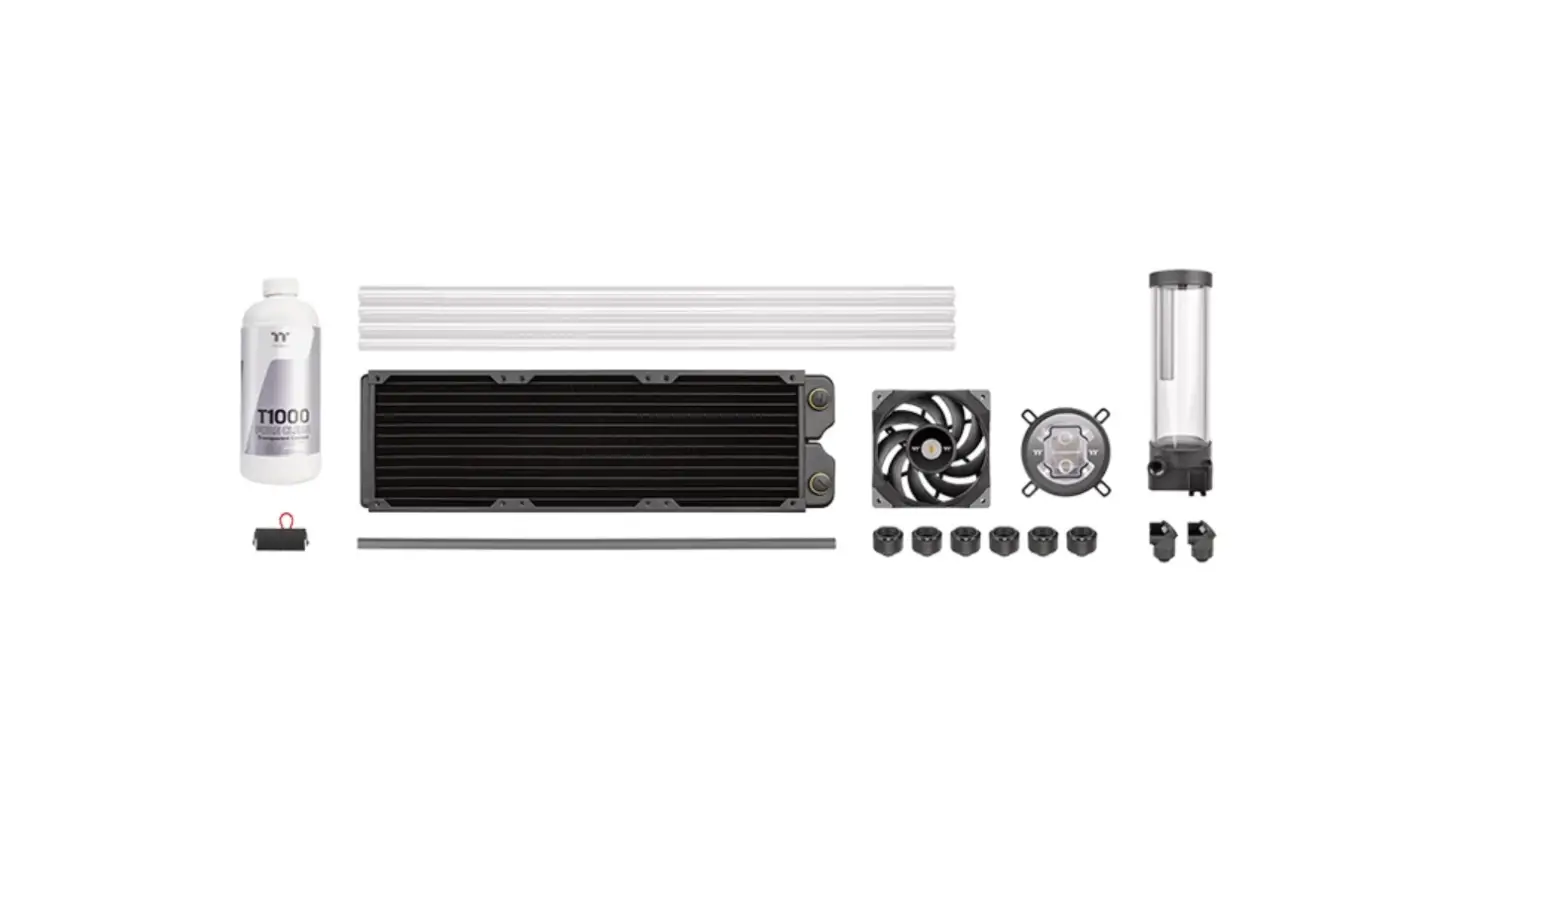
Fan & Radiator


CPU Water Block Installation Guide
- This product is intended for installation only by expert users. Please consult with a qualified technician for installation. Improper installation may result in damage to your equipment. Before you start using this product please follow these basic guidelines:
- Please carefully read through the instruction manual before beginning the installation process.
- Please remove your graphics card from your motherboard to insure the safest process and in order to prevent any possible damages to your CPU and motherboard.
- It is strongly recommended to use market proven pre-mix coolant, such as Thermaltake Coolant Serie
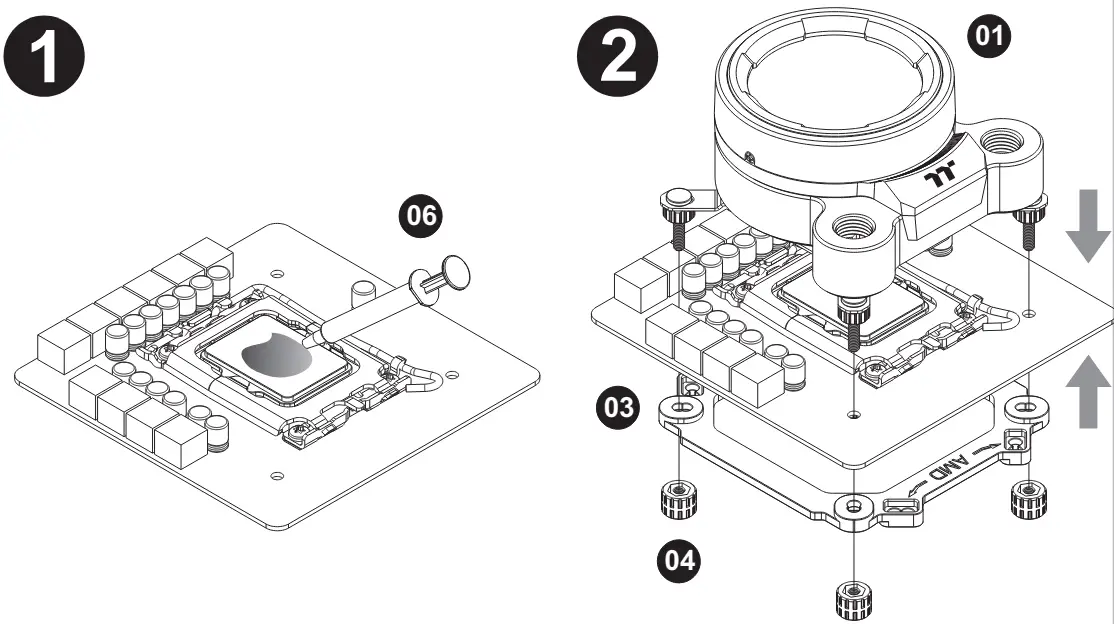
b)LGA1200/1156/1155/1151/1150
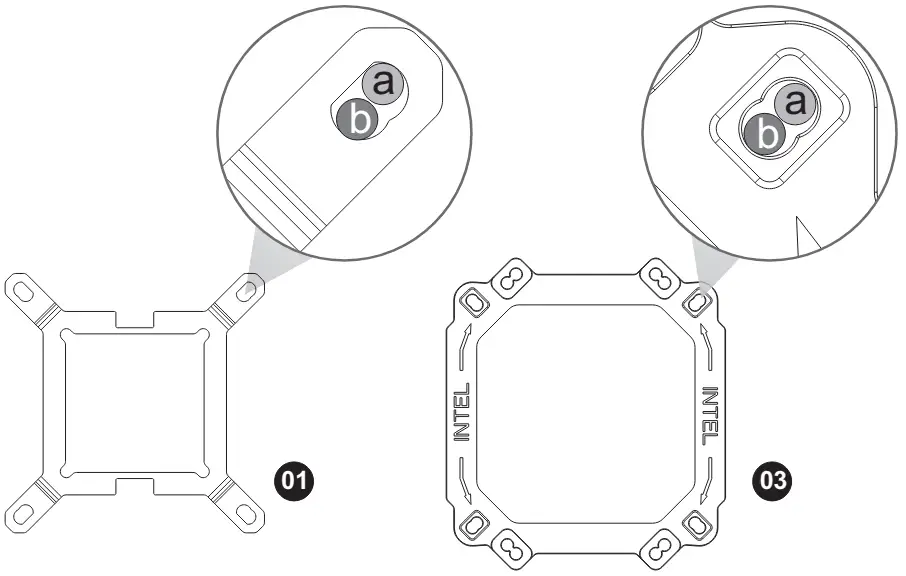
Intel LGA 1700
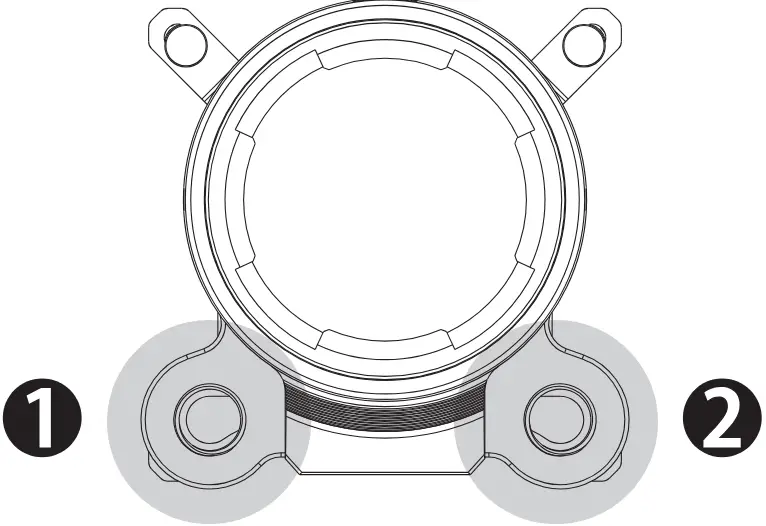
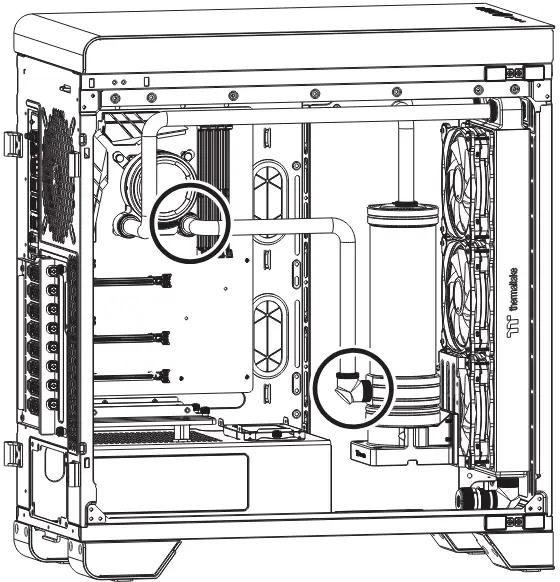
- Out : Circle 1 is designed for liquid outlet
- In : Circle 2 is designed for liquid inlet/fill 1
MB SYNC Installation Guide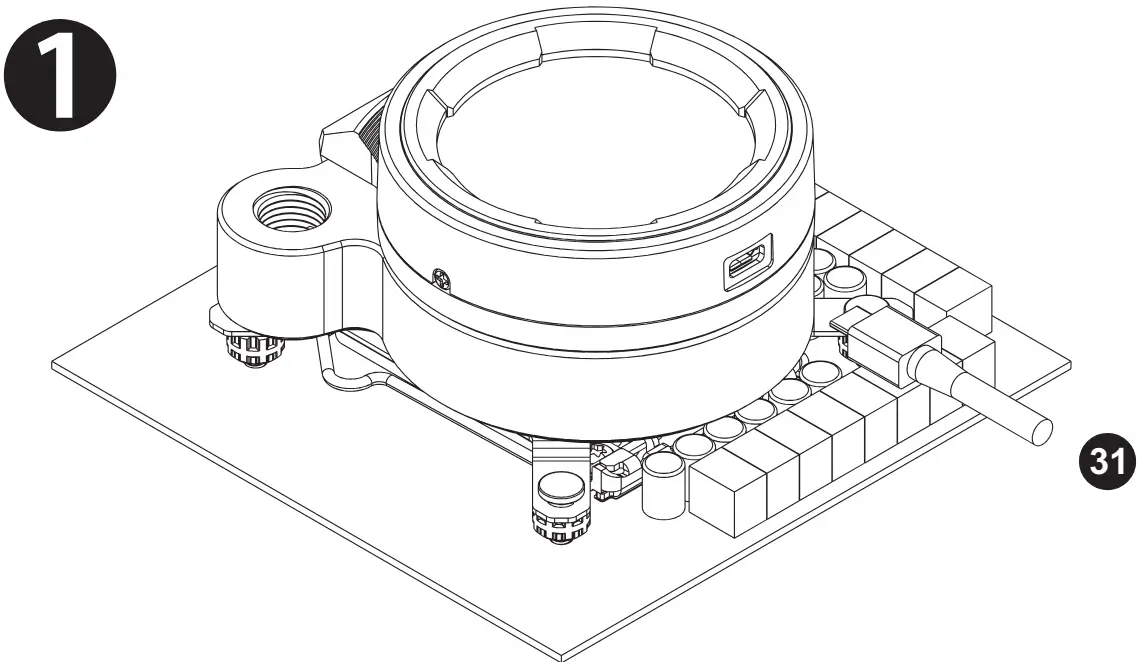
![]() CAUTION
CAUTION
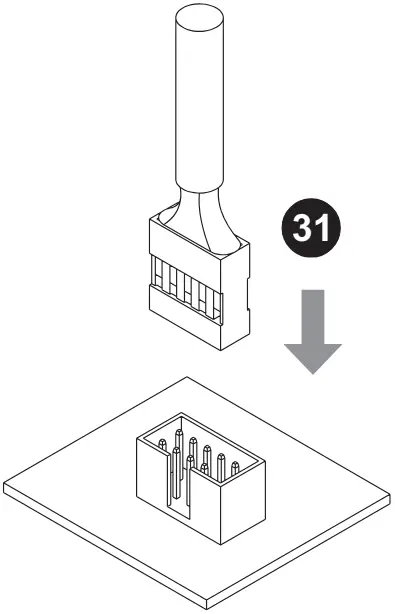
To control the LCD display by TT RGB PLUS Software, Please connect the water block and motherboard with cable G.
This device complies with Part 15 of the FCC Rules. Operation is subject to the following two conditions:
- this device may not cause harmful interference, and
- this device must accept any interference received, including interference that may cause undesired operation.
Installation Guide
CAUTIONS:
- Make sure there is enough space when you start to set up the LCS product
- Please use the wrench to install/ uninstall the base parts during all the installation
Fitting
Dismantle the fitting by using the wrench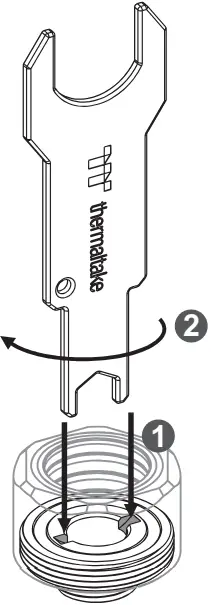
Nut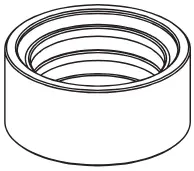
O-Ring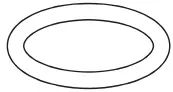
Packing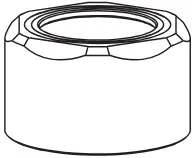
Base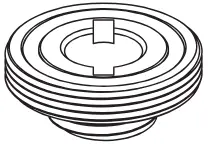
Radiator
To ensure a clean loop, flush and rinse your radiators and water blocks with distilled water before using.
Make sure the fittings are screwed securely when placing them onto the radiator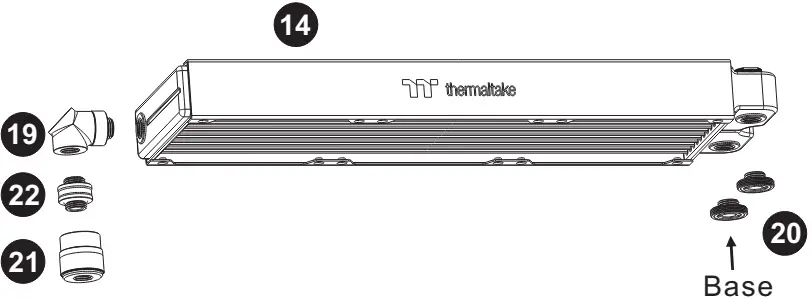
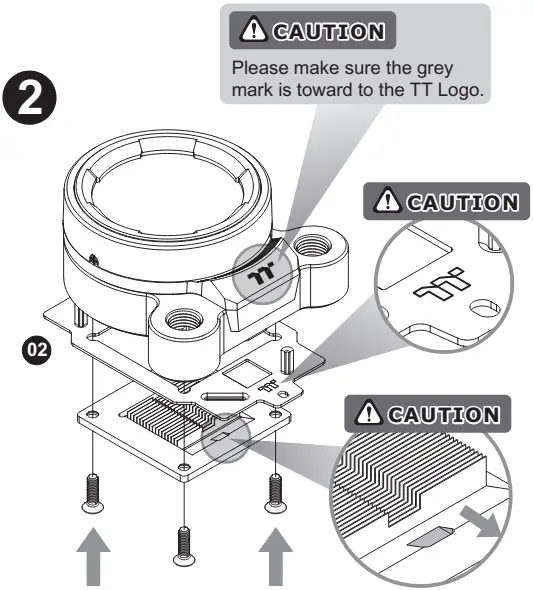
Water Block
Attach the fittings to the inlet and outlet of the water block.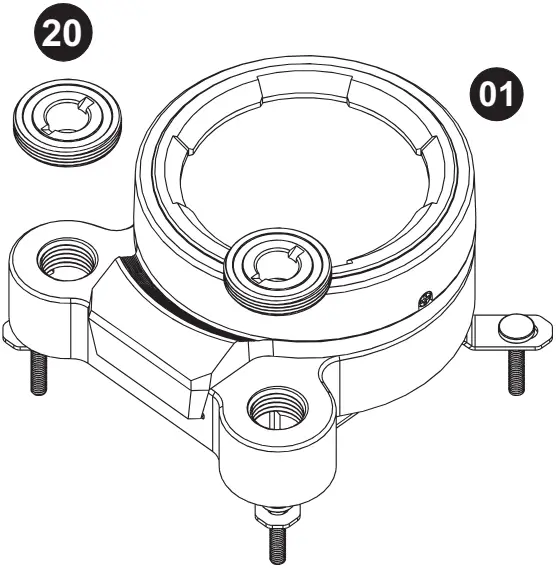
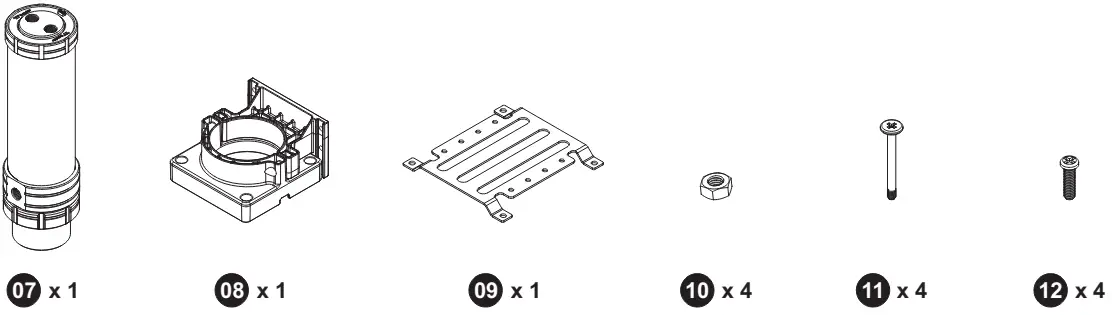
Pump / Reservoir
Choose the proper way to mount the pump and reservoir by referring to the manual (suggest vertical placement)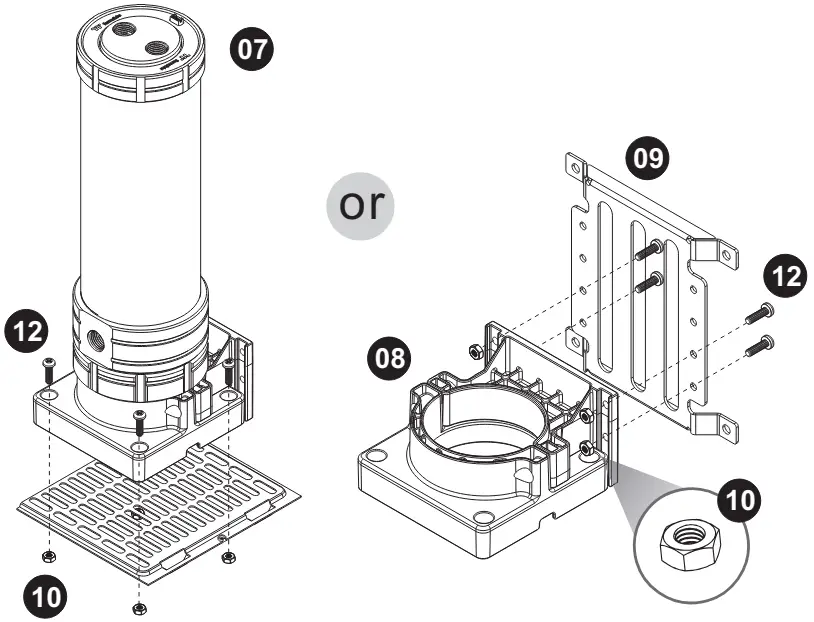
Attach fittings onto the pump and reservoir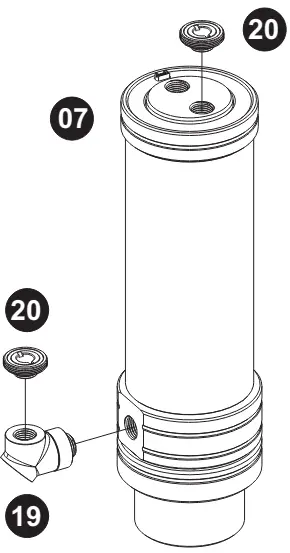
Case Fan
Attach the fans to the radiator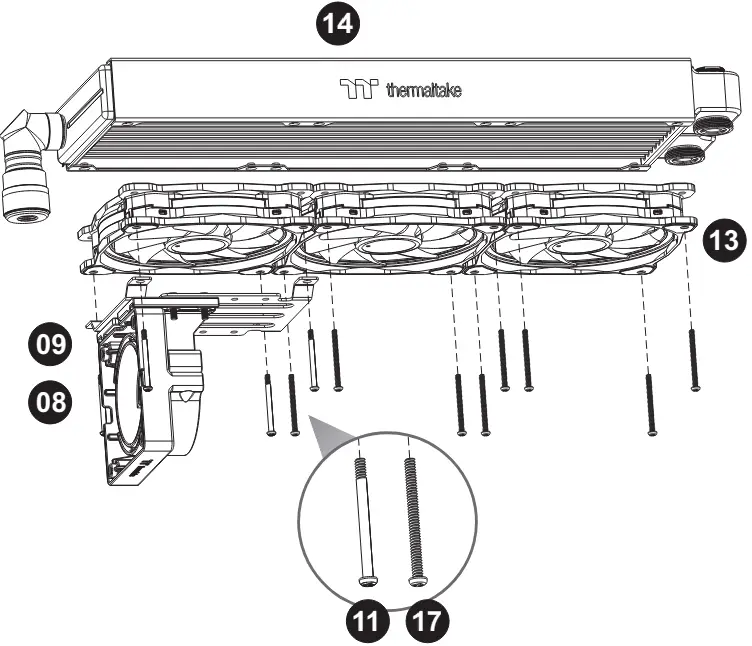
Installation Walkthrough
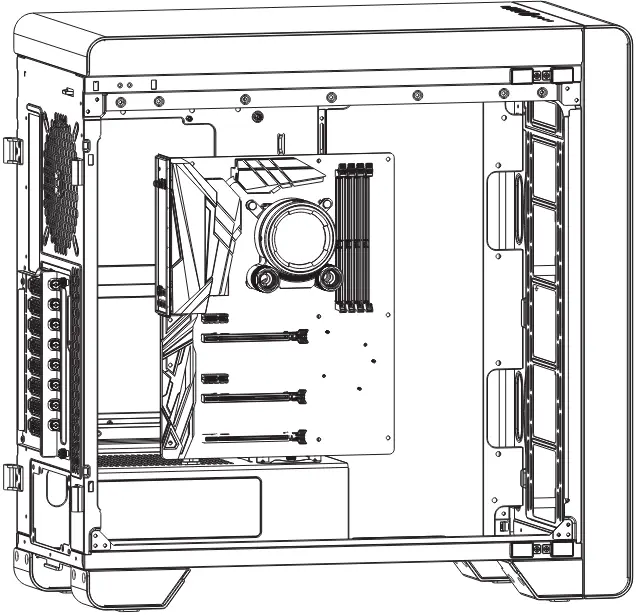
- Place the motherboard into the case.

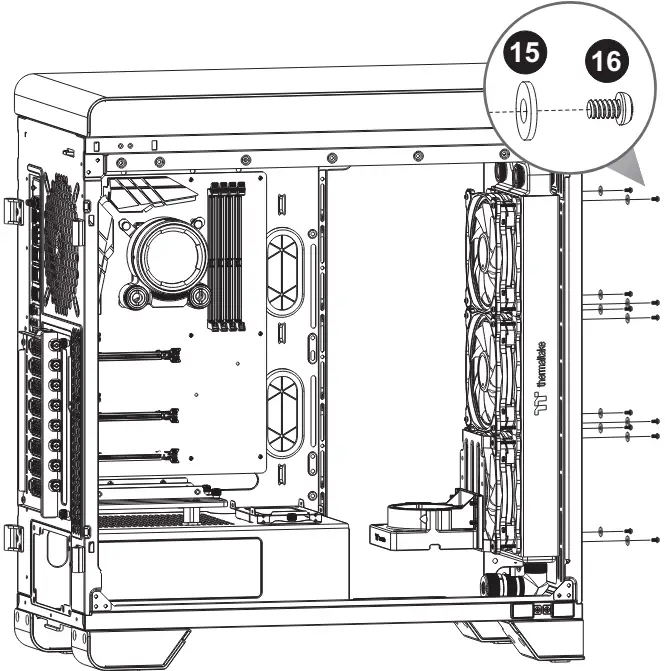
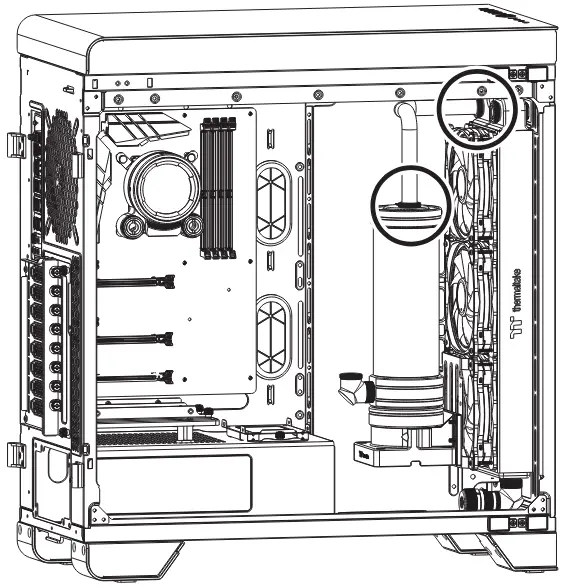
- Position the radiator.

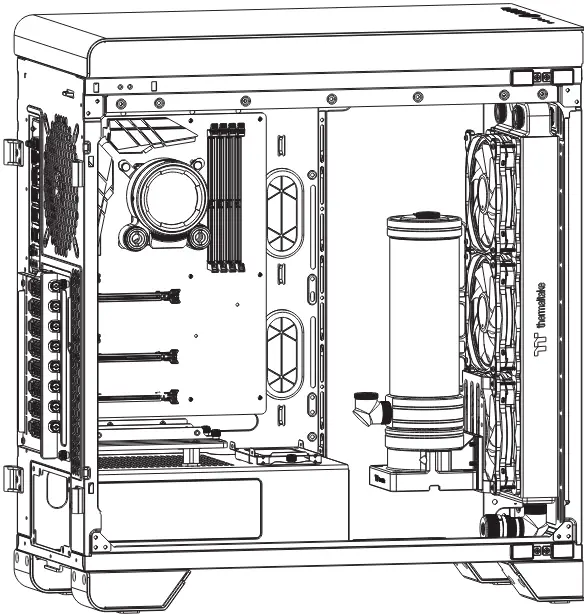
- Attach the pump and reservoir into 3 the chosen locations. 1 2

Cutting and Attaching the Tubing
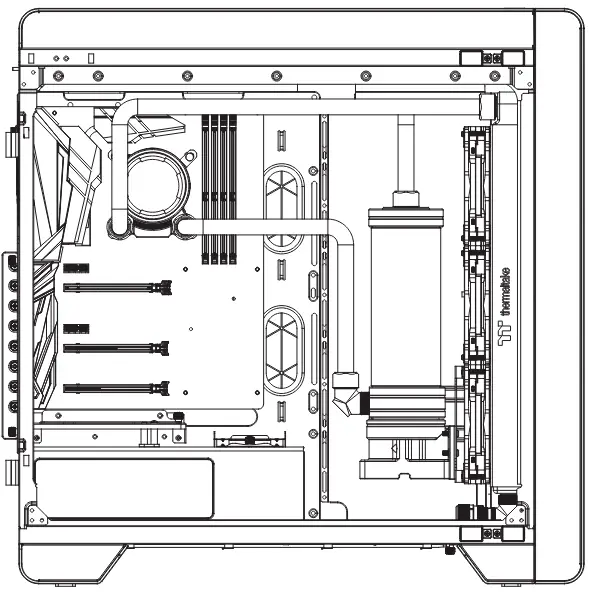
- Measure the tube length based on the base part of the fitting, and make (bend) the tubes. The loop order : Pump Outlet > Water Block

- Measure the tube length based on the base part of the fitting, and make (bend) the tubes. The loop order : Water Block > Radiator
- Measure the tube length based on the base part of the fitting, and make (bend) the tubes. The loop order : Radiator > Reservoir inlet

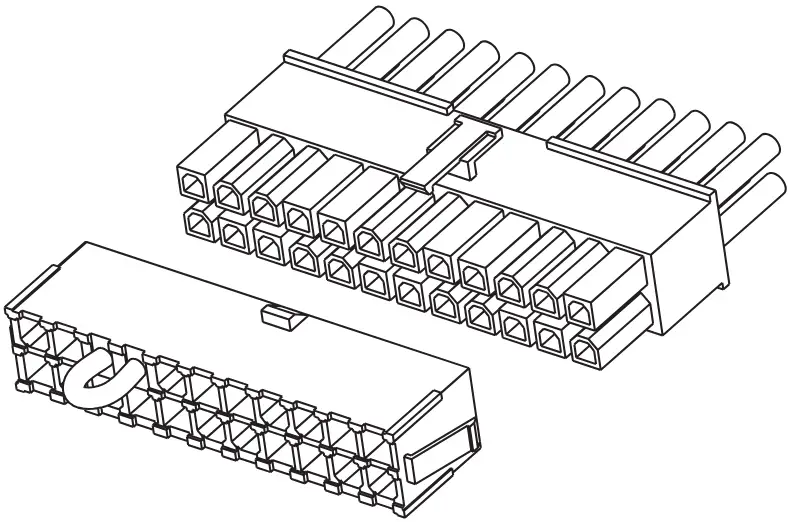
- Fit the C-Pro fitting to the tube according to the order in the picture below, Install the tubes and tight the fitting cap


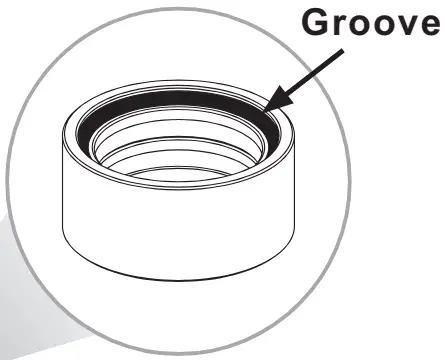
 CAUTION
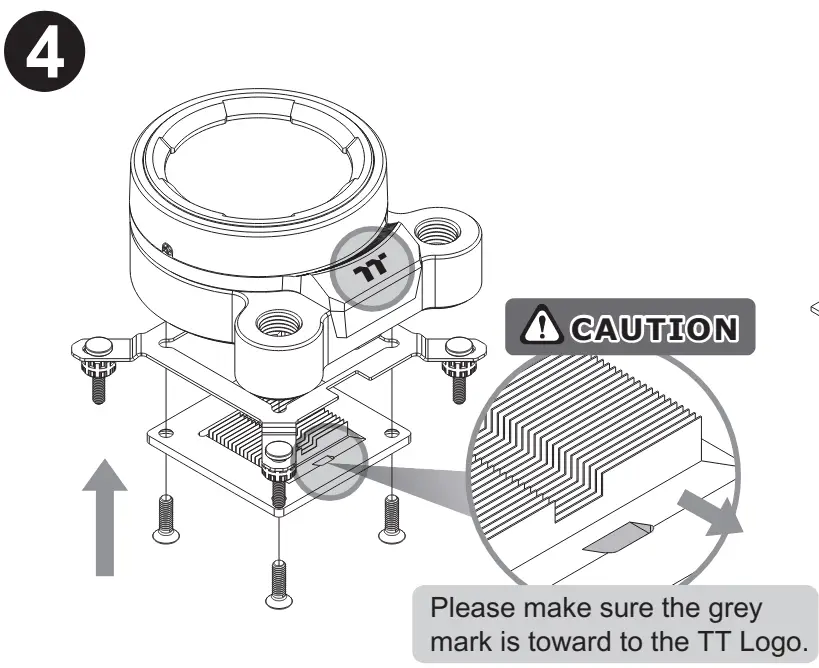
The O-ring and the packing with a groove on the inside diameter must always be installed towards the top of the compression nut - Finished


Filling the System
- Before filling the system, please make sure that each fitting as well as unused ports are completely sealed.
- If there is any case of leaking, immediately turn off the power and clean the leak
- If there is any related electronic parts stained on liquid coolant, make sure to completely clean and dry the components. And then make sure they all work well.
- After switching off the power supply, connect the PSU power cord and product cables.

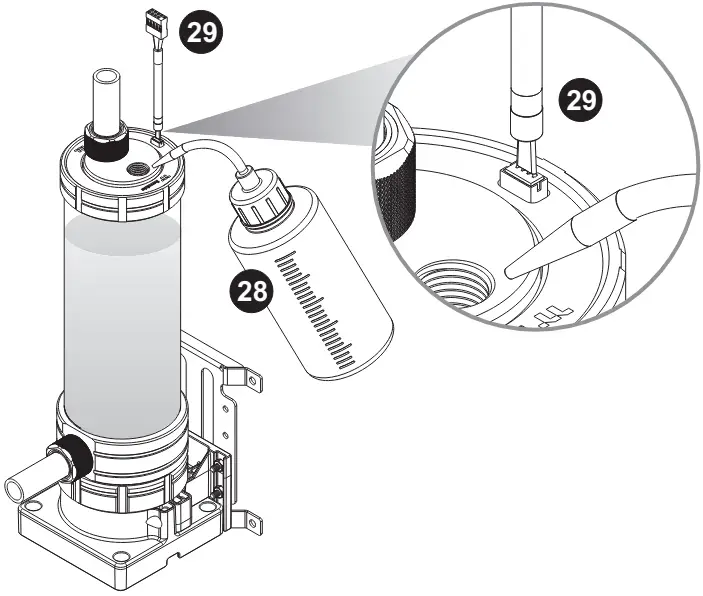
- Use the refill bottle to fill coolant into the reservoir After adding the recommended coolant, remember to fill the reservoir to only 80% and leave the fill port cap off. This will help stabilize your internal loop pressure

Caution! Keep the reservoir cap dry! Do not allow coolant to access the wire and the LED module - Place your PSU outside of the case and attach it to the pumps 4pin molex connector, turn on the power of PSU and make the rest of the system fills up.
- It is strongly recommended to use market proven pre-mix coolant, such as Thermaltake Coolant 1000. It offers great performance while preventing the entire cooling system – copper, brass, nickel, aluminum, and steel – from corrosion.
- Fill the reservoir with coolant and cycle the power on and off several times while the pump pushing the coolant into the loop.
- DO NOT let the pump run dry, when there is no liquid entering the pump turn off your power immediately
- Fill the reservoir to the top as it will prevent air from going into the pump
- If necessary tilt the system slightly from side to side to bleed the air out of the loop.
- Place some paper towels under fittings and joining points to test for leaks.
- Run the loop with the fill port open for about 24 hours to completely bleed the air out of the loop
Installation Guide

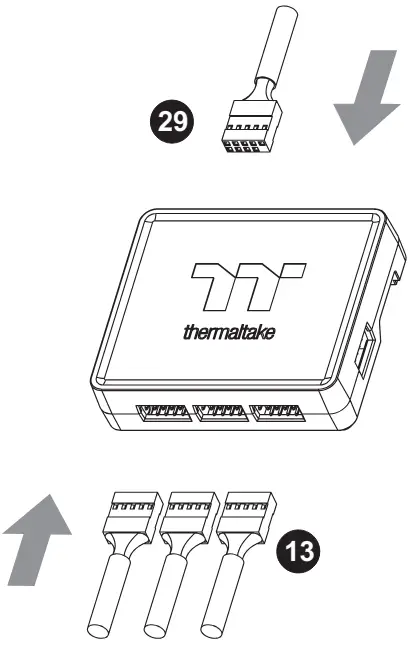
Connect the plug into the port in numerical order, start with plug one.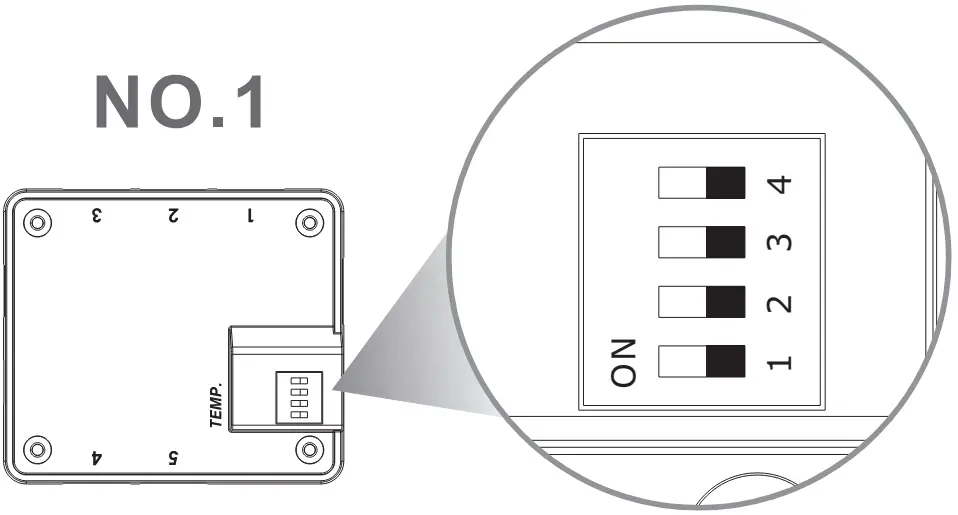
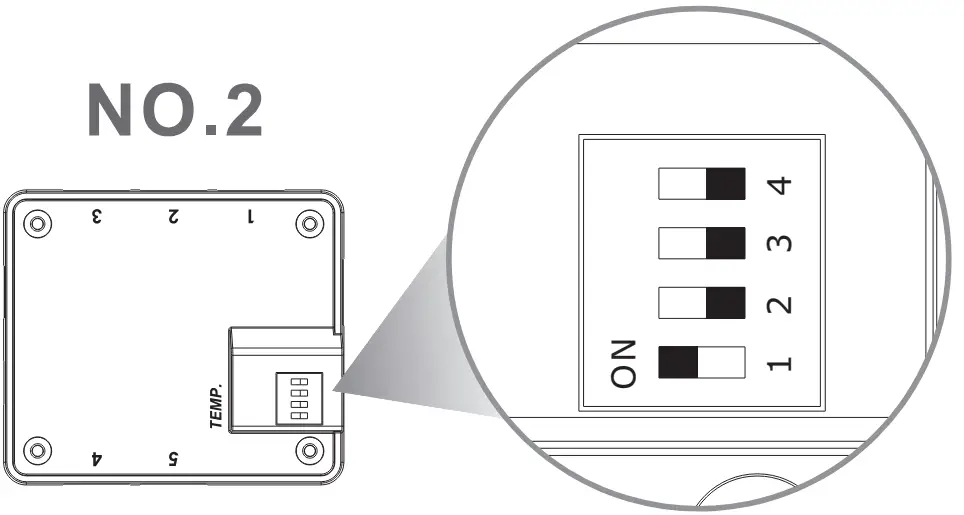
Set the DIP switch on the back side of the controller to assign the number of the controller.
Connect the controller cable onto the mainboard (USB 2.0 9 pin) and controller.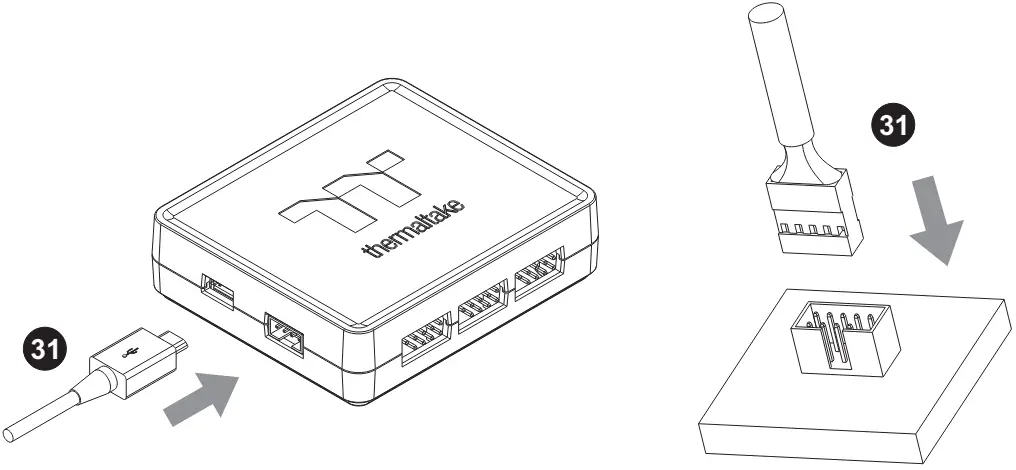
Connect the power cable to the 4pin Molex connecter and controller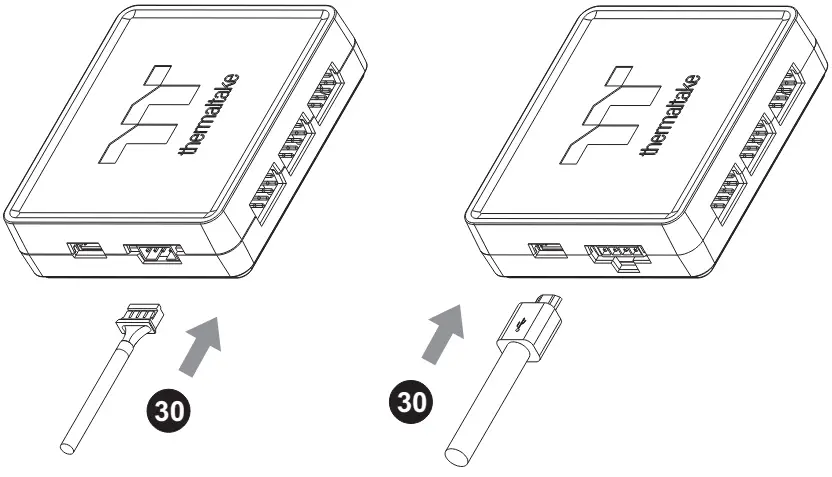
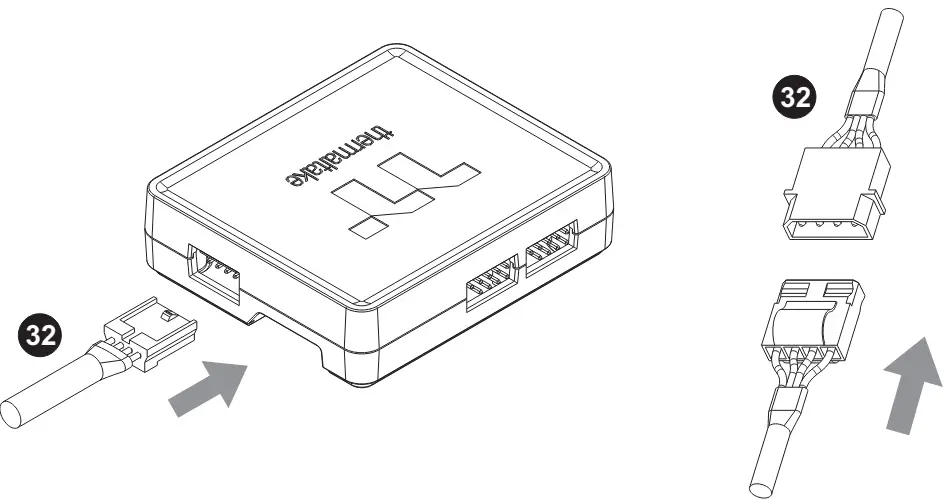
Connect the Bridge Cable to the Controller
TT RGB Plus Software control interface
OS compatibility: Windows 10 & Windows 11
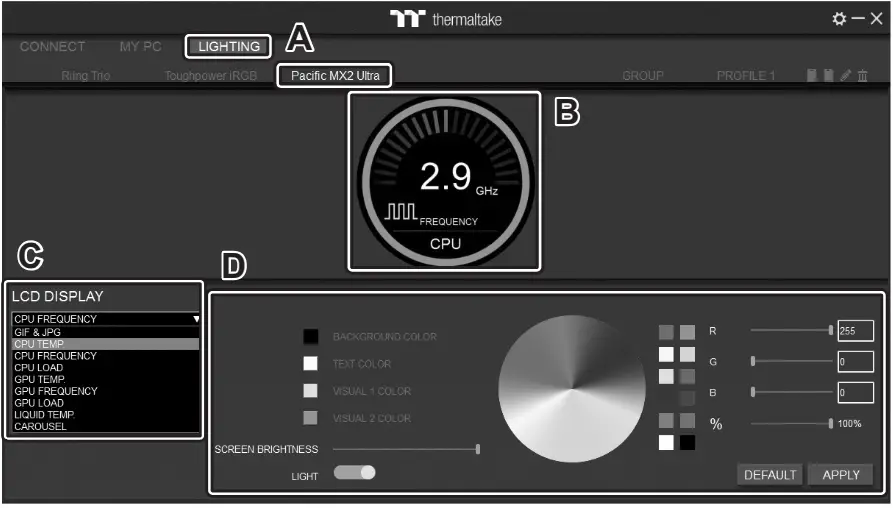
B. Preset the CPU water block LCD.
C. LCD DISPLAY function list.
- GIF & JPG (Upload picture to LCD display)
- CPU TEMP.
- CPU CLOCK SPEED
- CPU LOAD
- GPU TEMP.
- GPU CLOCK SPEED
- GPU LOAD
- LIQUID TEMP.
- CAROSUEL (Switches between CPU/GPU/Liquid information)
D. LCD visual effect settings. Set LCD display background, text and visual color, screen brightness or turn off LCD screen.
GIF & JPG
A. Select “GIF & JPG” form “LCD DISPLAY”. You can upload a GIF or JPG file to show the picture on the LCD screen. (Max size: 20MB)
B. Set the LCD display text information, speed and brightness, or turn off LCD screen.
C. Click “UPLOAD” to upload the picture. (GIF and JPG files only)
SETTINGS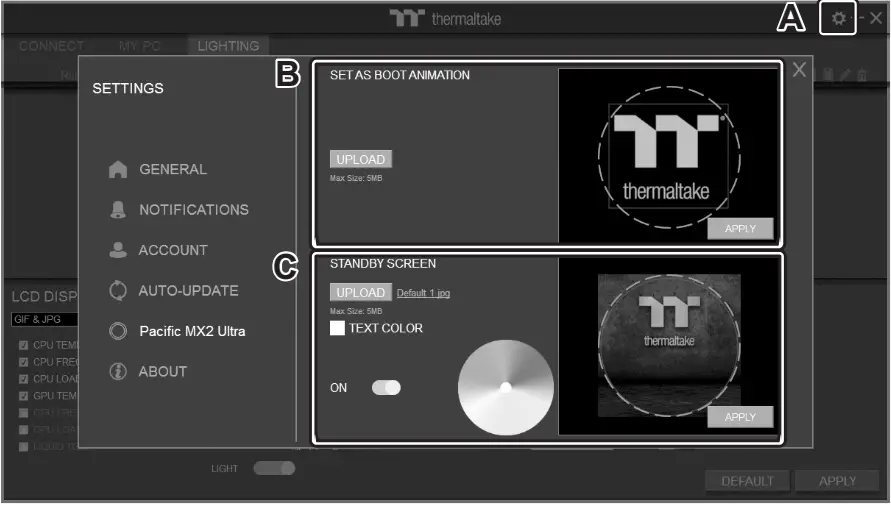
A. Click the gear icon on the upper right corner to enter the “SETTINGS” menu.
B. Upload the picture to set as LCD boot animation. (GIF only, Max size: 5MB)
C. Upload the picture to set as LCD standby screen. (JPG only, Max size: 5MB)
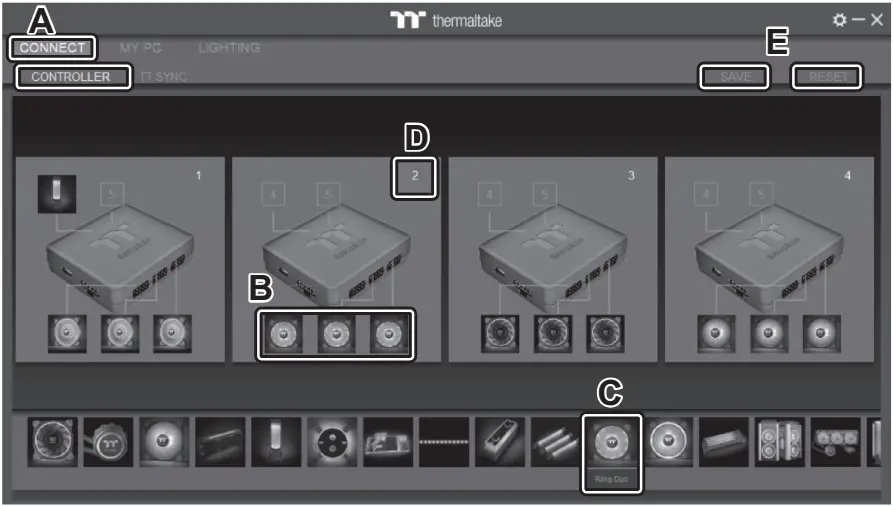
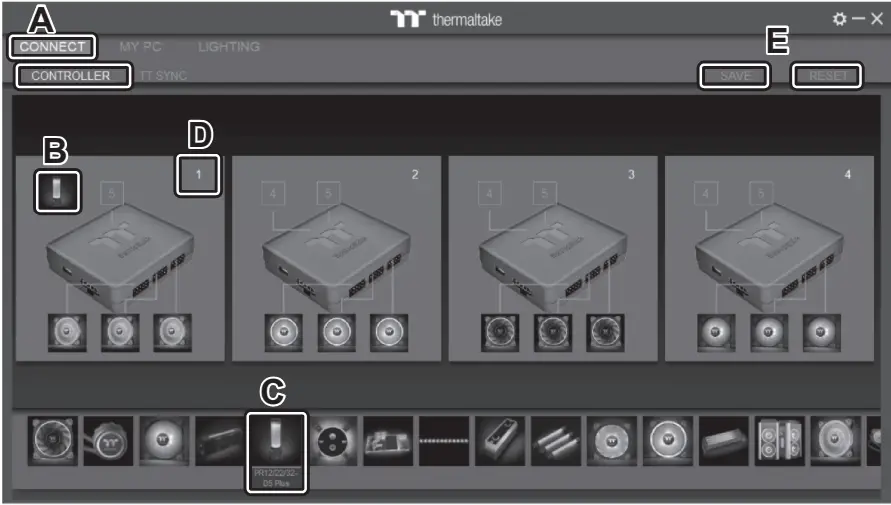
A. After installation of TT RGB PLUS, you can see several controllers installed on the “CONNECT” page.
B. Click the controller port to make the Riing Duo LEDs glow red lighting to pair.
C. Drag & drop to pair the Riing Duo Plus with controller.
D. Show the controller DIP number.
E. Save and reset controller pairing settings.
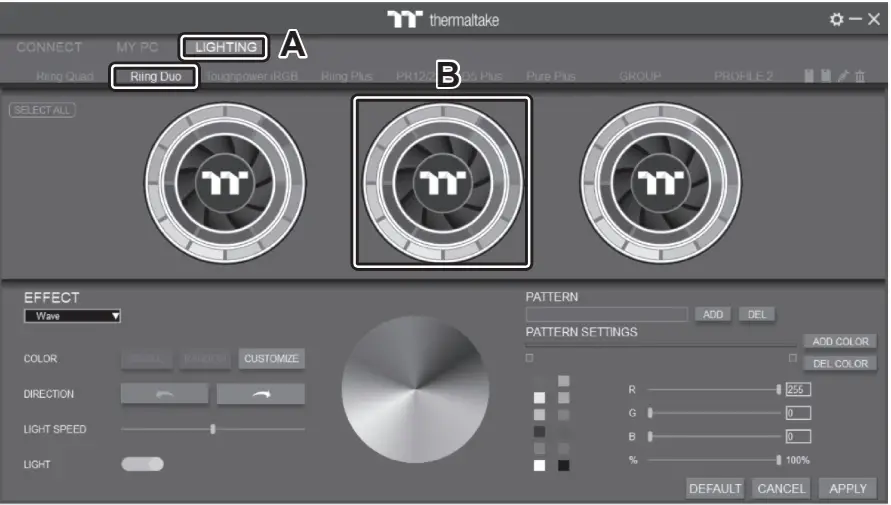
A. You can see Riing Duo on “LIGHTING” page.
B. Preview and edit Riing Duo LEDs lighting effect.
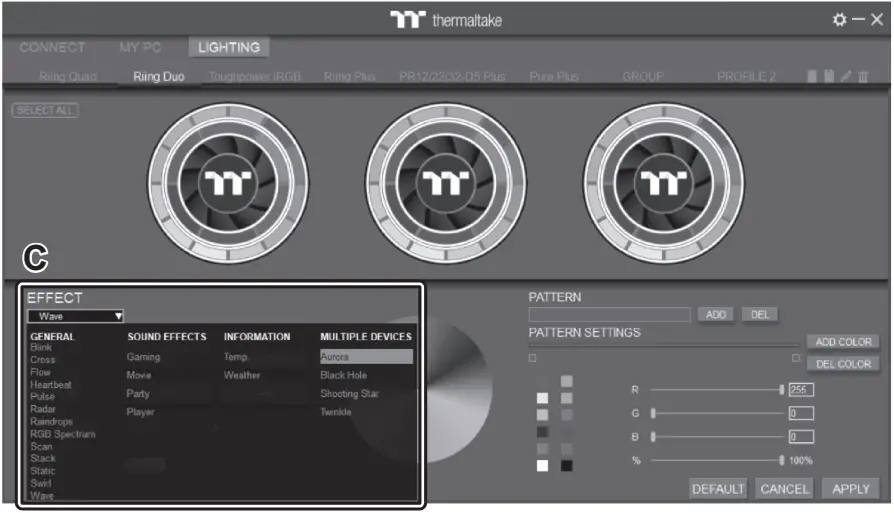
C. TT RGB PLUS provides 23 kinds of lighting effects.
A. After installation of TT RGB PLUS, you can see several controllers installed on the “CONNECT” page.
B. Click the controller port to make the PR32-D5 Plus LEDs glow red lighting to pair.
C. Drag & drop to pair the PR32-D5 Plus with controller.
D. Show the controller DIP number.
E. Save and reset controller pairing settings.
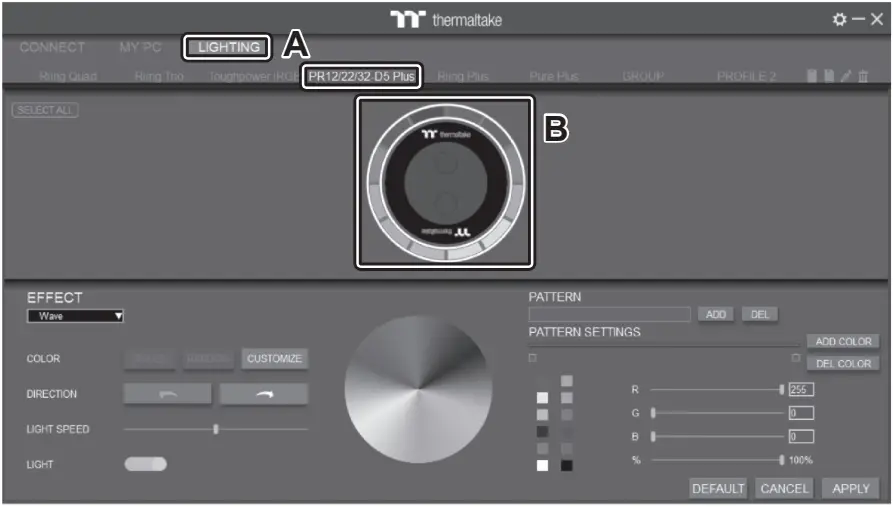
B. Preview and edit PR32-D5 Plus LEDs lighting effect.
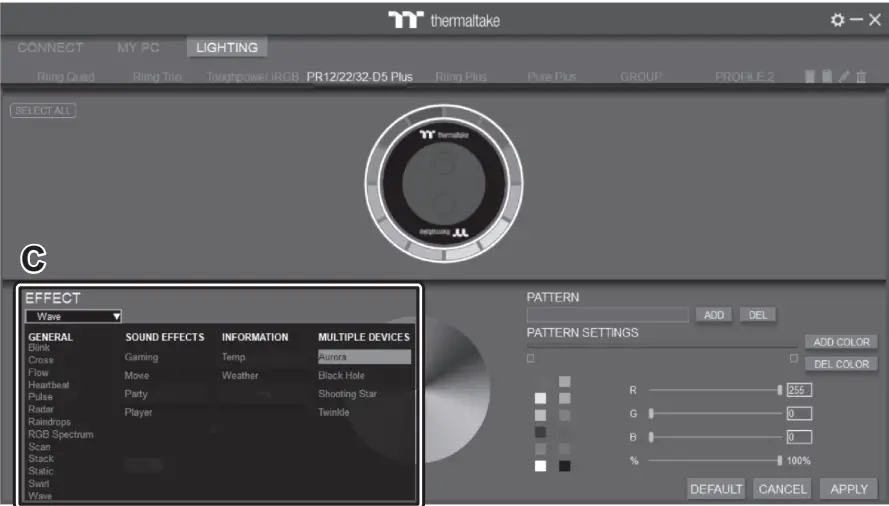
C. TT RGB PLUS provides 23 kinds of lighting effects.


