![]() INSTRUCTION MANUAL MT150
INSTRUCTION MANUAL MT150
50M LASER DISTANCE METER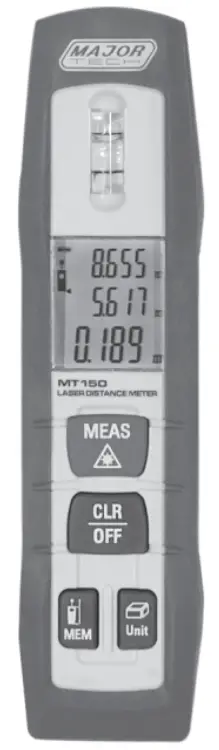
Introduction
Thank you for purchasing the Laser Distance Meter. The MT150 is a pen-shaped laser distance meter and was specifically designed for indoor applications. Shortcut and Soft grip keys for addition, subtraction, area and volume calculation allow for fast and very
reliable measurement.
Features
- Bluetooth 4.0 with App support
- Built-in level vial
- Unit selectable (m, ft, in)
- Area, volume calculations
- Continuous measurement
- Min/Max distance tracking
- Reference level selectable
- Water and dustproof
- Backlight LCD display
- 3-line display
- Buzzer indication
Safety Instructions
- Use extreme caution when the laser beam is turned on.
- Do not point the beam into your eye, another person’s eye or the eye of an animal.
- Be careful not to point the beam on a reflective surface, striking your eye.
- Do not allow the laser light beam impinge on any gas which can explode.
CAUTION
LASER RADIATION DO NOT STARE INTO BEAM![]() DIODE LASER <1mW Output at 635nm CLASS II LASER PRODUCT
DIODE LASER <1mW Output at 635nm CLASS II LASER PRODUCT
3.1. Permitted Use
- Measuring distances.
- Computing functions, e. g. areas and volumes.
3.2. Prohibited Use - Using the instrument without instruction.
- Using outside the stated limits.
- Deactivation of safety systems and removal of explanatory and hazard labels.
- Opening of the equipment by using tools (screwdrivers, etc.), as far as not specifically permitted for certain cases.
- Carrying out modification or conversion of the product.
- Use of accessories from other manufacturers without the express approval of by us.
- Deliberate or irresponsible behavior on scaffolding, when using ladders, when measuring near machines which are running, or near parts of machines or installations which are unprotected.
- Aiming directly into the sun.
- Inadequate safeguards at the surveying site (e.g. when measuring on roads, construction sites, etc.).
Laser Classification
There is a visible laser beam which emerges from the front of the instrument.
Laser Class 2 products:
Do not stare into the laser beam or direct it towards other people unnecessarily. Eye‘s protection is normally afforded by aversion responses including the blink reflex.
Inserting/Replacing Batteries
- Remove battery compartment lid.
- Insert batteries, observing correct polarity.
- Close the battery compartment again.
• Replace the batteries when the symbol “ “ flashes permanently in the display.
• Use alkaline batteries only.
• Remove the batteries before any long period of non-use to avoid the danger of corrosion.
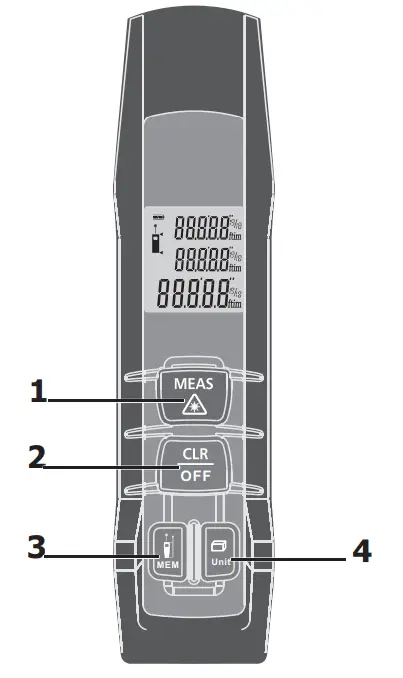
Keypad
- ON/MEAS button
- CLR/OFF button
- MEM/Reference button
- Function ( ) /Unit button
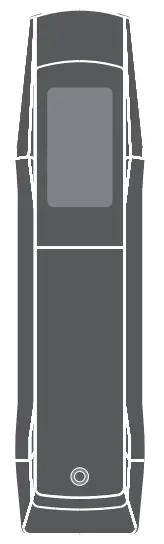
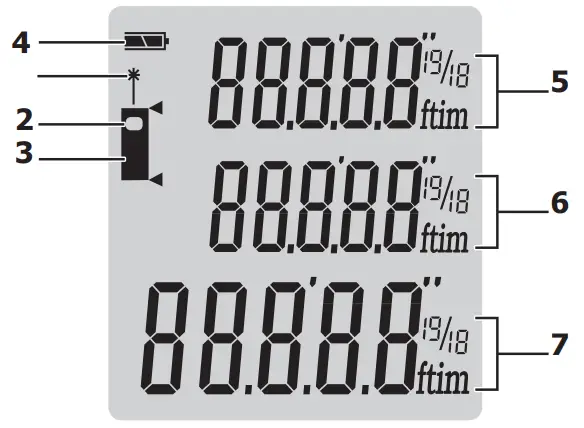
LCD Display
- Laser active
- Reference level (front)
- Reference level (rear)
- Battery status
- Intermediate line 1
- Intermediate line 2
- Summary line
Initial Operation and Setting
8.1. Switching On and Off Switches on the instrument and laser.![]() Press this button longer to switch off the instrument.
Press this button longer to switch off the instrument.![]() The instrument switches off automatically after three minutes of inactivity.
The instrument switches off automatically after three minutes of inactivity.
8.2. Clear Button![]() The last action is cancelled or the data display is cleared. If in the mode of History storage, press MEM button and Clear button simultaneously will clear all storage data in the memory.
The last action is cancelled or the data display is cleared. If in the mode of History storage, press MEM button and Clear button simultaneously will clear all storage data in the memory.
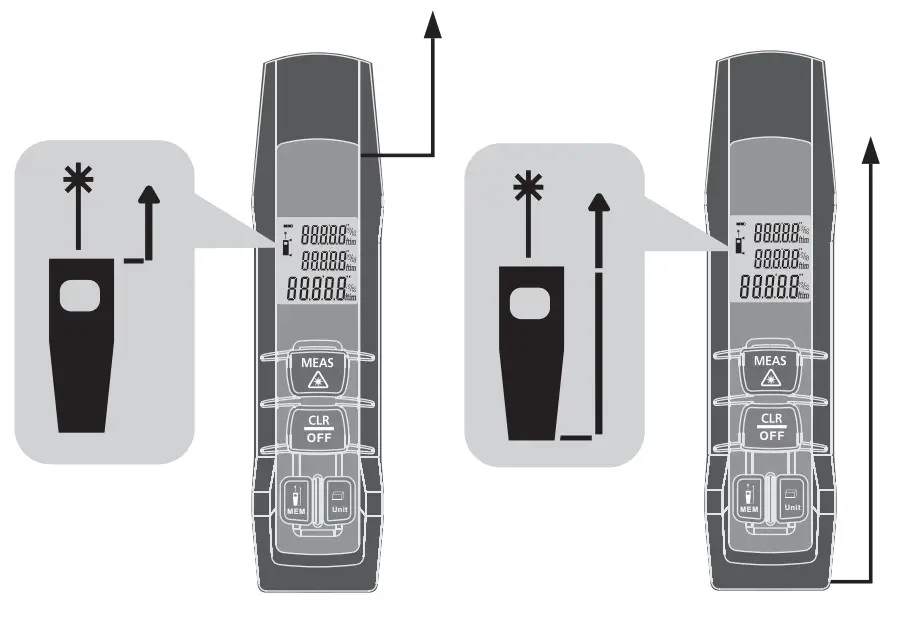
8.3. Reference Level Setting
The default reference setting is from the rear of the instrument.
Hold down this button ![]() to take the selection from
to take the selection from ![]() the front edge , a special beep sounds whenever the reference setting is changed. After a re-startup the reference returns automatically to the default setting (rear reference).
the front edge , a special beep sounds whenever the reference setting is changed. After a re-startup the reference returns automatically to the default setting (rear reference).
8.4. Distance Unit Setting For Instrument![]() Click the button longer to change the next type of unit. The following unit can be set:
Click the button longer to change the next type of unit. The following unit can be set:
| Distance | Area | Volume | |
| 1 | 0.000 m | 0.000 m2 | 0.000 m3 |
| 2 | 0.0 in | 0.000 ft2 | 0.000 ft3 |
| 3 | 0 1/16 in | 0.000 ft2 | 0.000 ft3 |
| 4 | 0.000 ft | 0.000 ft2 | 0.000 ft3 |
| 5 | 0’00” 1/16 | 0.000 ft2 | 0.000 ft3 |
8.5. Measuring
8.5.1. Single Distance Measurement![]() Press to activate the laser. Press again to trigger the distance measurement. The measured value is displayed immediately.
Press to activate the laser. Press again to trigger the distance measurement. The measured value is displayed immediately.
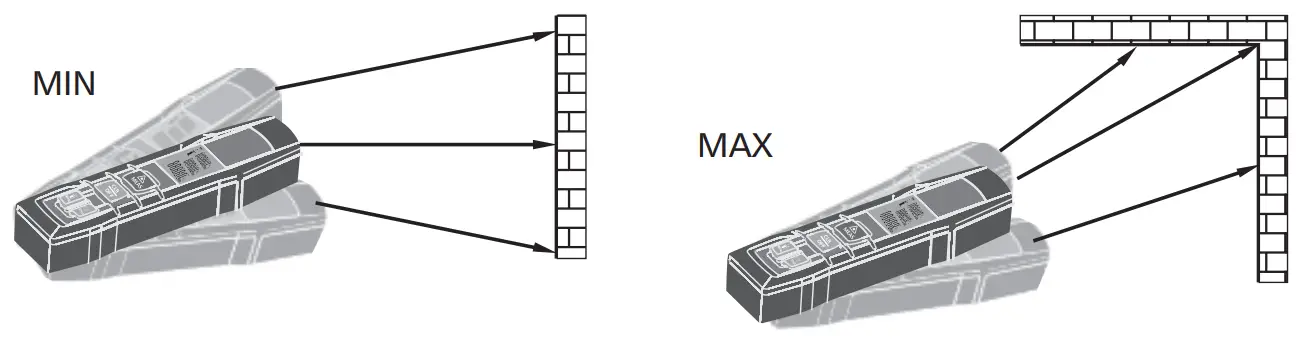
8.5.2. Continuous Measurement (Tracking) & Max and Min Measurement
The continuous measurement function (tracking) is used for the transferring of measurements, e.g., from construction plans. In continuous measurement mode, the measuring tool can be moved to the target, whereby the measured value is updated approx.
every 0.5 seconds in the third line. The corresponding MIN and MAX values are displayed dynamically in the first and second line. As an example, the user can move from a wall to the required distance, while the actual distance can be read continuously. For continuous measurement, hold down the button to start the continuous measurement. Press![]() or
or ![]() button
button![]() again to stop the function. The function is terminated automatically after continuous 100 times measurement.
again to stop the function. The function is terminated automatically after continuous 100 times measurement.
Functions
9.1. Area Measurement
Press the ![]() button once will start the area measurement function.
button once will start the area measurement function.
Press button ![]() to take the first length measurement (e.g. length).
to take the first length measurement (e.g. length).
Press button![]() again to take the second length measurement (e.g. width).
again to take the second length measurement (e.g. width).
The result of the area measurement is displayed in the third line, the individually measured values are displayed in lines 1 and 2. Whilst the first connection between the Phone/PC and the Laser distance meter is being established, a prompt for the Pin-code of the instrument may be displayed. In this case, enter the code 0000 into your Phone/PC.
9.2. Volume Measurement
Press the button![]() twice will start volume measurement function.
twice will start volume measurement function.
Press button![]() to measure the first distance (e.g. length)
to measure the first distance (e.g. length)
Press button![]() to measure the second distance (e.g. width).
to measure the second distance (e.g. width).
The result of the area measurement from the values already measured is displayed in the summary line.
Press button![]() to measure the third distance (e.g. height).
to measure the third distance (e.g. height).
The value is displayed in the second line. The result of the volume measurement is displayed in the summary line, the two previously measured values in lines 1 and 2.
9.3. Historical Storage
The previous 20 records (measurements or calculated results) are shown in the reverse order. Use buttons ![]() to navigate through these records. You can clear all records by pressing the Storage button and Clear button simultaneously in historical storage mode.
to navigate through these records. You can clear all records by pressing the Storage button and Clear button simultaneously in historical storage mode.
9.4. Switching BLUETOOTH On
Hold down the button ![]() until the Bluetooth symbol disappears in the display. Then you can use our Meterbox APP installed on your phone to connect with this instrument.
until the Bluetooth symbol disappears in the display. Then you can use our Meterbox APP installed on your phone to connect with this instrument.
9.5. Switching BLUETOOTH Off
Hold down the button ![]() until the Bluetooth symbol disappears in the display. BLUETOOTH is disabled when the instrument is turned off.
until the Bluetooth symbol disappears in the display. BLUETOOTH is disabled when the instrument is turned off.
Measuring Conditions
10.1. Measuring Range
The range is limited to Technical Specifications.
10.2. Target Surfaces
Measuring errors can occur when measuring toward colorless liquids (e.g. water) or dust free glass, Styrofoam or similar semi-permeable surfaces. Aiming at high gloss surfaces may deflect the laser beam and lead to measurement errors. Against non-reflective and dark surfaces the measuring time may increase.
10.3. Care
Do not immerse the instrument in water. Wipe off dirt with a damp, soft cloth. Do not use aggressive cleaning agents or solutions.
Handle the instrument as you would a telescope or camera.
10.4. Troubleshooting – Causes and Corrective Measures
| Code | Cause | Corrective Measure |
| 208 | Received signal too weak, measurement time too long. Distance>50m | Use target plate |
| 252 | Temperature too high | Cool down instrument |
| 253 | Temperature too low | Warm up instrument |
| 255 | Hardware error | Switch on/off the device several times, If the symbol still appears, please contact your dealer for assistance. |
Specifications
| Function | Range |
| Range (Use target plate from ±50m) | 0.05 to 50m (0.2 to 164ft) |
| Measuring accuracy up to 10m (2a, standard deviation) | Typically: ±1.5mm (±1/161n) |
| Measuring units | m, in, ft |
| Laser class | Class II |
| Laser Type | 650 nm, <1mW |
| Smallest unit displayed | 1mm |
| Range of BLUETOOTH | 10m |
| IP54 Housing | Dust resistant / Splash proof |
| History measurement records | 20 |
| Keyboard Type | Super Soft-Touch (Long life) |
| Operating Temperature | 0°C to 40°C (32°F to 104°F) |
| Storage Temperature | 10°C to 60°C (14°F to 140°F) |
| Batteries | 2 x AAA |
| Battery Life | up to 5,000 measurements |
| Auto laser switch-off | after 30 seconds |
| Auto instrument switch-off | after 3 minutes |
| Dimensions | 135 x 33 x 24mm |
| Weight | 80g |
- Use a target plate to increase the measurement range during daylight or if the target has poor reflection properties.
- In favorable conditions (good target surface properties, room temperature) up to 10m (33ft). In unfavorable conditions, such as intense sunshine, poorly reflecting target surface or high temperature variations, the deviation over distances above 10m (33ft) can increase by ±0.15mm/m (±0.0018in/ft).
MAJOR TECH (PTY) LTD
South Africa![]() www.major-tech.com
www.major-tech.com![]() [email protected]
[email protected]
Australia![]() www.majortech.com.au
www.majortech.com.au![]() [email protected]
[email protected]![]()


