
ANKER AK-98ANWVM-UBA Vertical Mouse

Thank you for choosing this special wired vertical mouse. Please read the user manual carefully when using this product.
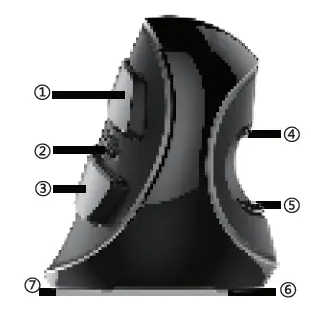
- Left-click
- Scroll wheel
- Right-click
- Forward
- Backward
- DPI cycle {on bottom)
- ON/OFF button {on bottom)
Features
- Vertical mouse, worm bionic shape design
- The floating RGB light effect provides with different experience
- Ergonomic design with the removable palm rest, to reduce the hand and wrist pain
Installation
Plug the USB connector for the wired mouse to the USB port in your computer, after detecting successfully it will work normally.
Specification
- Solution PAN3212
- Version Wired
- Light Mode Floating RGB. ON/OFF switch is on the
- is on the bottom.
- DPI 800/1200/1600/2400/4000 DPI,
- DPI cycle is on the bottom of the mouse
- Polling Rate S00Hz
- Working Voltage sv
- Working Current S70mA
Driver Installation
Install the driver from the CD in the package, or you can download it is from: http://www.deluxworld.com
Tip: Please make sure the mouse has already been connected to your computer when installing the driver.
Driver Setting Instruction
After installation ok, get into the setting interface, you can start to set up the mouse function 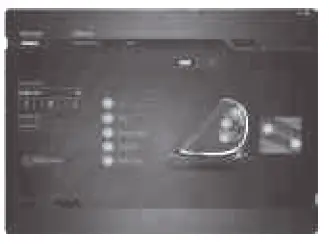
Driver Setting Instruction
After installation ok, get into the setting interface, and you can start to set up the mouse function.
A. Button Setting (Custom)
- 7 buttons can be set for the function (Gl~G7).10 functions can be chosen for one button.
- Refer to picture A. For Mouse function mode, 11 different functions you can choose. Refer to picture B.

- For Mouse function mode, 11 different functions you can choose. Refer to picture B.
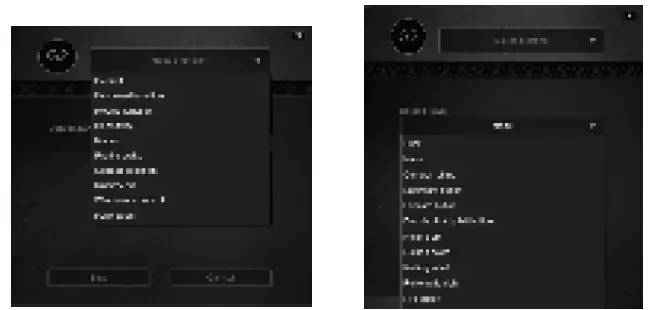
Note:
The function of Left Click cannot be set firstly, only after another button is set as the function of Left Click.
B. Performance
By adjusting the coordinate, you can set the Sensitivity (DPI), Pointer Speed and Polling Rate. 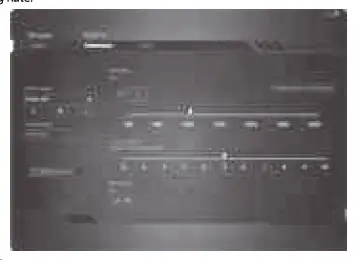
C. Light
You can set different light mode: All off, Full-lighted, Breathing, Floating RGB mode, Running RGB mode, Neon RGB mode. 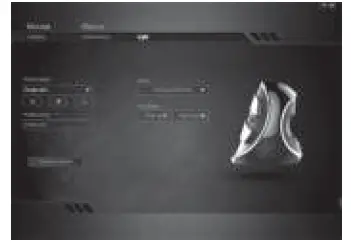
Macro
Assign a Macro: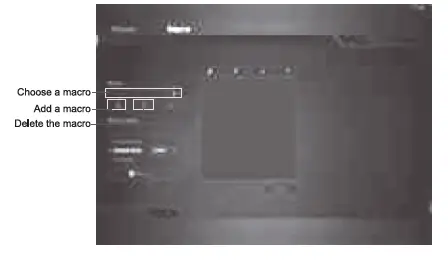
- Open Macro on the main interface.
- Choose one existing macro to modify it, or add to create a new one.
- Click “Record” to start the recording, and click “Stop” to finish it.
- You can set the default delay or no delay by choosing Record delay.


