![]()
![]()
Instructions
and
User Manual
1239 Rev 1.0
13 Sept 2011 (HSP)
User Instructions
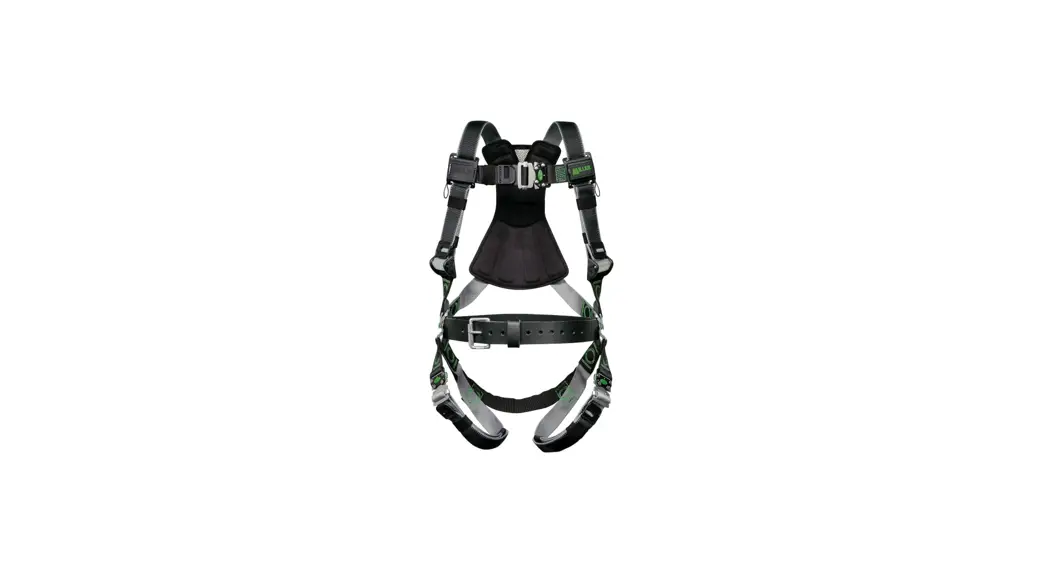
Thank you for purchasing the Miller Revolution Harness. The Revolution is an all-new and totally innovative harness engineered with seven (7) unique components and more than eleven (11) key product features. Your Miller Revolution harness was engineered to meet or exceed all applicable OSHA, ANSI, and CSA requirements and standards. Please carefully read the new Miller Harness Instruction manual to help you identify all of the various general warnings, inspection procedures, and other helpful information.
Please carefully read this supplemental Revolution Instruction manual. It contains special instructions, inspections, and maintenance procedures that are unique to the Revolution Harness product line. Should you have any questions about your Miller Revolution Harness, please contact the Miller Customer Service at 800-873-5242.
Preparing your harness for use:
- Before you don (wear) the harness, you must read and understand the Miller Harness Instruction manual.
- Although your harness is “ready-to-use,” sizing it the first time will require some adjustments to ensure proper fit.
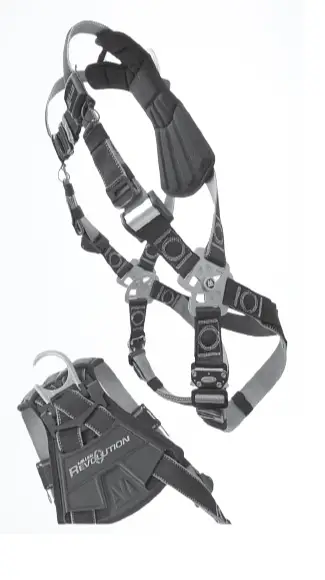
Miller Revolution Key Features
DualTech™ Webbing
Miller’s new DualTech Webbing makes donning easy with two-sided contrasting colors and textures. The webbing is engineered with a shape-retention memory for a more comfortable fit. In addition, the black outside and grey colored inside make identifying twisted straps when donning the harness easier.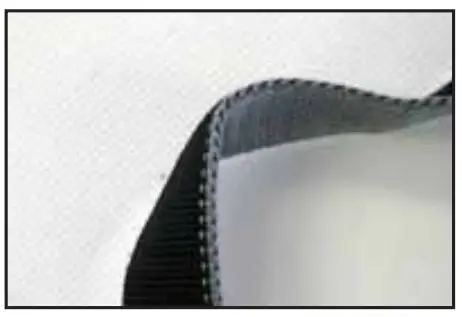
Cam Buckle
The Cam buckle allows easy one-hand adjustment and release of shoulder straps. Their non-slip design promotes proper snug fit of the harness and allows for easy adjustment to accommodate seasonal clothing.
Self–Contained Label Pack
The new self-contained label pack encapsulates labels minimizing damage and loss. It is conveniently located on the chest for easy access, and it incorporates integrated pull-free lanyard rings for securing lanyards when not in use.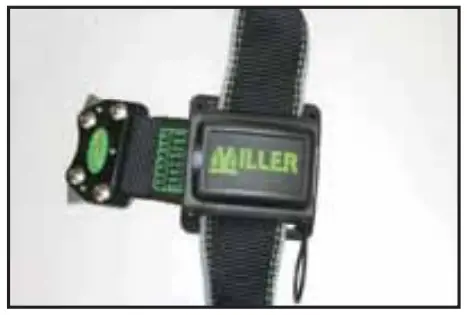
Stand Up D-Ring
Spring-loaded D-Ring simplifies the snap-hook connection.
Do not apply lubricants to the spring mechanism. If dirt begins to collect inside the mechanism, use compressed air, a soft brush, and/or warm water with a mild detergent to clean it.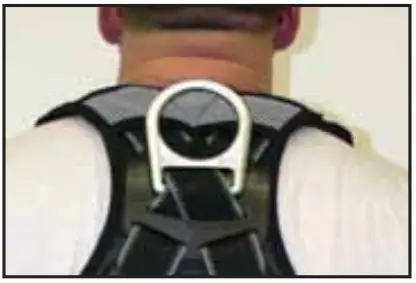 ErgoArmorTM Back Shield
Semi-Flexible ErgoArmor back shield minimizes impact from sharp/ heavy snap hooks and self-retracting lifelines.
The back shield also provides two locations for custom labels. The left for a company label, and the right for a high visibility individual worker identification label. Both may be purchased separately. Please contact your salesperson or Miller customer service for more information on the company-specific ID.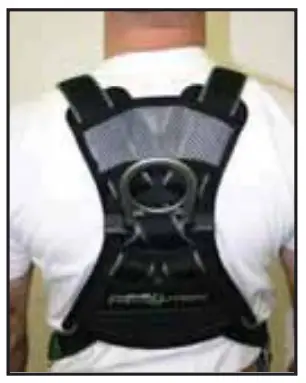 Web Finials
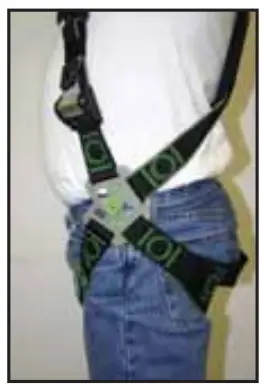
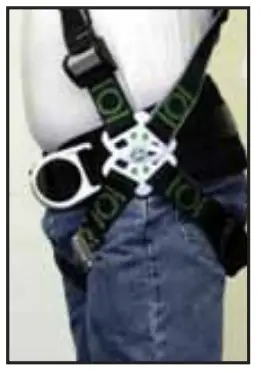
Web Finials on all adjustable webbing ends provide a gripping surface for easier adjustment, in addition to providing a way to secure and organize the loose webbing with the integrated clip.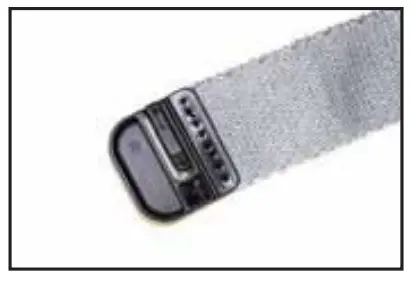 PivotLinkTM Connection
The PivotLink connection allows you greater freedom of movement while wearing your harness than was previously available. By pivoting at the hip, there’s no pulling or tugging when you bend. The PivotLink is designed to be “self-cleaning,” but if dirt or debris begins to collect inside of the metal, use compressed air, a soft brush, and/or warm water with a mild detergent to clean it. Check for free movement and make sure the PivotLink does not bind. Do not apply lubricants to the PivotLink mechanism.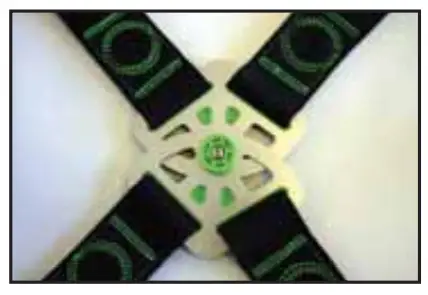 Integrated Accessory System
The integrated modular accessory system provides a wide variety of options for attaching belts, tools, and accessories to your Revolution harness.
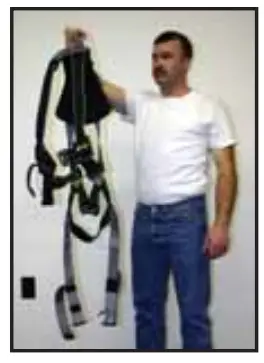
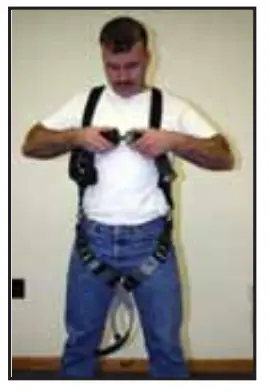
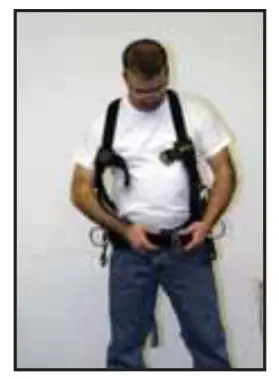
Donning the Revolution without Belt
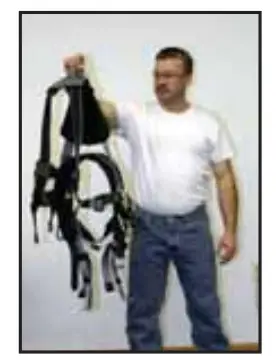
- Hold harness by back D-ring. Shake harness to allow all straps to fall in place.

- If leg or chest straps are buckled, release straps and unbuckle at this time.

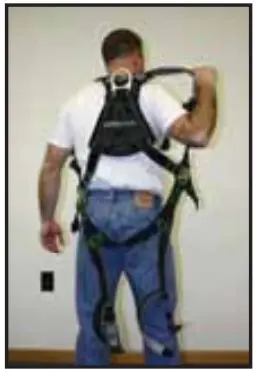
- Slip straps over shoulders so D-ring is located in the middle of the back between shoulder blades.

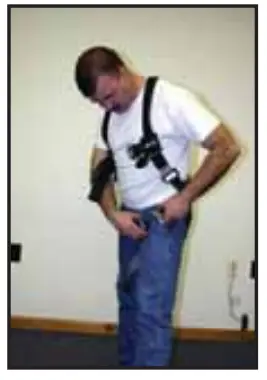
- Pull buckle portion of leg strap between legs and connect to the opposite end of leg strap. Repeat with a second leg strap.

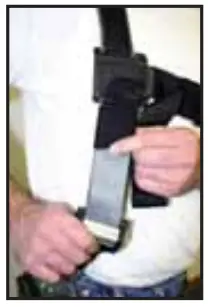
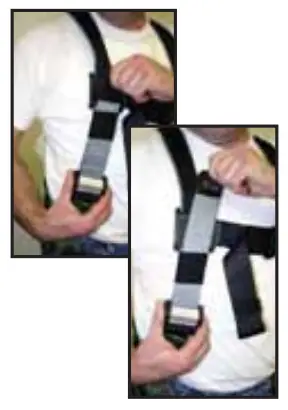
- Connect chest strap. The shoulder strap retainer (chest strap) must be positioned in the mid-chest area 6” to 8” below the trachea but not below the sternum. Fasten securely to keep shoulder straps taut.

- After all straps have been buckled, tighten webbing so that harness allows full range of movement. To maximize comfort, be sure to adjust the harness so that the PivotLink centers are just outside of your hipbone.

- To remove the harness, release quick connect or tongue buckles.
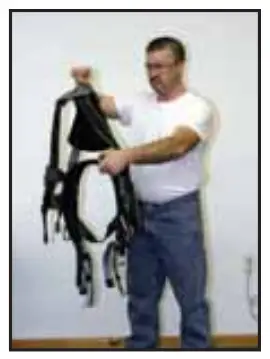
- Miller Fall Protection recommends hanging the harness by the back D-ring to help it keep its shape when not in use and provide the worker with a starting point when next attempting to don the harness.

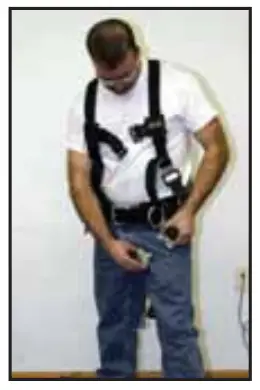
Donning the Revolution with Belt
- Hold harness by back D-ring. Shake harness to allow all straps to fall in place.

- If leg or chest straps are buckled, release straps and unbuckle at this time.

- Slip straps over shoulders so D-ring is located in the middle of the back between shoulder blades.

- Attach integral waist belt. Connecting belt PivotLink is in the proper location.

- Pull buckle portion of leg strap between legs and connect to the opposite end of leg strap. Repeat with a second leg strap.
 Connect chest strap. The shoulder strap retainer (chest strap) must be positioned in the mid-chest area 6” (152mm) to 8” (203mm) below the trachea but not below the sternum. Fasten securely to keep shoulder straps taut.
- After all, straps have been buckled, tighten webbing so snug, but allow full range of movement. To maximize comfort, be sure to adjust the harness
so that the PivotLink centers are just outside of your hipbone.
- To remove the harness, reverse procedure.
- Miller Fall Protection recommends hanging the harness by the back D-ring to help it keep its shape when not in use and provide the worker with a starting point when next attempting to don the harness.

 Connect chest strap. The shoulder strap retainer (chest strap) must be positioned in the mid-chest area 6” (152mm) to 8” (203mm) below the trachea but not below the sternum. Fasten securely to keep shoulder straps taut.
Steps for Ensuring a Snug Fit
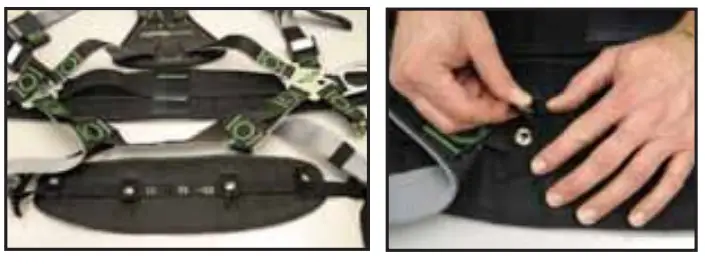
Adjusting Back D-Ring Pad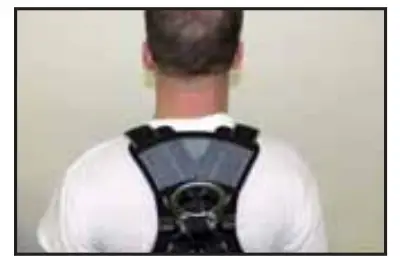
The upper part D-ring pad (gray mesh) should be located approximately one (1) inch below the neckline. (This should position the back D-ring in between the lower part of the shoulder blades.)
Correct adjustment of the back D-ring pad will allow shoulder strap webbing (and optional pads) to be located further away from the neck.
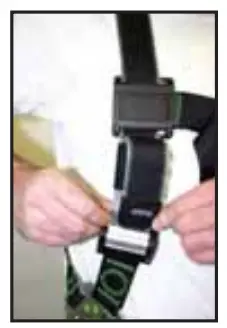
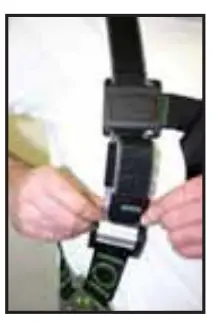
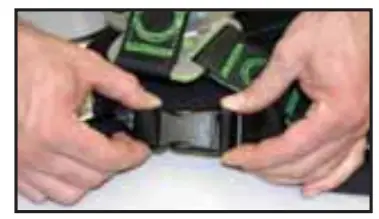
Adjusting Cam Buckles
- Unclip the web end finial from the webbing.

- Slide any webbing keepers away from the buckle.

- Pull webbing away from the buckle (upward) to adjust tighter.

- Reposition keepers and web end finial.

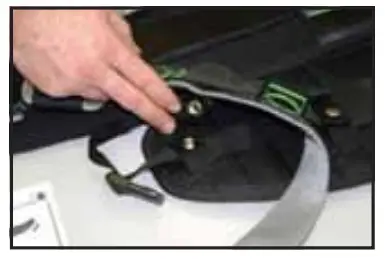
Installing Optional Accessories
Connecting Accessories
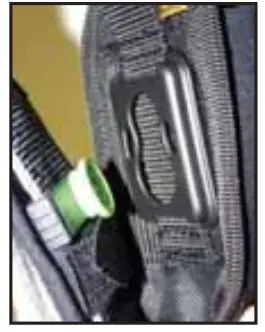
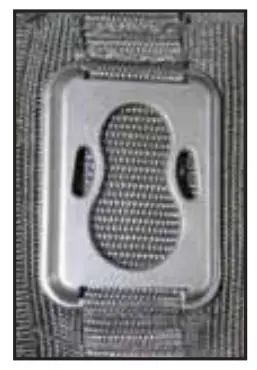
- Locate the figure “8” shaped composite attachment clip on the back of the accessory.

- Identify the green button attachment point on the belt or harness that will be used.

- Place the widest end of the figure “8” over the green connection button.

- Push the accessory downward until you feel it snap into place.

- To remove, reverse the procedure by gripping the 1″ loop and pulling upward.

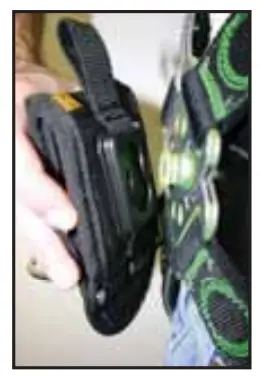
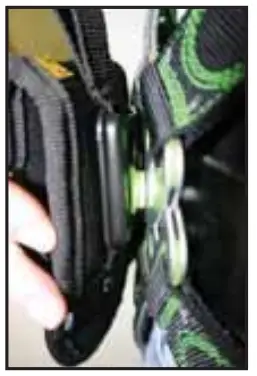
Miller integrated accessories have a weight limit of 25 lbs. when connected via the composite link. For loads heavier than 25 lbs., connecting to a belt via the tunnel loop is recommended for more even weight distribution. The combined weight of the harness user and all attached tools and accessories should not exceed the maximum capacity of the fall protection system being used.
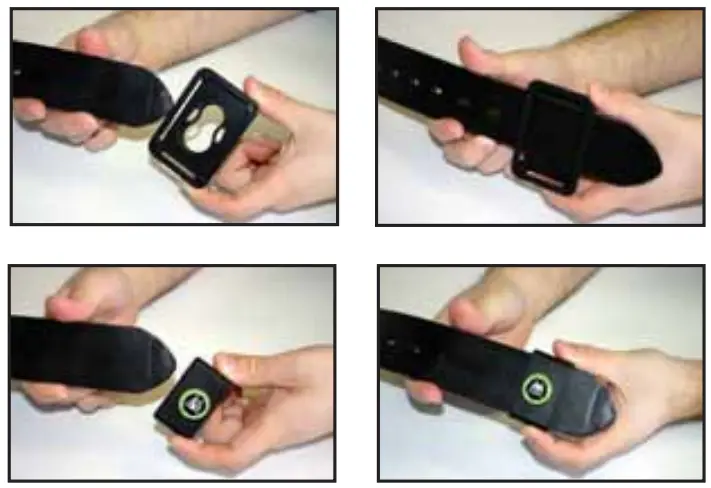
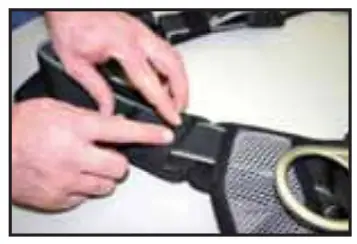
Installing Attachment Points to Belts
To install the belt attachment clip onto a belt, Make sure the smaller circle of the figure “8” shape is at the top and to the inside, then slide onto the belt.
To install the belt attachment clip onto a belt, simply slide onto the belt.
Installing Shoulder Pads
Optional Shoulder Pads
Optional harness shoulder pads are available. Please contact your salesperson or Miller Customer Service for more information.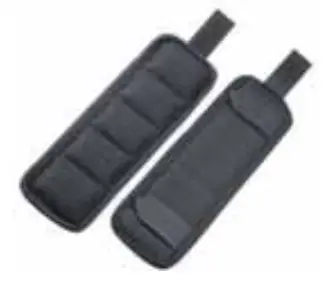 Installing Shoulder Pads
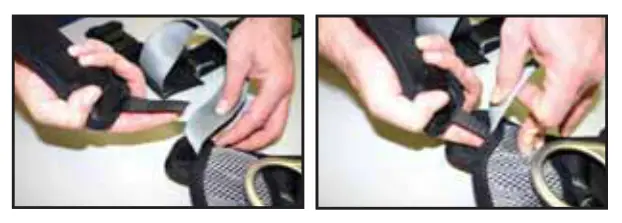
- Turn the harness, so that the D-ring is laying up on a flat surface.
Take one of the shoulder pads and place your finger over the Velcro®
- Lift up the webbing shoulder strap and carefully slide the Velcro a portion of the shoulder pad into the pocket.

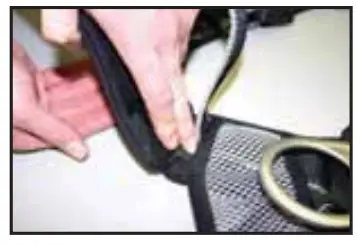
- Remove your finger and press the two Velcro strips together.

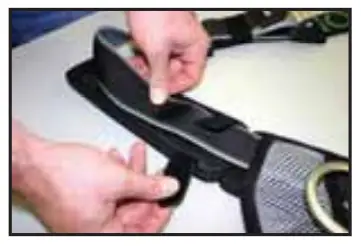
- Finish by wrapping the other two sets of Velcro around the shoulder strap webbing.

Installing a Seat Pad
Optional Seat Pad
An optional harness seat pad is available. Please contact your salesperson or Miller Customer Service for more information.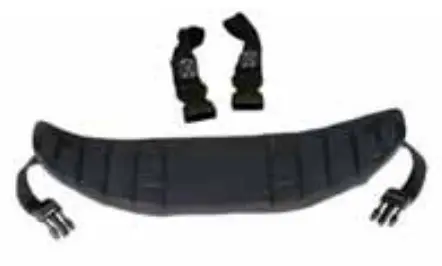
Installing Seat Pad
- Make sure the flat side of the seat pad is facing towards the back of the harness, then attach the two snap straps in the middle of the butt strap.

- Next, thread the front snap retaining straps at the front of the pad over the leg strap, under the butt strap, and in between the two tacks next to the pivot link. Make sure the seat pad adjustment strap goes under the harness webbing.

- Thread the cinch-through strap down through the slot in the D-ring, then cinch back through itself.

- Snap the two ends of the buckle together.


Available Accessories
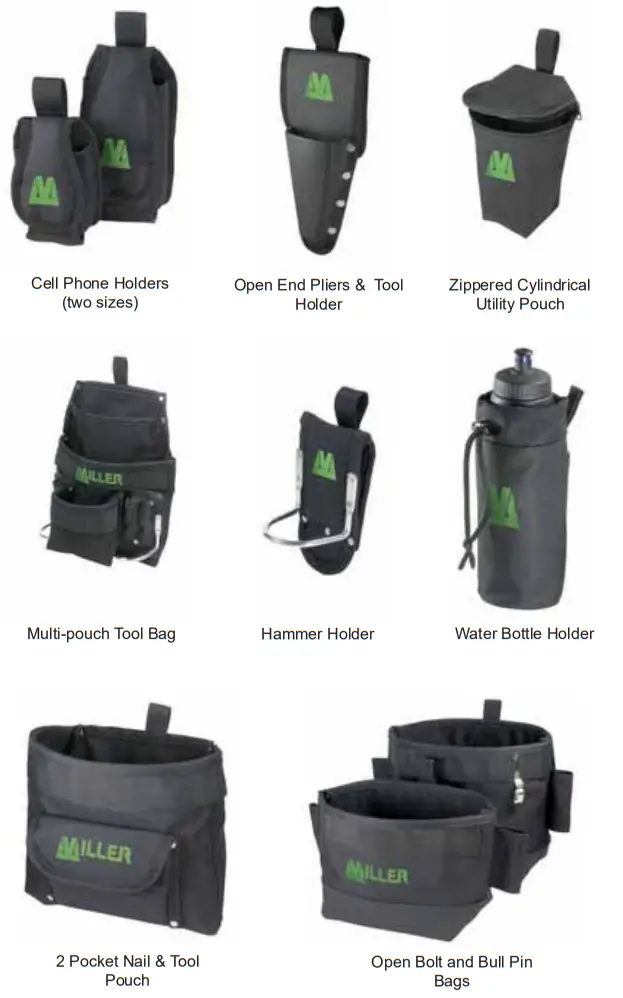 For more information or to purchase accessories, contact your Miller distributor or Miller Customer Service at 1-800-873-5242.
Materials
Materials Specific to the Revolution Harness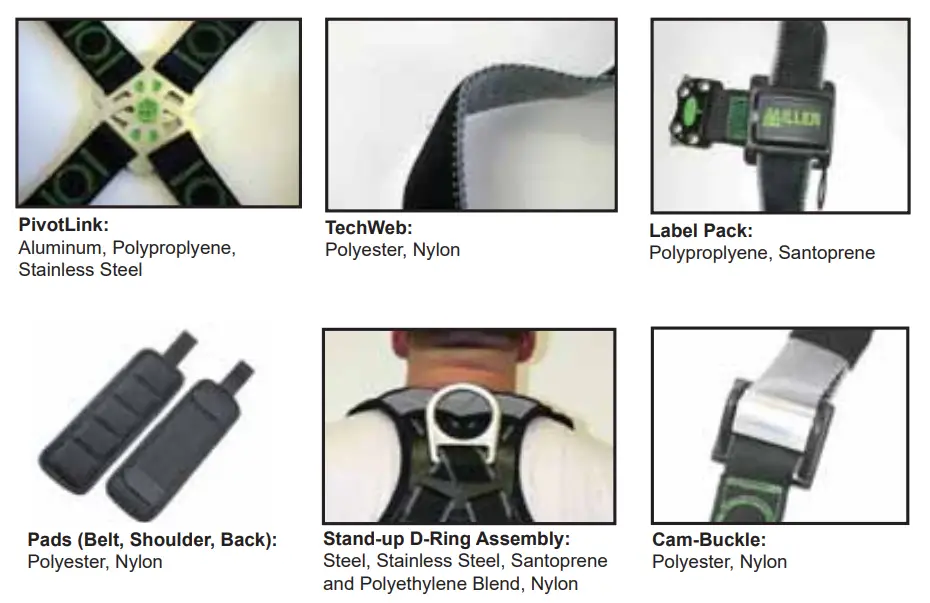 NOTES
NOTES
![]() Toll-Free: 800.873.5242
Toll-Free: 800.873.5242
Fax: 800.892.4078
Download this manual at: www.millerfallprotection.com
Honeywell Safety Products
P.O. Box 271, 1345 15th Street
Franklin, PA 16323 USA


