![]() Get Started!
Get Started!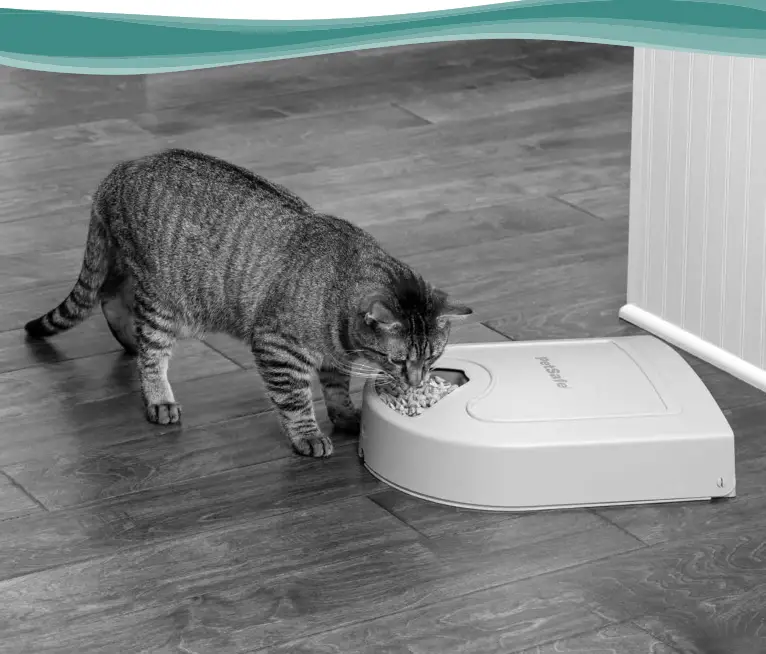
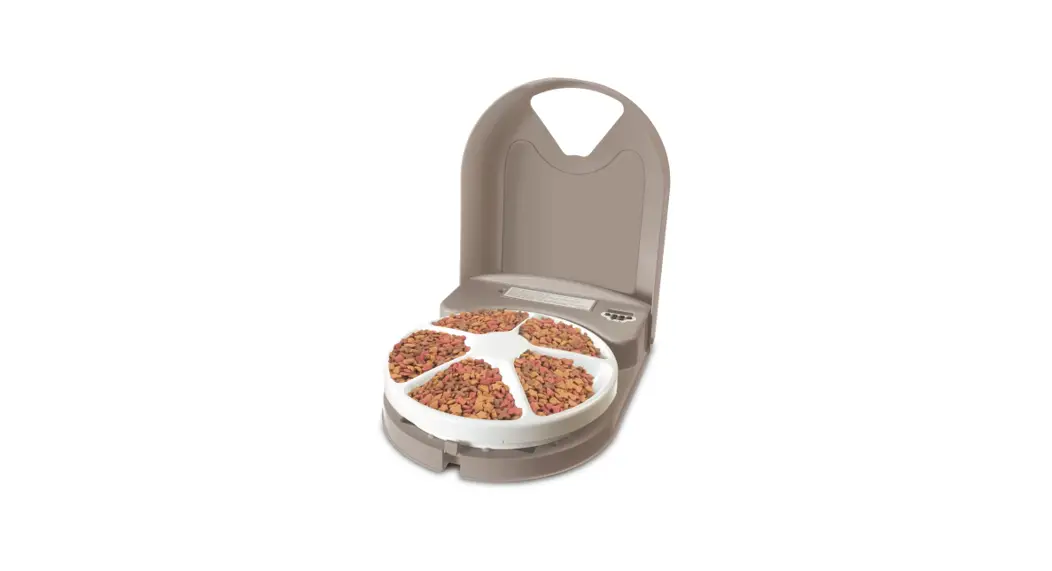
5 Meal Pet Feeder
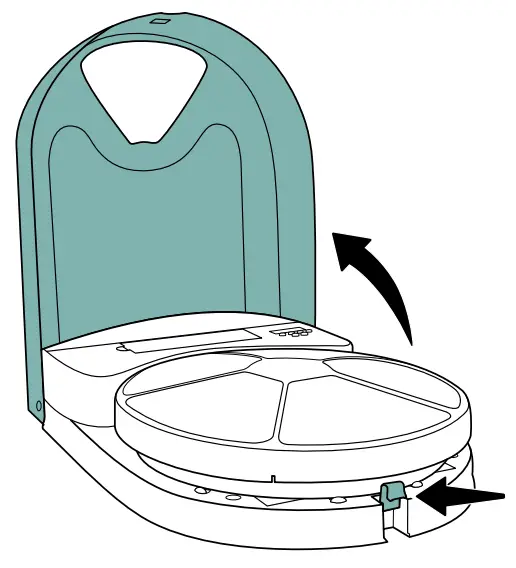
Press the latch on the front of the feeder and open the lid.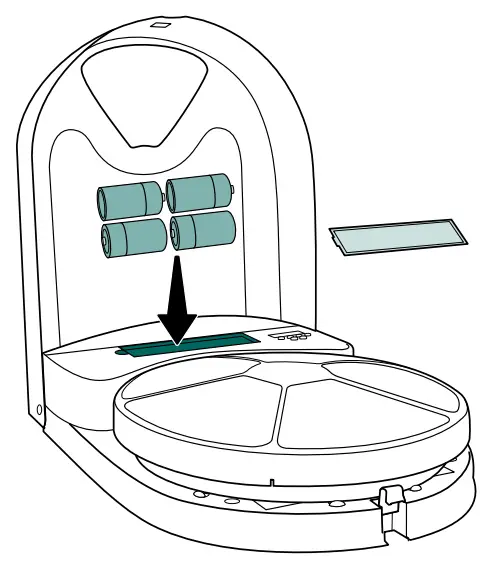
Pull up the battery door to remove it.
Insert 4 D-cell alkaline batteries (not included) as shown on the label inside the battery compartment. Replace the battery door.
All meal prep should be this easy.
If you want, clean the feeder before use.
Remove the food tray and wash it by hand or in the dishwasher.
Wipe the feeder base with a non-abrasive cloth; do not submerge it in water.
Make sure the food tray is completely dry before replacing it on the feeder base.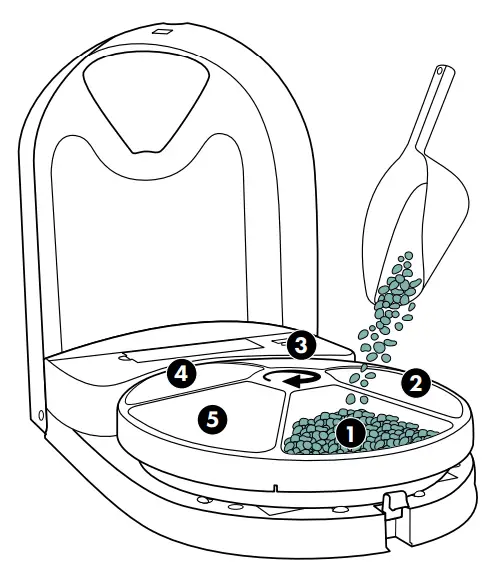
The food tray rotates clockwise. Slot 1 will be available to your pet immediately. Slot 2 feeds the first scheduled meal time, slot 3 feeds the second scheduled meal time, and so forth.
Keeping this in mind, fill the needed slots with up to 1 cup of dry or semi-moist food or treats. Level the food in each slot and do not overfill — if the feeder is too full it may not work properly.
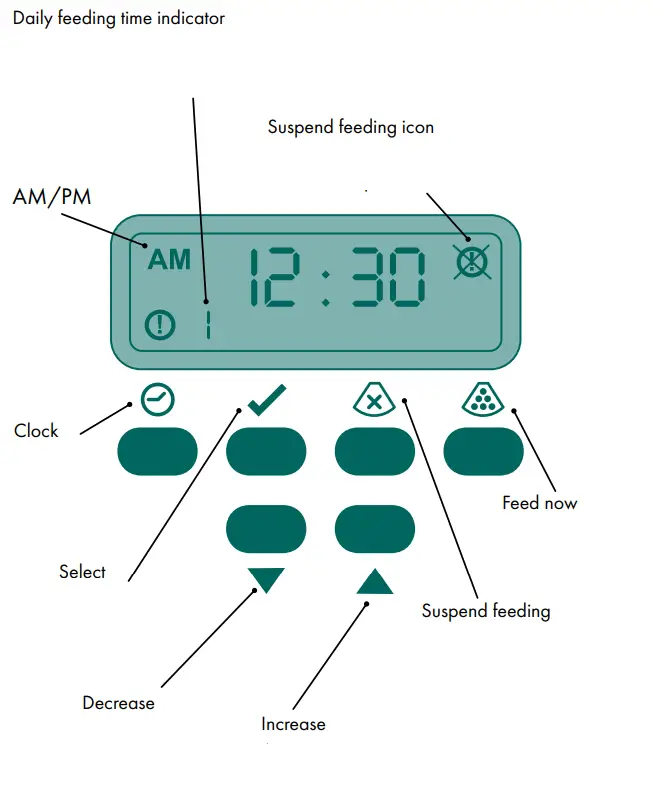 |  |
Set the feeder clock:
a. Press the![]() button.
button.
b. Press the button. The hours will begin to flash.
c. Use the![]() and
and![]() buttons to set the hour and select AM or PM.
buttons to set the hour and select AM or PM.
d. Press the button again. The minutes will begin to flash.
e. Use the![]() buttons
buttons![]() to set the minutes.
to set the minutes.
f. Press the![]() button to finish setting the clock.
button to finish setting the clock.
The clock must be set correctly for the feeder to dispense meals or treats at the desired times. To switch between a 12-hour and a 24-hour clock, press the button for 15 seconds.
Set up the first daily meal or treat time:
a. Press the![]() button, then press the button until appears at the
button, then press the button until appears at the![]() bottom left of the display panel.
bottom left of the display panel.
b. Press the button. The hours will begin to flash.
c. Use the![]() and
and![]() buttons to set the hour and select AM or PM.
buttons to set the hour and select AM or PM.
d. Press the button again. The minutes will begin to flash.
e. Use the![]() buttons
buttons![]() to set the minutes.
to set the minutes.
f. Press the![]() button to finish setting the feeding time.
button to finish setting the feeding time.
To set up an additional daily meal or treat time:
a. Press the![]() button, then press the button until the
button, then press the button until the![]() number of the feeding time you wish to set (for example, or ) appears at the bottom left of the display panel.
number of the feeding time you wish to set (for example, or ) appears at the bottom left of the display panel.
b. Press the button. The hours will begin to flash.
c. Use the![]() and
and![]() buttons to set the hour and select AM or PM.
buttons to set the hour and select AM or PM.
d. Press the button again. The minutes will begin to flash.
e. Use the![]() buttons
buttons![]() to set the minutes.
to set the minutes.
f. Press the![]() button to finish setting the feeding time.
button to finish setting the feeding time.
Repeat the above steps for each daily meal or treat the time you want to set up. For example, if you want to feed your pet two meals each day, set up feeding times 1 and 2. If you want to feed your pet two meals and one treats each day, set up feeding times 1, 2, and 3.
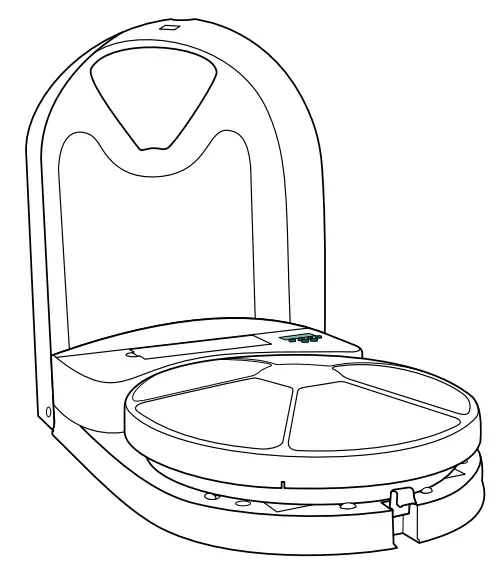
Make sure the desired food tray slot is in position at the front of the feeder. To rotate the food tray, press the button. Close the lid and place the feeder in the desired location. The feeder is ready to use and will automatically feed your pet daily at the times you have set up.
To remove a set feeding time, press the![]() button, then press the button until the feeding time you want to remove appears at the bottom left of the display panel (for example, or ). Press the button. The feeding time will reset too. Press the
button, then press the button until the feeding time you want to remove appears at the bottom left of the display panel (for example, or ). Press the button. The feeding time will reset too. Press the![]() button to finish removing the feeding time.
button to finish removing the feeding time.
To suspend feeding without losing your settings, press and hold the button for 7 seconds (or wait for the “:” in the feeder clock to blink 7 times), then release the button. The suspend feeding icon ( ) will appear at the top right of the display. To resume feeding at the set times, press and release the clock button. The suspend feeding icon will disappear.
Dinner is served.
Let us help!
For questions or additional tips:
petsafe.com
For important safety instructions, please see the customer care guide.
©2022 Radio Systems Corporation
Model: PFD11-13707
L400-2562-11


