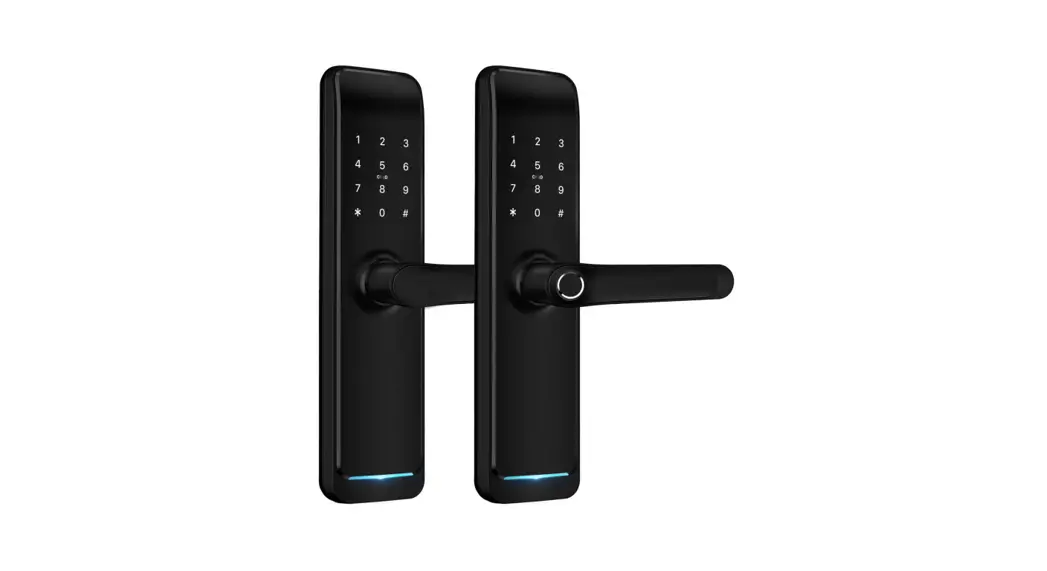
Tec H35B Smart door locked
User Manual
Special attention:
- mechanical eys lease eep outdoor, username eyes lock doors.
- please place or leathery hen ow wattage alarm.
- reading his annual carefully before installation, and torture reference.
Introduction
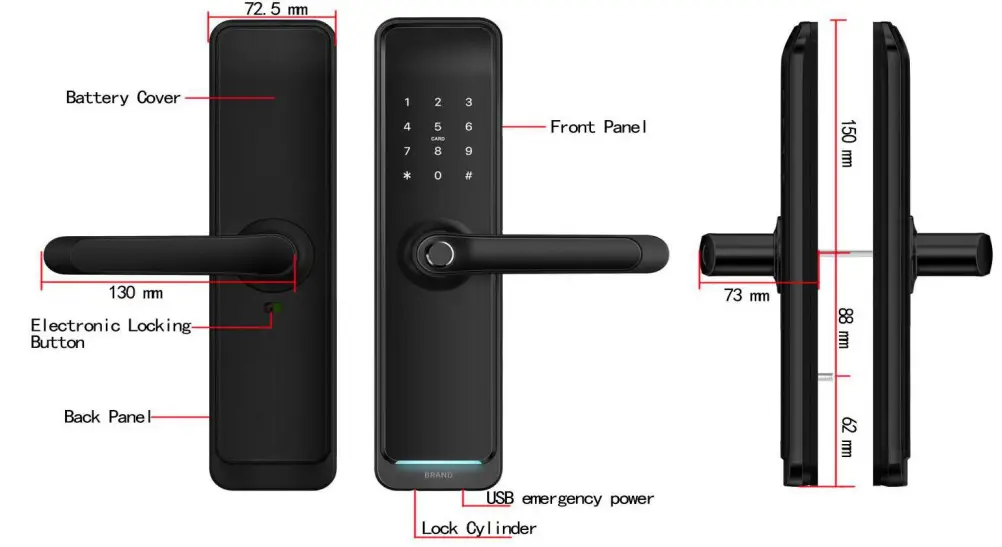
1.1.Lock structure
1.2.Packing List![]() Check the following drawing to check whether the package contains all the parts
Check the following drawing to check whether the package contains all the partsName Qty NO. Name Qty Front Panel 1 11 Mortise Screws:10*5 (For Aluminum Door) 4 Back Panel 1 12 Mortise Screws:25*4mm (For Wooden Door) 4 Mortise: latch 1 13 60mm/80mm Square shaft 2 Card 3 14 M5*25mm Screw for Door Thickness 35-39mm 2 Mechanical Key 2 15 M5*30mm Screw for Door Thickness 30-65mm 2 Waterproof Rubber Plate 2 16 M5*40mm Screw for Door Thickness 50-65mm 2 Screw Stubs: M5*35mm 2 17 User Manual 1 Screw Stubs: MS*30mm 2 18 Chuck 1 Strike&Strike Box 1+1 19 U-Clip 1 Sliding Screws:16*5mm 2 20 From Panel screws 3
1.3.Specifications
| Suitable for Models | H35 | Doors Applicable | Aluminum door Wooden door |
| Materials | Handle: Zinc Alloy Panel: SS304 | Working Voltage | 6V/4x AA Batteries |
| Lock Weight | 3KG | Door Thickness to Fit | 35-65mm |
| Unlocking Way | Bluetooth Fingerprint(option) Password Card Mechanical key Gateway(option) | Data Capacity | Fingerprint: 200 Password: 150 Card: 200 |
| Color | Silver Black | Working Temperature | -10.C-55°C |
| Low Wattage Alarm | Less than 4.8V | Working Humidity | 0-95% |
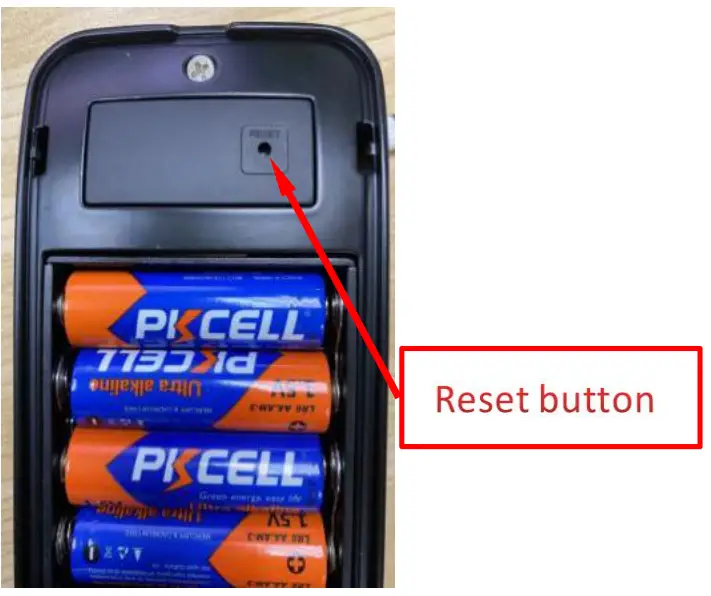
1.4.System Initialization
Open the cover plate of the front panel,long press the “Reset” button on the back panel for 5s, press “000#”, and the initialization is complete
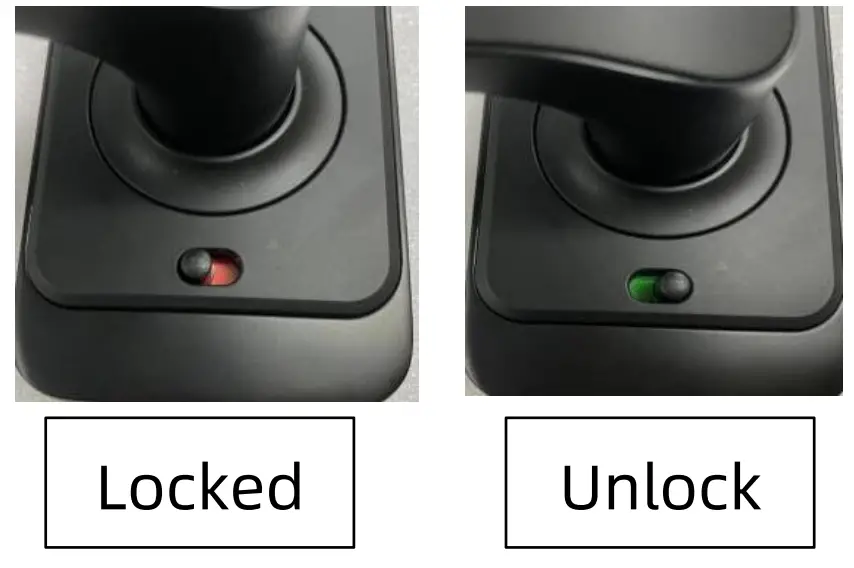
1.5.Electronic Locking Button
When you pull the button to “red” status, the lock was on “Locked” status. And it can be opened from outside, only by Master Admin. Other unlock ways, when you try to unlock, it will voice out ” the lock was locked”. To disable this function, you need to pull the button to “green” status, to release the “Locked” status.
Installation
2.1Turn the handle
Notice: Adjust the handle according to the direction you open the door.
For Front Panel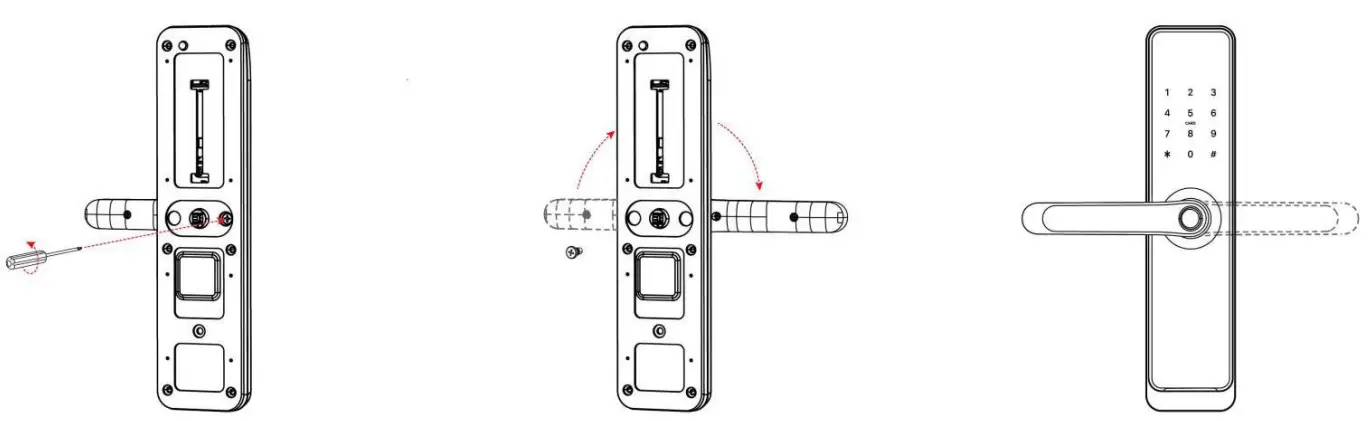
1.Loose Four Screws 2.Left Open the Handle Toword the Left; Right
Open the Handle Toword the Right.3. Reinstall the Screw After Adjusting the Direction
For Back Panel
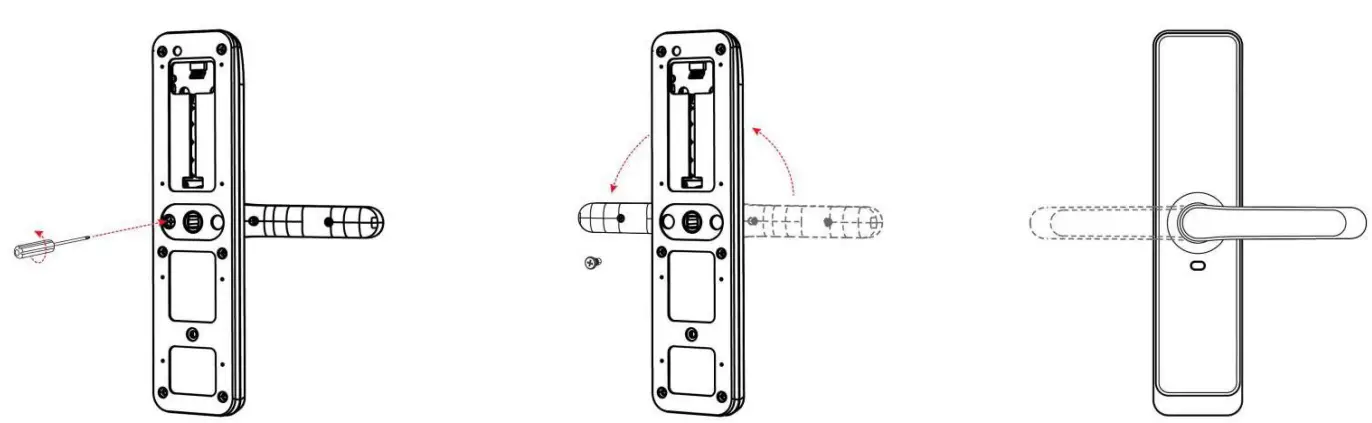 | ||
| 1. Loose Four Screws | 2.The direction of the rear panel handle is opposite to the front panel handle | 3.Reinstall the Screw After Adjusting the Direection |
2.2. Installation Diagram(For 5572)Step 1 Install Mortise Step 2 Install Sliding Screw Casing 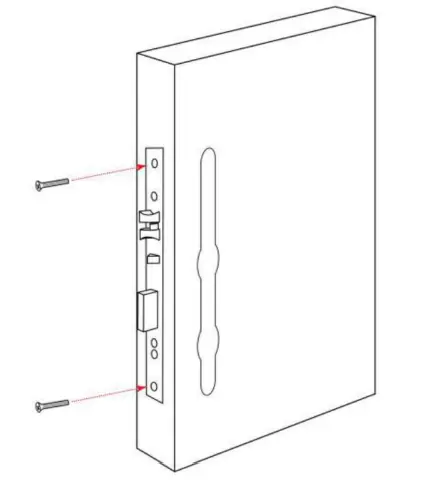
 1. The screw casing place is adjustable from 55mm to 100mm far from the square shaft. Depending on the location of the hole drilling or the old door hole.
2. The arrow is always pointing downStep 3 Install Back Panel and link wire Step 4 Install fixing screws 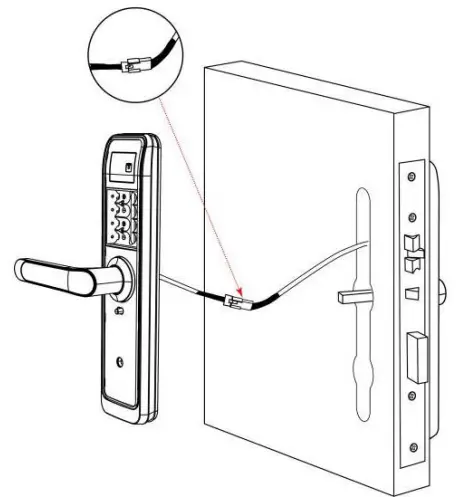
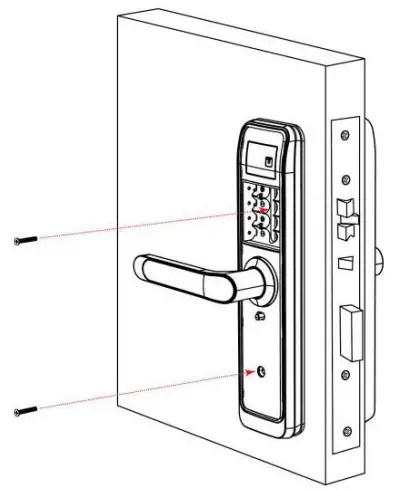
Step 5 installation complete 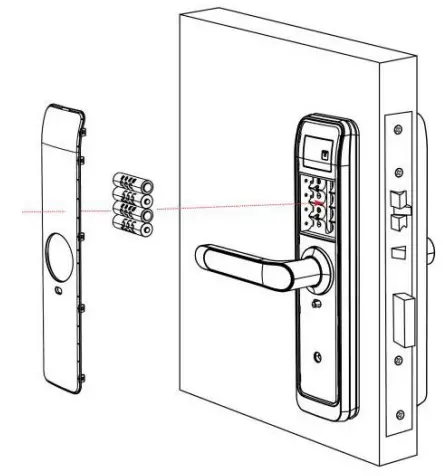
Operation

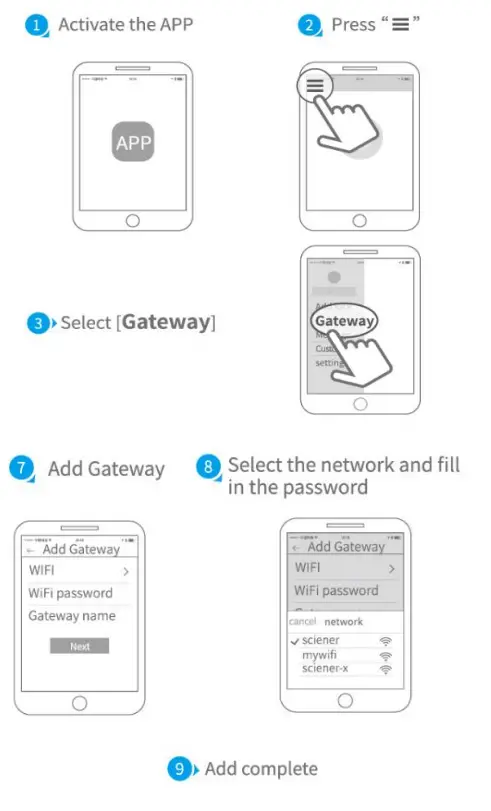
3.1.Registration
The software (iOS version) can be downloaded from the app store, and the Android version can be downloaded from the application store of Google play, Yingyongbao, Baidu, Ali, 360, Huawei, and Xiaomi.
http://a.app.qq.com/o/simple.jsp?pkgname=com.tongtongsuo.app&fromcase=40003
3.2. Connect the lock to the phone
- please scan the QR code to download the app
- You can also search for TTLock in the APP store(Google Play)to download
- Register a new account (phone number or email) or login with an existing account.
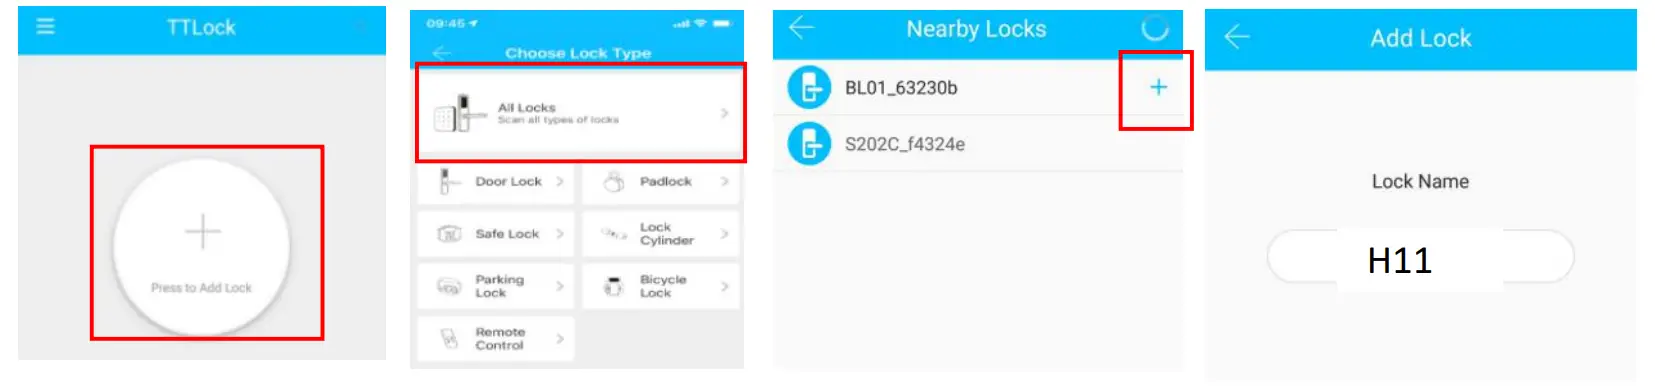
- Touch the lock screen to light, click “+ Add Lock”
- The lock nearby will appear on the phone screen, Click “+”
- Re-name the lock
- The lock was added successfully
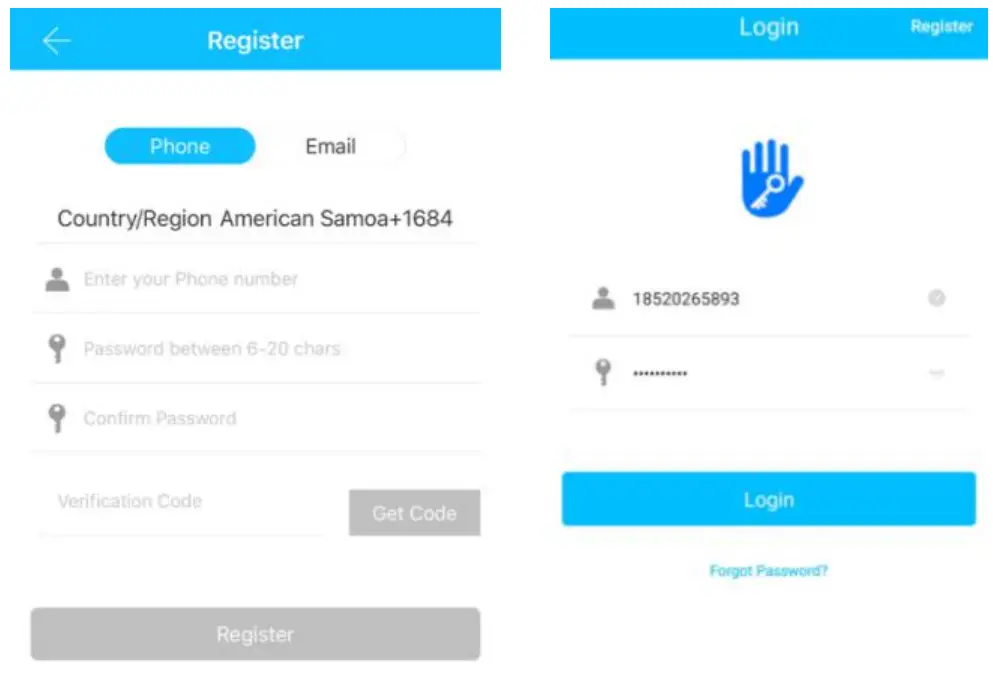
TTlock users can register the account by mobile phone and Email which currently support 200 countries and regions in the world. The verification code will be sent to the user’s mobile phone or email, and the registration will be successful after the verification.
3.3.Add locks
TTLock supports multiple types of lock devices. The lock needs to be added by the app after entering the add mode. Generally, a lock that has not been added, as long as the locking keyboard is touched, it will enter the add mode. The default password is 123456 if not added by the phone
3.4.User Management
3.4.1. Bluetooth management
Make sure there is no problem with Bluetooth communication. After connecting the phone to the door lock as above, Click “![]() “to unlock.(the phone is within 5 meters from the door lock)
“to unlock.(the phone is within 5 meters from the door lock)
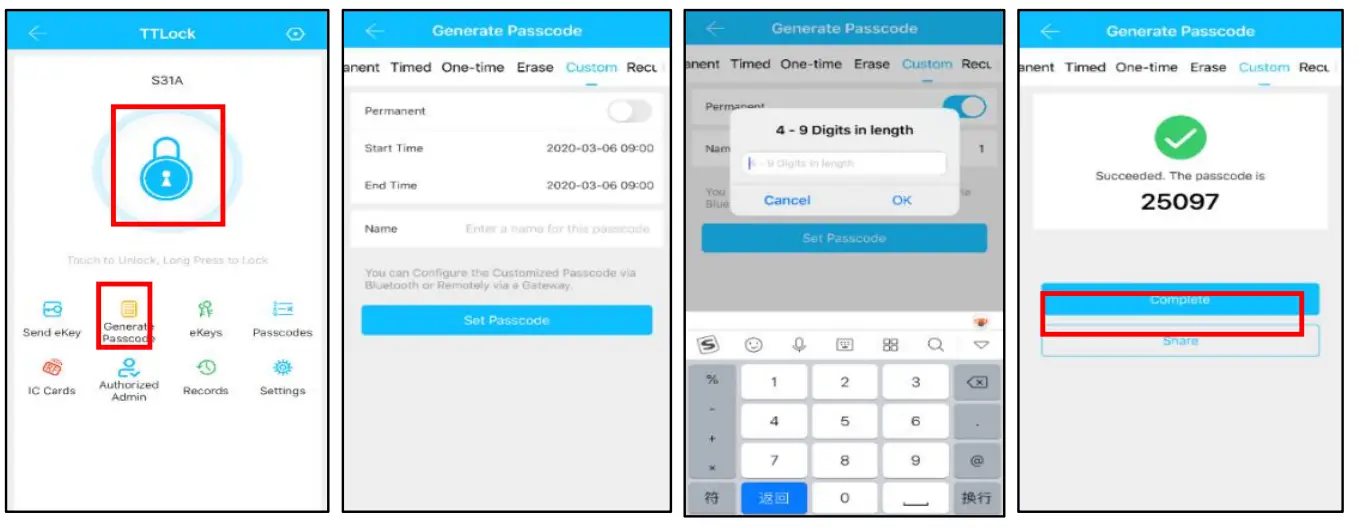
3.4.2. Setting Passcode
Passcodes are also a way to unlock. After entering the passcode on the locked keyboard, press the unlock button in the lower right corner to unlock. Passcodes are divided into
permanent, time-limited, single, clear, cycle, and custom.(You can share the Passcode with another user via WeChat、SMS、Email、Messenger、WhatsApp)
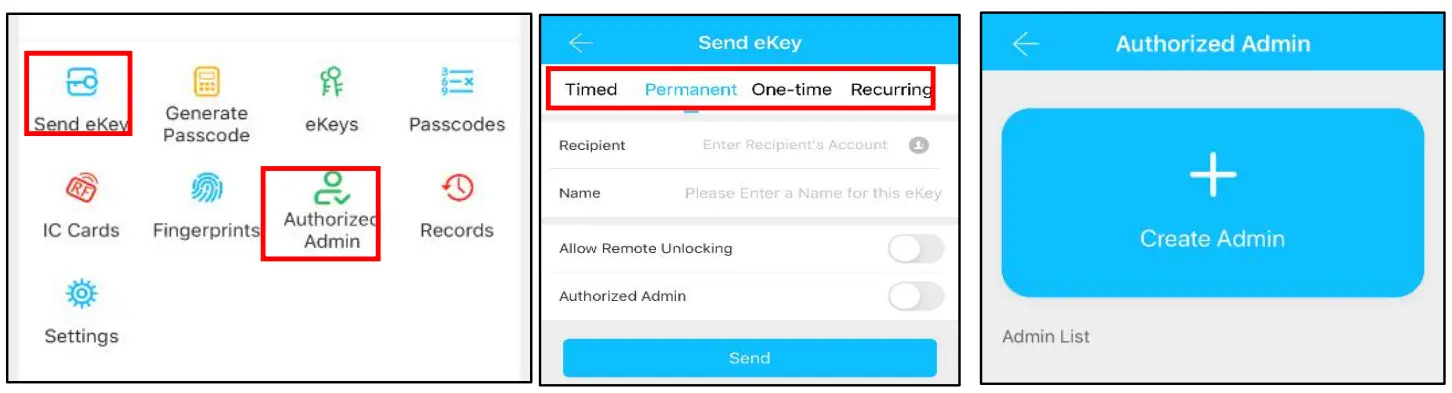
3.4.3. Send e-Key
Click on the ” ![]() ” as shown in the figure, and you can send the eKey to other users of TTlock to authorize the unlock(the receiver must download the APP and set up an account)→ Select the e-key format (Timed, permanent, One-time, Recurring) → Enter the recipient’s account of TTlock, set the name and effective time of the key, Can choose to allow remote unlocking or disallowing, authorized administrator or not authorized, as shown in figure →Send→The recipient’s account has Bluetooth unlock permission
” as shown in the figure, and you can send the eKey to other users of TTlock to authorize the unlock(the receiver must download the APP and set up an account)→ Select the e-key format (Timed, permanent, One-time, Recurring) → Enter the recipient’s account of TTlock, set the name and effective time of the key, Can choose to allow remote unlocking or disallowing, authorized administrator or not authorized, as shown in figure →Send→The recipient’s account has Bluetooth unlock permission

3.4.4.Add card
Supports opening doors through various IC cards. Before an IC card is used to open the door, it needs to be added first. The adding process needs to be performed by the app besides the lock. The validity period of the IC can be set, it can be permanent, or it can be limited in time.

3.4.5. Add fingerprint
The premise that a fingerprint can be used to open a door is that it needs to be added first. The adding process needs to be performed by the APP beside the lock. The fingerprint expiration data can be set, it can be permanent, or it can be limited. After setting, you can modify its validity period.
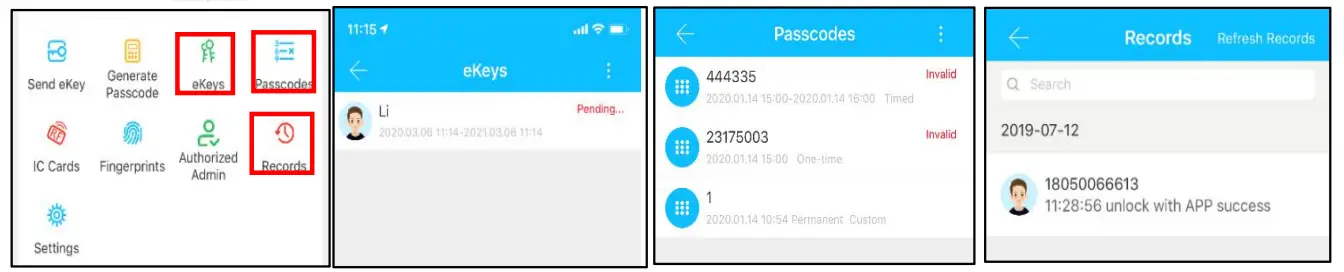
3.4.6. e-Key management
Click “ ![]() “ The manager can delete the key, reset the key, send, and adjust the Okay, meanwhile he can search the lock record.
“ The manager can delete the key, reset the key, send, and adjust the Okay, meanwhile he can search the lock record.
3.4.7. Passcode management
Click “![]() “.All generated passwords can be viewed and managed in the password management module. This includes a password change, password deletion, password reset, and password unlock the record.
“.All generated passwords can be viewed and managed in the password management module. This includes a password change, password deletion, password reset, and password unlock the record.
3.4.8.Unlock records
Click ” ![]() “you can query your unlock record as shown in figure
“you can query your unlock record as shown in figure
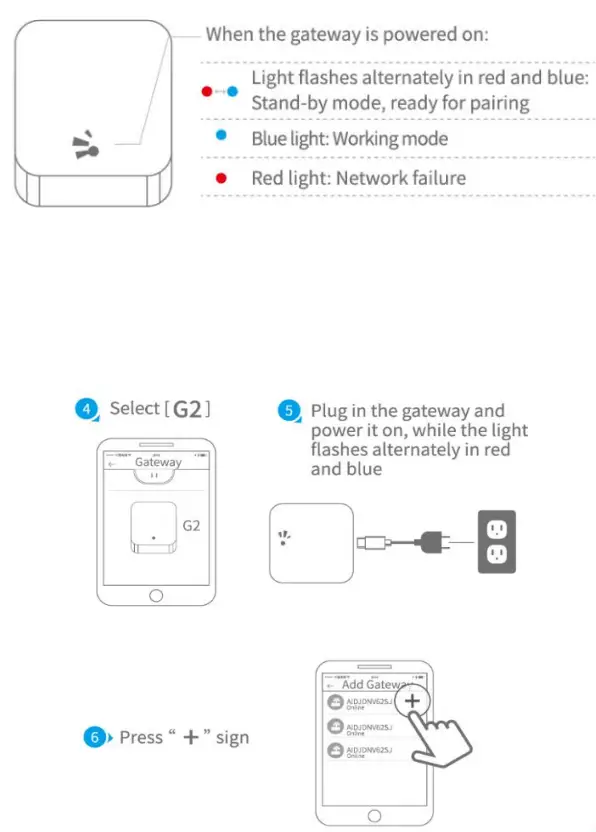
3.5. Gateway management(Optional)
The TT lock is directly connected via Bluetooth, which is why it is not attacked by the network. The gateway is a bridge between smart locks and home WIFI networks. Through the gateway, the user can remotely view and calibrate the lock clock, and read the unlock record. Meanwhile, it can remotely delete and modify the password.
3.5.1. Add Gateway
Lights Status
Pair the Getaway With App 3.5.2. Manual
After a short period of time, you can see which locks are in their coverage in the app. Once the lock is bound to the gateway, the lock can be managed through the gateway
FAQ
– In the Records of the main interface.
– You need to perform an unlock verification in any method then the passage mode will take effect.
– You can set how long to lock after unlocking
– a) In this case, first check that the positive and negative electrodes of the battery have been installed upside down, whether the battery has enough power
– b) Remove the back panel and see if it’s connected.
– c) To eliminate the above situation, you need to remove the lock, check whether the wires of the lock body are squeezed, and re-wire.
– Check the fingers for dirt or wear, check the fingerprint head on the lock for dirt and oil stains, etc.
– Check to see if the fingerprint is working properly(Press to see if there is any response.
– a) Large standby power consumption
– b) Short circuit
– It may be the triangle direction on the clutch was an error, please check the correction.
– Enter the wrong password more than 5 times in a row, the keyboard is locked for 5 mins, Other ways to can open the door
Guarantee
Customer Name: ……………………
Customer Calls:……………………..
Purchase Date: …………………………
Product Name: …………………………
Product Model: ……………………………
Note:
- Please keep this card so that you can use it when you need warranty service.
- We provide you with a one-year warranty from the date of purchase.
- This warranty service is valid for customers in any country in the world.


