Assembly
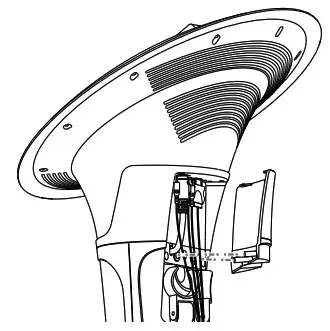
5. Connect to AC power, HDMI (if desired) and speakers as shown on page 7. Put the pedestal jack cover onto the rear of the main unit. You will hear a “click” sound when locked.
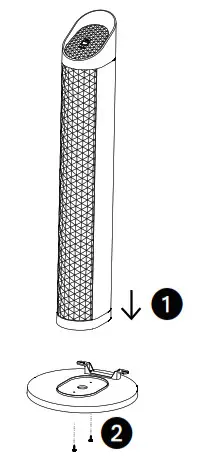 6. Place the tower speaker on the speaker stand while aligning the screw holes
 1. Then insert and tighten the speaker screws 2 from the bottom of the stand. Repeat the same process on the second tower speaker.
Location of Controls (Top)
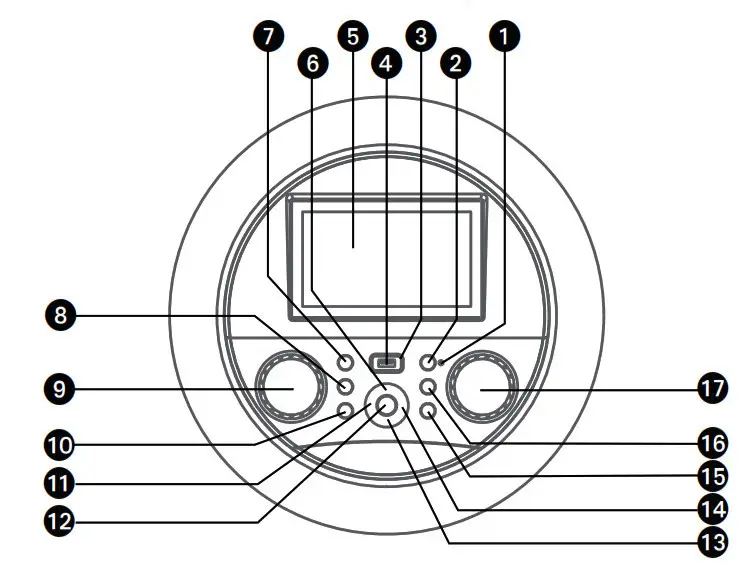
| 1. Bluetooth Indicator 2. Bluetooth Button 3. FUNCTION Indicator 4. USB Port 5. Touch Screen 6. 7. 8. 9. MUSIC VOLUME Control | 10. 11. 12. 13. 14. 15. 16. 17. MIC VOLUME/ECHO Control |
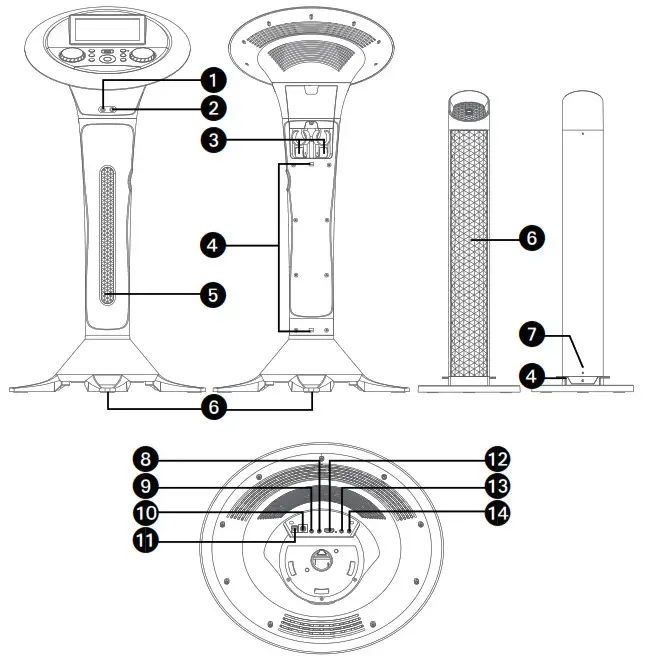
| 1. Mic 1 Jack 2. Mic 2 Jack 3. Retractable MIC holders 4. Cord management clamps 5. Lights 6. Speaker 7. Speaker cable | 8. Left Tower Speaker Jack 9. Right Tower Speaker Jack 10. Subwoofer Jack 11. DC IN Jack 12. HDMI Jack (Video only) 13. Line Out Jack 14. Line In Jack |
Connections
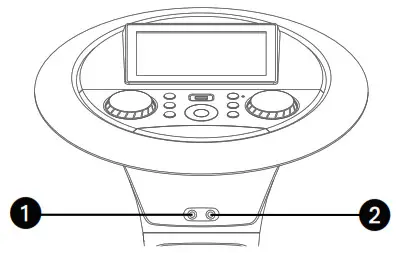
Connecting the Microphone(s)
| Connecting the Microphone(s)
| Microphones: Connect a microphone into Mic jack 1 1 as well as Mic jack 2 2 (when desired).Note: Do not drop or tap the Mic as damage to the Mic or speakers may occur. Do not twirl the microphone cord as it will cause damage to the encased wiring. |
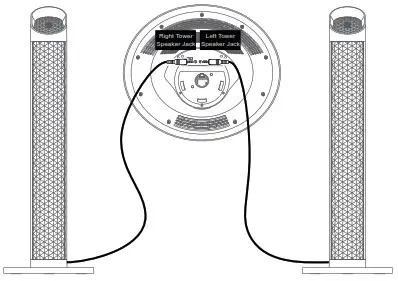
| Connecting the Tower Speakers
| 1. To protect the speakers, make sure the unit is off and the MUSIC VOLUME and MIC VOLUME. controls are set to minimum. 2. Connect the Right and Left Tower Speakers to the jacks on back of the unit as illustrated. 3. Turn the power on and slowly raise the MUSIC VOLUME and MIC VOLUME controls to a comfortable level. |
Connecting to AC Power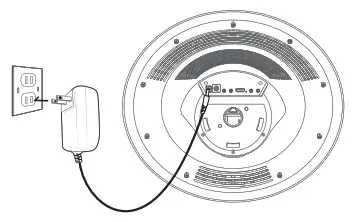 | 1. To protect the speakers, make sure the unit is off and the MUSIC VOLUME and MIC VOLUME. controls are set to minimum. 2. Connect the Right and Left Tower Speakers to the jacks on back of the unit as illustrated. 3. Turn the power on and slowly raise the MUSIC VOLUME and MIC VOLUME controls to a comfortable level. |
Note:
- Make all connections prior to plugging the AC adaptor into a power outlet.
- The AC adaptor has a polarized plug that fits into the AC outlet only one way. If the plug does not fit properly, turn it over and try again. Do not force and do not file or cut the wide blade.
Connecting to Line Out Jack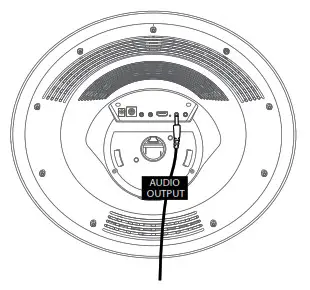 | This unit can be connected to another audio system for greater audio output via 3.5mm AUX cord (not included). Plug one end of AUX cord into the LINE OUT jack located on the rear of the machine. Plug the other end of the AUX cord into the Line In jack on your separate audio device. You may need to refer the instructions of your separate audio device for more details. |
Connecting the Unit to a TV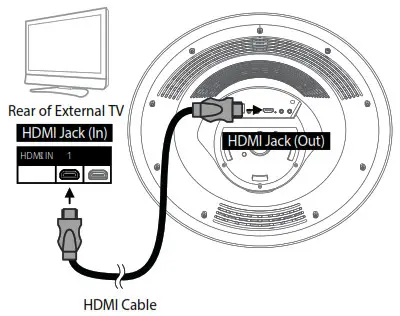 | The video and lyrics will be displayed on the built-in screen. You may also want to connect a TV to display a larger image (follow the steps below): Plug the HDMI cable (not included) into the HDMI Jack on the back of the unit. Plug the other end of the HDMI cable into the HDMI input on your TV. |
Notes:
- This unit can be used with or without a TV.
- Also refer to the TV’s or external unit’s User Guide.


