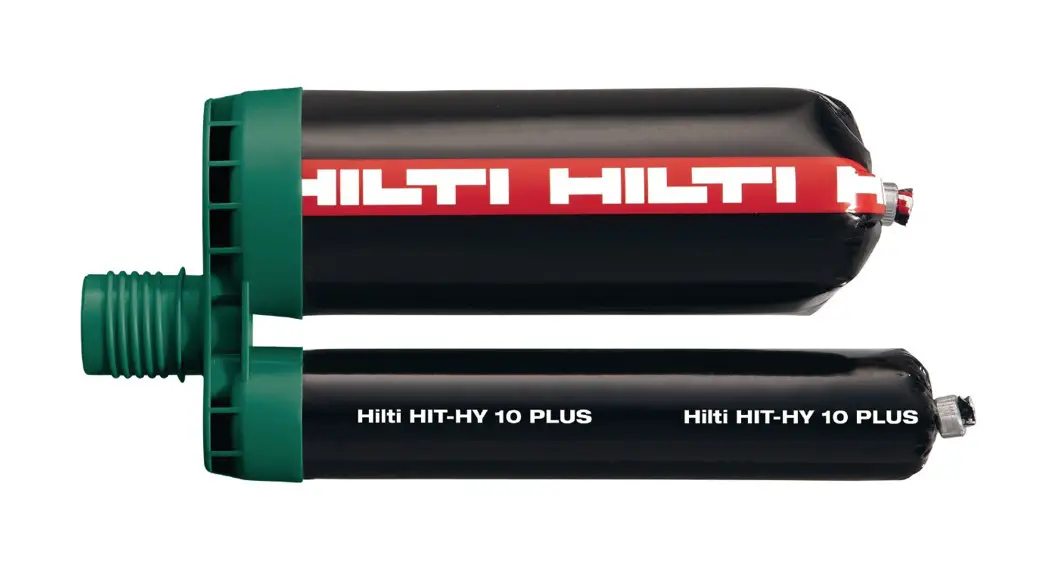
![]() HILTI HIT-HY 10 PLUS
HILTI HIT-HY 10 PLUS
HIT-HY 10 PLUS Adhesive Anchor
 |   |
Setting Details of Hilti HIT-HY 10 PLUS with threaded rod HAS
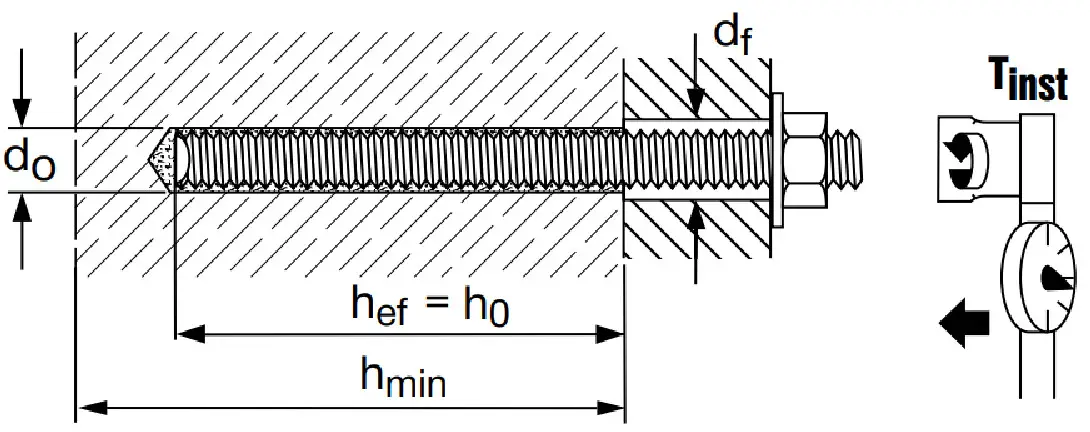
Inch Sizes
| Rod Diameter | Setting Detail | d in. | 3/8 | 1/2 | 5/8 | 3/4 |
| Drill bit diameter | do in. | 7/16 | 9/16 | 3/4 | 7/8 | |
| HIT-RB cleaning brush | d in. | 7/16 | 9/16 | 3/4 | 7/8 | |
| Embedment Depth | het in. | 2 1/4 – 4 1/2 | 3 – 6 | 3 3/4 – 71/2 | 4 1/2 – 9 | |
| Max. Tightening torque | -List ft-lb | 15 | 20 | 50 | 105 | |
| Diameter of clearance hole | df in. | 7/16 | 9/16 | 11/16 | 13/16 | |
| Min. base material thickness | hmin in. | het + 2 in. | hef + 2 in. | hef + 2 in. | het + 2 in. | |
The holes must be filled about 2/3 full.
Metric Sizes
| Rod Diameter | Setting Detail | d mm | M 10 | M 12 | M 16 | M 20 |
| Element diameter | d mm | 10 | 12 | 16 | 20 | |
| Drill bit diameter | do mm | 12 | 14 | 18 | 22 | |
| HIT-RB cleaning brush | d mm | 12 | 14 | 18 | 22 | |
| Embedment Depth | hef mm | 60 – 115 | 75 – 150 | 95 – 190 | 115 – 230 | |
| Max. Tightening torque | Twist Nm | 20 | 27 | 68 | 142 | |
| Diameter of clearance hole | df mm | 12 | 14 | 18 | 22 | |
| Min. base material thickness | hm,, mm | hef + 50 mm | hef + 50 mm | hef + 50 mm | hef + 50 mm | |
The holes must be filled about 2/3 full.

Setting Details of Hilti HIT-HY 10 PLUS with HAS
Inch Sizes
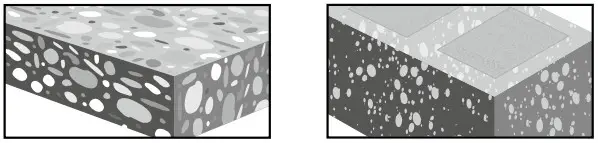
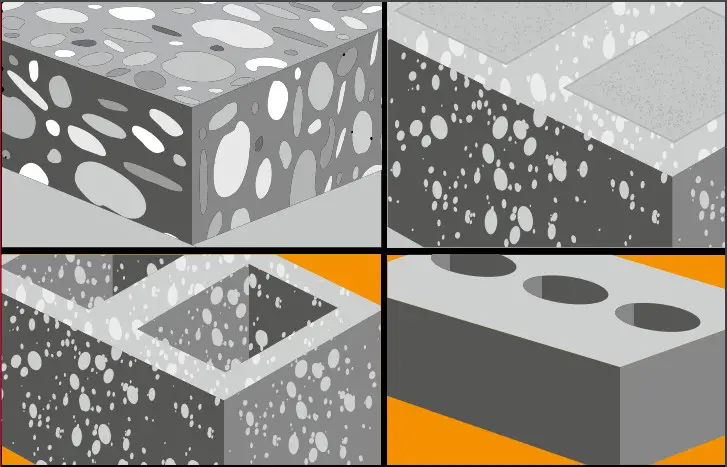
| Characteristic | Units | Hollow Concrete Masonry | Clay Brick with Holes | |||||
| HAS Rod | HAS Rod | |||||||
| Anchor Rod Size | in. | 1/4 | 5/16 | 3/8 | 1/2 | 5/16 | 3/8 | 1/2 |
| d bit Drill Bit Diameter | in. | 1/2 | 5/8 | 5/8 | 11/16 | 5/8 | 5/8 | 7/8 |
| ho Minimum Hole Depth | in. | Through face cell | 33/4 | |||||
| h_, Effective Embedment her Depth | in | 2 | 31/8 | |||||
| Required Screen | mm | 12×50 | 16 x 50 | 16 x 50 | 18×50 | 16×85 | 16 x 85 | 18 x 85 |
| Tinst Tightening Torque | ft-lb | 2. | 2. | 3.0 | 5. | 2. | 3.0 | 5. |
| Approximate Fastening per Cartridge | Small | 24 | 16 | 16 | 10 | 8 | 8 | 5 |
| Medium | 38 | 25 | 25 | 17 | 13 | 13 | 8 | |
| Filling Volume | ml | 12 | 18 | 18 | 24 | 30 | 30 | 36 |
| HDM | Approx. number trigger of pulls | 3 | 4 | 4 | 5 | 6 | 6 | 8 |
| HDE | Approx. trigger p | 2 | 3 | 3 | 4 | 5 | 5 | 6 |
Metric Sizes
| Characteristic | Units | Hollow Concrete Masonry | Clay Brick with Holes | ||||||||
| HAS Rod | HAS Rod | ||||||||||
| Anchor Rod Size | mm | 6 | 8 | 10 | 12 | 8 | 10 | 12 | |||
| dbit Drill Bit Diameter | mm | 12 | 16 | 16 | 18 | 16 | 16 | 18 | |||
| ho Minimum Hole Depth | mm | Through face cell | 95 | ||||||||
| het Effective Embedment Depth | mm | 50 | 80 | ||||||||
| Required Screen | mm | 12 x 50 | 16 x 50 | 16 x 50 | 18 x 50 | 16 x 85 | 16 x 85 | 18 x 85 | |||
| T,nst Tightening Torque | Nm | 3 | 3 | 4 | 6 | 3 | 4 | 6 | |||
| Approximate Fastening per Cartridge | Small | 24 | 16 | 16 | 10 | 8 | 8 | 5 | |||
| Medium | 38 | 25 | 25 | 17 | 13 | 13 | 8 | ||||
| Filling Volume | ml | 12 | 18 | 18 | 24 | 30 | 30 | 36 | |||
| HDM | Approx. number of trigger ulls | 3 | 4 | 4 | 5 | 6 | 6 | 8 | |||
| HDE | Approx. number of trigger pulls | 2 | 3 | 3 | 4 | 5 | 5 | 6 | |||
Setting Details of Hilti HIT-HY 10 PLUS with reinforcement bars
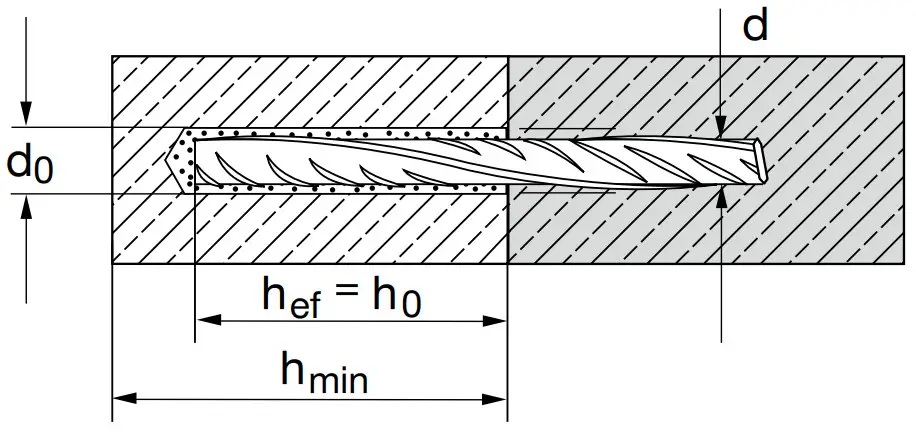
US Inch reinforcement bar sizes
| Setting Parameter | Symbol Unit | # 3 | # 4 | # 5 | # 6 | ||
| Setting Detail | Bar Diameter | d | in. | 3/8 | 1/2 | 5/8 | 3/4 |
| Drill bit diameter | do | in. | 1/2 | 5/8 | 3/4 | 7/8 | |
| HIT-RB cleaning brush | d | in. | 1/2 | 5/8 | 3/4 | 7/8 | |
| Embedment Range hef,min – hef,max | het | in. | 2 1/4 – 4 1/2 | 3 – 6 | 3 3/4 – 7 1/2 | 4 1/2 – 9 | |
| Min. base material thickness | hmin | in. | hef+ 2 in. | het+ 2 in. | het+ 2 in. | hef+ 2 in. | |
The holes must be filled about 2/3 full
Metric reinforcement bar sizes
| Setting Parameter | Symbol | Unit | 10 | 12 | 16 | 20 | |
| Setting Detail | Bar Diameter | d | mm | 10 | 12 | 16 | 20 |
| Drill bit diameter | do | mm | 14 | 16 | 20 | 25 | |
| HIT-RB cleaning brush | d | mm | 14 | 16 | 20 | 25 | |
| Embedment Range hef.min – hef,max | hef | mm | 60 -115 | 75 -150 | 95 -190 | 115 – 230 | |
| Min. base material thickness | hmin | mm | hef + 50 mm | ||||
The holes must be filled about 2/3 full
Canadian reinforcement bar sizes
| Setting Parameter | Symbol Unit | 10 M | 15 M i | 20 M |
| Bar Diameter Setting Detail | d mm | 10 | 15 | 20 |
| Drill bit diameter | do in. | 9/16 | 3/4 | 1 |
| HIT-RB cleaning brush | d in. | 9/16 | 3/4 | 1 |
| Embedment Range hef.min – hef,max | hef mm | 60 – 115 | 95 – 190 | 115 – 230 |
| Min. base material thickness | hmin mm | hef + 50 mm | het + 50 mm | het + 50 mm |
The holes must be filled about 2/3 full
Hilti HIT-HY 10 PLUS
Adhesive anchoring system for fastenings in concrete and masonry.
Prior to use of product, follow instructions for use and recommended safety precautions.
Check expiration date: See expiration date imprint on foilpack manifold. (Month/Year). Do not use an expired product.
Foil pack temperature: Must be between 41°F and 104°F (5°C – 40°C) when in use.
Base material temperature at time of installation: Must be between 32°F and 104°F (0°C – 40°C).
Exception in solid clay brick: between 41°F and 104°F (+5°C and 40°C).
Instructions for transport and storage: Keep in a cool, dry and dark place between 41°F to 77°F (5°C – 25°C).
Material Safety Data Sheet: Review the MSDS before use.
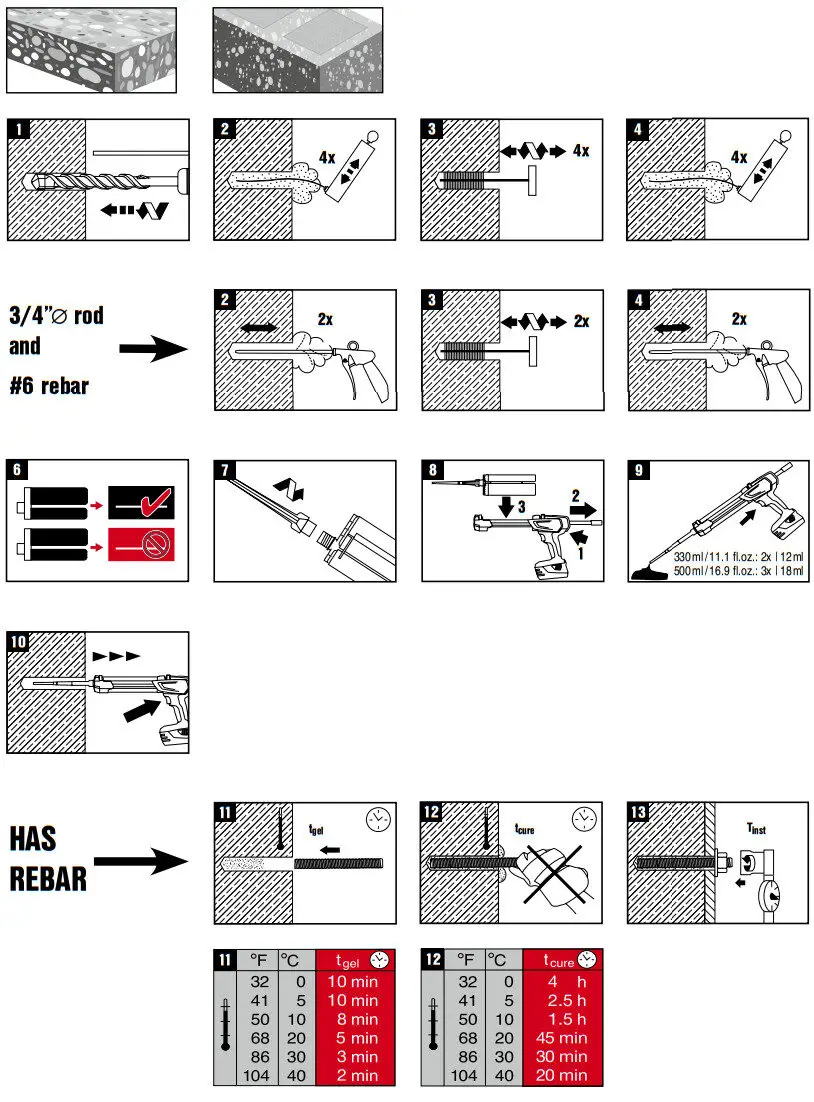
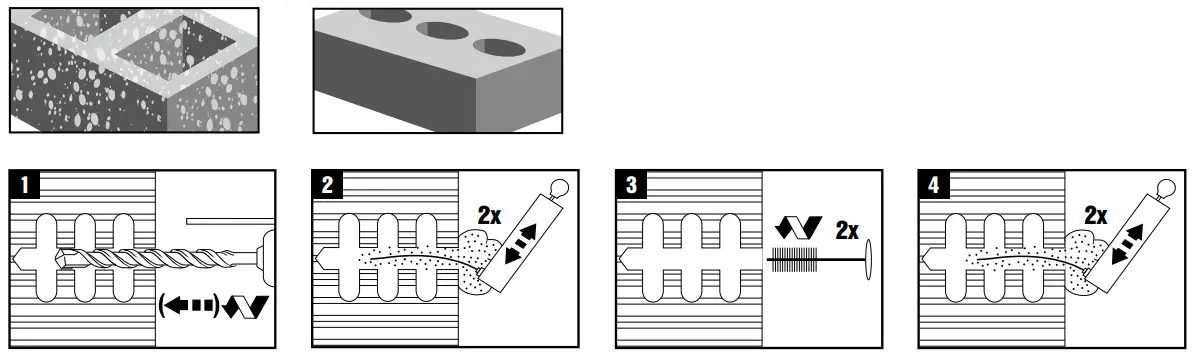
Installation instructions: Follow the illustrations on page 1 and 2 for the sequence of operations and refer to tables for setting details. For any application not specifically covered by this document, contact Hilti.
1. Drill hole with a hammer-drill using an appropriately sized carbide drill. For holes drilled in concrete use the rotation hammer mode, for hollow base materials rotation ode only. For holes drilled with other drill types contact a Hilti representative.
2 – 4 Clean hole. Just before setting an anchor/rebar, the hole must be cleaned of water, dust and debris by the cleaning method described below: Solid base material:
- Blow – 4 strokes with Hilti blow-out pump with the nozzle extended to the back of the hole.
- Brush – 4 times with the specified brush size (brush Ø ≥ borehole Ø) by inserting the round steel brush to the back of the hole with a twisting motion.
- Blow – 4 strokes with Hilti blow-out pump with the nozzle extended to the back of the hole.
– Note – For 3/4” diameter rods and #6 Rebar: - Blow – 2 strokes with oil-free compressed air (90 psi at 3.5 CFM (6bar at 6m³/h)) with the nozzle extended to the back of the hole.
- Brush – 2 times with the specified brush size (brush Ø ≥ borehole Ø) by inserting the round steel brush to the back of the hole with a twisting motion.
- Blow – 2 strokes with oil-free compressed air (90 psi at 3.5 CFM (6bar at 6m³/h)) with the nozzle extended to the back of the hole.
Hollow base material: - Blow – 2 strokes with Hilti blow-out pump with the nozzle extended to the back of the hole.
- Brush – 2 times with the specified brush size (brush Ø ≥ borehole Ø) by inserting the round steel brush to the back of the hole with a twisting motion.
- Blow – 2 strokes with Hilti blow-out pump with the nozzle extended to the back of the hole.
Standing Water:
The concrete in and around the drilled hole may be water saturated at the time of adhesive injection. However, if standing water is present in the anchor hole, flush the hole with normal hose pressure until water runs clear, perform 3 brush insertions, flush again until water runs clear and remove all standing water completely (i.e. vacuum, compressed air or other appropriate procedure). Prior to injection of anchor adhesive, blow out using oil-free compressed air to achieve a relatively dry borehole surface.
The hole must be free of dust, debris, water, ice, oil, grease and other contaminants prior to adhesive injection. Inadequate hole cleaning = poor load value!
5.For hollow base material: Insert a mesh sleeve HIT-SC into the borehole!
6.Insert foil pack in black foil pack holder. Never use damaged foil packs and/or damaged orunclean foil pack holders. Attach new mixer prior to dispensing a new foil pack (snug fit).
7. Tightly attach Hilti HIT-RE-M mixer to foil pack manifold. Do not modify the mixer in any way. Make sure the mixing element is in the mixer. Use only the mixer supplied with the adhesive.
8. Insert foil pack holder with foil pack into HIT-dispenser. Push release trigger, retract plunger and insert foil pack holder into the appropriate Hilti dispenser.
9. Discard initial anchor adhesive. The foil pack is self-opening when dispensing begins. Do not pierce the foil pack manually (can cause system failure). Do not use the material from the first trigger pulls when a foil pack is first used, or when a new mixing nozzle is installed: – foil pack 11.1 oz. (330 ml): discard 2 trigger pulls – foil pack 16.9 oz. (500 ml): discard 3 trigger pulls Dispose discarded mortar into the empty outer packaging.
10. Inject anchor adhesive into hole or mesh sleeve without forming air pockets. Solid base material: Inject the anchor adhesive from the back of the hole towards the front and withdraw the mixer slowly as adhesive is being dispensed (Use mixer extensionfor deep holes). Fill holes approximately two-thirds full, or as required to ensure that the anular gap between the anchor/rebar and the concrete is completely filled with anchor adhesive over the embedment length. Hollow base material: Fill the mesh sleeve with mortar from the centering cap until mortar escapes at the centering cap (filling control).
11. Insert anchor/rebar into bore hole. Mark and set anchor/rebar to the required embedment depth. Before use, verify that the anchor/rebar is dry and free of oil and other contaminants. To ease installation, anchor/rebar may be slowly twisted as they are inserted. After installing an anchor/rebar, the annular gap must be completely filled with adhesive.
12. Observe the gel time “t gel”, which varies according to temperature of base material. Minor adjustments to the anchor/rebar position may be performed during the gel time. See table 12. Once the gel time has elapsed, do not disturb the anchor/rebar until the curing time “t cure” has elapsed.
13.Apply designed load/torque after “t cure” has passed, and the fixture to be attached has been positioned. See table 13.
Partly used foil packs must be used up within four weeks. Leave the mixer attached on the foil pack manifold and store under the recommended storage conditions. If reused, attach a new mixer and discard the initial quantity of anchor adhesive as described by point 9.
Safety instructions
Contains: Hydroxypropyl methacrylate(A), 1,4-Butanediol dimethacrylate (A), dibenzoyl peroxide(B) (A, B)
  B
B
Warning
H317 May cause an allergic skin reaction. (A,B)
H319 Causes serious eye irritation (A)
H410 Very toxic to aquatic life with long lasting effects. (B)
P262 Do not get in eyes, on skin, or on clothing.
P280 Wear protective gloves/protective clothing/eye protection.
P302+P352 IF ON SKIN: Wash with plenty of soap and water.
P305+P351+P338
IF IN EYES: Rinse cautiously with water for several minutes. Remove contact lenses, if present and easy to do. Continue rinsing. P333+P313 If skin irritation or rash occurs: et medical advice/attention.
P337+P313 If eye irritation persists: Get medical advice/attention.
Disposal instructions:
– Empty packs: May be disposed via the local Green Dot collecting system![]() or EAK waste material code: 150102 plastic packaging
or EAK waste material code: 150102 plastic packaging
– Full or only partially emptied packs must be disposed of as special waste in accordance with official regulations. EAK waste material code: 200127* paint, inks, adhesives and resins containing dangerous substances. Or EAK 080409* waste adhesives and sealants containing organic solvents or other dangerous substances.
Warranty: Refer to standard Hilti terms and conditions of sale for warranty information.
Failure to observe these installation instructions, use of non-Hilti anchors, poor or questionable concrete conditions, or unique applications may affect the reliability or performance of the fastenings.
Hilti, Inc.
5400 South 122nd East Ave.
Tulsa, OK 74146 USA
Tel.: +1-800-879 8000
www.us.hilti.com
Hilti Canada Corporation
2360 Meadowpine Blvd.
CDN-Mississauga, Ontario L5N 6S2
Tel.: (800) 363-4458
www.hilti.ca
![]()
Warning(A, B) B
 Contains: hydroxypropyl methacrylate (A), 1,4-Butanediol dimethacrylate
(A), dibenzoyl peroxide (B)
May cause an allergic skin reaction.(A,B) Causes serious eye irritation.(A) Very toxic to aquatic life with long lasting effects.(B).
 Cetifed to NSF NANI/CAN61
Hilti Inc.
5400 South 122nd East Ave.
Tulsa, OK 74146 USA
Tel.: +1-800-879 8000
www.us.hilti.com
Made in Germany
Hilti = registered trademark of Hilti Corporation, Schaan, Liechtenstein
www.us.hilti.com
Printed in Germany © 2022
Right of technical changes reserved S.E. & O


 10 Screw Anchors User Manual")


