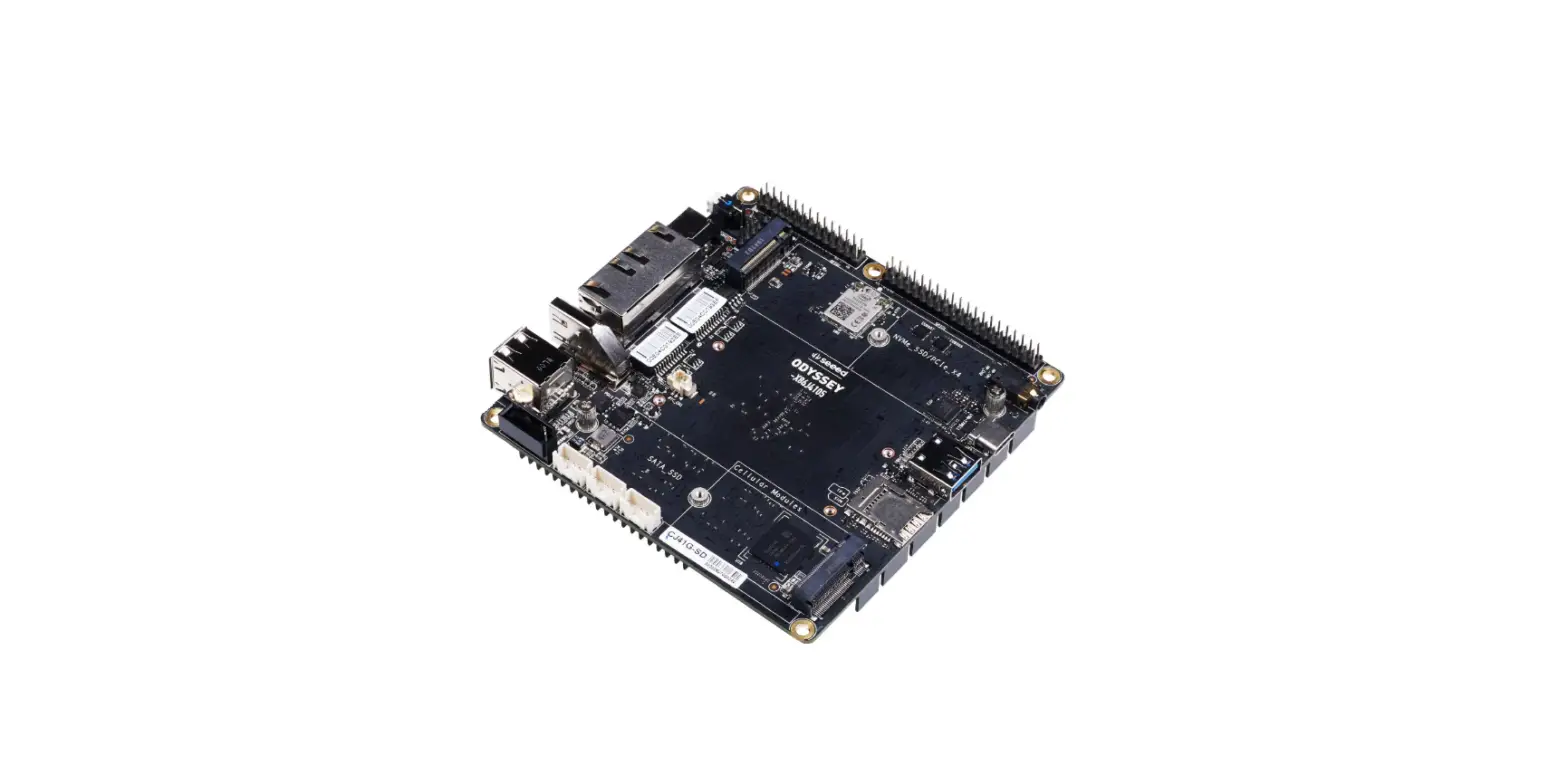
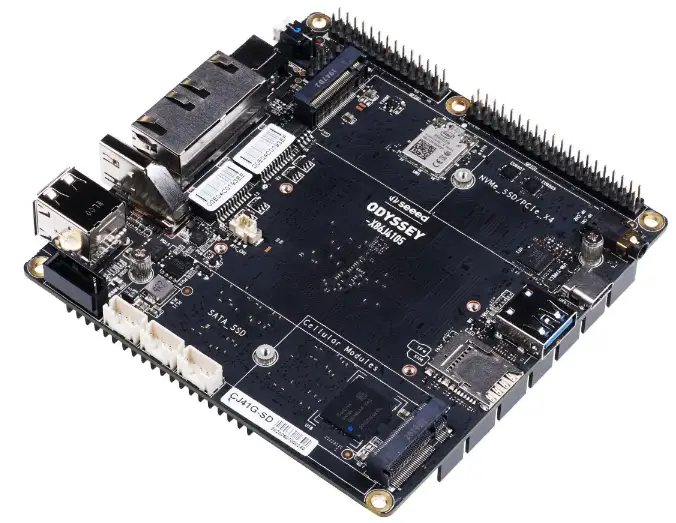
ODYSSEY-X86J4125 Celeron Board with GPIO
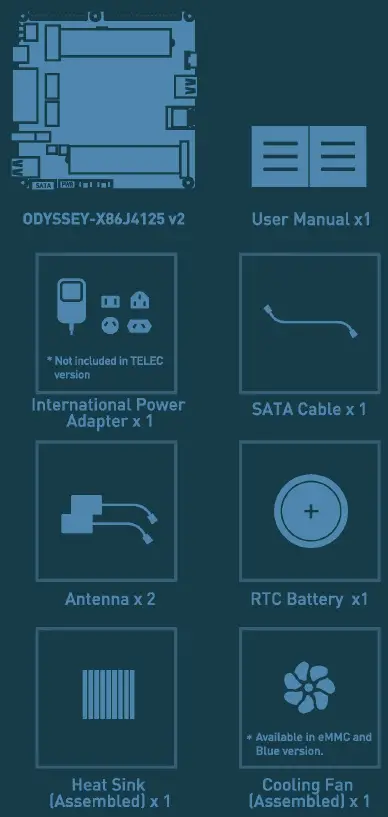
Package Contents
- ODYSSEY – X86J4125 v2
- User Manual
- International Power Adapter [Not included in TELEC version!
- SATA Cable
- Antenna x2
- RTC Battery
- Heat Sink [Assembled]
- Cooling Fan [Assembled] [Included in EMMC and Blue version]
Specifications
| Processor | Intel ® Celeron® J4125 Frequency: 2.0-2.7GHz |
| Coprocessor | Raspberry Pi” RP2040 32bit ARM® Dual-Core Cortex®MO+ |
| Graphics | Intel• UH □ Graphics 600 Frequency, 250 – 750MHz |
| Memory
Storage | LPDDR4 8GB
64GB eMMC V5.1 (in eMMC version) |
| Wireless | Wi-Fi 802.11 a/b/g/n/ac • 2.4/5 GHz HT160 Bluetooth® 5.0 |
| Networking | 2 x Intel® 1226-V PC le 2.5GbE LAN |
| Audio | Microphone+ headphone Combo Connector |
| Headers | 28-pin header from Raspberry Pi RP2040 40-pin header compatible with Raspberry Pi |
|
USB | USB 2.0 Type-A x2 USB 3.1 Type-A xl USB 3.1 Type-C xl |
| Video Interfaces | HDMl2.0a, Up to 4096×2160 la 60Hz 24bpp DP1.2a, Up to 4096×2160 la 60Hz 24bpp |
|
Expansion Slots | M.2[Key B, 2242/22801, SATA Ill, USB2.0, UIM M.2 [Key M, 2242/2280), PCle 2.0 x4 Micro SD card Socket SIM Card Socket SATAIII |
| RTC | JST 1.0 CR2032 3V |
| TPM | Built-in JTPM [2.01. optional external TPM 2.0 |
|
Power | DC Jack 5.5/2.lmm or Type-C PD DC Jack input, 12-19V DC Type-C input, USB PD |
| Dimensions | 110x110mm |
| Certifications | FCC, CE, TELEC, UKCA |
Quick Start with ODYSSEY- X86J4125 v2
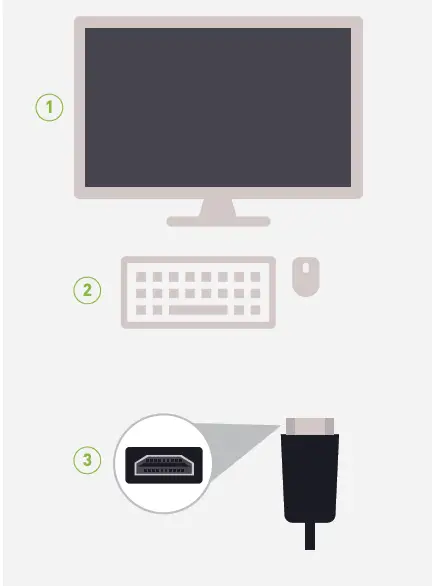
Before you Start
Make sure you have the following:
- An external monitor
- A keyboard and a mouse
- An HDMI Cable
Attaching External Storage
If you have bought the 64GB EMMC storage version of the ODYSSEY – X86J4125 v2, you can skip this step. However, if you need more storage for your needs, feel free to follow this step.
There are four methods of adding storage to ODYSSEY – X86J4125 v2.
- Through M.2 PCIE Connector
- Through M.2 SATA connector
- Through SATA Connector
- Through Micro-SD Card Slot
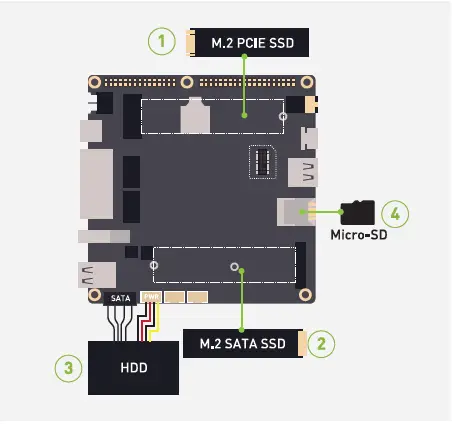
Note
Only three storage types support installing an operating system inside (M.2 SATA, M.2 PCIE, and SATAI. and the Micro SD Card can only be used as external storage.
Connecting Antennas
Insert the two antennas into the two sockets on the ODYSSEY – X86J4125 v2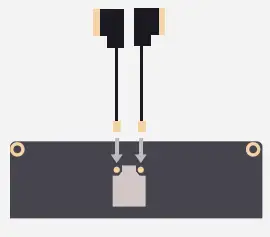
Note: One antenna is for Wi-Fi and Bluetooth whereas the second antenna is for strong 5G connectivity
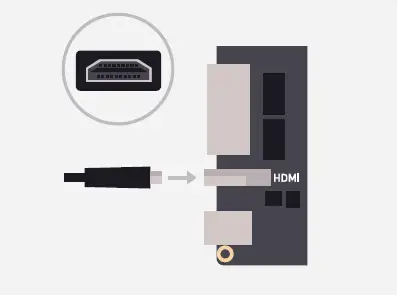
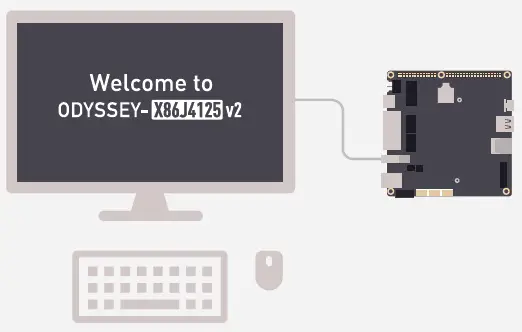
Connecting to a display
- There are two ways to connect your ODYSSEY – X86J4125 v2 to an external display
Method 1
Method 2
Connecting to a keyboard and a mouse
Connect your favorite keyboard and mouse to the ODYSSEY – X86J4125 v2 through any of the USB connectors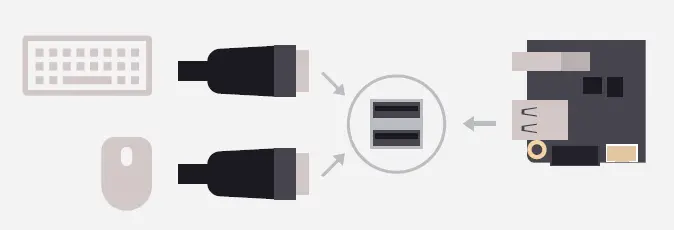
Adding external TPM (Optional)
There is a built-in fTPM (2 O] If you don’t need an external TPM, you can skip this step.
Note: Please ensure TPM is placed in the right direction.
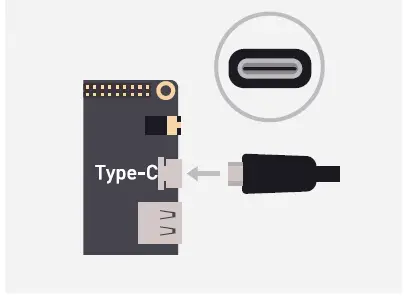
Powering up
- There are two ways to power up your ODYSSEY – X86J4125 v2.
Method 1
Use the 12V/2A power adapter [provided]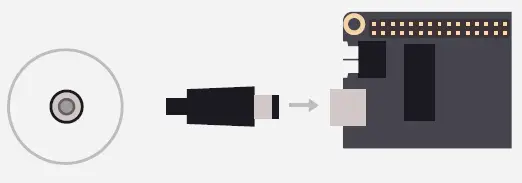
Method 2
Use a USB Type-C Cable [Supports DP]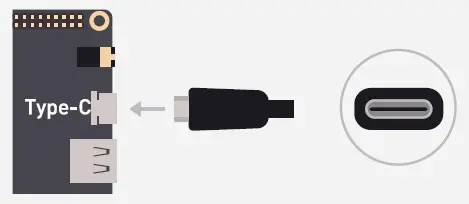
- Press the power button and you will notice the blue power LED turn on

- Wait a few seconds until it boots into the operating system.
Installing an Operating System
ODYSSEY -X86J4125 v2 supports both Windows and Linux operating systems. If you have bought the non-EMMC version, you could attach external storage by following the previous steps and install your desired operating system by creating a bootable USB drive. Also, if you have bought the EMMC version with windows pre-installed, you could additionally install Linux according to your requirements.
Step 1
Connect your bootable USB drive to one of the USB ports on the ODYSSEY -X86J4125 v2.
Step 2
Press the power button and keep pressing the F7 key on the keyboard until you see the Boot Manager screen.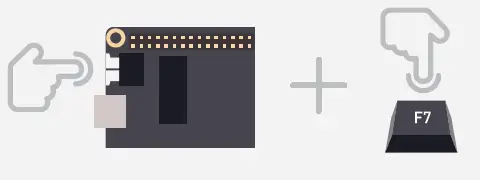
Step 3
Select the connected USB Drive as the boot drive and press enter 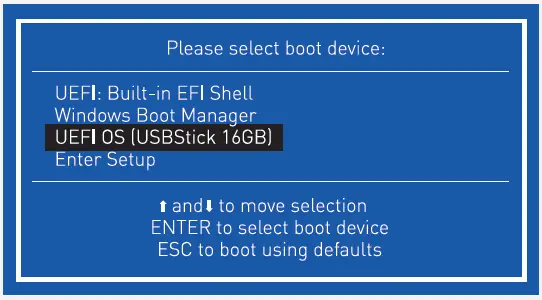
Step 4
Then follow the instructions on the installation screen to complete installing your desired operating system.
Adding 46 Cellular Connectivity
Step 1
Insert a Micro-SIM Card to the bottom layer of the slot.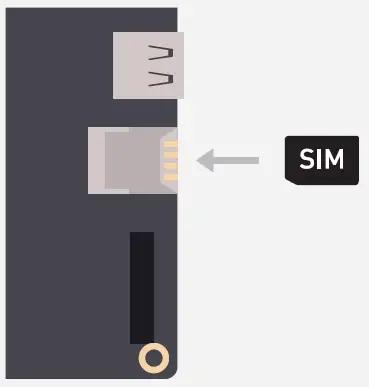
Step 2
Insert a USB interface 4G module.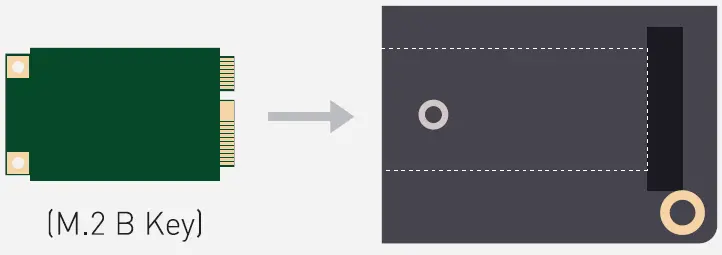
Note: This module is a must-have if you want to use the connected SIM card.
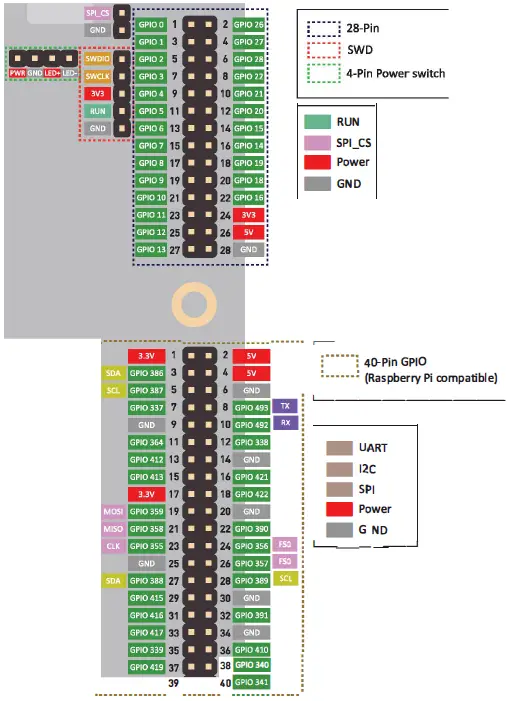
Pinout diagram
FAQ
- Q: How can I access the BIOS setup?
A: Press the Power Button and keep pressing the DEL key until you see the BIOS Setup. - Q: I cannot connect to Wi-Fi and Bluetooth
A: Check BIOS settings and enable Wi-Fi and Bluetooth from BIOS. - Q: ODYSSEY – X86J4125 v2 does “t power up
A: Make sure you use the 12V/2A power adapter provided in the box and check the connection.
If you have any further questions, please visit forum.seeedstudio.com or send an email to [email protected].
seeed studio
www.seeedstudio.com www.seeed.cc.


