BILBIL
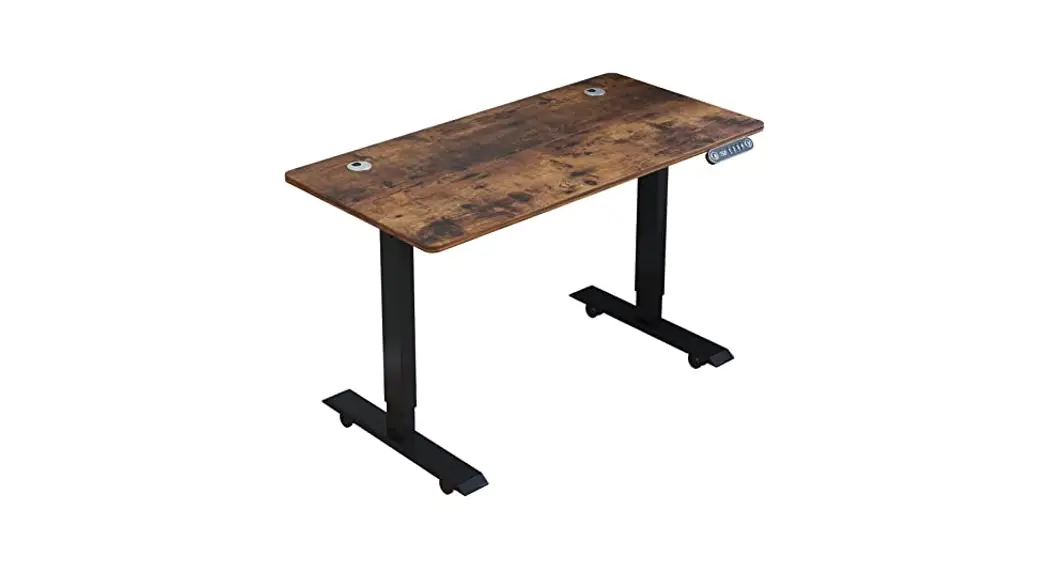
L59 Electric Height Adjustable Standing Desk
User Manual
L59 Electric Height Adjustable Standing Desk
IMPORTANT INFORMATION IS READ CAREFULLY. KEEP THIS INFORMATION FOR FURTHER REFERENCE.
GENERAL GUIDELINES
- Please read the following instruction carefully and use the product accordingly.
- Please keep this manual and hand it over when you transfer the product.
- This summary may not include every detail of all variations and considered steps. Please contact us when further information and help are needed.
NOTES
- Please follow the assembly instructions precisely and only use the product as intended.
- If an odor is present when first opening the package, please leave the unwrapped product in a shaded and ventilated area for a few days to air out.
- Prior to assembly, please check the product for defects or missing accessories. If any defects are found or accessories are missing, do not use the product as damage or Injury may occur;
- Please contact us for assistance and replacement.
- During assembly, please only slightly tighten the screws in their Cared position first, then fully tighten them. A Philo’s screwdriver is recommended but not included.
- It is suggested you regularly check the product bolts and connections to ensure safe use.
- Assemble the item on a soft flat and clean surface to avoid scratches and damage.
WARNING
- During assembly, keep parts and packaging materials away from children and pets as there could cause injury and are a potential choking hazard.
- Avoid sharp objects or corrosive chemicals to prevent damage to the product.
- Please open the item slowly and cautiously to avoid pinching your hands with metal joints, especially for children.
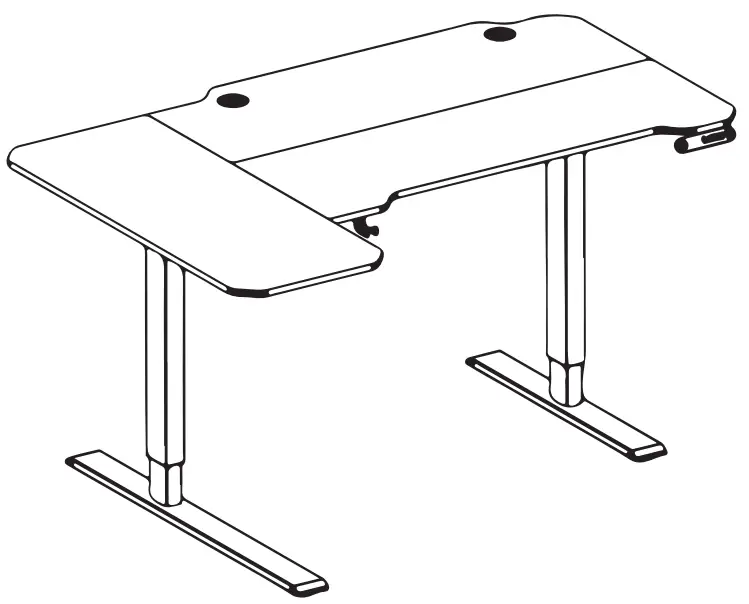
Components
Please check you have all the pieces listed below
Part List
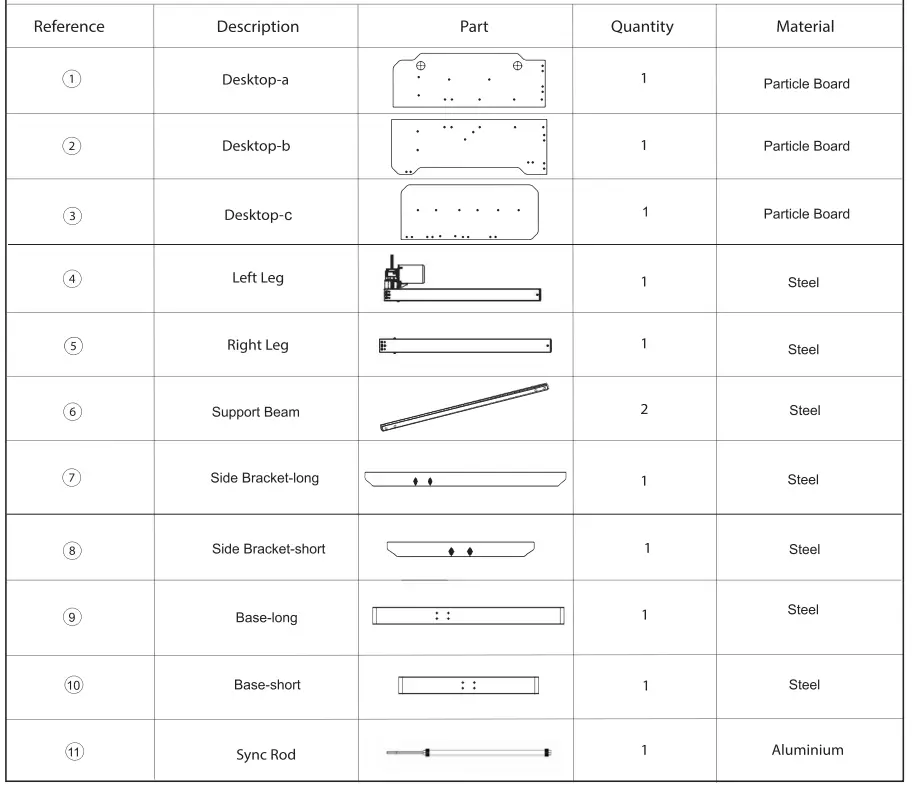
Components
Please check you have all the pieces listed below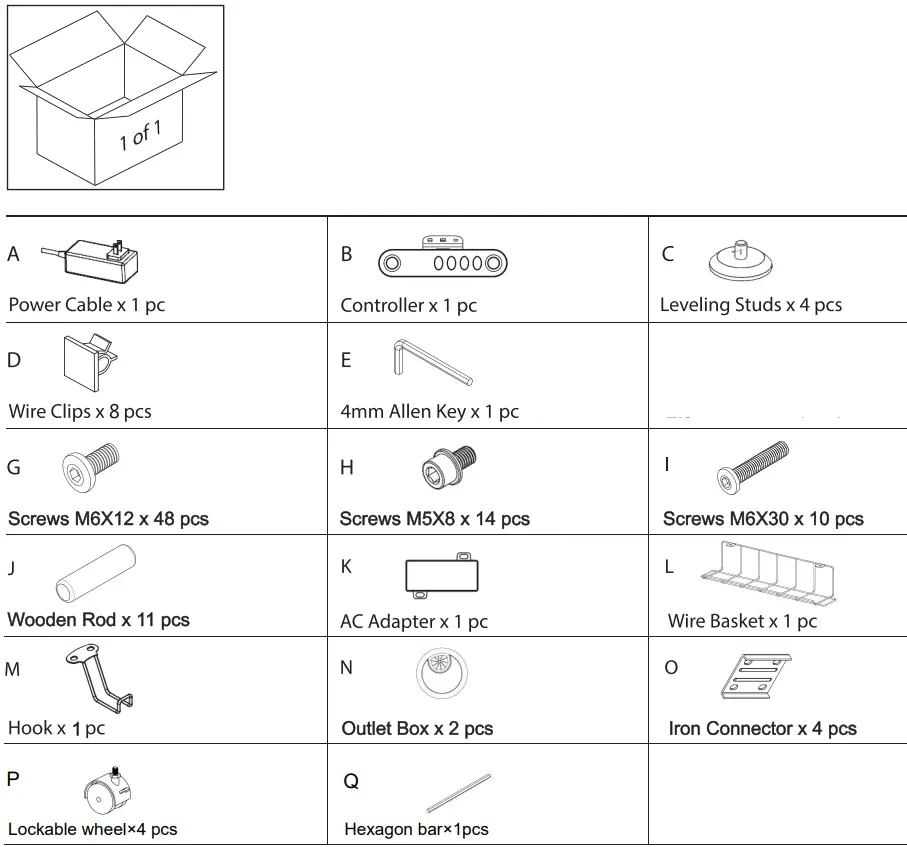
![]()
Note: Two more wooden rods in the accessory bag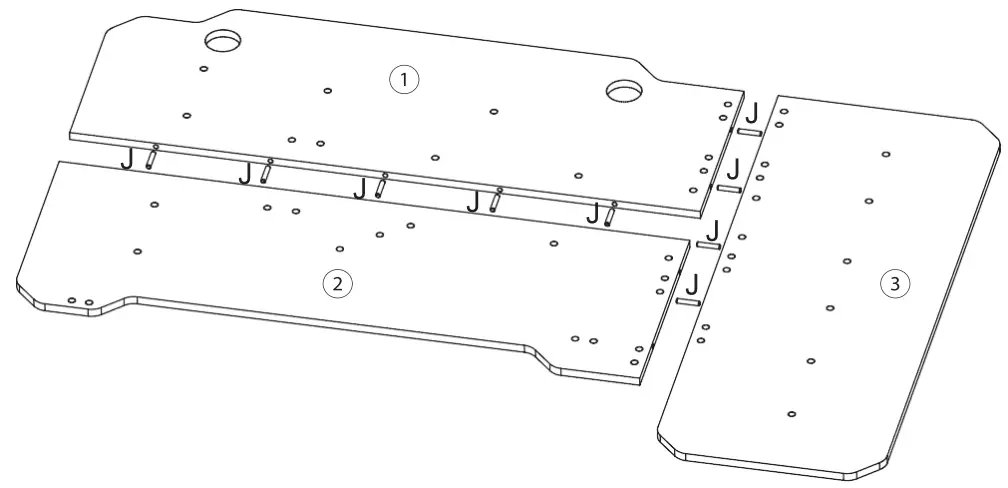
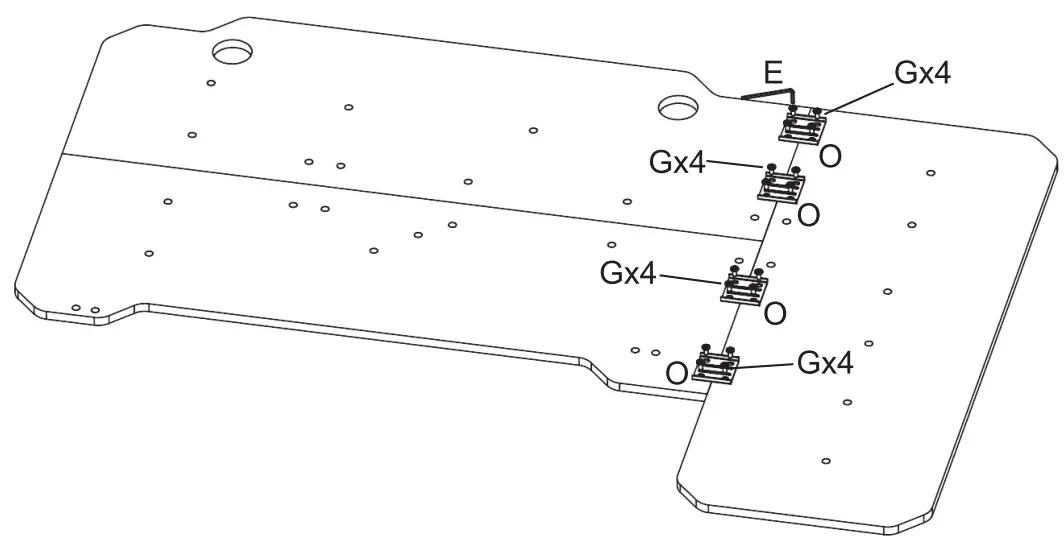
![]()
Note: The horizontal bar on the Iron Connector should be perpendicular to the seam of the table panel splice
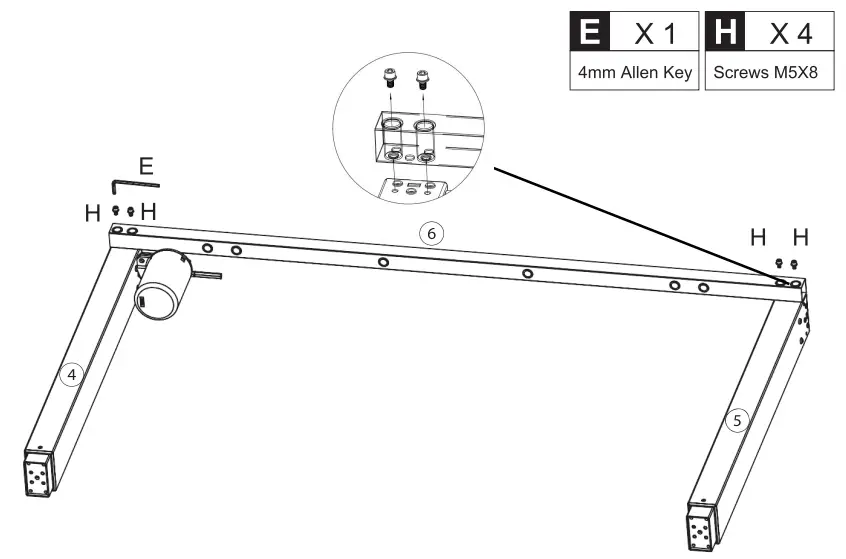
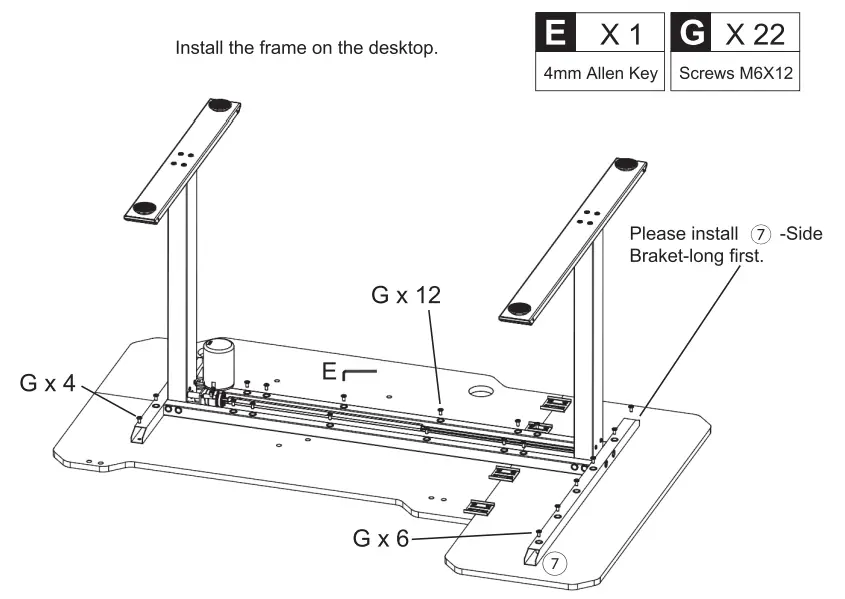
Install the other 6-Support Beam on the other side in the same way as in step 3. 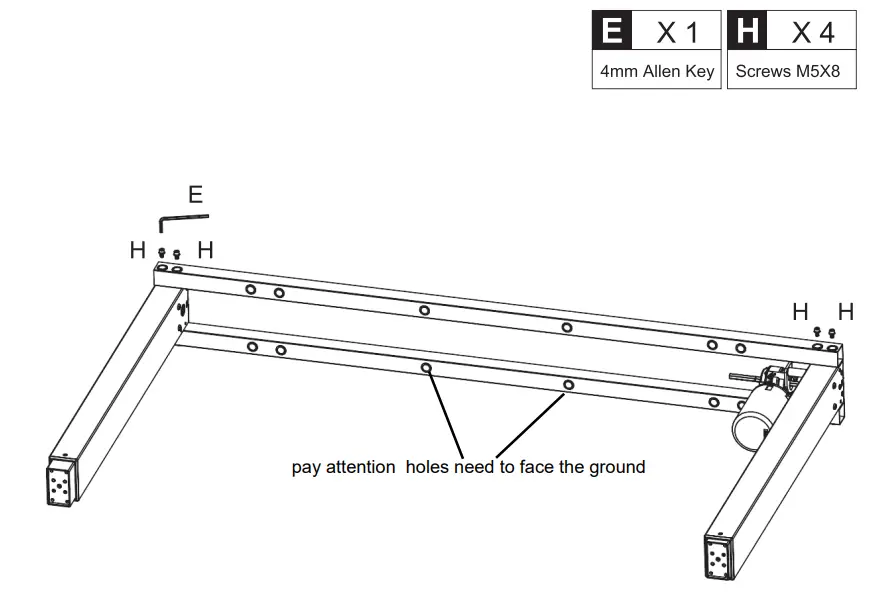
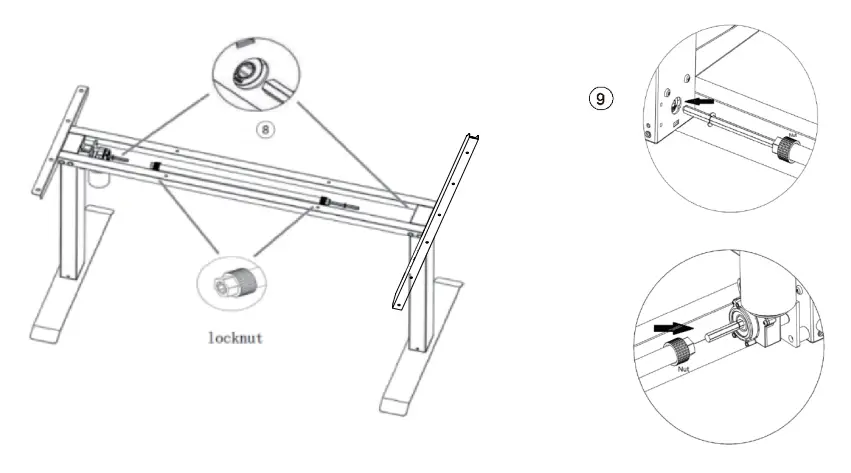
Install the 11-Sync Rod and tighten the two screws at both end of the Sync Rod.
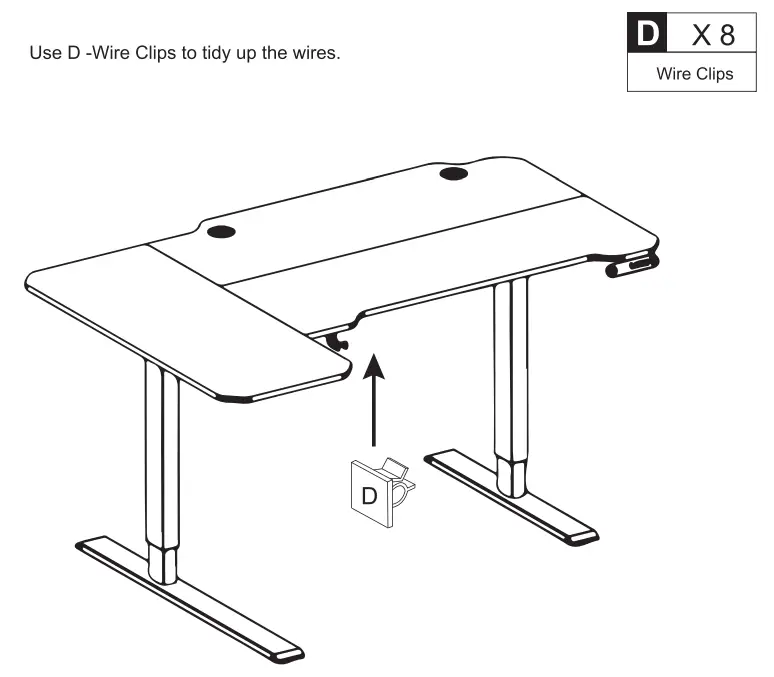
Install K -AC Adapter, B -Controller, L -Wire Basket, and M -Hook on the desktop. 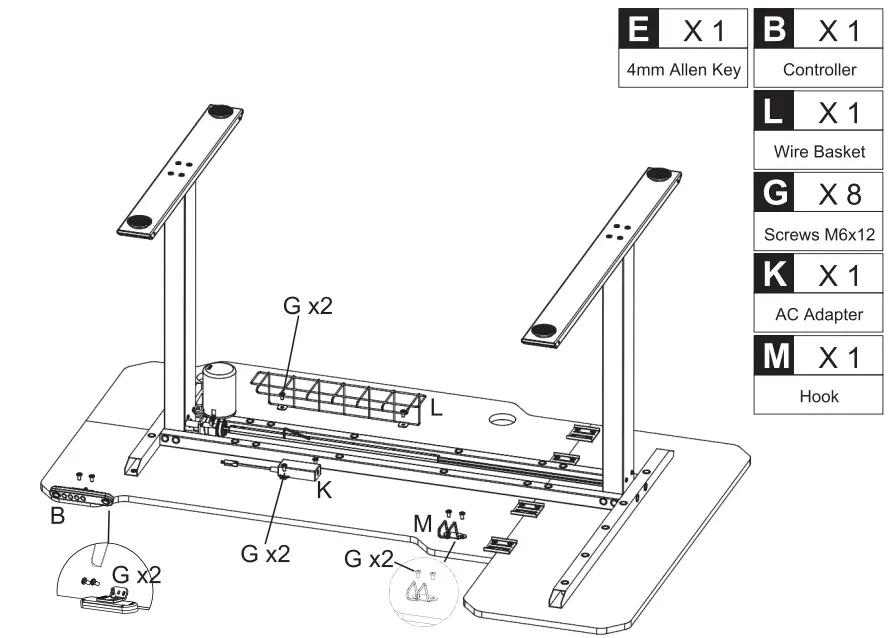
Stand the desk up and press the outlet box firmly into the desk. 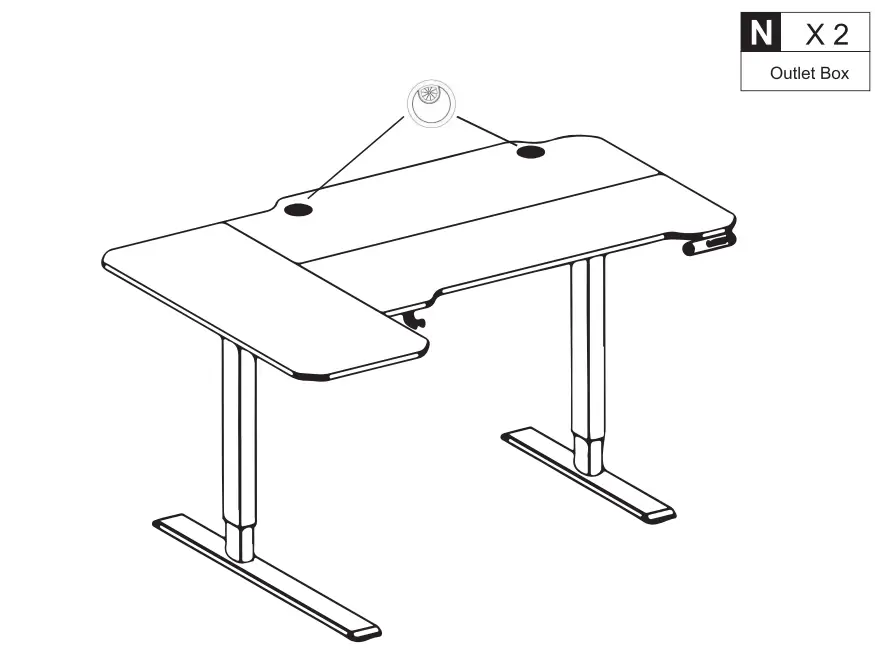
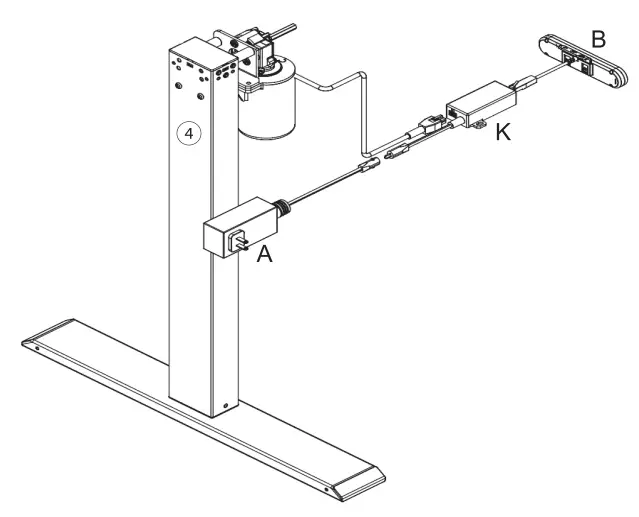
Connect Controller, AC Adapter, Power Cable, and Left Leg.
CONTROLLER INSTRUCTION

| RESET Setting | Method 1:Press and hold the A ” and a V ” buttons on the handset at the same time for seconds until you hear the beep. Release the buttons. The desk will go automatically until it shows 69, and the reset is successful. |
| Height Adjustment | Up: Press Up an A ” .Down: Press Down a V “. |
| Switch Display | Press and hold a V ” and Button 4 to switch cm to inch to cm. |
| Memory Height | Press and hold any of the memory buttons (1,2,3 or 4) until you hear a beep. Release the button, and this position height will be stored in memory. When the working height of memory needs to be used, press the memory position button and the desk will automatically adjust to the memory height. Note: This standing desk has 4 different height memories. The memory positions stored are still valid after powering off. You can use the up and down buttons to adjust the standing desk to the height you need to work. |
Troubleshooting Guide:
If your standing desk does not work properly, you may need to reset it. If any error codes appear, you need to reset it. If it still does not work after the reset, please contact us for more help.
Maintenance and Consideration.
- During daily maintenance, use a clean soft cloth to remove surface dust not use a wet cloth or hard material to wipe the surface of the table.
- Avoid contacting the surface with acid-based chemicals.
- For slight scratches,gentle wipe with a soft cloth, and you can smooth out scratches. Avoid attaching tape directly to the outer surface of the metal feet to prevent paint from peeling.


