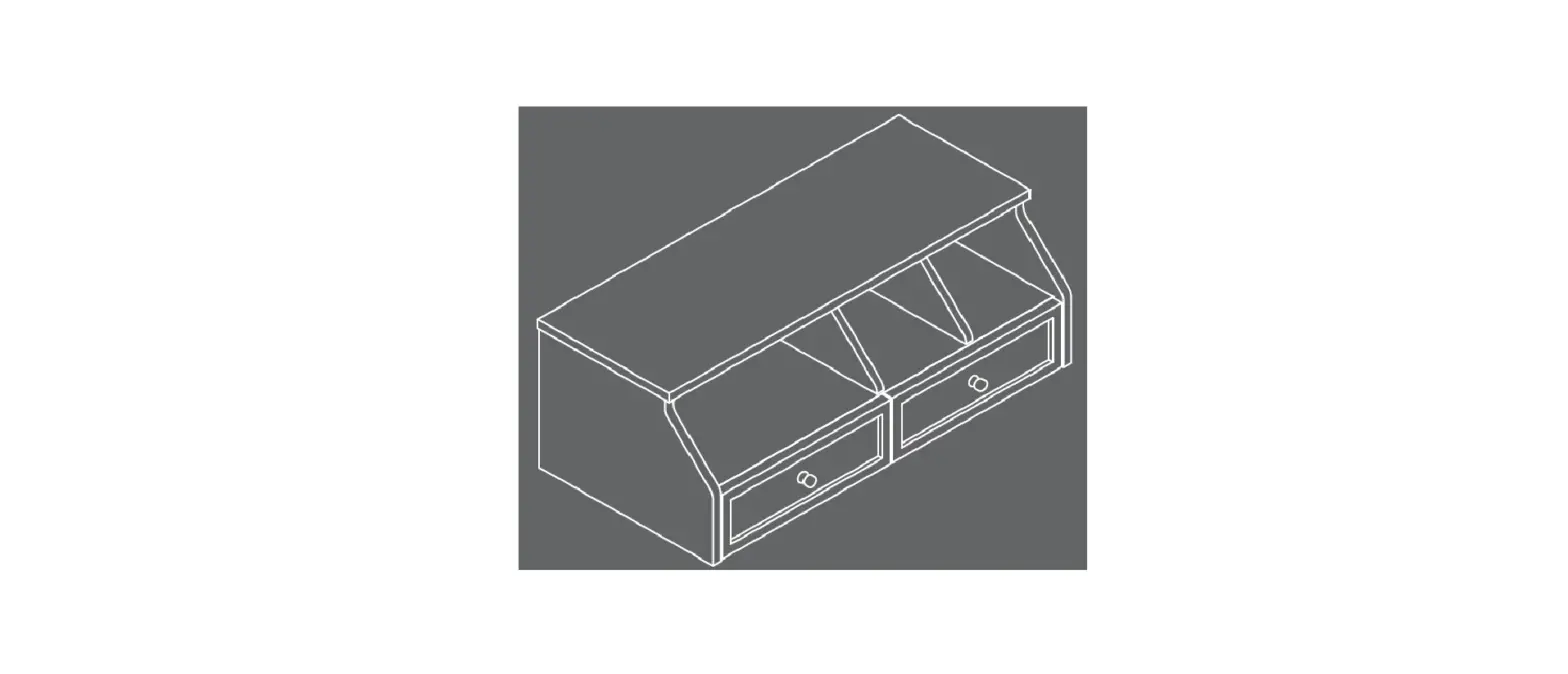
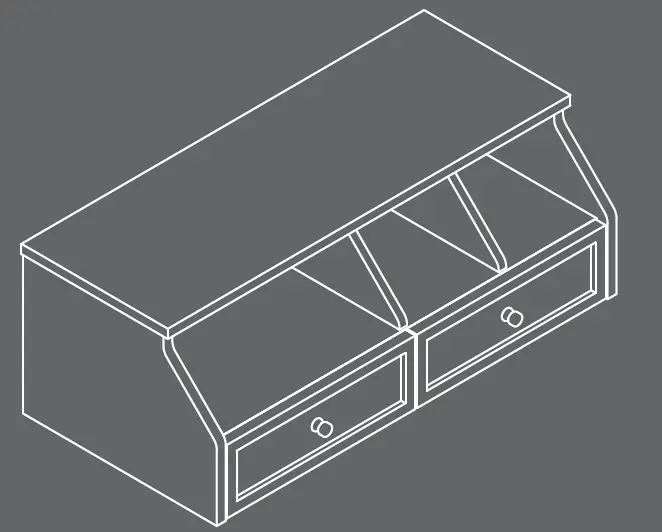
Teknik 5421416 Organizer Hutch
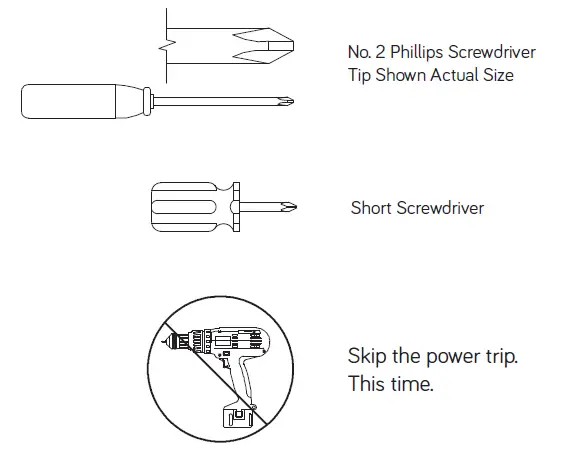
Assembly Tools Required
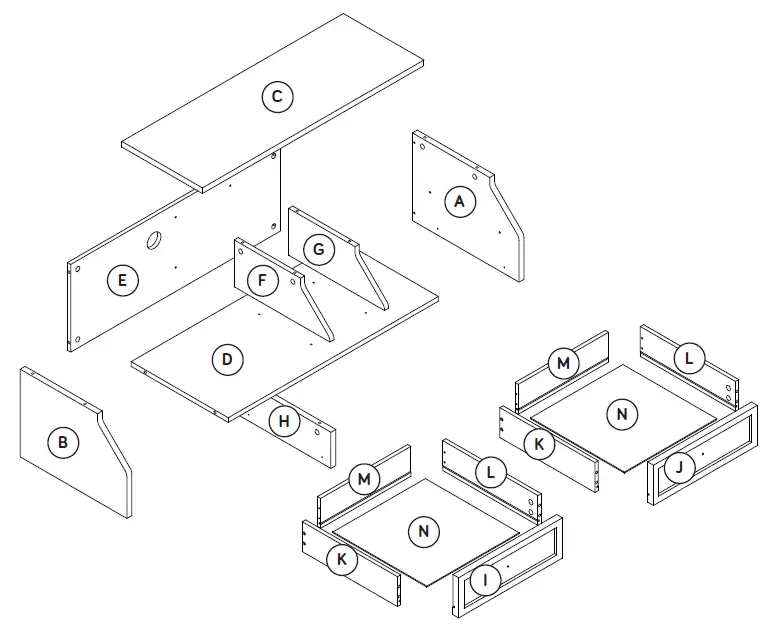
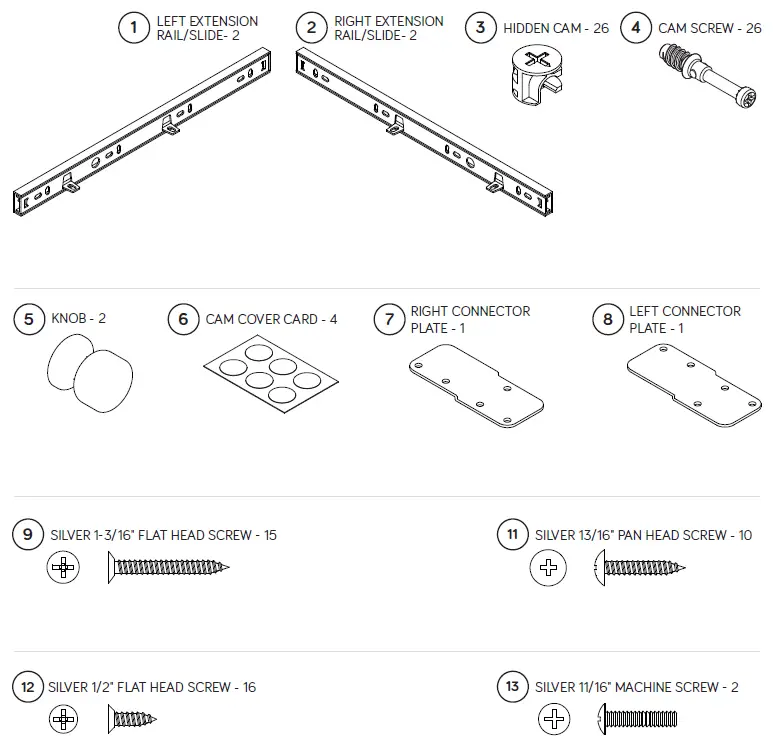
Part Identification
While not all parts are labeled, some of the parts will have a label or an inked letter on the edge to help distinguish similar parts from each other. Use this part identification to help identify similar parts.
- A RIGHT END (1)
- B LEFT END (1)
- C TOP (1)
- D SHELF (1)
- E BACK (1)
- F LEFT UPRIGHT (1)
- G RIGHT UPRIGHT (1)
- H DIVIDER (1)
- I LEFT DRAWER FRONT (1)
- J RIGHT DRAWER FRONT (1)
- K LEFT DRAWER SIDE (2)
- L RIGHT DRAWER SIDE (2)
- M DRAWER BACK (2)
- N DRAWER BOTTOM (2)

Hardware Identification
Screws are shown actual size. You may receive extra hardware with your unit.
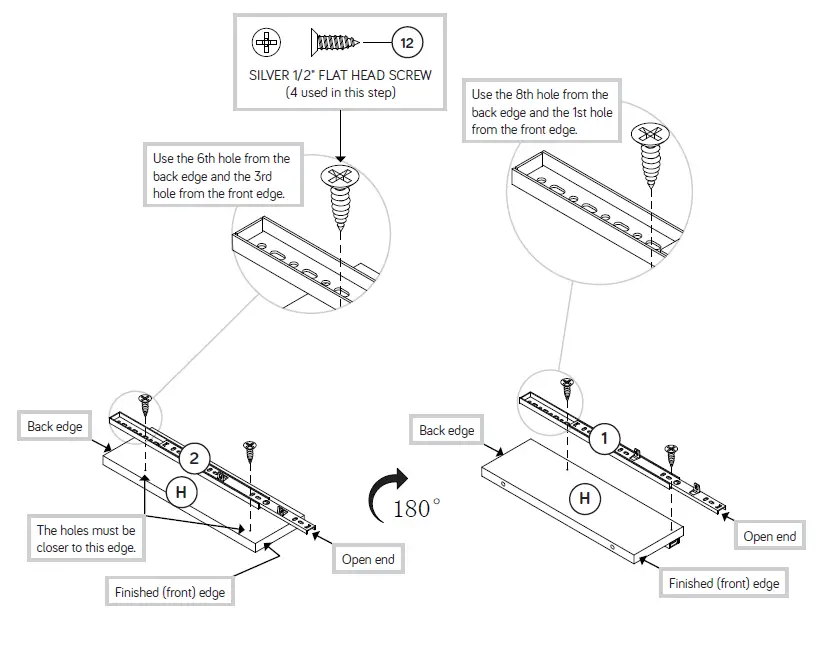
 Step 1
- Assemble your unit on a carpeted floor or on the empty carton to avoid scratching your unit or the floor.
- Fasten a RIGHT EXTENSION RAIL/SLIDE (2) to the DIVIDER (H) as shown in the left diagram. Use two SILVER 1/2″ FLAT HEAD SCREWS (12).
- Turn over the DIVIDER (H) and fasten a LEFT EXTENSION RAIL/SLIDE (1) to the DIVIDER as shown in the right diagram. Use two SILVER 1/2″ FLAT HEAD SCREWS (12).

Step 2
- Fasten the remaining LEFT EXTENSION RAIL/SLIDE (1) to the LEFT END (B) as shown in the left diagram. Use two SILVER 1/2″ FLAT HEAD SCREWS (12).
Fasten the remaining RIGHT EXTENSION RAIL/SLIDE (2) to the RIGHT END (A) as shown in the right diagram. Use two SILVER 1/2″ FLAT HEAD SCREWS (12).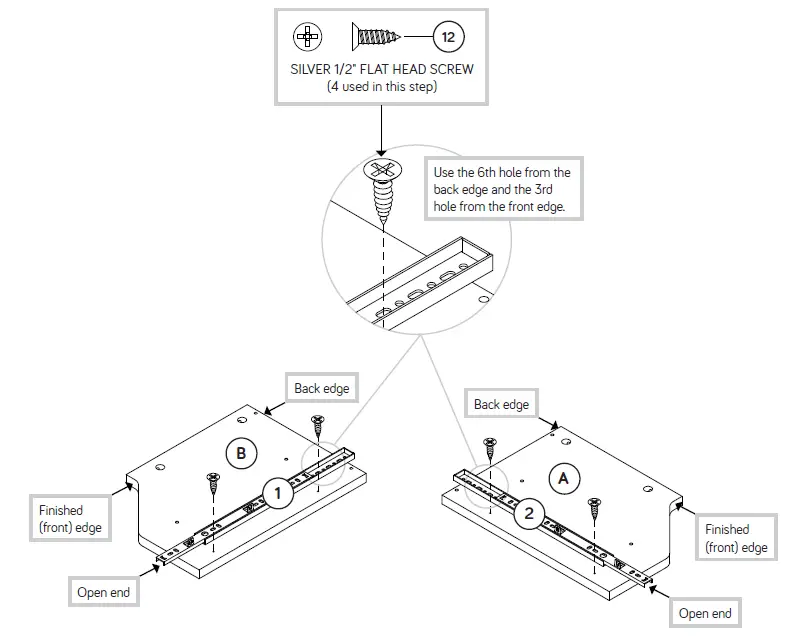 Step 3
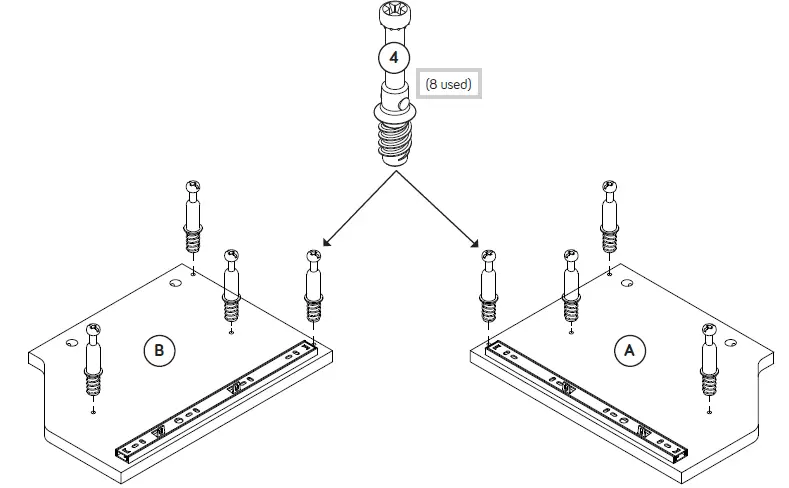
Turn eight CAM SCREWS (4) into the ENDS (A and B).
 Step 4
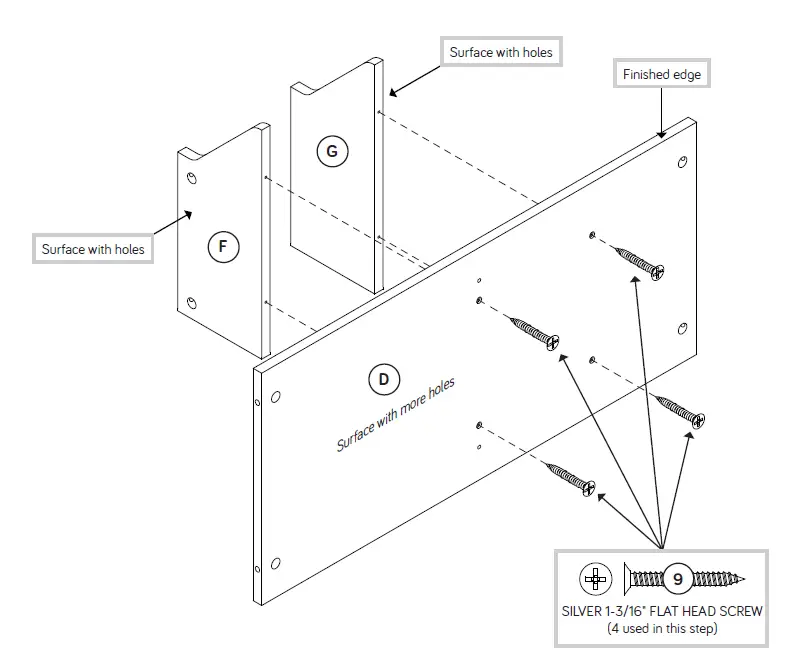
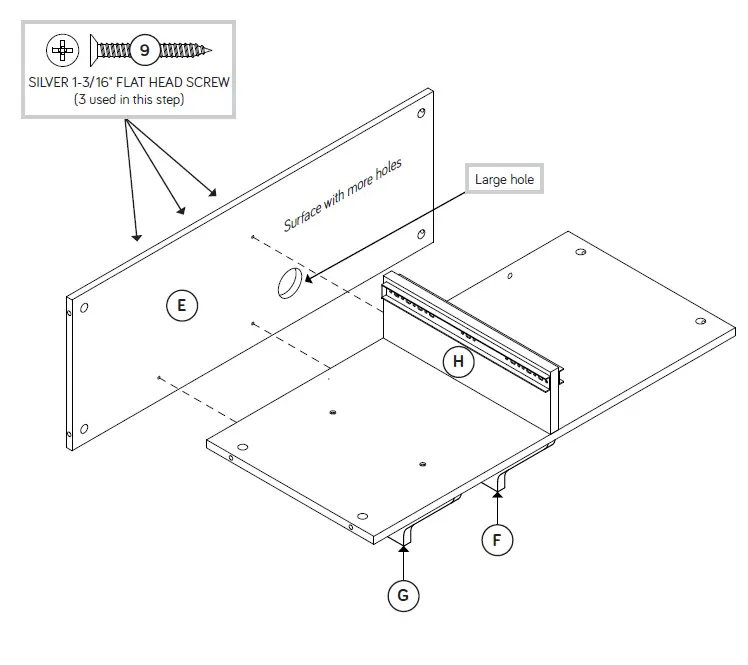
- Fasten the UPRIGHTS (F and G) to the SHELF (D). Use four SILVER 1-3/16″ FLAT HEAD SCREWS (9).
- NOTE: You should start each SCREW a few turns before completely tightening any of them.

Step 5
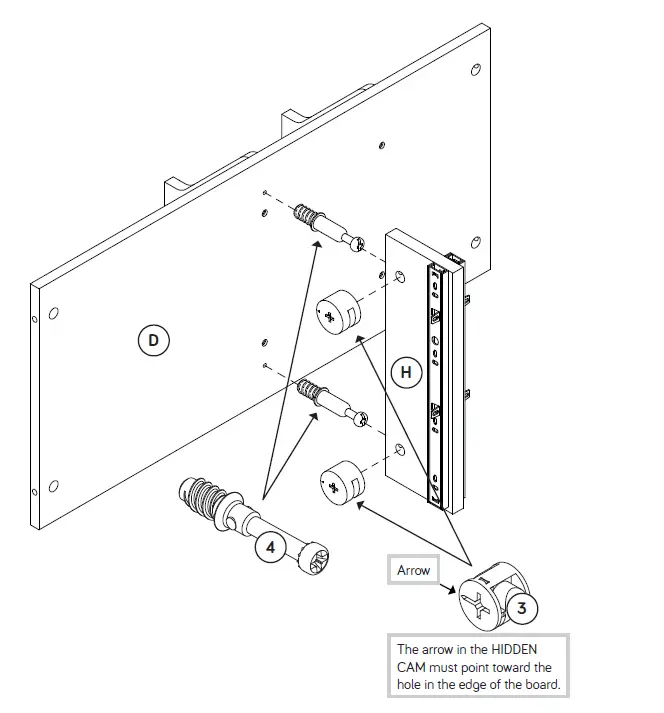
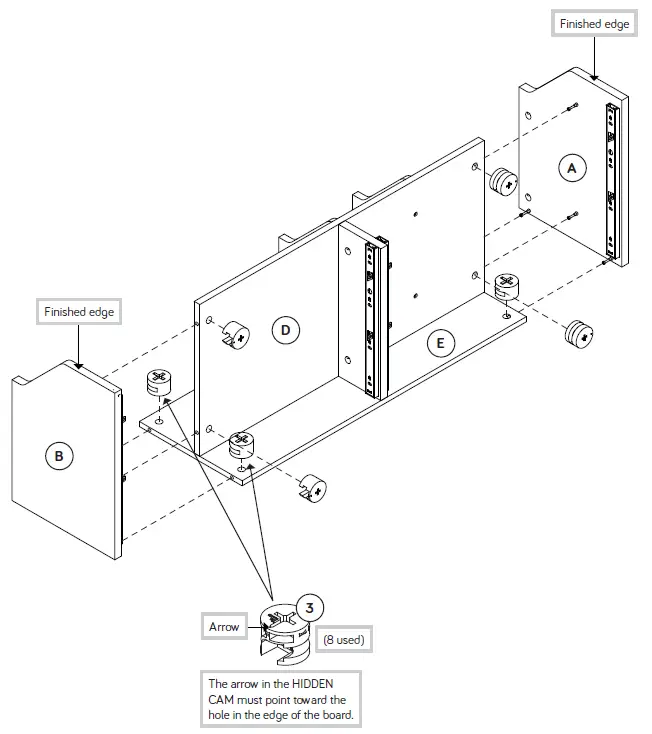
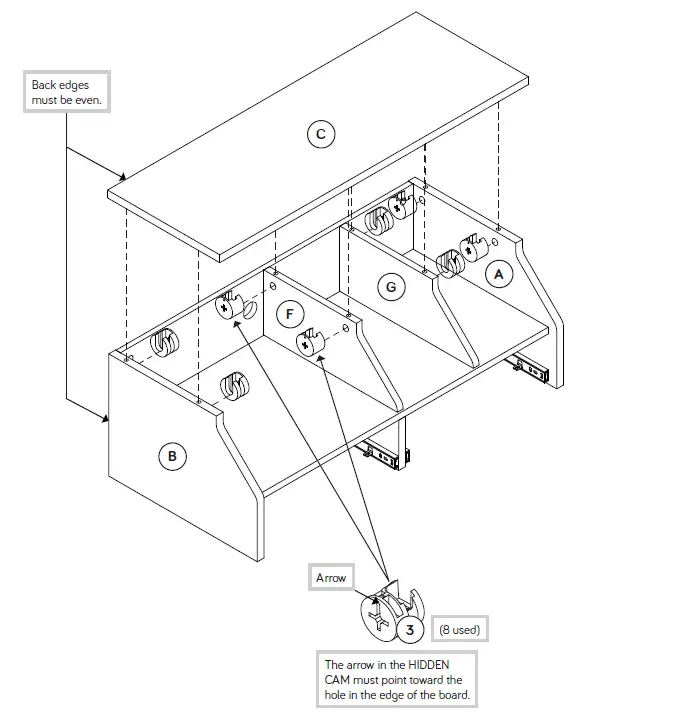
- Push two HIDDEN CAMS (3) into the DIVIDER (H).
- Turn two CAM SCREWS (4) into the SHELF (D).
- Fasten the DIVIDER (H) to the SHELF (D). Tighten two HIDDEN CAMS.


Step 6
- Position the UPRIGHTS (F and G) as shown.
- Fasten the BACK (E) to the UPRIGHTS (F and G) and DIVIDER (H). Use three SILVER 1-3/16″ FLAT HEAD SCREWS (9).
- NOTE: You should start each SCREW a few turns before completely tightening any of them.

Step 7
- Lay the unit on the BACK (E).
- Push eight HIDDEN CAMS (3) into the SHELF (D) and BACK (E).
- Fasten the ENDS (A and B) to the SHELF (D) and BACK (E). Tighten eight HIDDEN CAMS.

Step 8
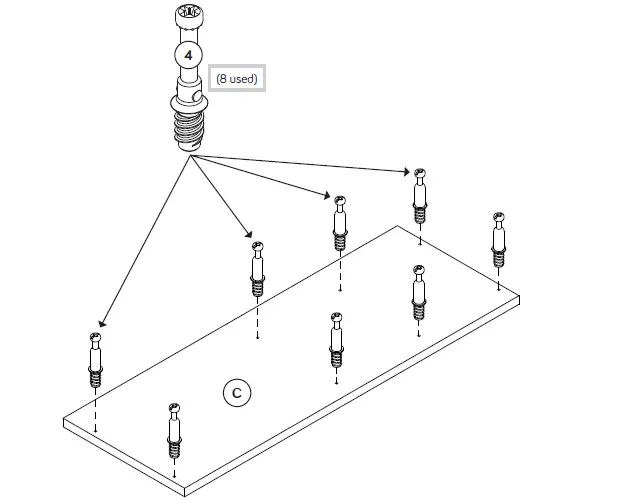
- Turn eight CAM SCREWS (4) into the TOP (C).


Step 9
- Push eight HIDDEN CAMS (3) into the ENDS (A and B) and UPRIGHTS (F and G).
- Fasten the TOP (C) to the ENDS (A and B) and UPRIGHTS (F and G). Tighten eight HIDDEN CAMS using your SHORT SCREWDRIVER.

Step 10
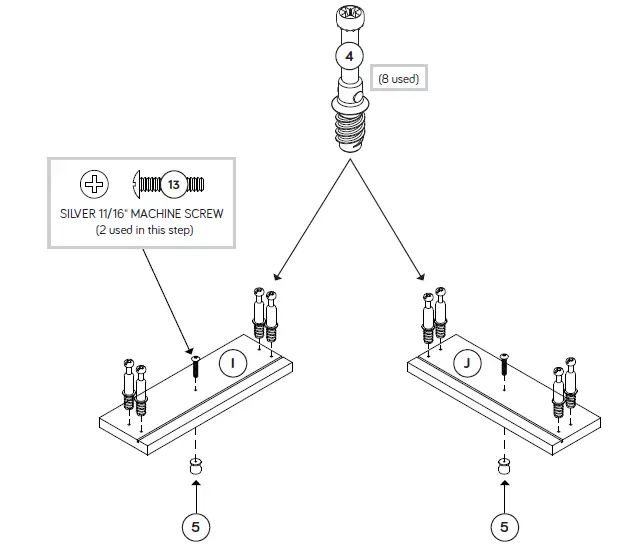
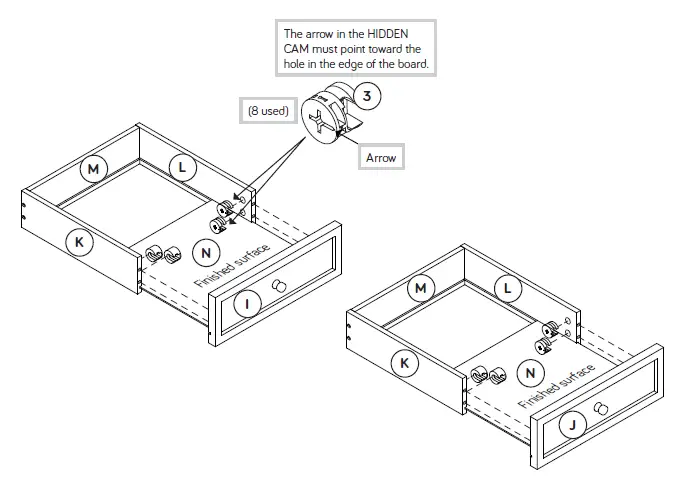
- Turn eight CAM SCREWS (4) into the DRAWER FRONTS (I and J).
- Fasten a KNOB (5) to each DRAWER FRONT (I and J). Use two SILVER 11/16″ MACHINE SCREWS (13).


Step 11
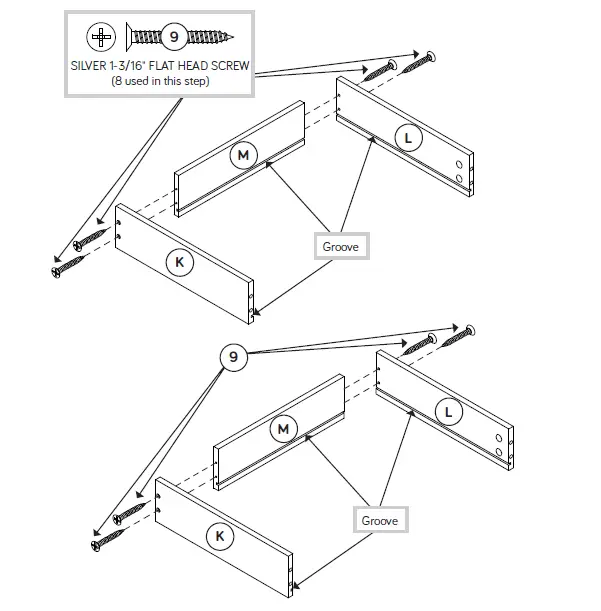
- Fasten the DRAWER SIDES (K and L) to the DRAWER BACKS (M). Use eight SILVER 1-3/16″ FLAT HEAD SCREWS (9).

Step 12
- Push eight HIDDEN CAMS (3) into the DRAWER SIDES (K and L).
- Slide the DRAWER BOTTOMS (N) into the grooves in the DRAWER SIDES (K and L) and DRAWER BACKS (M).
- Fasten the DRAWER FRONTS (I and J) to the DRAWER SIDES (K and L). Tighten eight HIDDEN CAMS.
- NOTE: Be sure the DRAWER BOTTOM inserts into the DRAWER FRONT groove.

Step 13
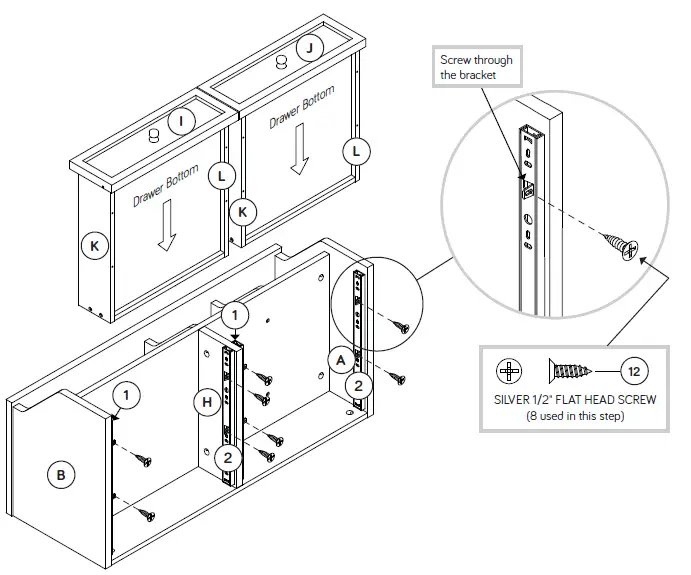
- Carefully turn your unit onto its back edges.
- Slide the DRAWERS between the ENDS (A and B) and DIVIDER (H) as shown below.
- NOTE: Be sure the DRAWERS are positioned as shown below.
- Fasten the EXTENSION RAILS/SLIDES (1 and 2) to the DRAWER SIDES (K and L). Use eight SILVER 1/2″ FLAT HEAD SCREWS (12).

Step 14
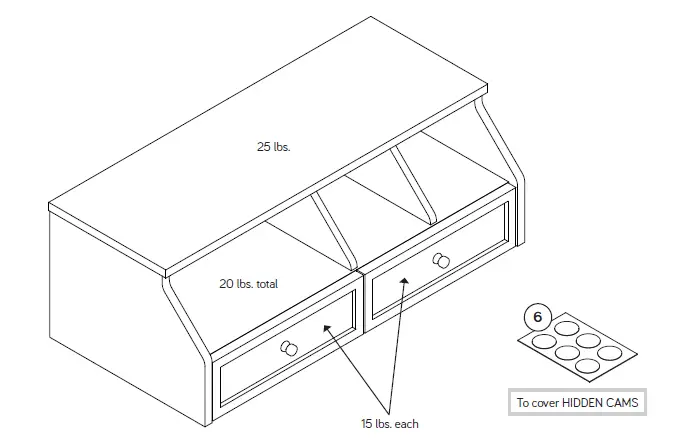
- Carefully stand your unit upright.
- Peel CAM COVERS from the CAM COVER CARDS (6) and stick them onto the visible HIDDEN CAMS.

Step 15
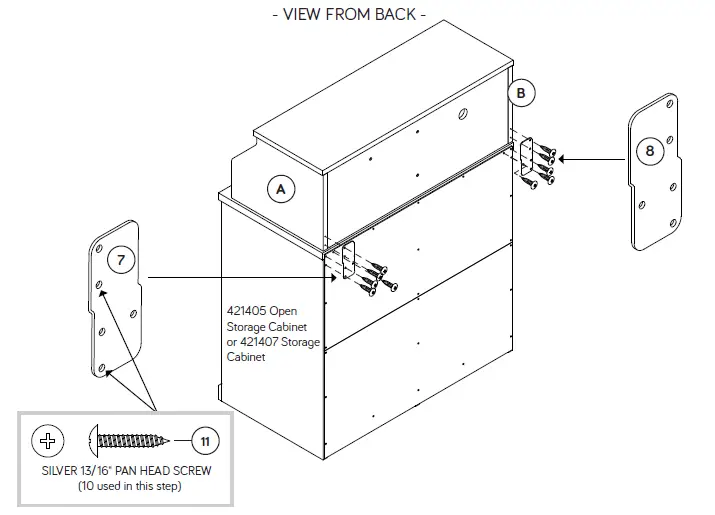
- This Hutch is designed to attach to the 421405 Open Storage Cabinet and 421407 Storage Cabinet.
- Carefully set your Hutch on top of the unit you are fastening it to.
- Fasten the CONNECTOR PLATES (7 and 8) to the Hutch ENDS (A and B) and then to the top and ends of the Storage
- Cabinets. Use ten SILVER 13/16″ PAN HEAD SCREWS (11).
- NOTE: Please read the back pages of the instruction booklet for important safety information.
- This completes assembly. Clean with your favorite furniture polish or a damp cloth. Wipe dry.

| WARNING Please use your furniture correctly and safely. Improper use can cause safety hazards, or damage to your furniture or household items. Carefully read the following chart. | ||
| Look out for: | What can happen: | How to avoid the problem: |
| • Overloaded shelves. | • Risk of injury. • Overloaded shelves can break. | • Never exceed the weight limits shown in the instructions |
| • Improperly moving furniture that is not designed and equipped with casters. | • Furniture can tip over or break if improperly moved. • Physical injury. Furniture can be very heavy. | • Unload shelves before moving the hutch. • The hutch should be removed from the desktop before attempting to move the desk. • Do not push furniture, especially on a carpeted floor. Have a friend help you lift the item and set it in place. |
| • Placing TVs on furniture items that are not designed to support a television is hazardous. | • Risk of injury or death. TVs can be very heavy. Plus the weight and location of the picture tube tends to make TVs unbalanced and prone to tipping forward. | • This product is not designed to support a television. |


