
![]() Reef 350
Reef 350
Instruction Manual
Parts
Safety
SAFETY REEF 350:
- Read the manual of the stand and accessories carefully before usage.
- Only suitable for indoor use.
- Before filling the aquarium with water, ensure that it is placed on a solid surface that can support the load.
- The aquarium must not be transported in a filled state because of the risk of glass breakage (no warranty coverage).
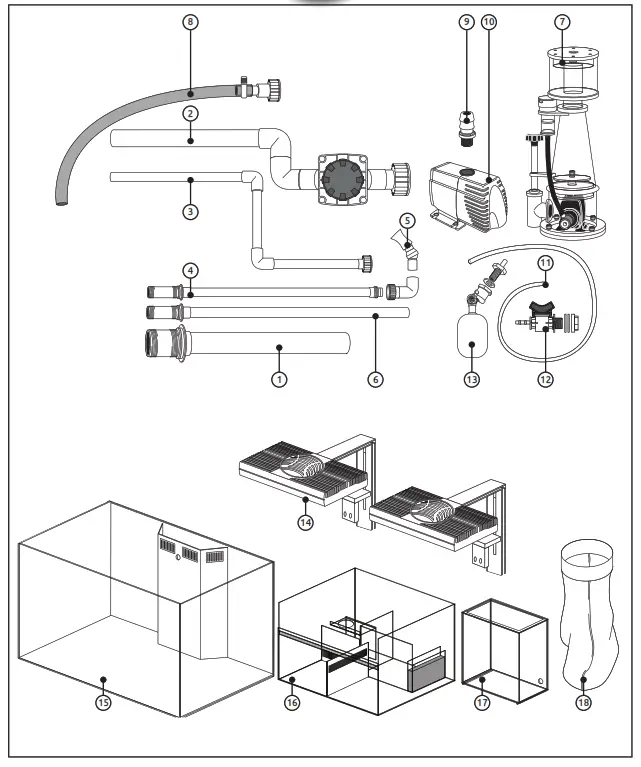
PARTS
| 1 Transit pipe 2 Transit pipe with a valve 3 Overflow transit with coupling 4 Outflow pipe 5 Nozzle 6 Overflow pipe 7 Skimmer 8 Pump hose with coupling 9 Pump hose connector | 10 Pump 11 Float hose 12 Tap of water reservoir 13 Float 14 ProLED Lighting 2x 15 Tank 16 Sump 17 Water reservoir 18 Filter-sock |
Technical installation
STEP 1
Place the aquarium (15) on the cabinet, and make sure the tank is aligned with the cabinet.
Make sure the aquarium is in its final position and horizontal, so it’s not necessary to move the aquarium anymore.
Make sure the aquarium is level. 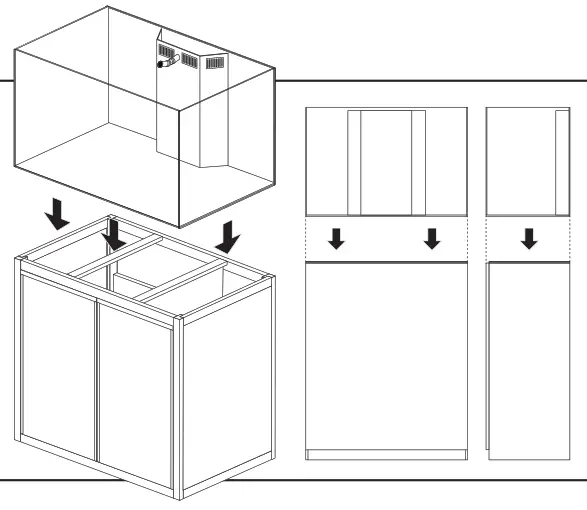 STEP 2
Remove the doors.
Remove the center pillar by loosening the screw on the inside of the pillar and sliding the pillar out.
Mount (A) the float (13) in the sump (16).
Place the sump in the left compartment of the cabinet against the backside.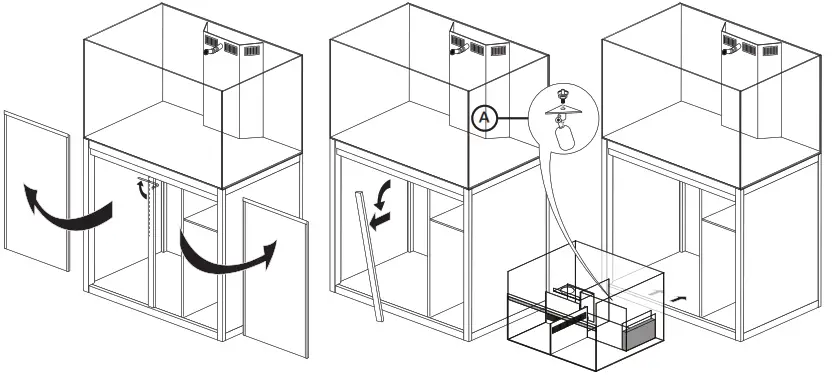
STEP 3
Place the transit pipe (1), the outflow pipe (4), and the overflow pipe (6) in the slots.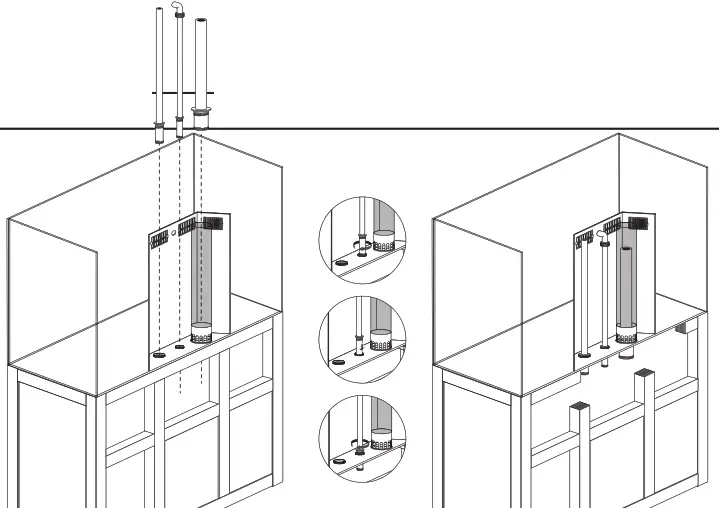 STEP 4
Fit the transit pipe with valve (2) and the overflow transit (3)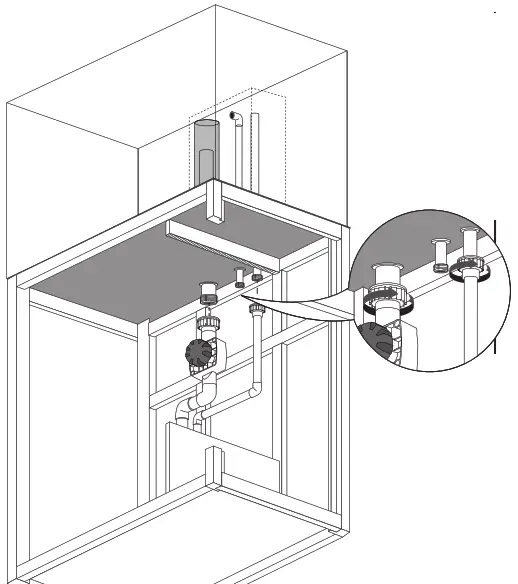 STEP 5
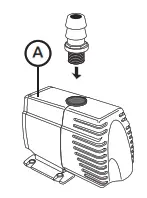 | 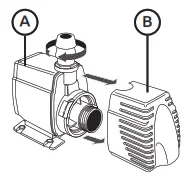 | 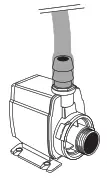 |
| Screw the hose connector (9) into the pump (A). | Remove the filter cover (B) of the pump, it is not necessary with a marine aquarium. | Slide the hose (8) onto the hose connector (9). |
STEP 6
Place the pump (10) in the appropriate section of the sump.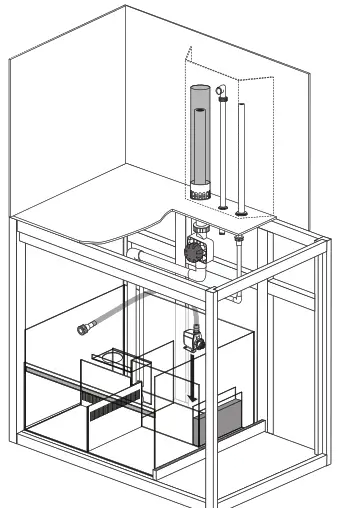
STEP 7
Connect the hose (8) to the outflow pipe (4) Place the nozzle (5) on the outflow pipe (4). STEP 8
Place the filter sock (18) and the skimmer (7) in the appropriate sections of the sump.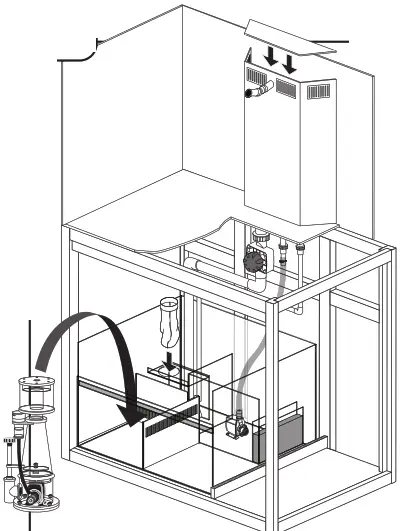
STEP 9
Assemble the water reservoir tap (12) on the water reservoir. Slide the float hose (11) to the tap.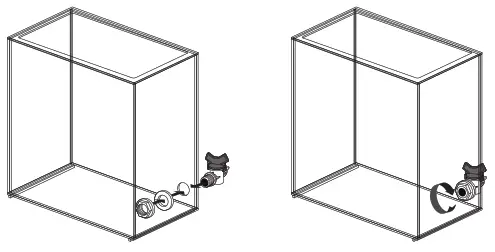 STEP 10
Place the water reservoir (17) on the sump. Connect the float hose (11) to the float.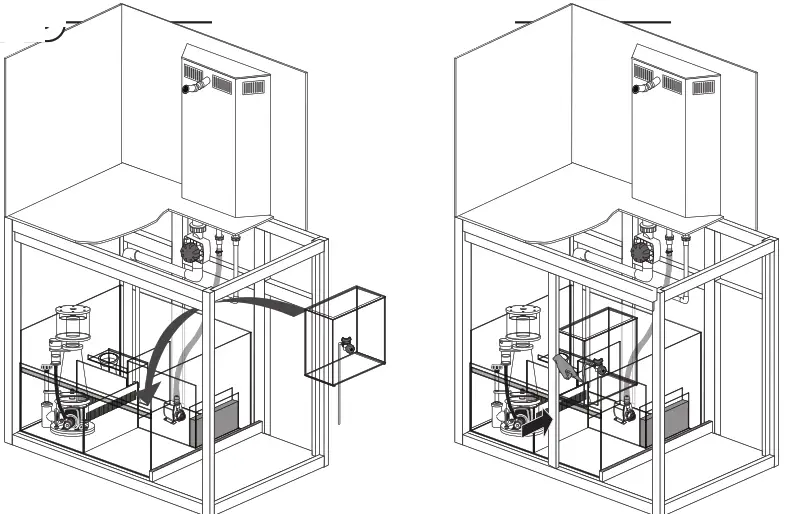 The position of the float can be adjusted with the adjusting screw A).
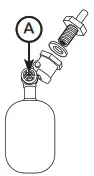 STEP 11
Place the ProLED (14) on the aquarium and fixate it with the screws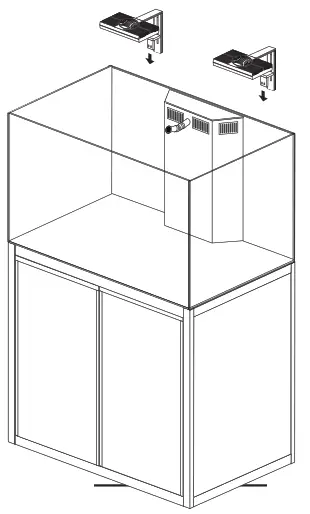 STEP 12
The aquarium is now ready for use.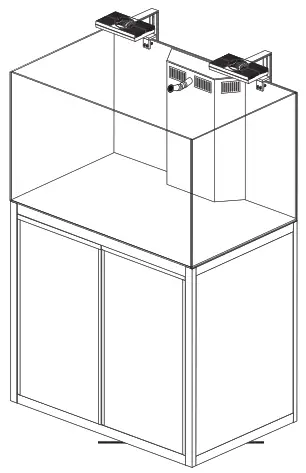
STEP 13
Open the tap of the transit pipe and fill the tank until the maximum water level has been reached in the sump.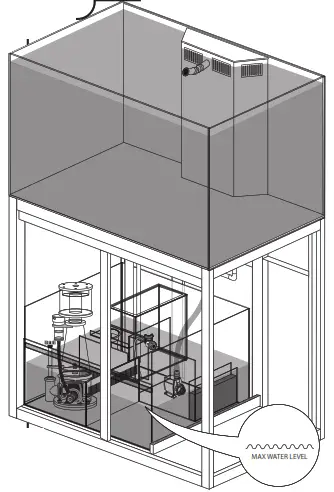 STEP 14
Fill the water reservoir (17) with osmosis water.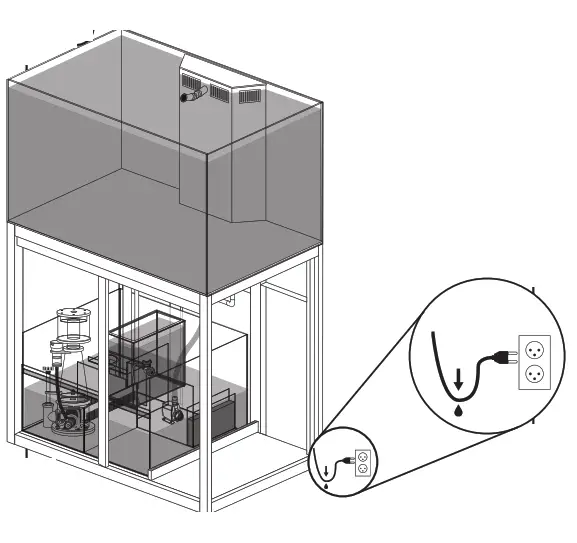 p meubel plaatsen
WARRANTY CONDITIONS:
This warranty is valid for 2 years on materials and incorrect construction. Only units with a fully filled-in warranty slip and official till receipt showing the date of purchase will be considered. You must supply the entire unit with accessories in the event of a warranty claim. We will inform you on a receipt whether the unit will be repaired or replaced. Aquadistri shall accept no liability for glass breakage or damage caused by negligence, incorrect use, transportation, incorrect set-up, or any subsequent modifications to the aquarium. No claims shall be assertible in excess of the value of the aquarium, in particular for damage to fish or corals.
| Artikel | Art. nr. | Am. | Max. Gewicht ‘ |
| REEF 350 ALUMINIUM STAND WHITE | 1007508 | 110x60x100 cm | 600 kg |
| REEF 350 ALUMINIUM STAND BLACK | 1007509 | 110x60x100 cm | 600 kg |
Materiaal
UK Powder coated aluminum body + 2 aluminum doors
Prijs
Dealer stamp
Date of purchase
- Always keep proof of purchase, without a purchase note no warranty!
- Bewahren Sie den Kassenbon immer auf; ohne Kaufbeweis keine Garantie!
- Toujours garder le bon d’achat, sans bon aucune garantie!
- Bewaar altijd het aankoopbewijs, zonder bon geen garantie!
![]()

![]() Produced in China for:
Produced in China for:
www.aquadistri.com
Vlietweg 8 NL-4791 EZ Klundert


