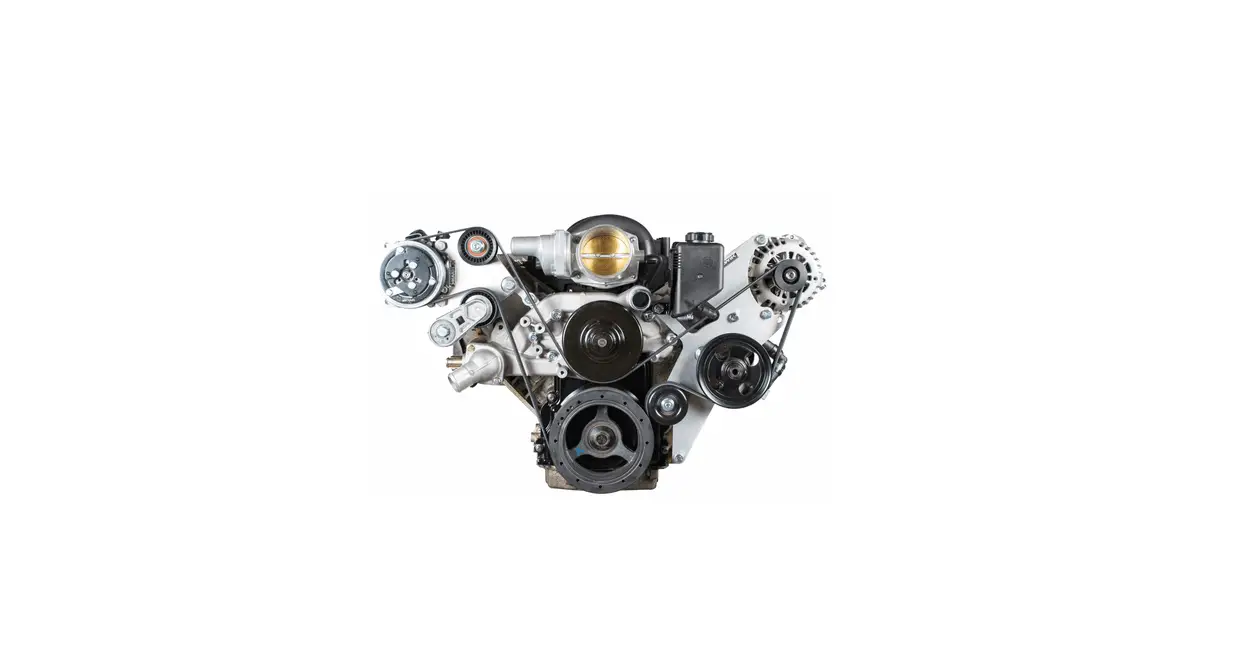
KWiK K10470 A/C Bracket for LS Engines with Corvette Balancer
Kit contents
- Mounting plates
- Spacer tubes
- Fasteners
- Idler pulley
- Tensioner
Additional parts required
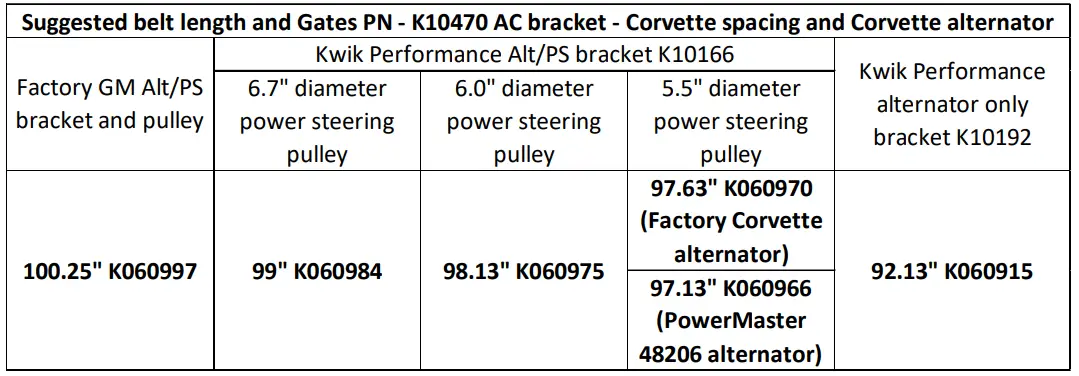
- Belt. See chart below.
- AC compressor, Sanden “508” style. Typical SD5 Sanden part number is 6629. However, we recommend the SD7 Sanden part number 4665 for smoother operation and less vibration.

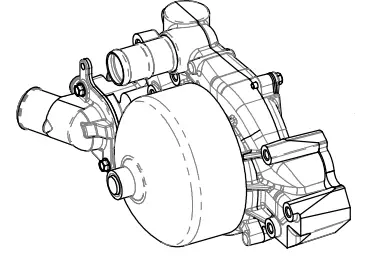
Water pump identification
Needed for Installation Step 2.
- LS3 water pump:

- LS1 and LS6 water pump:

- LS2 and LS7 water pump:


Installation Instructions
A/C Bracket for LS engines with Corvette balancer
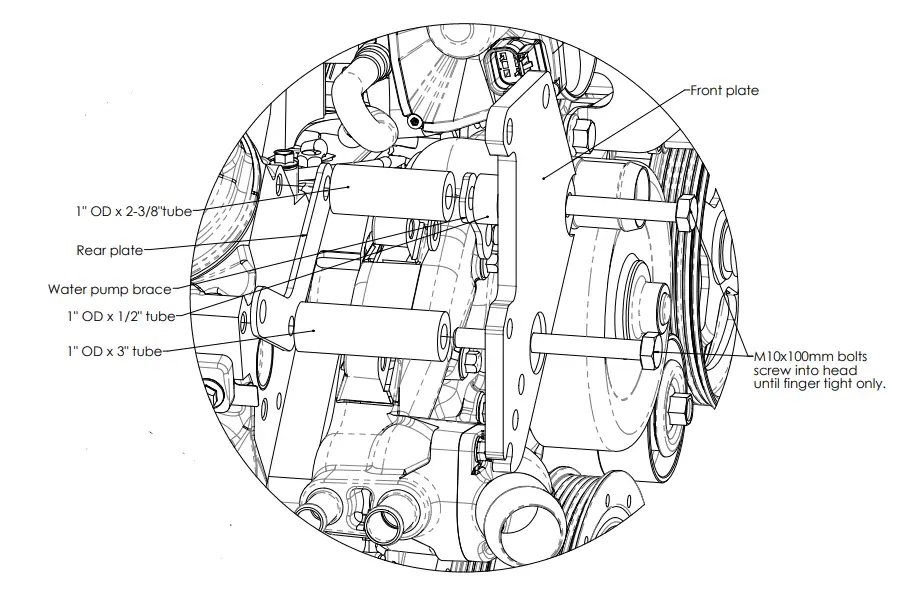
- Install bracket bolts in head

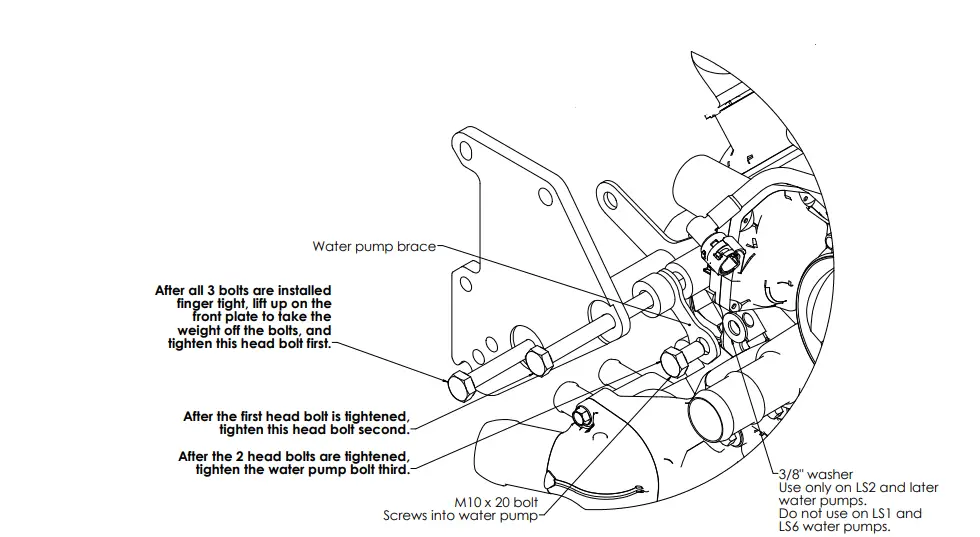
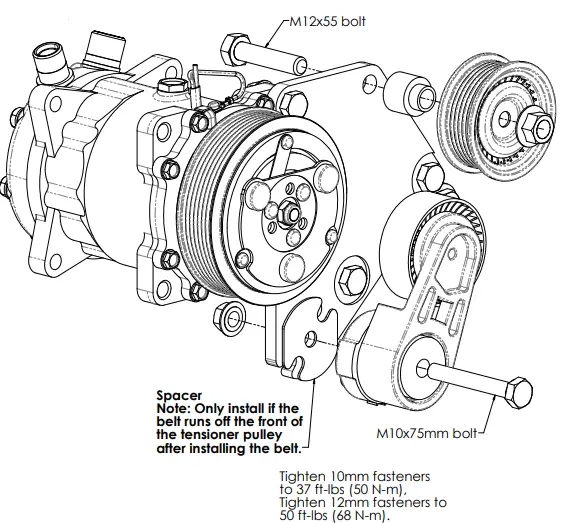
- Install Water Pump Bolt

- Bolt torque

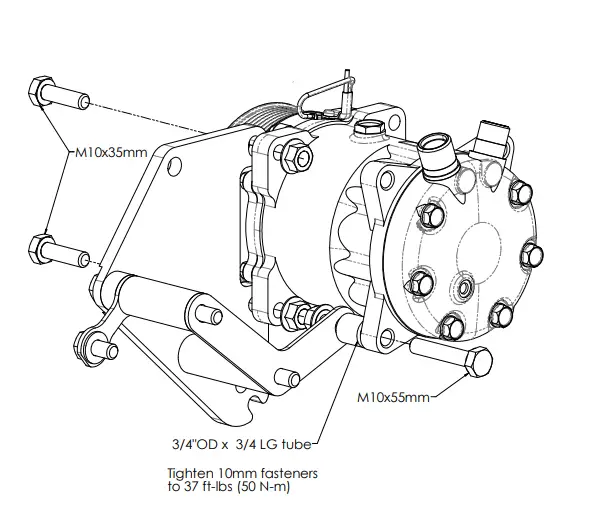
- Install compressor

- Install tensioner & idler pulley

- Install belt
 Note: Install belt in rear 6 grooves of 7 groove compressor.
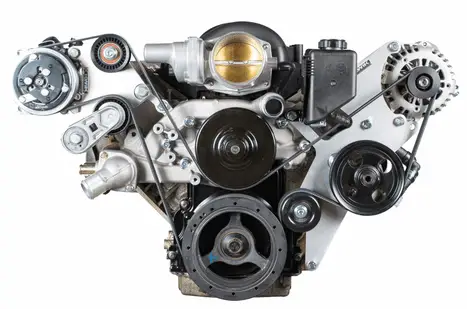
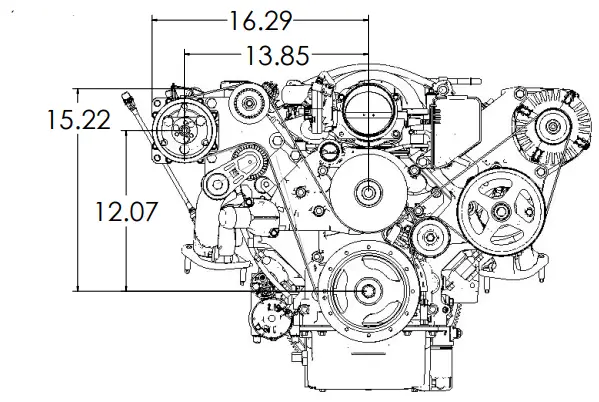
Note: For best performance and longest life, the belt lengths suggested by Kwik Performance are the shortest belt that can be reasonably installed. We recommend the following procedure:- When installing the serpentine belt, place the belt around all pulleys as shown in the diagram except for the water pump pulley.
- Check to see that the belt is in the correct grooves of the AC compressor.
- Check to make sure that the belt is seated all the way in the grooves of each grooved pulley.
- Retract the tensioner all the way and slip the belt onto the water pump pulley.
- Release the tensioner.

 Note: Install belt in rear 6 grooves of 7 groove compressor.


