![]() SIMPLE SEAL
SIMPLE SEAL
WATERTIGHT SEAL FOR
ECOFASTEN BRACKETS
INSTALLATION GUIDE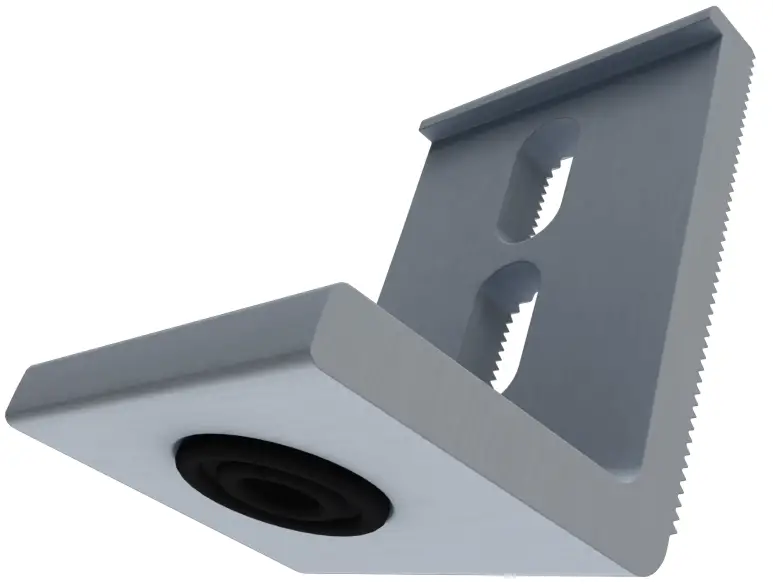
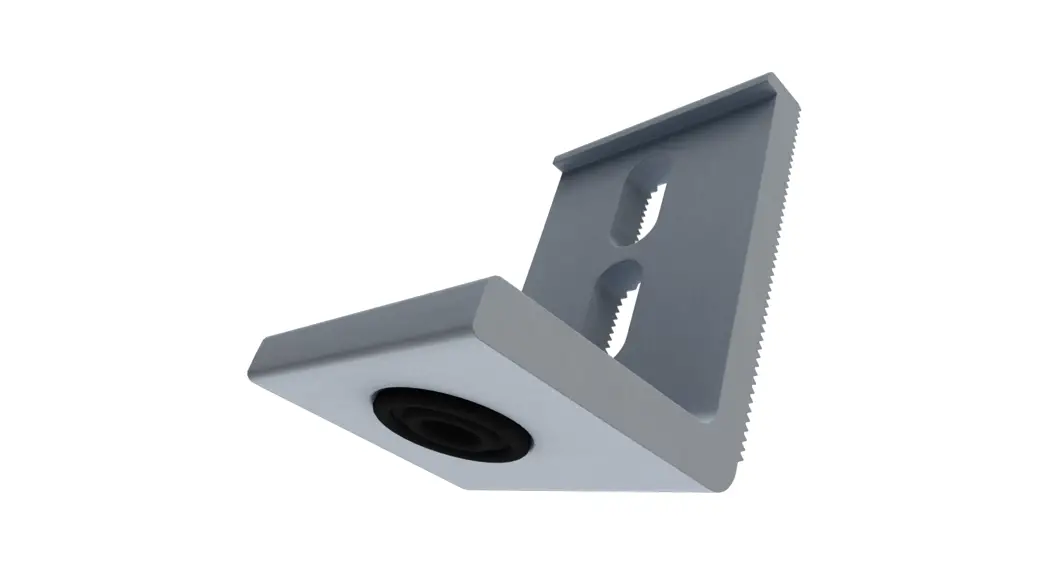
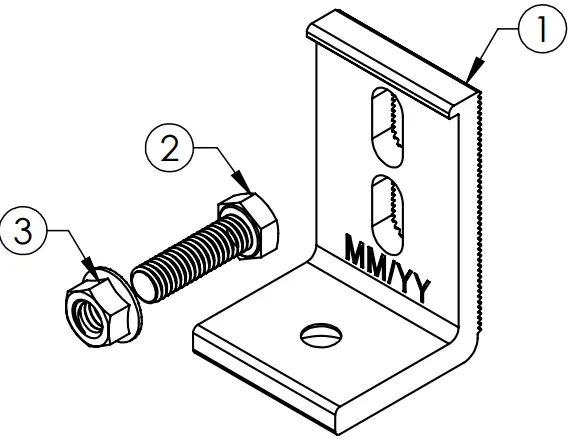
SLR-211-0459 3 Inch Slotted L-Bracket
| REVISION: 08/02/22 | VERSION: V2.3 |
SIMPLE SEAL
SimpleSeal was designed for installation on most metal roofs. The system utilizes a cone-shaped EPDM rubber bushing that fits into the countersink found on the underside of any EcoFasten compression bracket. When fastened to the roof, engaging a purlin or rafter, the SimpleSeal bushing is compressed inside the bracket, creating a watertight seal.
FEATURES
- Patented watertight technology
- Minimal components
- Compatible with a variety of EcoFasten compression brackets
SYSTEM COMPONENTS
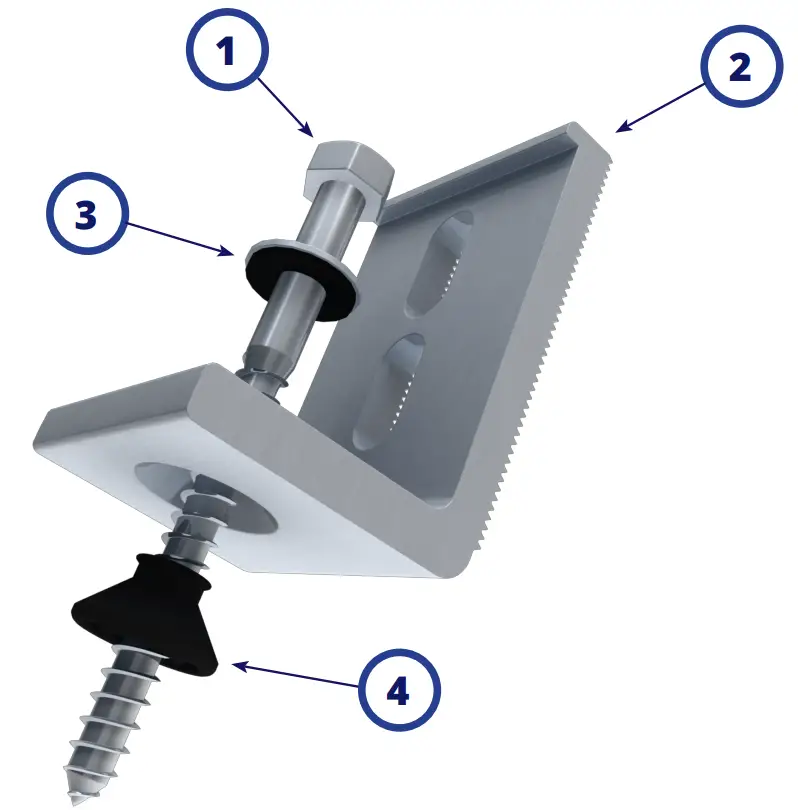
- 5/16″ LAG BOLT (AVAILABLE IN 3” AND 4”)
- L-FOOT SCL-101 ML 3″ (OTHER OPTIONS AVAILABLE)
- 5/16″ EPDM BONDED WASHER
- SIMPLE SEAL EPDM BUSHING
INSTALLING SIMPLICIAL
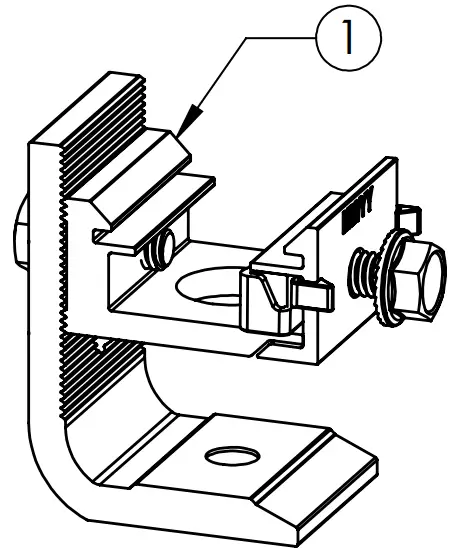
 Pre-install the cone-shaped rubber SimpleSeal EPDM bushing into an EcoFasten compression bracket of your choice prior to installation by inserting the tip of the cone into the corresponding shape at the bottom of the compression bracket. The ridge around the tip of the cone will hold the bushing in place until the bracket is installed.
 Place the compression bracket on the roof surface above a supporting structural component, ensuring that the bushing sits flat against the roof surface. SimpleSeal is not designed to be installed on any ridge or corrugation of the metal roof surface.
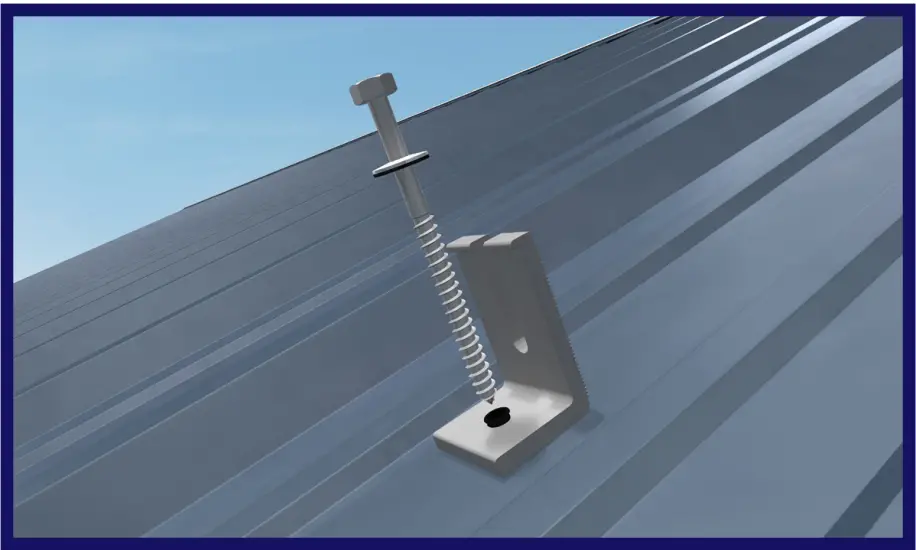 Thread the 5/16″ EPDM bonded sealing washer onto the 5/16″ lag bolt and insert the bolt into the top of the SimpleSeal EPDM bushing.
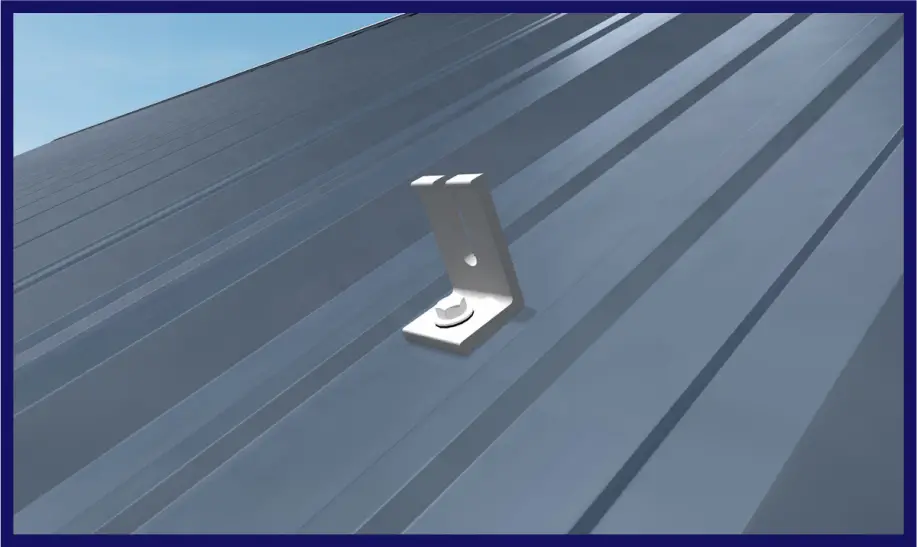 Tighten the fastener until the bracket is pulled down snugly to the roof surface. The tension required will vary with the project roof deck, age, and type. Be sure not to over-tighten the fasteners and strip the threads.
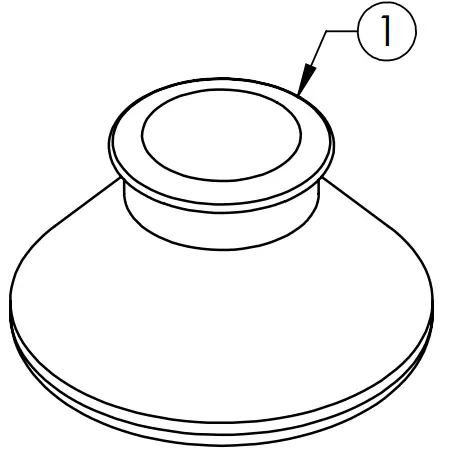
CUT SHEET: SIMPLESEAL EPDM BUSHING (50)
| PART NUMBER | DESCRIPTION |
| 3016015 | SIMPLICIAL EPDM BUSHING (50) |
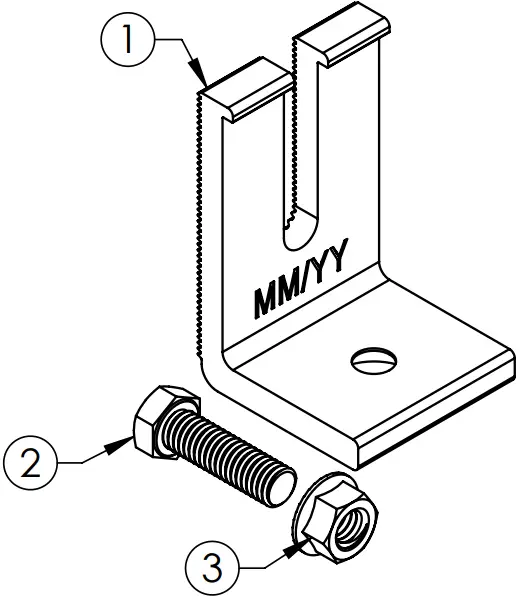
| ITEM NO. | DESCRIPTION |
| 1 | SIMPLE SEAL |
1) SIMPLE SEAL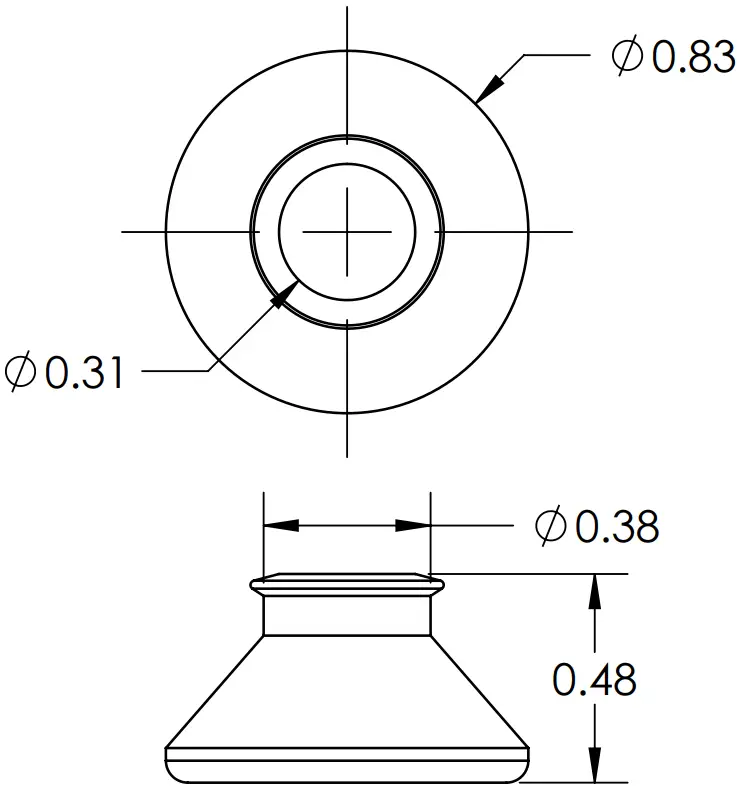
| Material | Rubber |
| Finish | Black |
CUT SHEET: L-FOOT L-102 BLK 3”
| PART NUMBER | DESCRIPTION |
| 3011015 | L-FOOT L-102 BLK 3″ |
| ITEM NO. | DESCRIPTION |
| 1 | L-102-3 AND BLK |
| 2 | SS HEX HD CAP SCREW, FULL THD, 3/8-16 UNC X 1.25 LONG |
| 3 | SS SERRATED FLANGE LOCK NUT, 3/8-16 |
1) L-102-3 AND BLK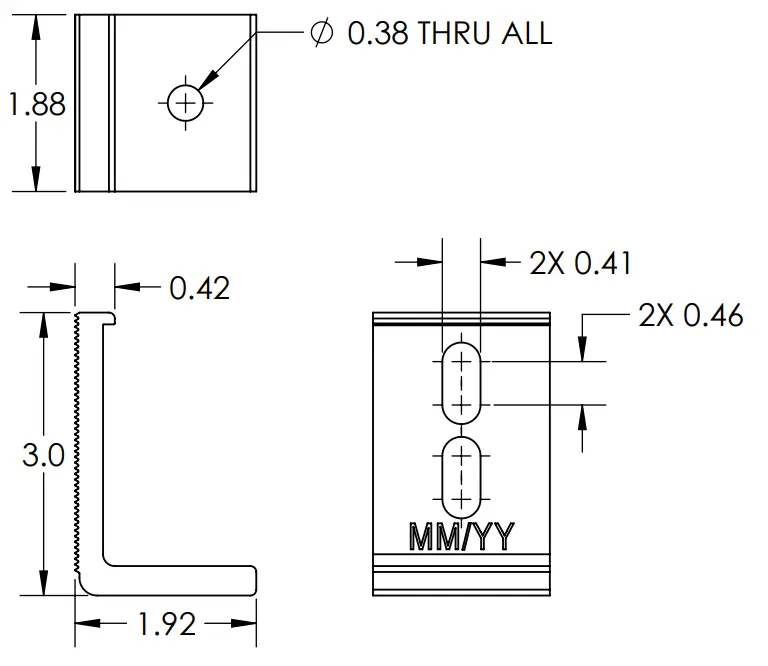
| Material | Aluminum |
| Finish | Black |
CUT SHEET: L-FOOT L-102 MLL 6”
| PART NUMBER | DESCRIPTION |
| 3011016 | L-FOOT L-102 MLL 6″ |
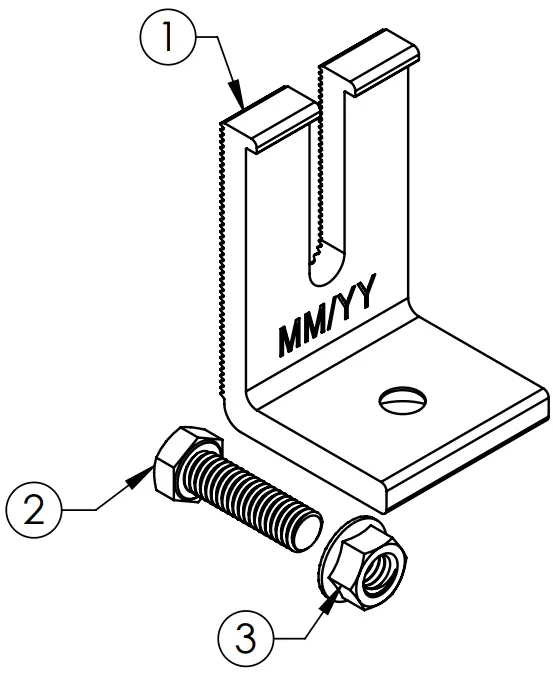
| ITEM NO. | DESCRIPTION |
| 1 | L-102-6 |
| 2 | SS HEX HD CAP SCREW, FULL THD, 3/8-16 UNC X 1.25 LONG |
| 3 | SS SERRATED FLANGE LOCK NUT, 3/8-16 |
1) L-102-6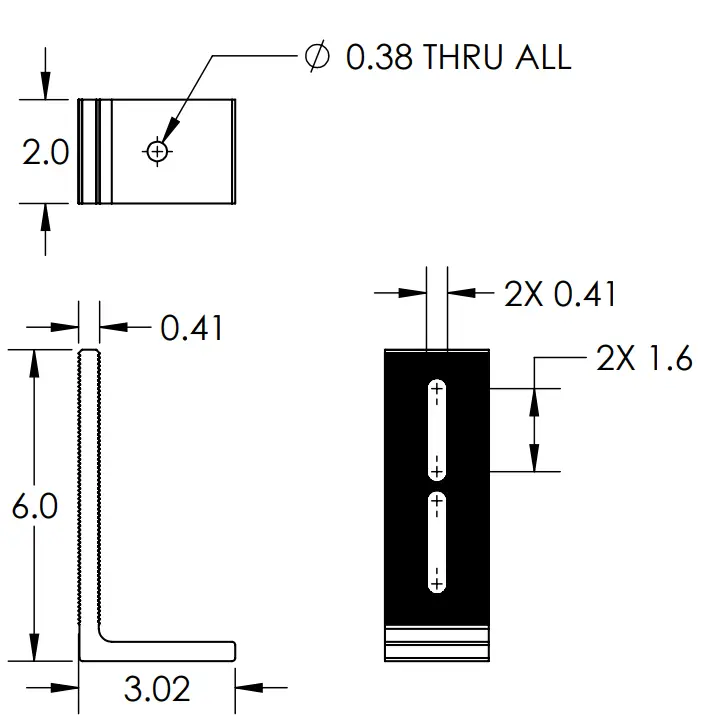
| Material | Aluminum |
| Finish | Mill |
CUT SHEET: L-FOOT SCL-101 MLL 3”
| PART NUMBER | DESCRIPTION |
| 3011017 | L-FOOT SCL-101 MLL 3″ |
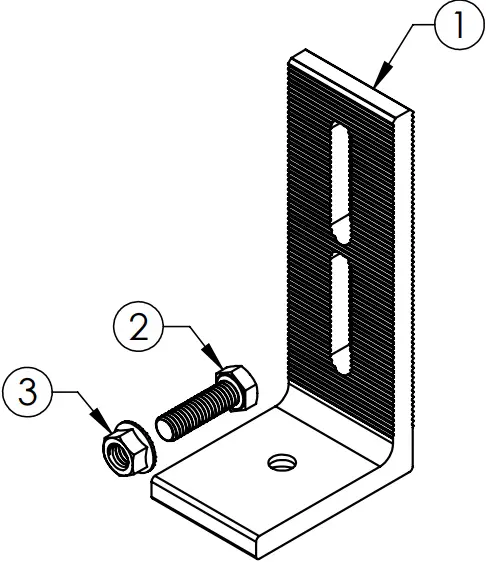
| ITEM NO. | DESCRIPTION |
| 1 | L FOOT W/ STANDARD DIMPLE AND OPEN SLOT, 3 IN TALL MLL |
| 2 | SS HEX HD CAP SCREW, FULL THD, 3/8-16 UNC X 1.25 LONG |
| 3 | SS SERRATED FLANGE LOCK NUT, 3/8-16 |
1) L FOOT W/ STANDARD DIMPLE AND OPEN SLOT, 3 IN TALL MLL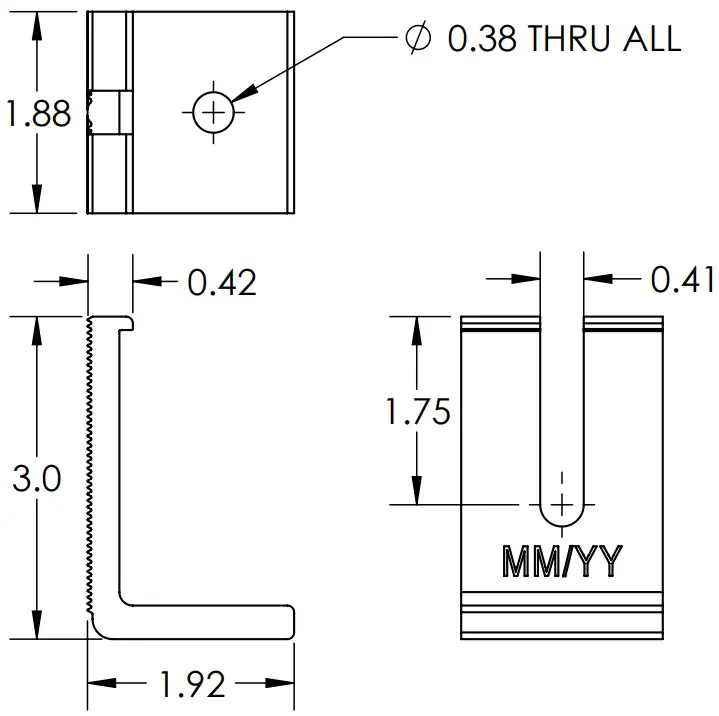 CUT SHEET: L-FOOT SCL-101 BLK 3”
| PART NUMBER | DESCRIPTION |
| 3011018 | L-FOOT SCL-101 BLK 3″ |
| ITEM NO. | DESCRIPTION |
| 1 | L FOOT W/ STANDARD DIMPLE AND OPEN SLOT, 3 IN TALL BLK |
| 2 | SS HEX HD CAP SCREW, FULL THD, 3/8-16 UNC X 1.25 LONG |
| 3 | SS SERRATED FLANGE LOCK NUT, 3/8-16 |
1) L FOOT W/ STANDARD DIMPLE AND OPEN SLOT, 3 IN TALL BLK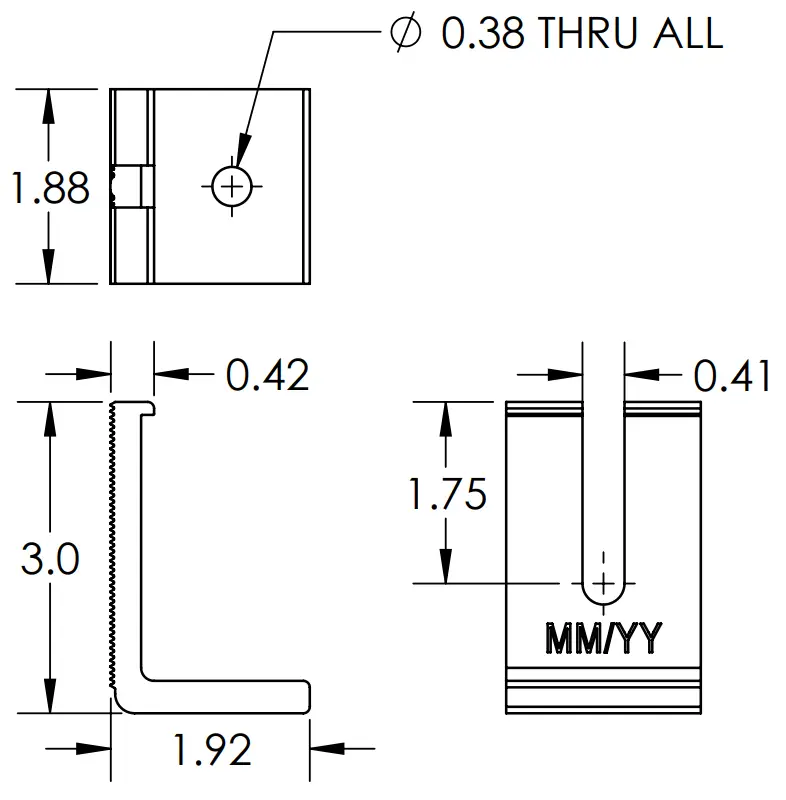
| Material | Aluminum |
| Finish | Mill |
CUT SHEET: CF UNIV L-FOOT MLL 3”
| PART NUMBER | DESCRIPTION |
| 2012022 | CF UNIV L-FOOT MLL 3″ |
| ITEM NO. | DESCRIPTION |
| 1 | CLICK FIT L FOOT ASSEMBLY |
1) CLICK FIT L FOOT ASSEMBLY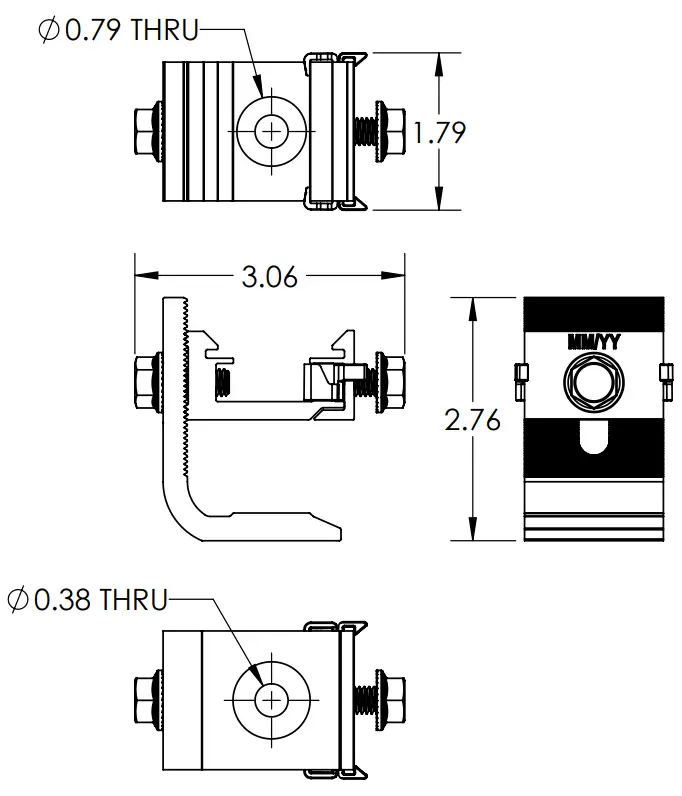
SYSTEM COMPONENTS
- Sim Seal Bushing:
Consists of (1) EPDM Rubbber cone-shaped bushing. - Aluminum Compression Bracket:
Compatible with a variety of EcoFasten compression brackets. EcoFasten compression brackets are made out of 6000 series aluminum with options available for mill or black finishes depending on the bracket. - Recommended Fasteners
5/16″x4″ lag bolts. - Recommended Sealant:
If required by the roof manufacturer, sealant shall be roof manufacturer-approved.
DELIVERY / STORAGE / HANDLING
Inspect material upon delivery. Notify the manufacturer within 24 hours of any missing or defective items. Keep material dry, covered, and off the ground until installed.
PATENTS
Visit www.efpatents.com for patent information.
DESIGN REQUIREMENTS
- Bracket spacing is to be recommended by the project engineer.
- Fasten attachment to the roof using 1 5/16″ lag bolt.
- It is important to design new structures or assess existing structures to make sure they withstand retained loads.
EXAMINATION
- Substrate: Inspect the structure on which brackets are to be installed and verify that it will withstand any additional loading that may be incurred.
- Notify the General Contractor of any deficiencies before installing EcoFasten Solar brackets.
- Verify that the roofing material has been installed correctly prior to installing the solar attachment bracket.
INSTALLATION
Comply with architectural drawings and the project engineer’s recommendation for the location of the system. Comply with the Manufacturer’s written installation instructions for installation and layout.
![]() An Esdec Solar Group Company
An Esdec Solar Group Company
4141 W. VAN BUREN ST, SUITE 2, PHOENIX AZ 85009
1 – 8 7 7 – 8 5 9 – 3 9 4 7
[email protected]


