The Outdoor GreatRoom Company WV-56 The Wave Table Instruction Manual
![]()
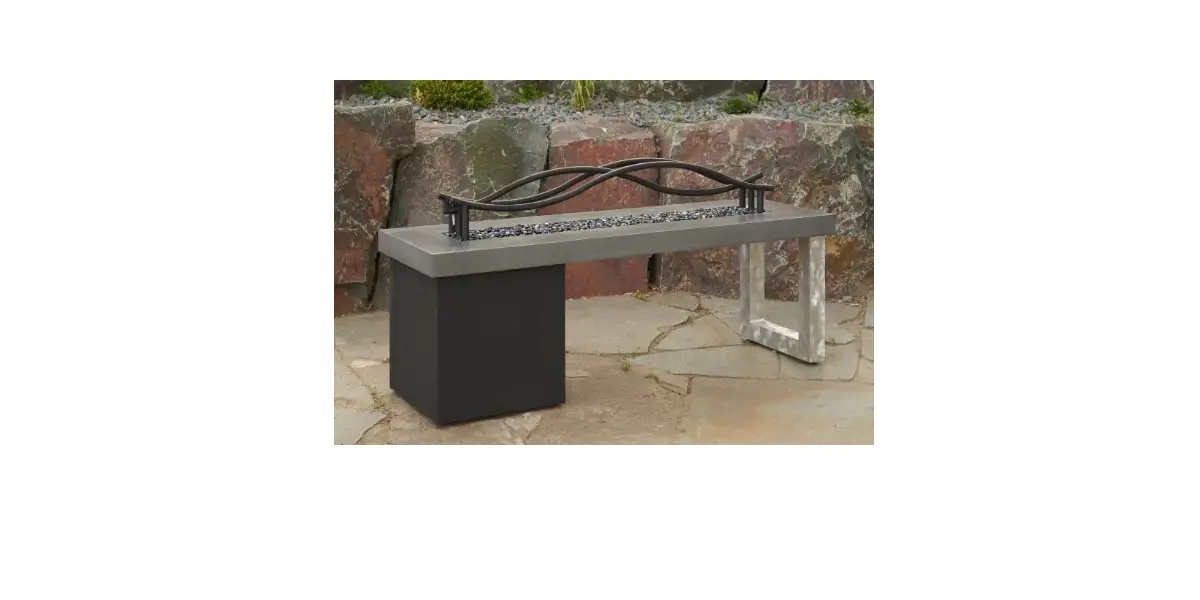
The Wave
Installation Instructions for WV-56 Table
IMPORTANT
Please consult your Wave Burner instruction manual for detailed instructions and important information related to hooking up your burner, including safety information, proper tightening of connections with two wrenches and full burner setup and lighting instructions.
DO NOT ATTEMPT TO INSTALL WV-56-BLK-DIY BURNER WITHOUT FIRST CONSULTING THE WAVE BURNER OWNER’S MANUAL.
Required Tools

Two people are required for this installation.
2 Open Ended Wrenches
To secure gas connections
Leather Gloves
To protect hands from rough edges found on fire pit table during installation
One AAA Battery (not included)
Required for electric spark igniter installation
Utility Knife
To cut and remove packaging
Included with your Fire Pit
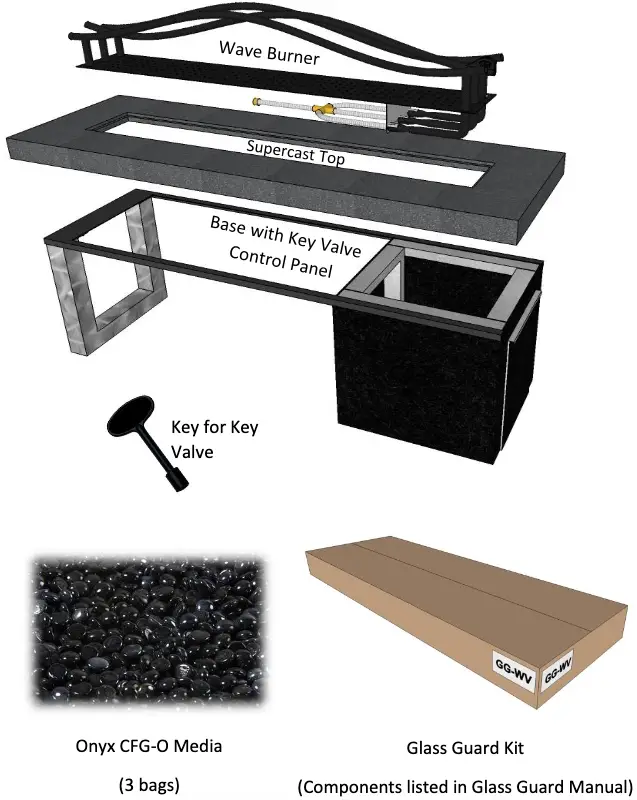
Assembly Instructions
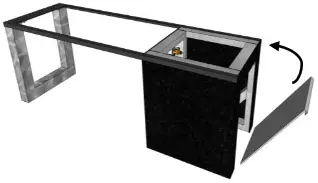
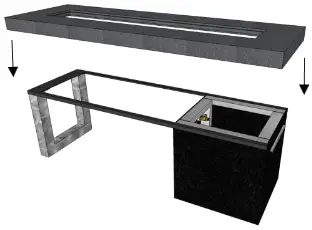
Once your fire pit has arrived, begin to unpack the contents.
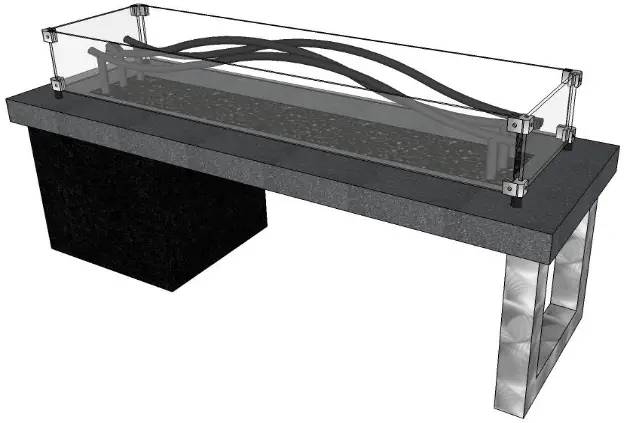
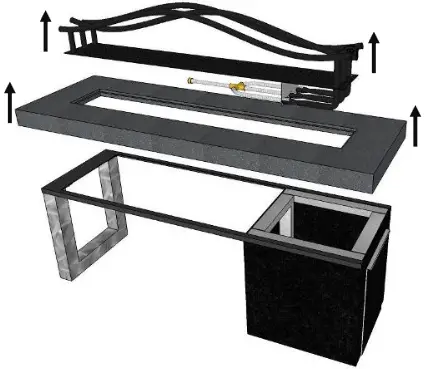
- Remove individually the burner from the supercast top and the supercast top from the base. Set both on a soft, flat surface.

- Remove access door. Set aside. Then, place base in desired location. Re-attach the access door.

- Next, place the supercast top back onto the base.

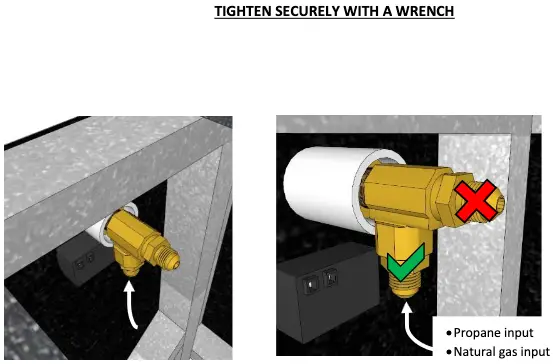
Gas Connections
Read and understand your Wave Burner Owner’s Manual before beginning burner hookups or using the device.
Do not use Teflon tape or pipe dope on flare fittings.
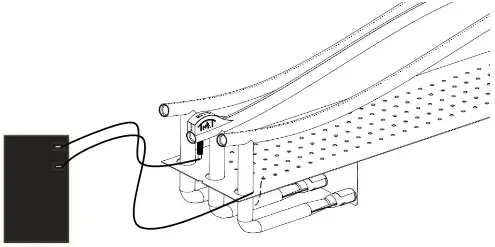
- Reach inside the base and attach gas supply line to the input shown below, using a 1/2” flare fitting.

- Ensure the correct orifices are installed for the fuel type you are using (see Wave Burner user manual included with burner for orifice sizing information).
- Set burner into the fire pit base exactly as shown below and make final gas connection to the Control Panel.

TIGHTEN CONNECTION SECURELY WITH WRENCH - Attach the flex line from the burner to the gas valve as shown above.
WARNING
After consulting the manual and following instructions, remember; before operating, all gas connections must be fully checked for leaks
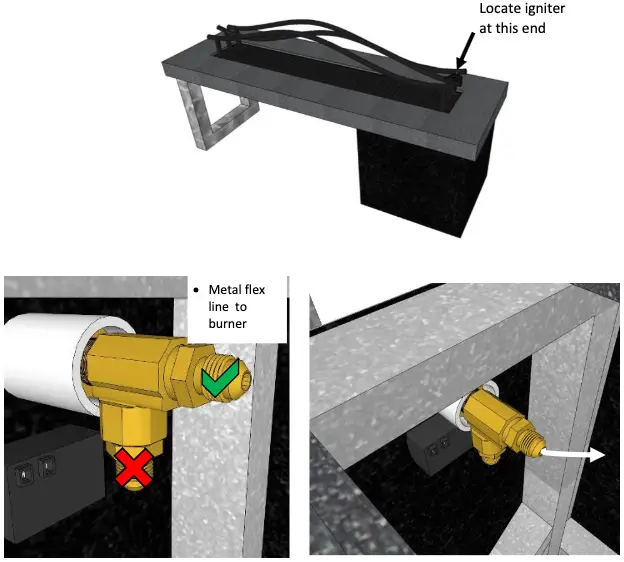
Igniter Installation
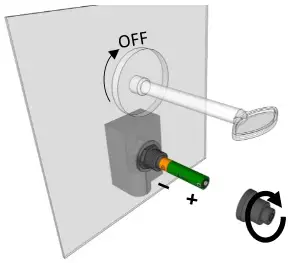
- Make sure the valve is in the OFF position before beginning.
- Remove sparker cap by turning counter-clockwise and insert a AAA battery (not included).
Reinstall sparker cap.
Sparker will not operate correctly without an ignition and ground wire attached. - Plug both BLACK wires hanging from the burner into the back of the sparker box.

- Test system by pushing the button on the igniter. Consult the troubleshooting section of the Wave Burner Owner’s Manual, if the spark is weak, intermittent, or not present.

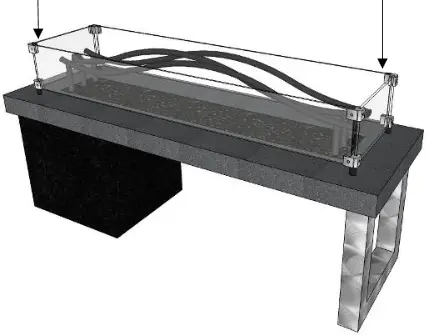
Glass Installation
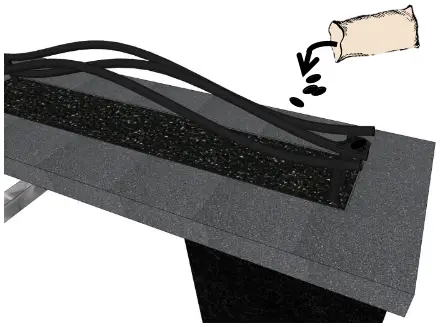
- Scatter glass beads evenly onto burner surface.
DO NOT OPERATE CRYSTAL FIRE BURNER WITHOUT GLASS BEADS OR OTHER DECORATIVE MEDIA PRESENT
- Glass guard is required for Wave burner. Install according to instructions supplied with included glass guard kit.

IMPORTANT
Please consult your Wave Burner instruction manual for detailed instructions and important information related to hooking up your burner, including safety information, proper tightening of connections with two wrenches, and full burner setup and lighting instructions.
DO NOT ATTEMPT TO INSTALL WV-56-BLK-DIY BURNER WITHOUT FIRST CONSULTING THE WAVE BURNER OWNER’S MANUAL.
WARNING
After consulting the manual and following instructions, remember; before operating, all gas connections must be fully checked for leaks
Warranty: Fire pit tables are covered under a 1-year manufacturer’s warranty. Please visit http://www.outdoorrooms.com/warranty-form/ to register your product.
Thank you for purchasing an Outdoor GreatRoom Company product! This fire pit was made with pride in the USA.

![]()
14400 Southcross Drive West • Suite 100 • Burnsville, MN 55306
Toll Free: 1-866-303-4028 • [email protected]


