![]()
INSTALLATION INSTRUCTIONS
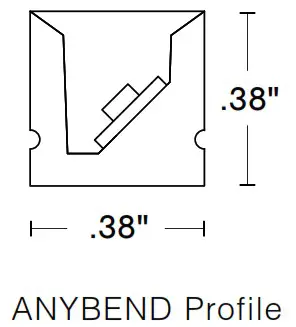
FLEXIBLE FIXTURES – ANYBEND
![]()
![]()
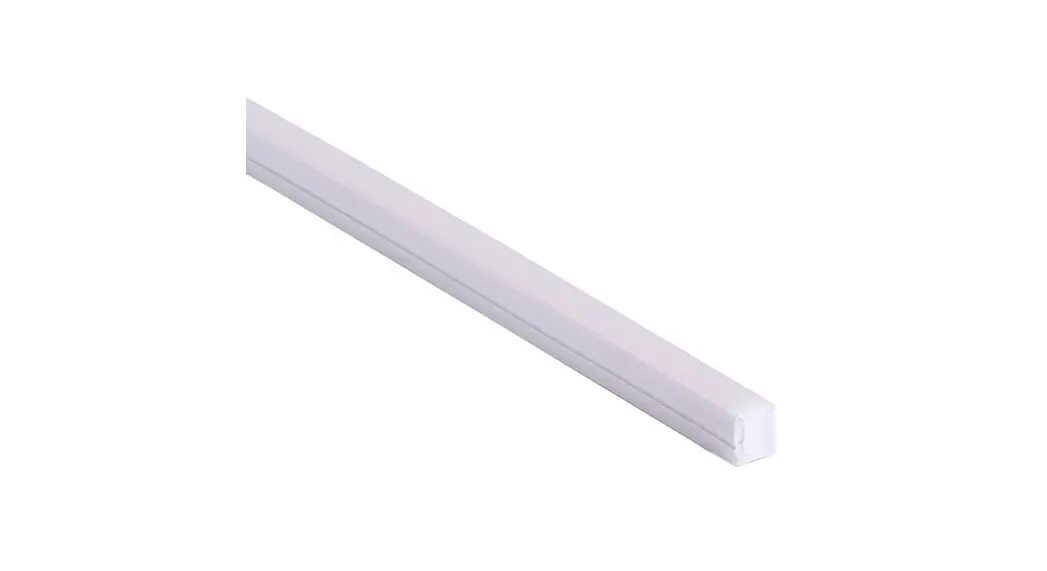
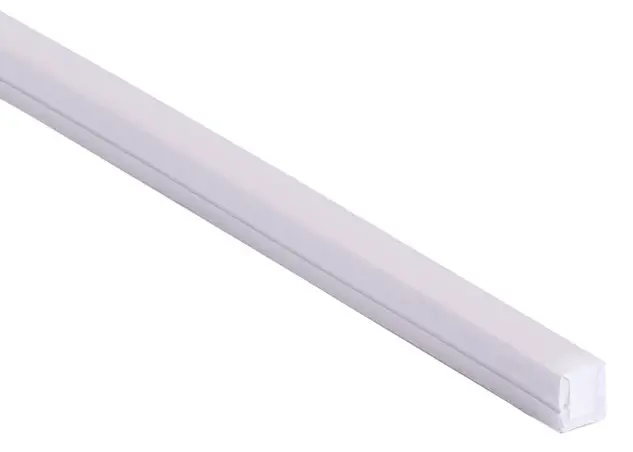
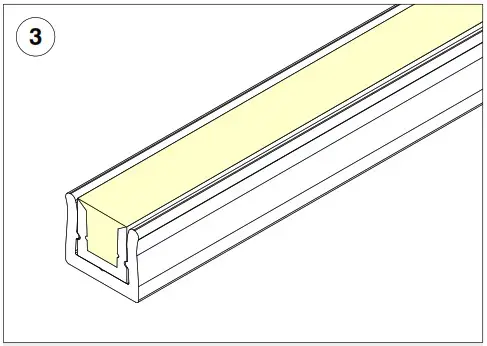
FXT-FLEXIBLE-ANYBEND Flexible Light Fixture
ATTENTION: Please read all instructions BEFORE installation
- Product to be installed by a licensed electrician – Field modifications void warranty
- Use only with Class 2 power supply unit — Compatible for use with Q-Tran power supplies
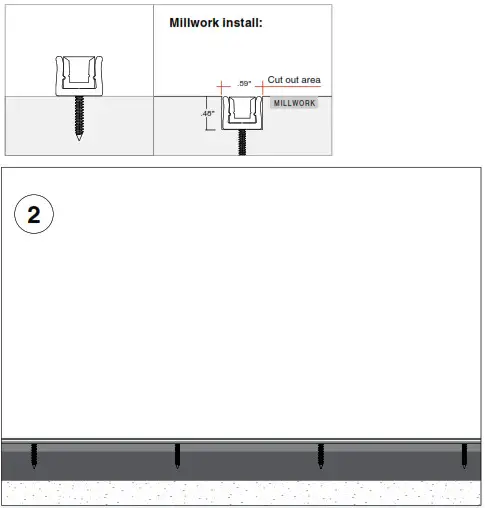
- Surface mount or recessed in millwork
- Not rated for walkover
- Input Voltage: 24VDC
- Diagrams for representation only and not to scale.
METHODS OF INSTALLATION
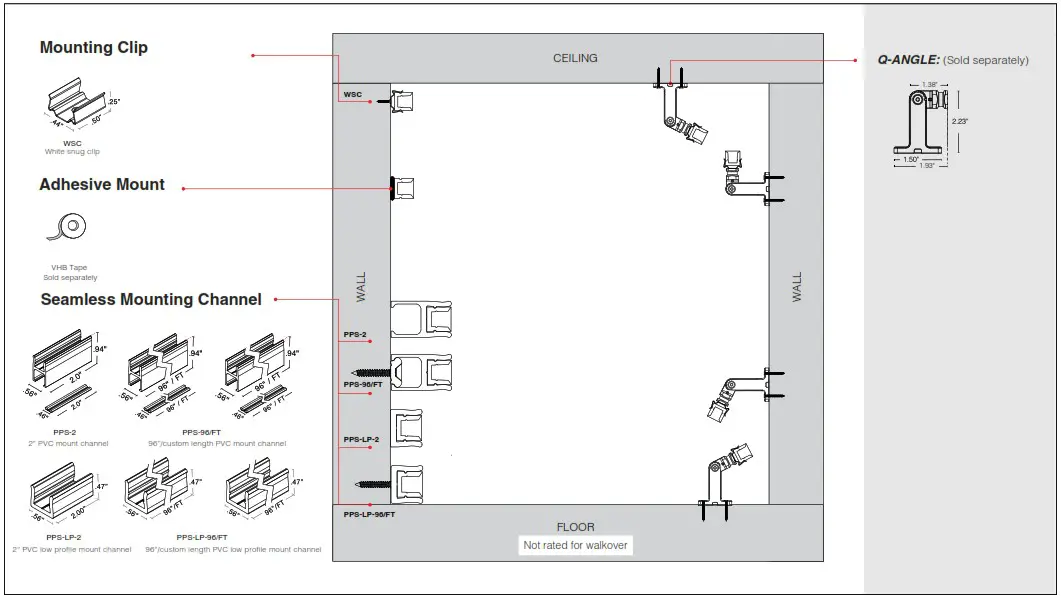
Mounting Method
| • VHB (page 6) • WSC (page 7) • PPS-2 (page 8) | • PPS-LP-2 (page 9) • PPS-96 & PPS-FT (page 10) • PPS-LP-96 & PPS-LP-FT (page 11) |

COMPONENTS & HARDWARE
| MOUNTING CLIP & MOUNTING CHANNEL | ADHESIVE SOLD SEPARATELY |
| WSC | VHB TAPE |
 | 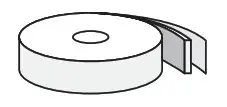 TAPE-VHB-IP20 TAPE-VHB-IP20 |
SEAMLESS MOUNTING CLIP & SEAMLESS MOUNTING CHANNEL
| PPS-2 | PPS-96 | PPS-FT |
 |  |  |
SEAMLESS MOUNTING CLIP & SEAMLESS MOUNTING CHANNEL
| PPS-LP-2 | PPS-LP-96 | PPS-LP-FT |
 |  |  |
ACCESSORIES SOLD SEPARATELY
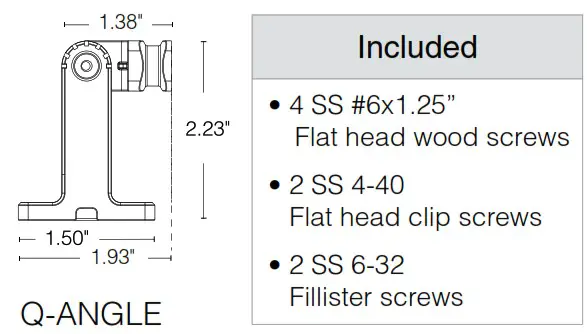
| Q-ANGLE; sold in pairs |
 |
NOTES:
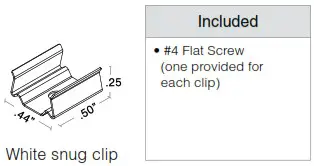
| MOUNTING CLIP • 2 white snug clips provided per first 12”, 1 for each additional 12”. Other mounting styles incur additional charge, see price guide for details | SEAMLESS CLIP • PPS-2 & PPS-LP-2 to join two fixtures together • PPS-96/FT & PPS-LP-96/FT to support the fixtures • PPS-FT is to be cut at Q-Tran to requested length |
CONTINUOUS WIRING CONFIGURATION OPTIONS
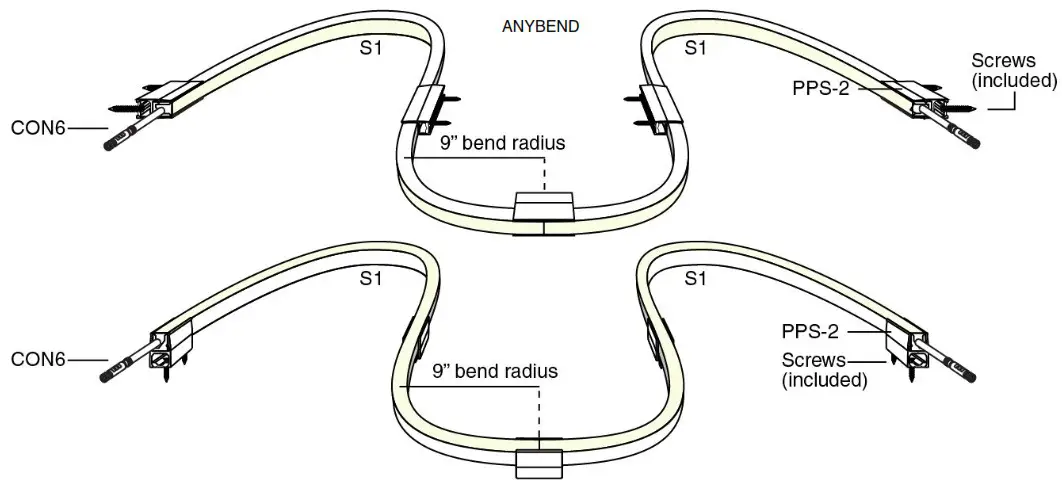
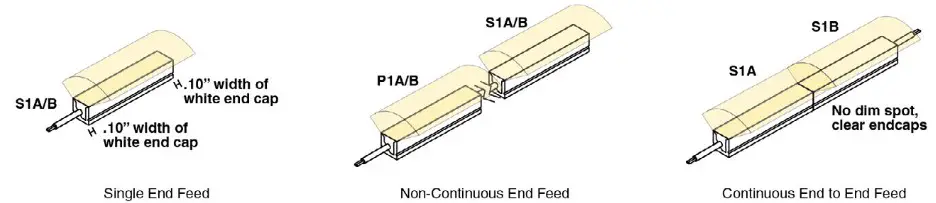
Review wire method to ensure clean installation prior to mounting finished fixture.
NOTE: Additional wire methods include:
S1A, S1B: Connector/Wire Input only
P1A, P1B: Connector/Wire Input and Output
SURFACE MOUNTING METHOD
SURFACE PREPARATION
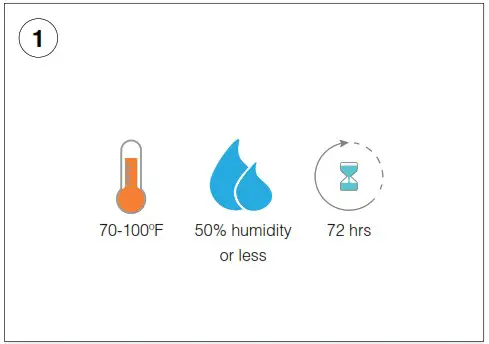
Temperature and environmental concerns:
- Ideal application environment is 70-100ºF in 50% humidity or less.
- Minimum application temperature: 50ºF
- This temperature and humidity should be maintained for 72 hours after application for maximum holding force.
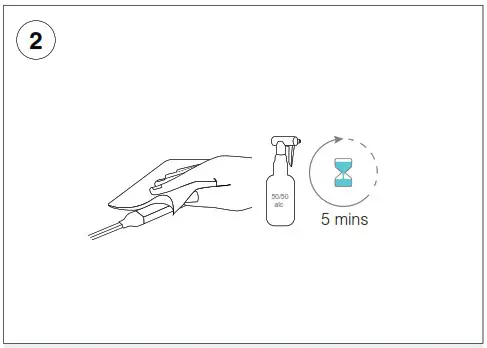
Using a 50/50 alcohol mix, thoroughly clean the backside of the fixture and the surface area where fixture will be installed.
Allow 5 minutes to dry.
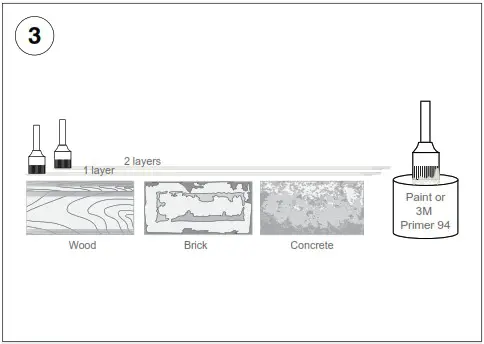
For porous materials (Wood, Brick, Concrete etc.) apply two layers of paint or primer to the surface. This will help create a better bonding surface for these materials. This can be purchased from local hardware store.
| MATERIALS | SUGGESTED EPOXIES |
| Concrete, Stone, Cinderblock, Metal, and Brick | Loctite Metal and Concrete Two-Part Epoxy |
| ABS, Fiberglass, Plastic, and PVC | Loctite Plastic Two-Part Epoxy |
| Tile, Wood, Ceramic, Glass, or Metal | Loctite Clear Two-Part Epoxy |
| All Purpose | Strong Stik |
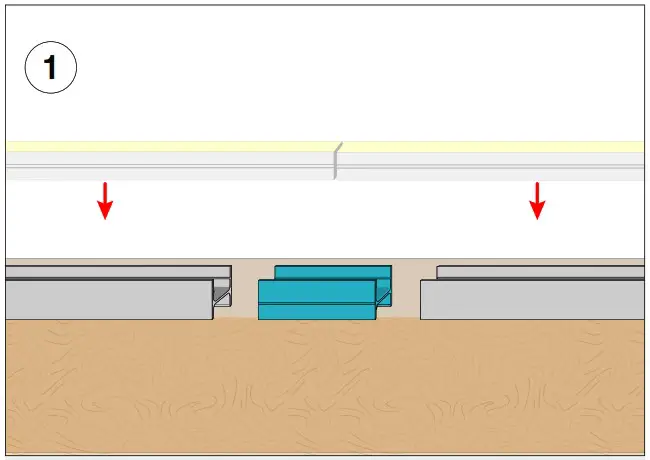
SURFACE MOUNTING METHOD: VHB ADHESIVE MOUNT
BEFORE installation, the surface must be thoroughly cleaned and dried for maximum bond strength. (Page 5)
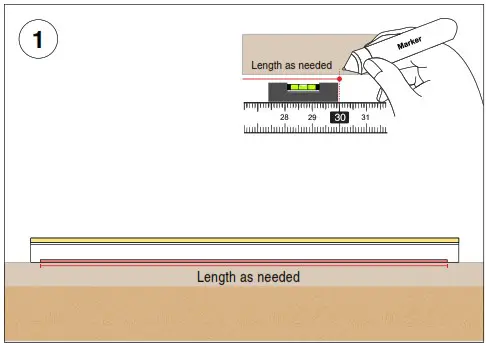
Determine the fixture(s) location and positioning on desired surface before adhering fixture to surface. Make any necessary reference markings to indicate extrusion placement.
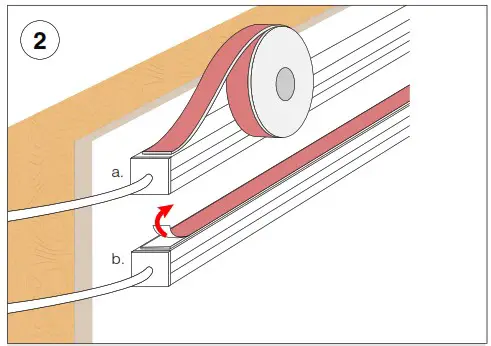
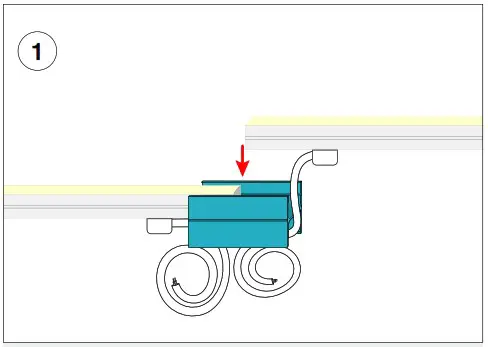
a. To adhere the VHB adhesive, peel the white film back while evenly applying the tape to the mounting side of the extrusion. The red side should be visible.
b. Remove the red film and position extrusion in place according to your previous reference marking(s).
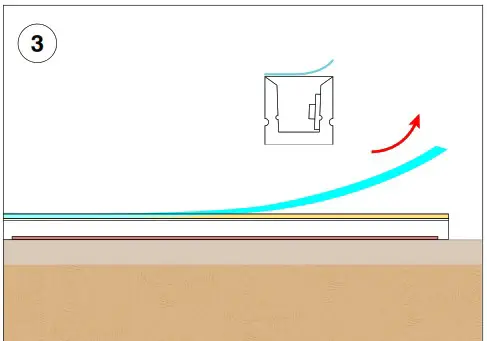
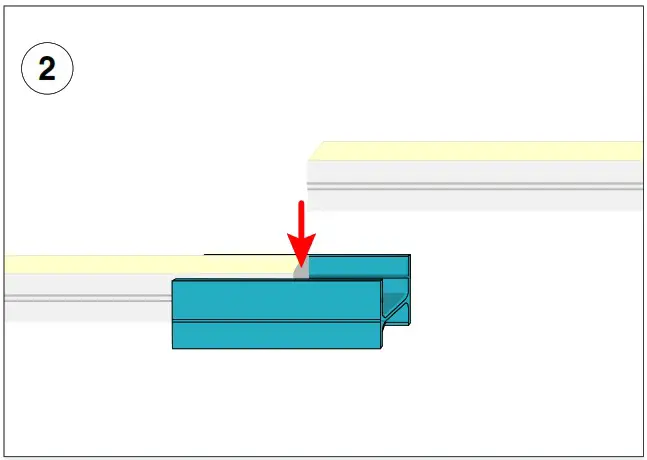
Remove protective film from the surface of the extrusion’s lens.
NOTES: EPOXY ALTERNATIVE: For improved bonding strength, apply a small amount of epoxy at each end. Refer to table on for suggested page 5 epoxies. These can be purchased at a local hardware store. Please follow all manufacturer instructions for suggested epoxy.
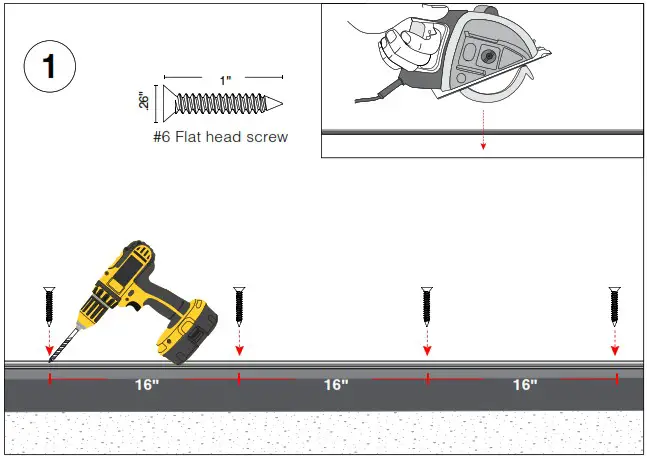
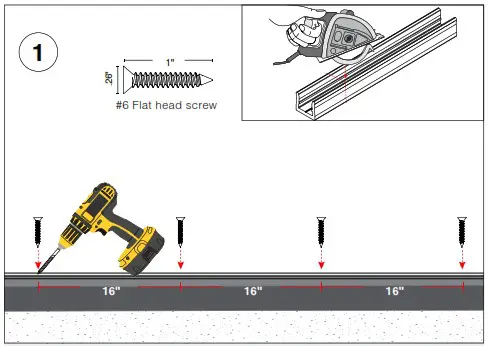
SURFACE MOUNTING METHOD: WHITE SNUG CLIP
• 2 clips provided per first 12”, 1 for each additional 12”

Determine the fixture(s) location and positioning on desired surface; evenly distribute clips. Make any necessary reference markings to indicate where each clip is to be secured in place. Recommended every 12”.
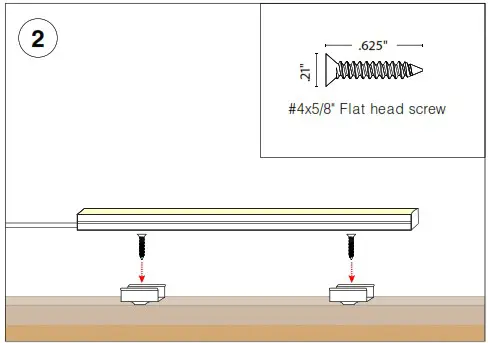
- Secure clips using the #6 flat head hardware provided
- Ensure the screw head is flush with the clip’s base.
NOTE: Flat head screw type is dependent on surface/application material Alternative flat head screws may be required. Refer to the surface material manufacturer for suggested screw type.
Snap fixture onto clips.
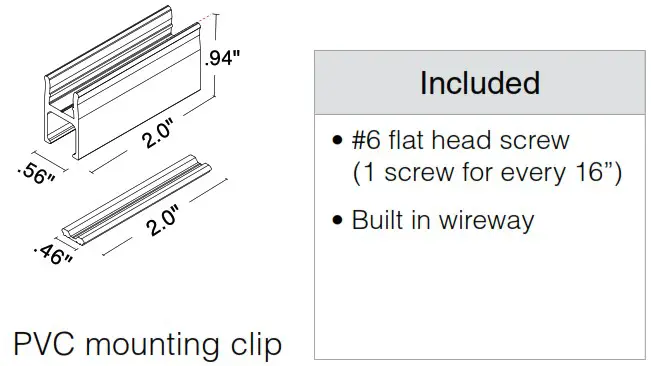
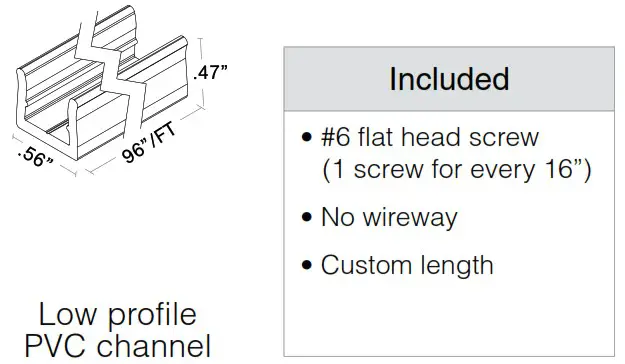
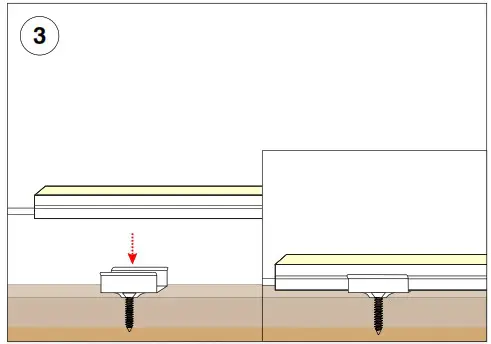
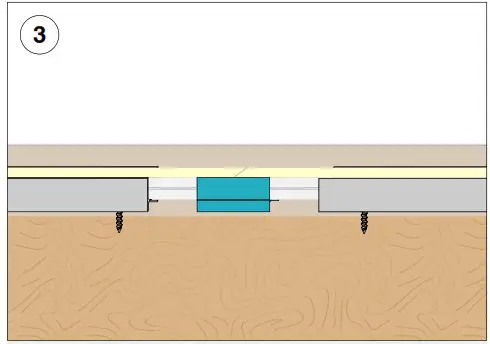
SEAMLESS MOUNTING METHOD: PPS-2
- Connects two seamless fixtures, with or without wire exit
- 2” PVC mount channel
- Built in wireway
Press both fixtures into PPS channel.
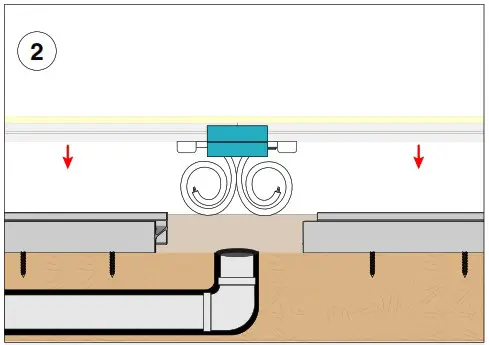
Snap fixture into mounted PPS channel when wire will exit into conduit do not install bracket.
Finished assembly for seamless feed mounting
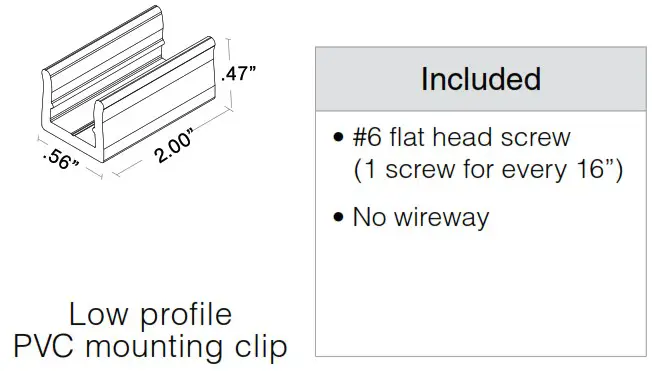
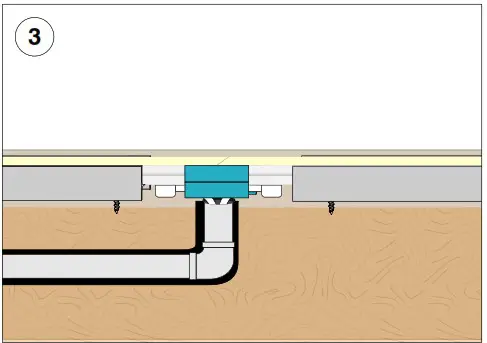
SEAMLESS MOUNTING METHOD: PPS-LP-2
- Connects two fixtures, with no wire exit
- 2” low profile PVC mount channel
Snap in 2” channel.
Press fixture into mounted PPS channel.
Finished assembly for end feed mounting
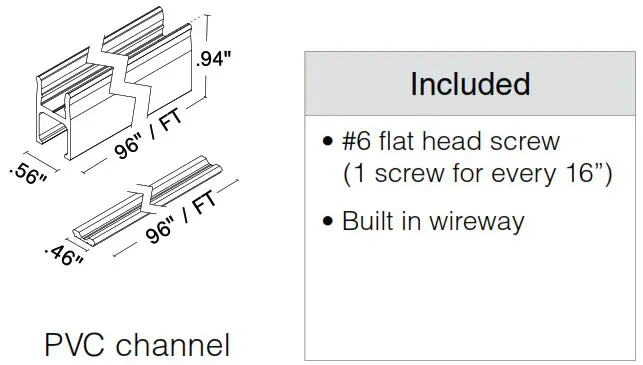
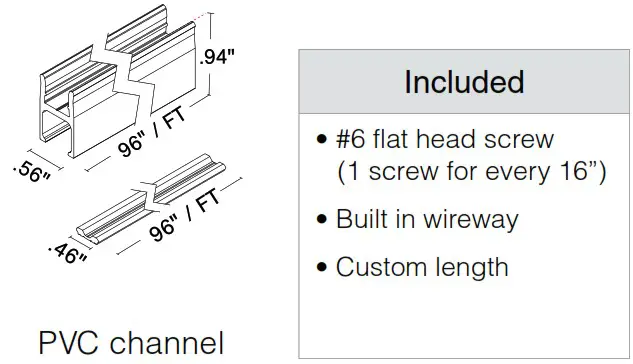
SEAMLESS MOUNTING METHOD: PPS-96 / PPS-FT
- Support two seamless fixtures, with or without wire exit
- 96” (PPS-96) or custom length (PPS-FT)
- Built in wireway
The PPS-BRACKET can be field cuttable and cut to whatever length your application requires. The PPS-BRACKET can be installed as a full length of 96”, multiple smaller pieces, or
end to end for longer seamless runs.
Using pre-drilled pilot holes screw the #6 flat head screws to mount the PPS-BRACKET (1 screw every 16”). 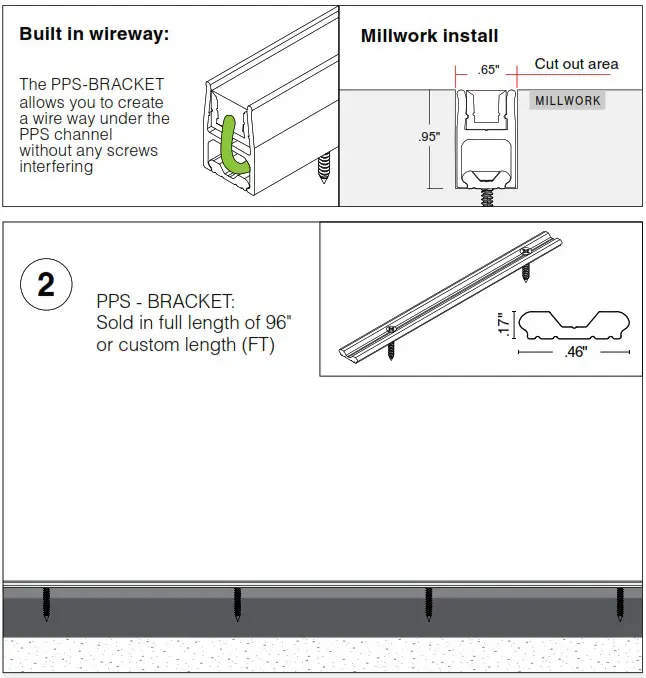
Using pre-drilled pilot holes, use the #6 flat head screws to mount the PPS-BRACKET.
NOTE: For drywall applications mount directly into a stud.
To mount, pinch the upper half of the PPS-96 or PPS-FT while you pivot it around one side of the PPS-BRACKET and push-in until you hear it snap into place. The PPS-96 or PPS-FT flexes around the PPS-BRACKET to create a solid, and secure snap on connection.
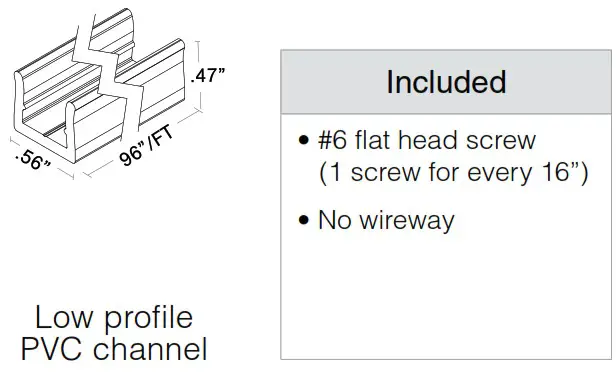
SEAMLESS MOUNTING METHOD: PPS-LP-96 / PPS-LP-FT
- Support two fixtures, without built-in wireway
- 96” (PPS-LP-96) or custom length (PPS-LP-FT)low profile PVC mount channel
The PPS-LP-96 or PPS-LP-FT can be field cuttable and cut to whatever length your application requires. The PPS-96 or PPS-FT can be installed as a full length of 96”, multiple smaller pieces, or end to end for longer seamless runs.
Drill holes (1 hole/screw every 16”) into the PPS-LP
Using pre-drilled holes, use the #6 flat head screws to mount the PPS-LP.
NOTE: For drywall applications mount directly into a stud.
Snap fixture into PPS-LP.
© 2023 Q-Tran Inc. All rights reserved
155 Hill St. Milford, CT 06460
203-367-8777
[email protected]
www.q-tran.com
Specification subject to change. Rev-07-13-23


