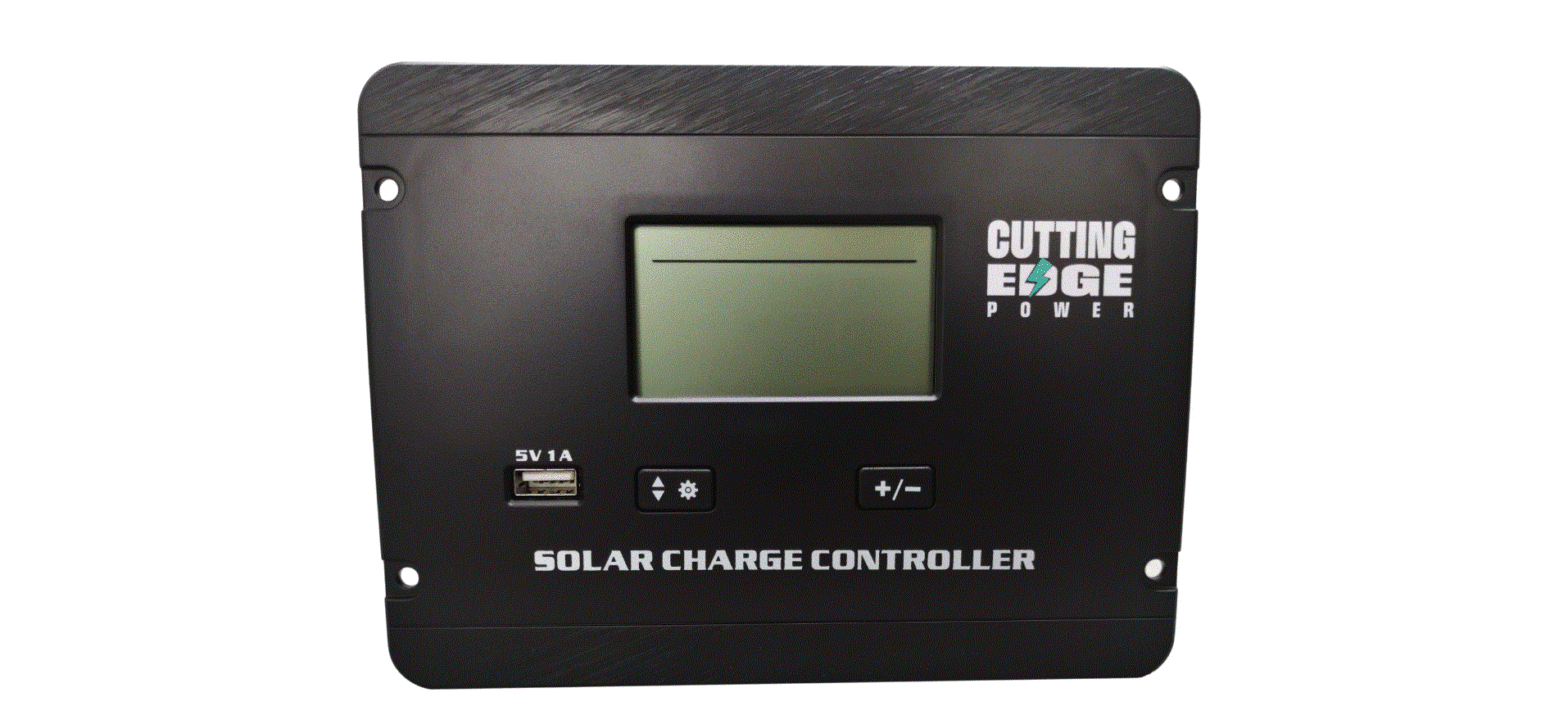
CUTTING EDGE POWER CEP300 Flush Mount Solar Charge Controller for Lead Acid
CONTROLLER FEATURES
- PCBA common negative design, necessary for all negative grounded solar power systems.
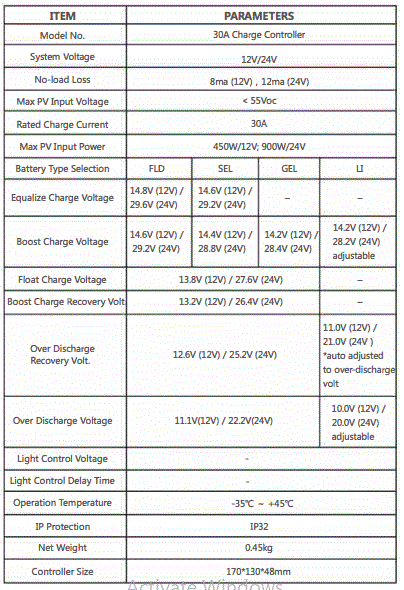
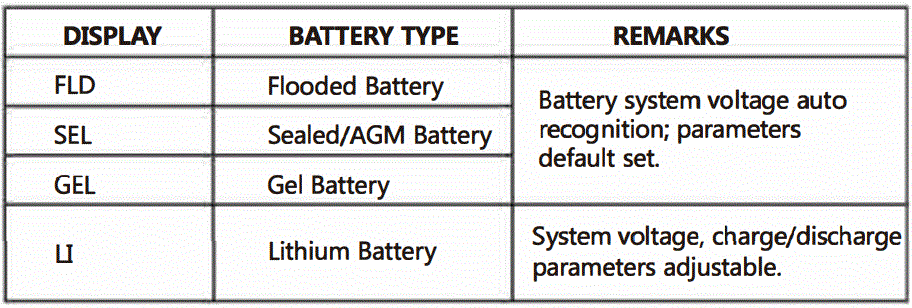
- 12/24V auto-recognition for Flooded, AGM and GEL batteries. Lithium battery must be manually set. 30A rated charge current.
- PWM 3-phase charging: equalize – boost- float (for Flooded, AGM and GEL).
- User friendly with easy-to-use settings. For Lithium battery systems, there are options for parameter adjustments.
- Flush mount design for easy installation.
- Backlit LCD display with informative pages (system status, current, voltage, voltage value settings, etc).
- Easy to use buttons for turning pages and controller parameter settings.
- 5V USB port for mobile device charging. (plug and play)
- Temperature compensation for better battery maintenance in extreme cold or hot environments.
- Multiple built-in protections including solar reverse connection, battery reverse connection, battery over-discharge, battery over voltage
INSTALLATION NOTES
1) IMPORTANT REMINDERS
- The battery must always be connected to the controller first.
- Please note that the maximum solar (PV) input voltage 1s SSV open-circuit voltage (OCV), so do not use solar module(s) with working voltage (VMP)of more than 40V (refer to solar (PV) module specs).
- Please note the maximum solar (PV) input power is 450W/12V or 900W/24V. Please do not exceed the rated power.
- Do not change any settings in the “U” battery mode if you are not using a lithium battery.
- In the LI battery mode, you must set the battery system voltage (12 or 24V) manually.
- If you would like to check the information in the “Li” battery mode settings, but not alter any settings, then you MUST remember to keep the right system voltage set (12 or 24V) before exiting from the settings.
HARDWARE SUGGESTIONS
* For maximum PWM charge efficiency, we suggest using solar modules with an output of 18V (VMP) for a 12V battery system, and 36V (VMP) module for 24V battery systems. You can still use modules with lower voltages but it may lead to a slightly lower charge efficiency. In all cases the solar (PV) input voltage (VMP) must be higher than the battery system voltage.
* For safety and protection we suggest using a DC breaker or fuse between both the solar and the controller, as well as between the controller and the battery.
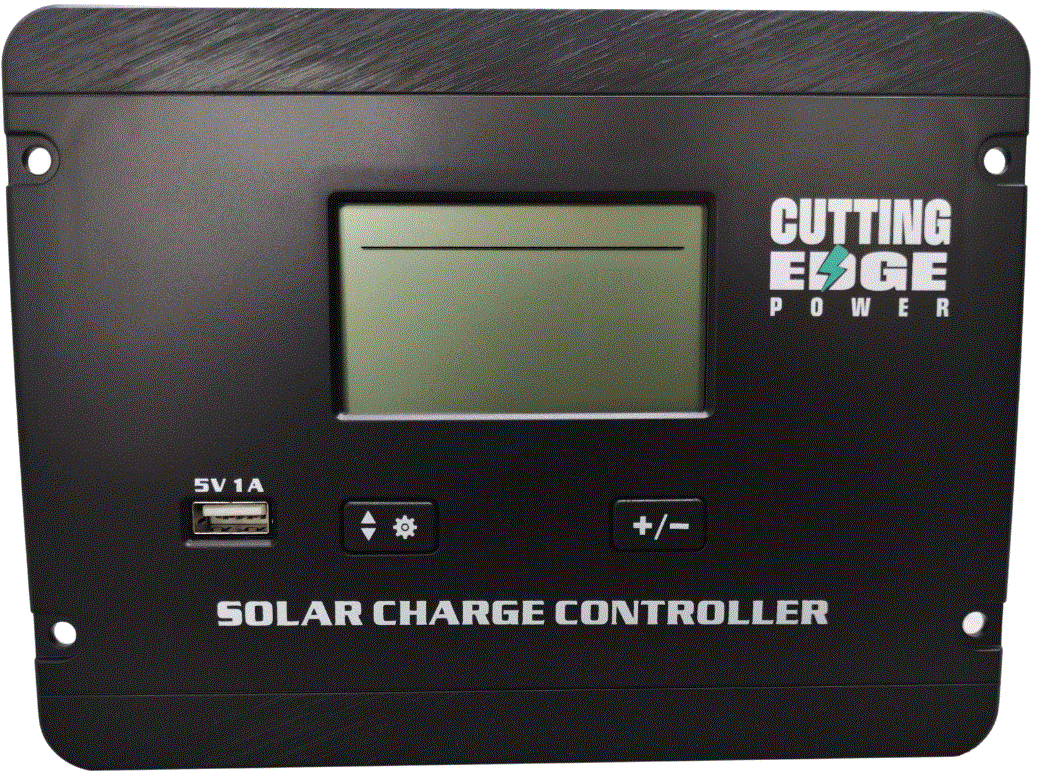
CONTROLLER ILLUSTRATION
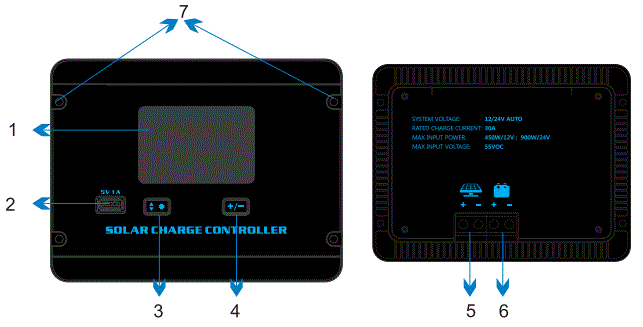
| 1 | LCD Display | 5 | Solar input wiring terminal |
| 2 | USB Port | 6 | Battery wiring terminal |
| 3 | Set/Page button | 7 | Installation holes |
| 4 | Parameter set button |
WIRING SEQUENCES
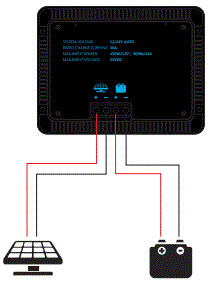
First: Connect the battery first, please choose cable accordingly.
last: Connect the solar panel second, please choose cable accordingly.
LCD DISPLAY ILLUSTRATIONS
Display Overview
You can check system information in the LCD display, including PV input voltage, charge current battery voltage, battery capacity, controller temperature, error code and battery setting pages. Here is an overall picture of the LCD display: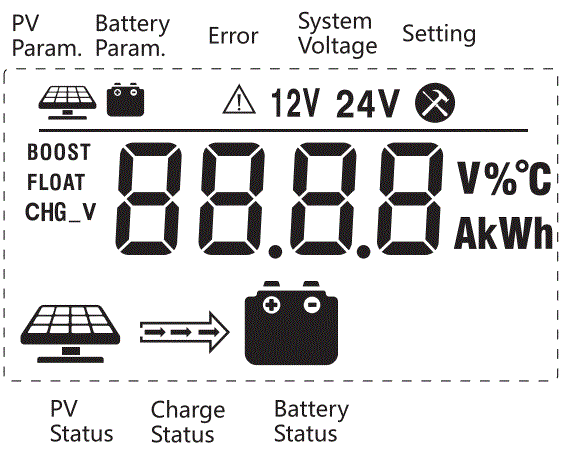
Solar (PV), Battery & Charge Indications
OPERATION & SETTINGS PAGES
Button Setting Info:
There are 2 buttons on the controller for operations and settings. Check the below diagram for setting details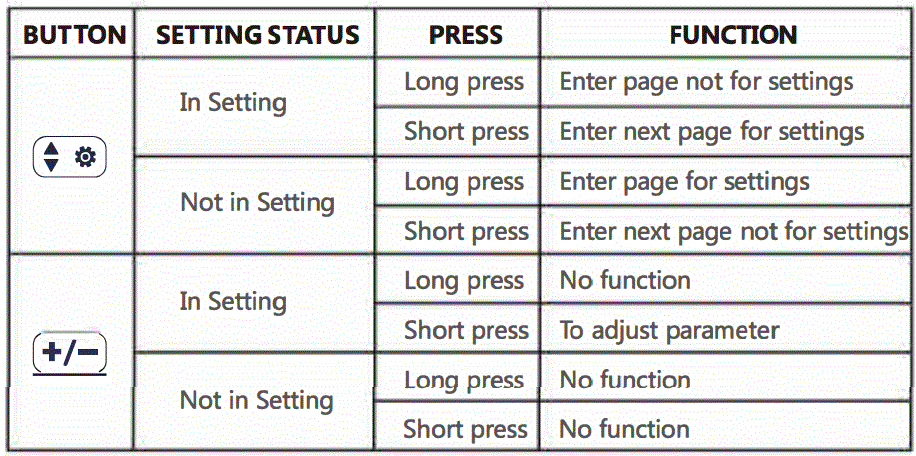
Remarks: “In Setting” means the user is in process of setting parameters.
Information Pages: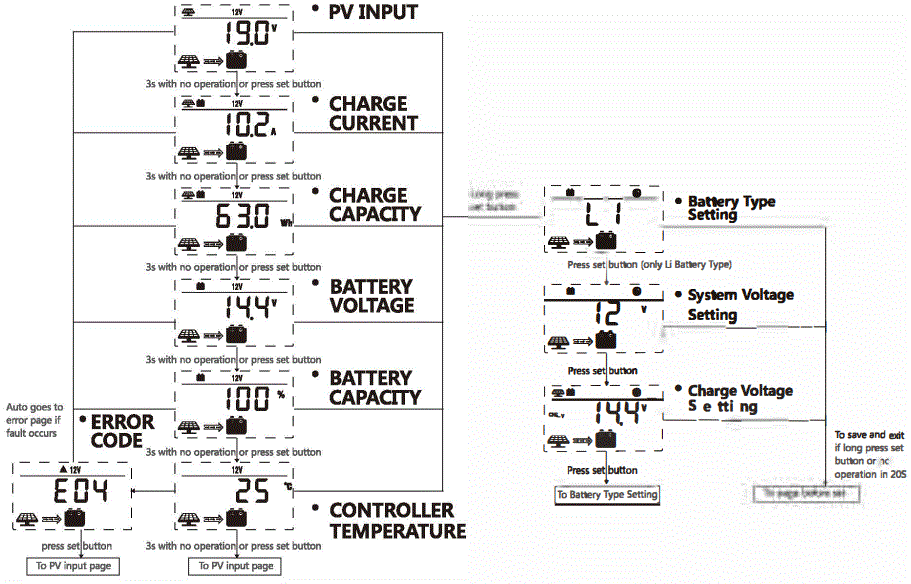
BATTERY TYPE & PARAMETER SETTINGS
Battery Type Setting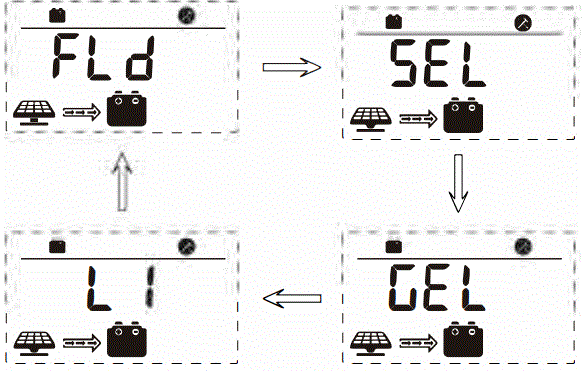
Battery System Voltage Setting (only for lithium battery)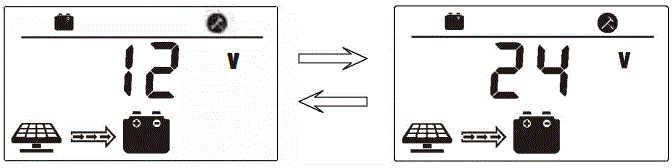
Charge Voltage Setting (only for lithium battery)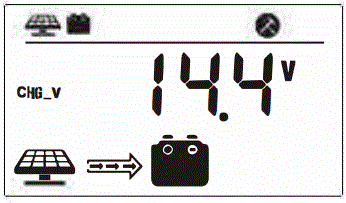
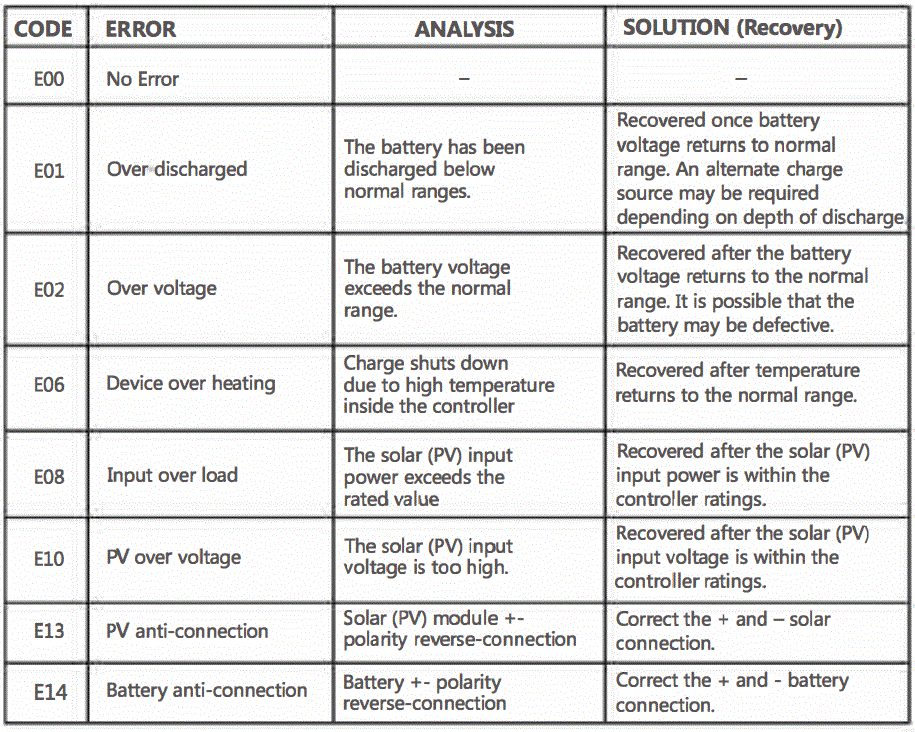
CONTROLLER ERROR INFO & RECOVERY
Due to a variety of potential issues, the controller may sometimes display an error code on the LCD screen. If this happens please refer to the below diagram: