RICE LAKE RS-130 Price Computing Retail Scale User Manual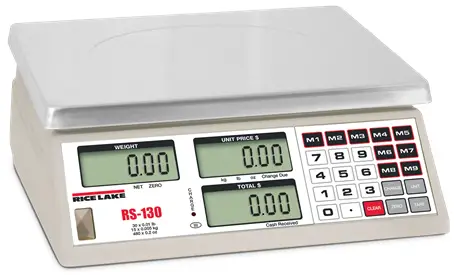
Revision History
This section tracks and describes the current and previous manual revisions for awareness of major updates and when the updates took place.
Table i. Revision Letter History
| Revision | Date | Description |
| A | 08/16/2018 | Initial manual release with the launch of the product |
| B | 03/23/2022 | Version displayed before entering setup updated to 7.4 |
Introduction
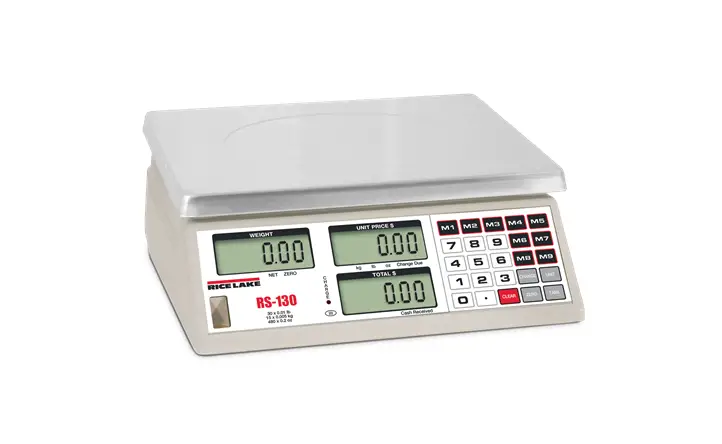
This manual provides all the necessary information to set up and operate the RS-130/RS-160 retail scale. The RS-130/RS-160 provides unmatched convenience and accuracy using one-button operation with weight displays in either pounds, kilograms or ounces.
![]() Manuals and additional resources are available from Rice Lake Weighing Systems at www.ricelake.com/manuals Warranty information can be found on the website at www.ricelake.com/warranties
Manuals and additional resources are available from Rice Lake Weighing Systems at www.ricelake.com/manuals Warranty information can be found on the website at www.ricelake.com/warranties
Overview
The RS-130/RS-160 retail scale offers practical solutions for a full range of point-of-sale weighing and price computing applications. Its compact design makes it easy to transport and the customer display on the rear of the RS-130/RS-160 offers extra convenience
Standard features of the RS-130/RS-160 include:
- NTEP Certified Legal for Trade
- Customer display on rear of unit
- Operates on 110 VAC or 6 VDC internal rechargeable battery (included)
- Battery charge indicator
- Configurable for lb, kg or oz
- Cash back calculation
- Nine PLU keys for direct price lookups
- Green backlight
- Large stainless steel platter
Safety
Safety Signal Definitions:
![]() Indicates an imminently hazardous situation that, if not avoided, will result in death or serious injury. Includes hazards that are exposed when guards are removed.
Indicates an imminently hazardous situation that, if not avoided, will result in death or serious injury. Includes hazards that are exposed when guards are removed.
![]() Indicates a potentially hazardous situation that, if not avoided, could result in serious injury or death. Includes hazards that are exposed when guards are removed.
Indicates a potentially hazardous situation that, if not avoided, could result in serious injury or death. Includes hazards that are exposed when guards are removed.
![]() Indicates a potentially hazardous situation that, if not avoided, could result in minor or moderate injury.
Indicates a potentially hazardous situation that, if not avoided, could result in minor or moderate injury.
![]() Indicates information about procedures that, if not observed, could result in damage to equipment or corruption to and loss of data.
Indicates information about procedures that, if not observed, could result in damage to equipment or corruption to and loss of data.
General Safety
![]() Do not operate or work on this equipment unless this manual has been read and all instructions are understood. Failure to follow the instructions or heed the warnings could result in injury or death. Contact any Rice Lake Weighing Systems dealer for replacement manuals.
Do not operate or work on this equipment unless this manual has been read and all instructions are understood. Failure to follow the instructions or heed the warnings could result in injury or death. Contact any Rice Lake Weighing Systems dealer for replacement manuals.
![]() Failure to heed could result in serious injury or death.
Failure to heed could result in serious injury or death.
Do not open the indicator, all procedures that require work inside the indicator enclosure are to be performed by qualified service personnel only
Do not operate without the enclosure completely assembled.
Do not use for purposes other than weight taking.
Do not place fingers into slots or possible pinch points.
Do not use this product if any of the components are cracked.
Do not exceed the rated specification of the unit.
Do not make alterations or modifications to the unit.
Do not remove or obscure warning labels.
Do not submerge.
Before opening the unit, ensure the power cord is disconnected from the outlet
Menu Navigation
This section describes the front panel keys, annunciators and display functions of the RS-130/RS-160.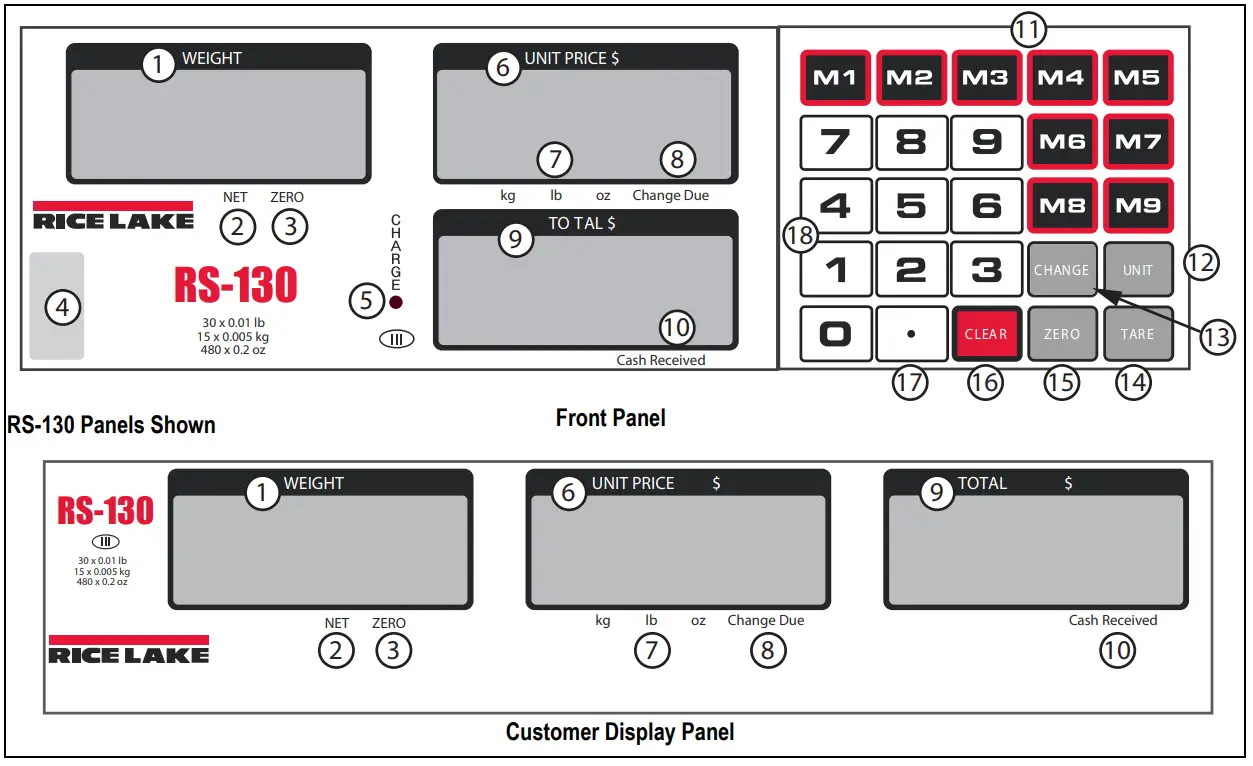
| Item No. | Function/Description |
| 1 | Weight Display – displays current weight of product on scale |
| 2 | Net – indicates scale is in NET mode |
| 3 | Zero – indicates scale is at 0 |
| 4 | Level Bubble – when the bubble is in the center of the circle, the scale is level |
| 5 | Battery Light – status of battery charging: Red: initial charge Orange: charging Green: fully charged |
| 6 | Unit Price – displays the unit price of product on the scale |
| 7 | Units – indicates weight is in either lb, kg, or oz |
| 8 | Change Due – indicates the amount of change due |
| 9 | Total Price – displays total price of product on the scale |
| 10 | Cash Received – indicates the amount of cash received |
| 11 | M1 – M9 Keys – nine direct PLU’s for saving different unit prices or figures. |
| 12 | Unit Key – selects the unit of measure (kg, lb or oz) in weighing mode. |
| 13 | Change Key – computes the amount of change to be given back to a customer for their purchase. |
| 14 | Tare Key – acquires the net weight value of the object being weighed. |
| 15 | Zero Key – resets gross weight to zero. |
| 16 | Clear Key – press to erase the value shown in the UNIT PRICE $ display. |
| 17 | Decimal Point Key – sets the decimal point. |
| 18 | 1-9 Numeric Keypad – enter the numeric value required. |
Start-up Self Check
The RS-130/RS-160 must charge for 24 hours prior to operation. Turn on the scale using the ON/OFF switch on the bottom, right side of the scale. The main program provides the following display check
- Shows the total capacity (30 or 60) in the WEIGHT display
- Counts from one to nine in each display window
- Displays the total capacity (30 or 60) in the WEIGHT display again
- Displays 0.00 for operation

Figure 1-2. ON/OFF Switch Location
Power Supply
The RS-130/RS-160 can use power supplied by either a plug-in 110 VAC or the internal sealed, lead-acid rechargeable battery with a life expectancy of five years under normal use.
- AC – 110V/60Hz ±10% (battery recharging only)
- DC – 6V / 25mA; P=0.2W (max) 4Ah
Battery Recharging
The battery has 100+ hours of use before it needs recharging. When the battery is low, the total display shows -LO- and there are three beeps. After the initial warning of low battery, the scale has approximately two to three hours of battery life left. If the battery is not charged, the scale will beep and then shut down. To recharge the battery, allow eight to ten hours for a full charge. Table 1-2 describes the Charge LED colors.
| LED Color | Description |
| Red | Initial connection |
| Orange | Charging |
| Green | Fully-charged |
Setting the Auto-Off Feature
![]() Work inside scale enclosure is not required
Work inside scale enclosure is not required
- Turn on the scale while pressing
 until 7.4 displays (approximately three seconds).
 6.3 displays on models with serial numbers preceding SN C00001 for RS-130 and SN D00001 for RS-160.
 - Press and hold until SETUP displays in WEIGHT (approximately three seconds).
- Press
 , USUAL displays.
 - Press to enter the Auto-Off mode. -OFF- displays.
- Use to select -30-, -15-, -5- or -OFF-.
- Press to confirm setting. The scale will automatically restart.
Setup
Unpacking
Carefully take the scale out of its package. Make sure there is no damage and all accessories are included.
- Remove the scale from the carton
- Remove the protective covering
- Inspect the scale and upper display (pole type only) for damage
- Make sure all components are included
If any parts were damaged in shipment, notify Rice Lake Weighing Systems and the shipper immediately.
Components
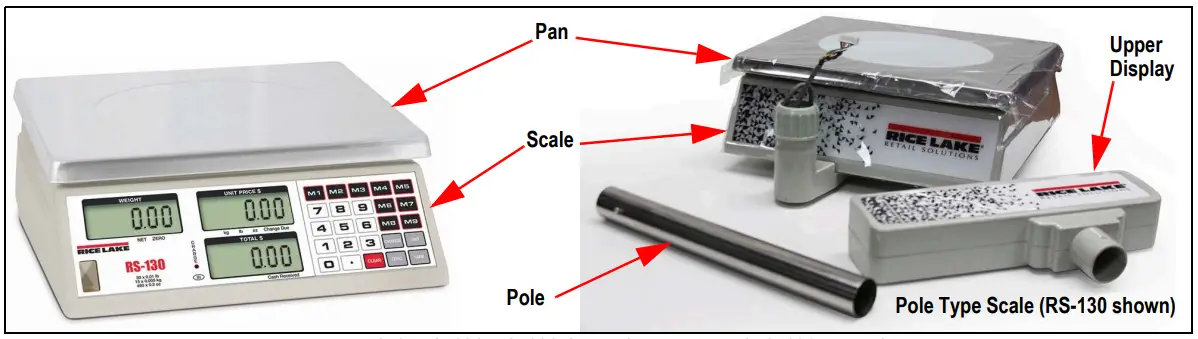
Figure 2-1. RS-130/RS-160 Scale Components (RS-130 shown)
- Scale
- Pan
- Power cord
- Pole (pole type only)
- Upper display (pole type only)
Leveling the Scale
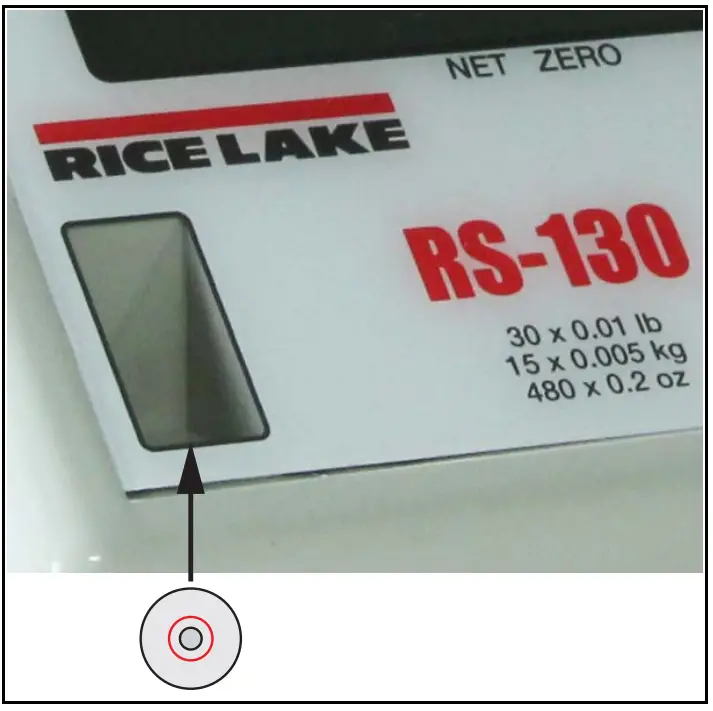
Figure 2-2. Level Bubble
- Place the scale on a flat level surface.
- Check the level bubble in the lower left corner of the front panel.
- Adjust the four corner feet until the scale is level and all feet contact the support surface so the scale does not rock.
- Lock the jam nuts on the feet when the final level is correct.
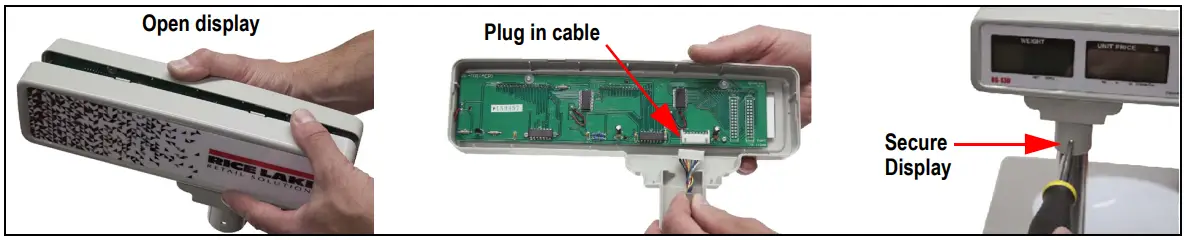
Assemble Pole Type Scale
The pole type scale requires assembly as follows: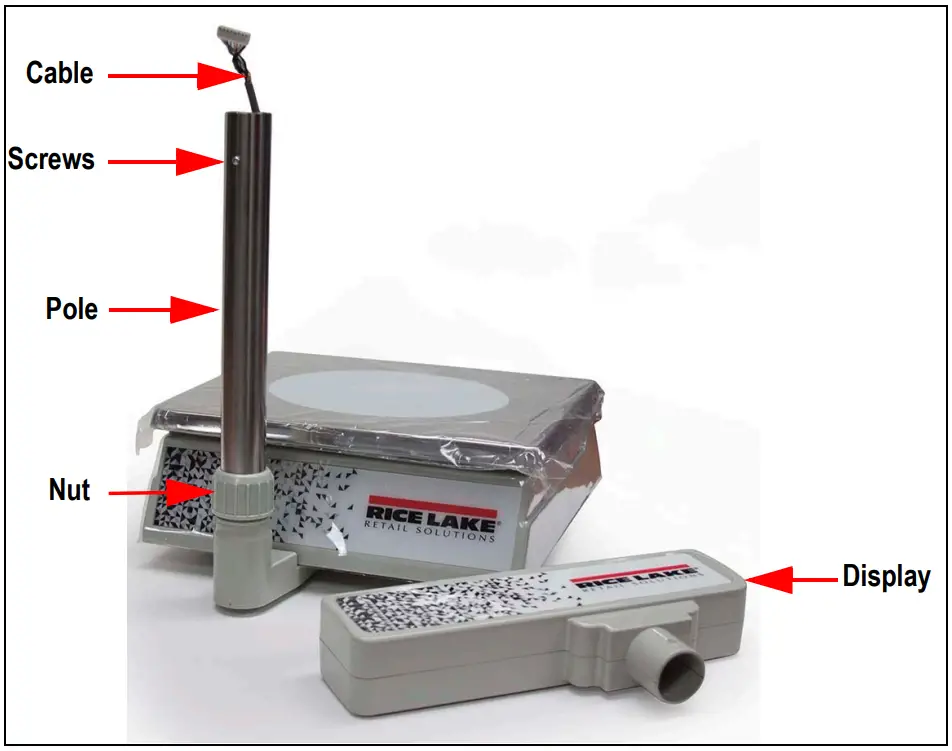
Figure 2-3. Pole Type Scale Assembly
- Place the scale on a flat level surface.
- Loosen the nut where the pole goes into the base.
- Thread the cable through the pole.
- Place the pole into the opening and tighten the nut securely.

- Carefully open the upper display by snapping the two sides apart.
- Plug the cable into the display board.
- Snap the two sides back together.
- Remove the screws from the upper part of the pole and slide the display onto the pole.
- Secure by reinstalling the screws.
- Level the scale,
Power Scale
To turn on the scale, toggle the On/Off switch located on the bottom, right side of the scale.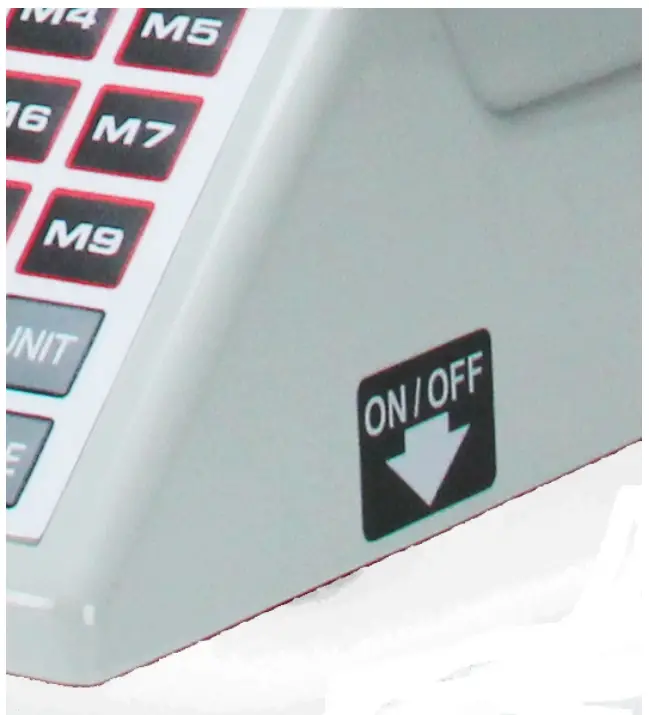
Figure 2-5. Power Switch
Setup Functions
The following settings can be set to the user’s requirements.
Auto-Backlight Enable/Disable
- Turn on the scale and press and hold until 7.4 displays. 6.3 displays on models with serial numbers preceding SN C00001 for RS-130 and SN D00001 for RS-160.
- Press and hold until SETUP displays.
- Press , USUAL displays.
- Press , the scale beeps (twice for enable, once for disable) and good flashes twice. The scale automatically restarts.
Keyboard Tare Enable/Disable
- Turn on the scale and press and hold until 7.4 displays.6.3 displays on models with serial numbers preceding SN C00001 for RS-130 and SN D00001 for RS-160.
- Press and hold until SETUP displays.
- Press , USUAL displays.
- Press
 , the scale beeps (twice for enable, once for disable) and good flashes twice.
Unit Price Auto Clear Enable/Disable
- Turn on the scale and press and hold until 7.4 displays.6.3 displays on models with serial numbers preceding SN C00001 for RS-130 and SN D00001 for RS-160.
- Press and hold until SETUP displays.
- Press , USUAL displays.
- Press , the scale beeps (twice for enable, once for disable) and good flashes twice.
Tare Auto Clear Enable/Disable
- Turn on the scale and press and hold until 7.4 displays. 6.3 displays on models with serial numbers preceding SN C00001 for RS-130 and SN D00001 for RS-160.
- Press and hold until SETUP displays.
- Press , USUAL displays.
- Press , the scale will beep (twice for enable, once for disable) and good flashes twice. When the Tare Auto Clear and Unit Price Auto Clear features are both enabled, the original Tare memory (M1-M9) is deleted.
Operation
To turn on the scale, toggle the On/Off switch located on the bottom, right side of the scale. See Figure 2-5 on page 6.
Zero
Press ![]() to reset the gross weight to zero. 0.00 displays with an arrow over ZERO.
to reset the gross weight to zero. 0.00 displays with an arrow over ZERO.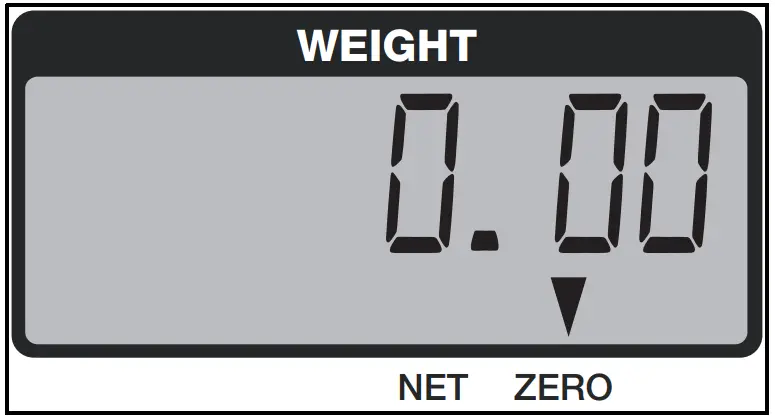
Figure 3-1. Weight Display at Zero
Units
Select the unit of measure (kg, lb or oz) in weighing mode.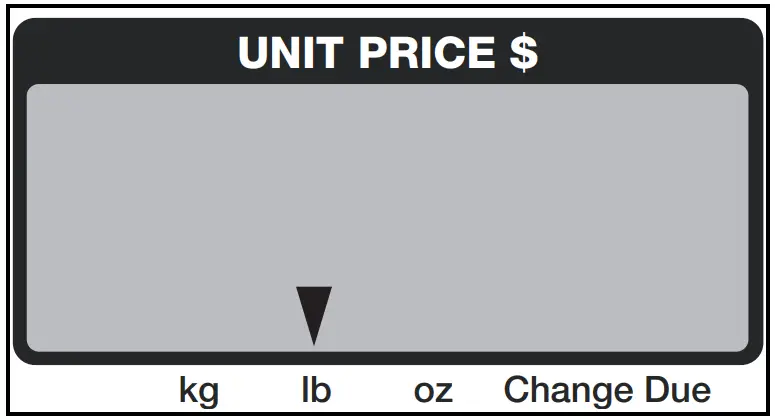
Figure 3-2. Unit Price Display – lb
- Press
 , ch9- displays.
 - Using the numeric keypad, enter:
- 1 to select kg
- 2 to select lb (default)
- 3 to select oz
The annunciator flashes above the selected unit of measure in the UNIT PRICE $ display.
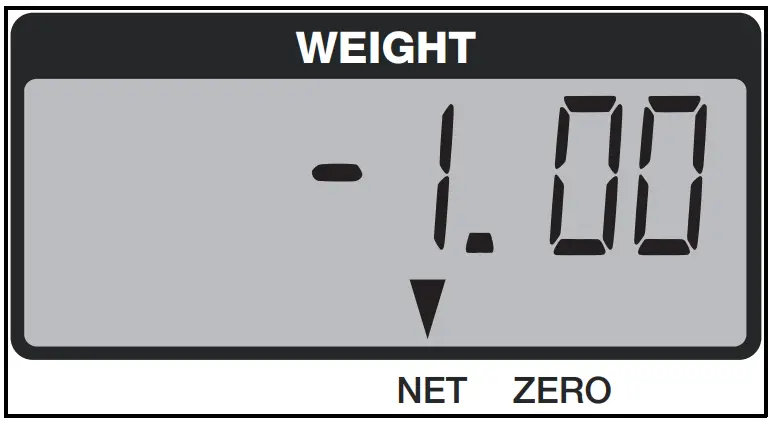
Tare
To acquire the net weight value of the object being weighed, use the tare function to remove the value of the container being used.
Using a Known Weight
If tare weight is known:
- Use the numeric keypad to enter the weight.
- Press , a negative weight displays and the arrow is over NET

Figure 3-3. Known Weight Tare
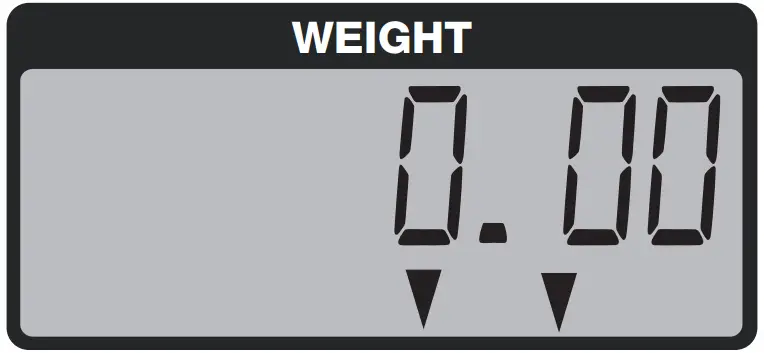
Using a Container
When using a package/container to weigh product:
- Place the empty package/container to be used on the platter. The weight of the container displays.
- Press . 0.00 displays and the arrows are above ZERO and NET.
 Do not remove the weight until the memory finishes saving.
Keyboard Tare![]() This feature is only available on SN B00551 and higher
This feature is only available on SN B00551 and higher
In Gross mode, place item on scale.
- Use the keyboard to enter the tare weight
- Press .
Example: with a tare of 61, 0.61 NET displays.
M1 – M9 Keys
There are nine memory keys available to save UNIT PRICE, TARE WEIGHT and UNIT OF MEASURE values.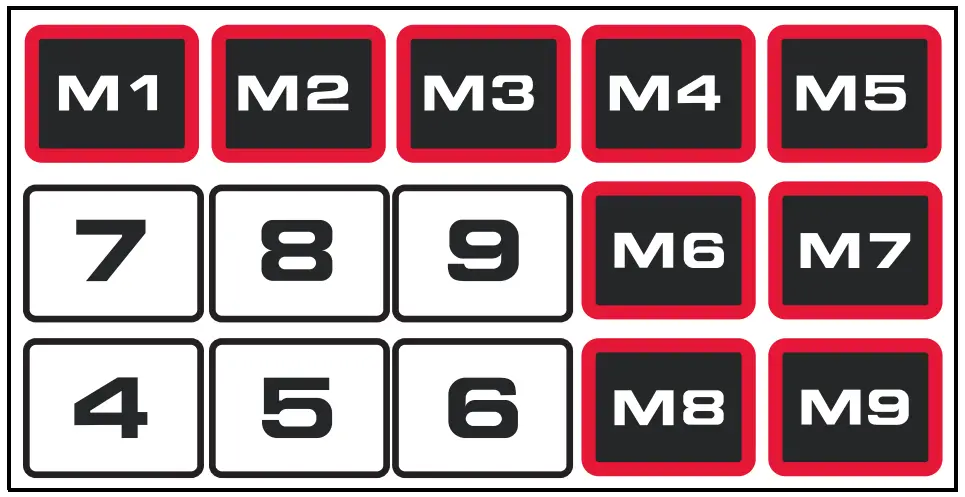
Figure 3-5. Memory Keys
- Choose the UNIT of MEASURE see Section 3.2 on page 8
- Enter the TARE WEIGHT see Section 3.3 on page 8.
- Use the numeric keypad to enter the UNIT PRICE $.
- Press and hold one of the M keys until the scale beeps.Do not remove the weight until the memory finishes saving.
Weighing Product Using M Keys
- Press the programmed M key (M1-M9).
- Place product on the scale.
- WEIGHT displays weight of product.
- UNIT PRICE $ displays unit price and arrows flash above selected unit (kg, lb, oz).
- TOTAL $ displays the total cost of product being weighed.
To change the setting of one of the memory keys, follow the steps in Section 3.4.
Change
Use to compute the amount of change to be given back to a customer for their purchase:
- TOTAL $ displays the amount owed for the product on the scale.
- Press .
- Use the numeric keypad to enter the amount received from the customer. The UNIT PRICE $ displays C (change due). The TOTAL $ displays 20.00 (cash received).
Clear
Press ![]() to erase a value displayed in the UNIT PRICE $.
to erase a value displayed in the UNIT PRICE $.
Decimal Point
Set the decimal point. This feature available on SN B00551 or higher only.
Numeric Keys (0 – 9)
Enter a Numeric Value
Use the numeric keys to enter the price-per-unit, PLU number or cash received.
Display Battery Voltage
Press and hold ![]() to display the battery voltage.
to display the battery voltage.
- 6.1 – 6.5 indicates the battery is fully charged.
- Less than 5.6 indicates the battery is in low charge.
- Press to return the display to normal operating mode.
Troubleshooting
Table 4-1 lists error messages for the RS-130/RS-160.
| Display | Description | Corrective Action |
| WEIGHT display shows “Err-1” | IC93C66 data-loss or IC93C66 damaged/faulty | Contact your nearest RLWS dealer |
| WEIGHT display shows “Err-3“ | At power-up, the weight on the platter is more than 5% of the maximum capacity | Remove the weight from the scale, or lighten the weight to under 5% of capacity and restart the scale |
| TOTAL $ display shows “E” | Total price value is larger than 9999.99 | Remove the measured object from the platter and press CLEAR to clear the unit price setting |
Table 4-1. Error Messages and Troubleshooting
© Rice Lake Weighing Systems. All rights reserved.
Rice Lake Weighing Systems® is a registered trademark of Rice Lake Weighing Systems.
All other brand or product names within this publication are trademarks or registered trademarks of their respective companies.
All information contained within this publication is, to the best of our knowledge, complete and accurate at the time of publication. Rice Lake Weighing Systems reserves the right to make changes to the technology, features, specifications and design of the equipment without notice.
The most current version of this publication, software, firmware and all other product updates can be found on our website:
www.ricelake.com