![]()
Assembly
Instructions
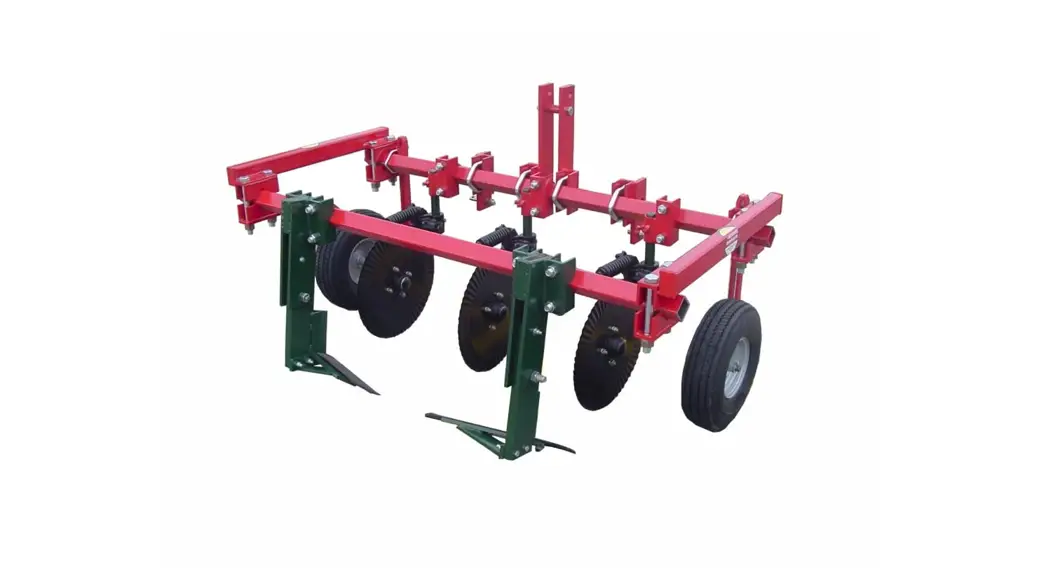
CHALLENGER MODEL 1800
PLASTIC MULCH LIFTER
STEP 1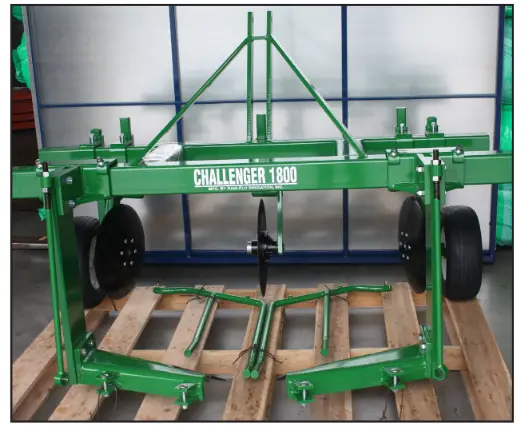
Standard Parts Shipped With Equipment: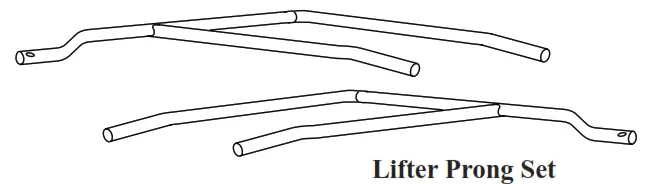
STEP 2
Installing Lifting Prongs
See Operating Manuel For Adjustments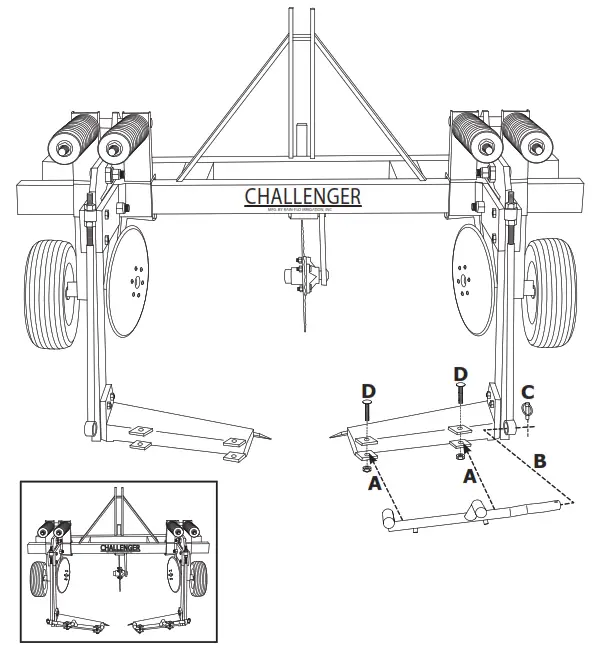
Install lifting prongs by sliding end through adjusting rod (B), placing them between the brackets (A), and placing lynch pin in position (C). Insert bolts through holes and tighten nut (D).
STEP 3
Adjusting Depth Wheels & Discs In or Out
See Operating Manuel for More Adjustments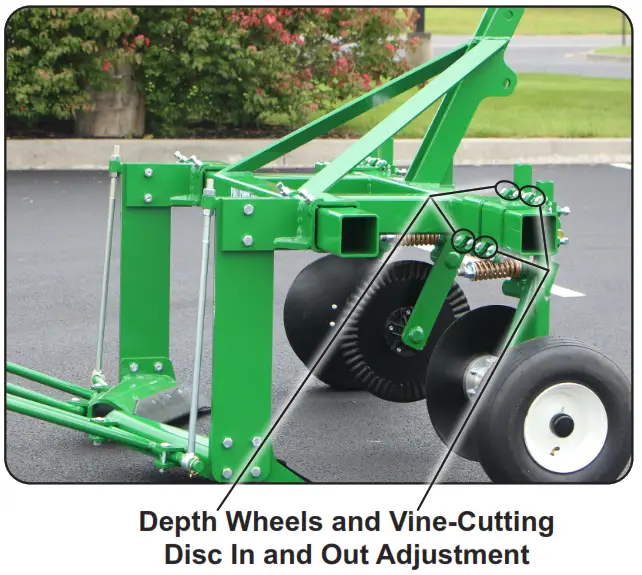
When you receive your plastic mulch lifter, depth wheels and vine-cutting discs will be installed but will need adjustments.
Depth wheels are slid toward the center for shipping. To adjust, loosen the bolts shown above, slide into the desired place, and re-tighten bolts. If discs need to be adjusted, follow the same steps as shown above. Set discs in line to cut with the outside edge of plow shank; about 2” to 3” deep.
Note: Setting disks too deep will keep the machine from going deep enough.
STEP 4
See Operating Manuel for More Adjustments
Adjusting Depth Wheels & Discs Up or Down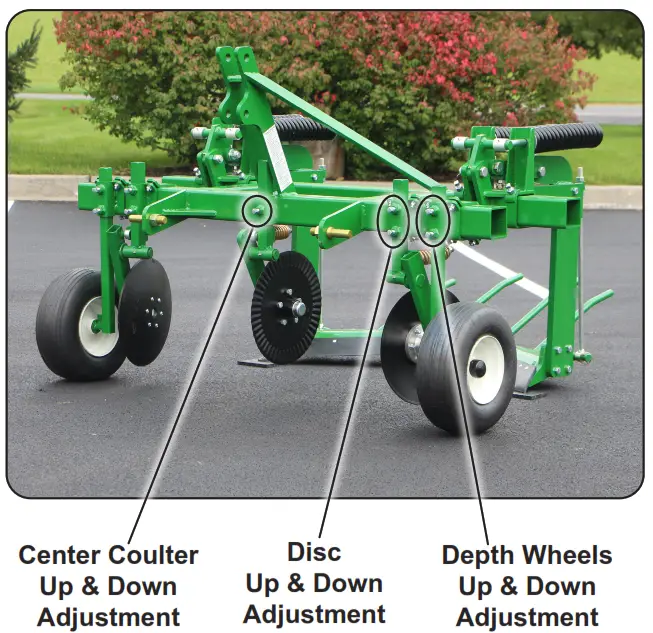
As shown in the Operating Manuel; colter, disc, and wheels may need up & down adjustments. To do this, loosen bolts shown above, slide into the desired place, and re-tighten bolts. The center colter is to cut plastic in half for better removal. When not needed, it can be removed by loosening bolt shown above and sliding the assembly downward.
STEP 5
Tractor Hook-Up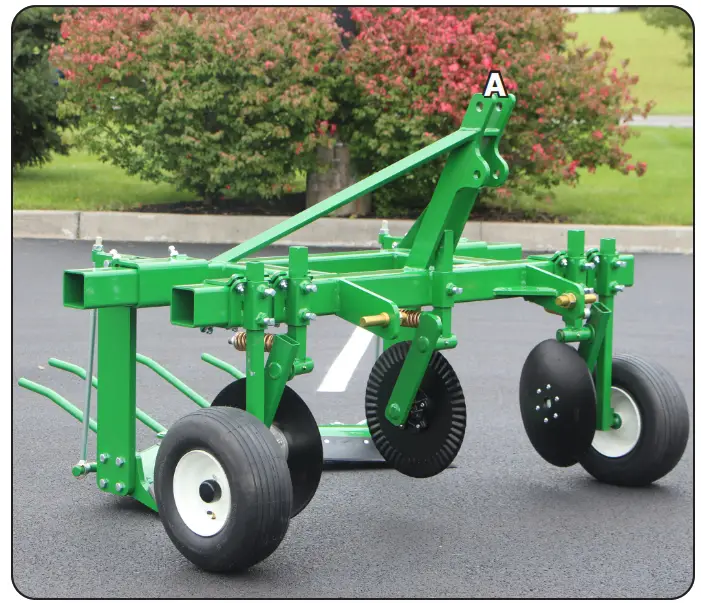
The Model 1800 has Cat II lift pins on a 3-point hitch. Hook up 3-point top link to top of A-frame (A) and adjust top link to level machine.
TIPS
- The machine works best if weeds and crop residue are mowed off first.
- Adjust 3-point top link to level machine.
- Drive about 2 to 4 MPH and adjust lifting rods 8” to 12” off the ground (must be lowered if dragging results).
- Adjust depth control wheels so machine lifting plows run approx. 6” below the plastic.
- Adjust inside of shanks approximately 2” narrower than original plastic width. (not bed top width)
- After plastic is lifted, it is advisable to gather it up before it rains.
~2021 Edition~
Rain-Flo Irrigation
(717) 445-3000


