![]() Pro Fit Software
Pro Fit Software
Instructions
QUICKTIP
Pro Fit Fitting Protocol
Pro Fit Software
Pro Fit will guide the hearing care professional through three fitting session types: Preparation, Fitting, and Follow-Up.
Wireless Initial Set-up
NOTE: To power on rechargeable 2.4 GHz hearing aids for the first time, briefly insert and remove them from the charger.
- Rechargeable 2.4 GHz hearing aids can only be programmed wirelessly via the 2.4 GHz or NOAH Link Wireless programmer. Hearing aids will ship with enough battery life to complete initial hearing aid programming, but not enough for a full day of use. Place hearing aids in the charger prior to the initial fitting to ensure there is enough battery life for use.
NOTE: If the hearing aid battery charge is too low, a low battery warning will appear when reading devices. If this occurs, the fitting session can proceed, but a firmware update (if available) cannot. A 7-minute turbo charge using the Star Link Chargers is enough to proceed with a firmware update. - If programming RIC hearing aids, attach Snap Fit 2.0 receivers.
- If fitting CROS/Biros hearing aids, the 2.4 GHz wireless CROS Receiver and Transmitter must be paired and programmed together at the initial fitting. Receivers can be programmed with or without the Transmitter present after the initial fitting. If a Transmitter is ordered separately, the hearing care professional must pair the Transmitter and Receiver as a set within Pro Fit. Streaming from the Transmitter is available during the fitting session.
Non-Wireless Initial Set-up
- Non-wireless hearing aids can only be programmed via programming cables and the Speed Port, Hypro, or NOAH Link programmers
- Insert orange programming flex strips into the hearing aids and connect to programming cables.
- Insert batteries into the hearing aids.
Pro Fit Minute Fit
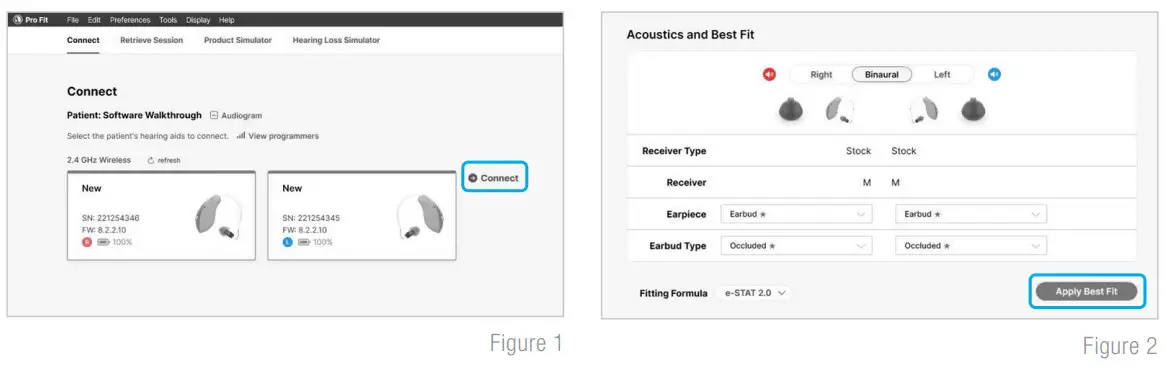
- Select the hearing aid(s) to be programmed. [Fig. 1]
- Select Connect to begin a new fitting or for a follow-up fitting session using the current settings in the hearing aids.
- Review and verify selections. Select Apply Best Fit. [Fig. 2]

Preparation
Pro Fit advances to the Preparation session automatically when programming new hearing aids. [Fig. 3]
- Set up new hearing aids.
A. Assign the Experience Level.
B. Select Programs and enable hearing aid programs, if desired.
C. Select User Controls. Drag any user control you wish to enable from the left and drop it on a gesture on the right. [Fig. 4] NOTE: Rechargeable hearing aids do not have battery doors.
To provide patients with the ability to power off their hearing aids while not in use, the Push & Hold user control will be configured as “Power Off” when shipped.
NOTE: Double Tap is only available for wireless products. Double Tap Sensitivity may be adjusted by selecting the dropdown arrow under the user control options.
D. Select Accessories to pair and configure accessories, if desired. See pairing information for information on the pairing process. Once paired, adjust the Hearing aid mic while streaming, Streaming sound for the streaming accessories and the Favorite Button configuration for the Remote. Adjust the Hearing aid mic while streaming phone and Streaming sound for phone use. [Fig. 5]
- Utilize the Flyout Menu and the Left Menu Bar to access additional screens and help features. [Fig. 6]
 NOTE: Rechargeable hearing aids do not have battery doors.
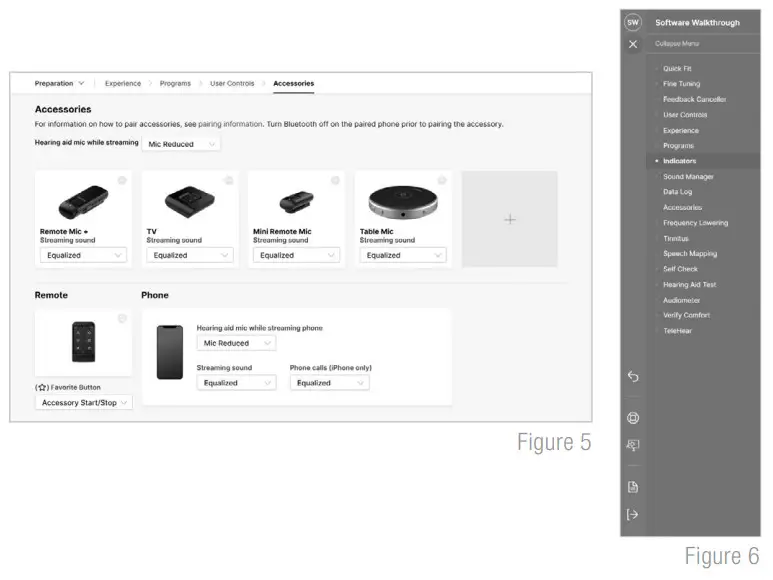
Fitting
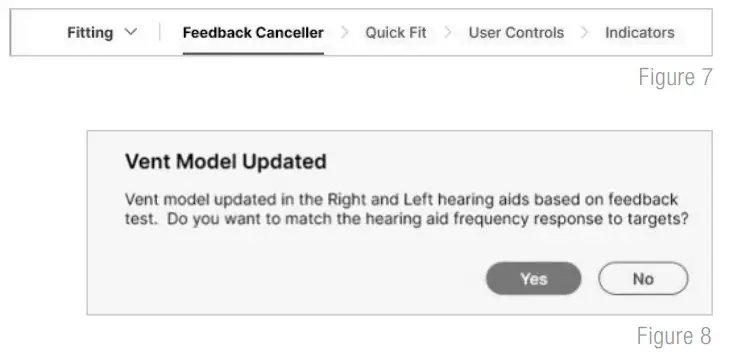
Following the Preparation session, Pro Fit will advance to the Fitting session automatically. [Fig. 7]
- Insert the hearing aids into the patient’s ears, reduce all sources of noise, then select Begin Test to run the Feedback Canceller initialization.
- If prompted to update the vent model, select Yes to match the new modeled response to target or select No if you have already adjusted away from the displayed targets (e.g., for patient preference). [Fig. 8]
 NOTE: The vent model is updated based on measurements obtained during the feedback canceller test.
This update does not change gain or output settings. The updated vent model reflects the measured acoustics of the ear canal with the hearing aid in the ear and will most often affect the low-to-mid frequencies. - Select Quick Fit to make global fitting adjustments. Select Fine Tuning on the bottom of the Quick Fit screen or from the left navigation menu to make detailed fitting adjustments of individual channels and input levels.
- If needed, select User Controls. Drag any user control you wish to enable from the left and drop it on a gesture on the right. [Fig. 4]
- Select Indicators. Click the check boxes to enable or disable indicators. [Fig. 9]
- Adjust All Indicators or individual indicators to increase or decrease volume level for all Tone or Speech indicators in 5 dB increments. Select the hearing aid icon to play the indicators directly through the hearing aids or the computer icon to play them through the loudspeaker.

- Utilize the Flyout Menu
 and the Left Menu Bar to access additional screens and help features. [Fig. 6]
 NOTE: The vent model is updated based on measurements obtained during the feedback canceller test.
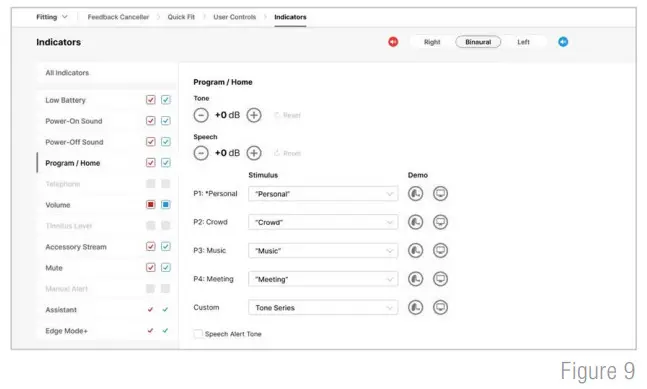
Follow-Up
Following the Fitting session, Pro Fit will advance to the Follow-Up session automatically. [Fig. 11]
- Review Data Log, if desired.
- If needed, select Fine Tuning to make detailed adjustments of individual channels and input levels.

- If needed, select Indicators to adjust the volume level and stimulus type for indicators. [Fig. 9]
- If needed, select User Controls. Drag any user control you wish to enable from the left and drop it on a gesture on the right. [Fig. 4]
- Utilize the Flyout Menu and the Left Menu Bar to access additional screens and help features [Fig. 6]

![]() To learn more, visit www.starkeypro.com/products/other-products/software/pro-fit
To learn more, visit www.starkeypro.com/products/other-products/software/pro-fit
OR www.audibelpro.com/products/other-products/software/pro-fit
Pro Fit, Minute Fit, Star Link and Starkey logo are trademarks of Starkey Laboratories, Inc.
©2023 Starkey Laboratories, Inc.
All Rights Reserved. 3/23 FLYR4073-01-EN-SC
SPECIFICATION
| Product Specifications | |
|---|---|
| Product Name | Starkey Pro Fit Software |
| Fitting Session Types | Preparation, Fitting, and Follow-Up |
| Wireless Initial Set-up | Rechargeable 2.4 GHz hearing aids can only be programmed wirelessly via the 2.4 GHz or NOAH Link Wireless programmer. Programming RIC hearing aids requires Snap Fit 2.0 receivers. Programming CROS/Biros hearing aids requires pairing the 2.4 GHz wireless CROS Receiver and Transmitter together at the initial fitting, with streaming from the Transmitter available during the fitting session. |
| Non-Wireless Initial Set-up | Non-wireless hearing aids can only be programmed via programming cables and the Speed Port, Hypro, or NOAH Link programmers. Insert orange programming flex strips into the hearing aids and connect to programming cables. Insert batteries into the hearing aids. |
| Pro Fit Minute Fit | Select the hearing aid(s) to be programmed. Select Connect to begin a new fitting or for a follow-up fitting session using the current settings in the hearing aids. Review and verify selections. Select Apply Best Fit. |
| Preparation Session | Assign experience level, select programs, enable user controls, and configure accessories. Utilize the Flyout Menu and the Left Menu Bar to access additional screens and help features. |
| Fitting Session | Insert hearing aids, run feedback canceller initialization, make global fitting adjustments, and detailed fitting adjustments of individual channels and input levels. Adjust volume levels and stimulus types for indicators, and enable user controls. Utilize the Flyout Menu and the Left Menu Bar to access additional screens and help features. |
| Follow-Up Session | Review data log, make detailed adjustments of individual channels and input levels, adjust volume levels and stimulus types for indicators, and enable user controls. Utilize the Flyout Menu and the Left Menu Bar to access |
FAQS
The Pro Fit Fitting Protocol Neuro Platform is a software designed to guide users through three fitting sessions, including Preparation, Fitting, and Follow-Up.
Rechargeable 2.4 GHz hearing aids can only be programmed wirelessly via the 2.4 GHz or NOAH Link Wireless programmer.
No, non-wireless hearing aids can only be programmed via programming cables and the Speed Port, Hypro, or NOAH Link programmers.
The Minute Fit feature allows users to select hearing aids, connect to a new fitting, or for a follow-up session using the current settings.
The Preparation session includes assigning an experience level, selecting programs, enabling user controls, and configuring accessories.
The Fitting session involves inserting the hearing aids into the patient’s ears, running feedback canceller initialization, making global fitting adjustments, and detailed fitting adjustments of individual channels and input levels.
The Follow-Up session includes reviewing the data log, making detailed adjustments to individual channels and input levels, adjusting volume levels and stimulus types for indicators, and enabling user controls.
Accessories can be paired and configured by selecting Accessories and adjusting the Hearing aid mic while streaming, Streaming sound for the streaming accessories, and the Favorite Button configuration for the Remote. Adjust the Hearing aid mic while streaming the phone and Streaming sound for phone use.
The Flyout Menu and Left Menu Bar can be used to access additional screens and help features.


