![]() 4751 Canon ImageRUNNER Advance DX
4751 Canon ImageRUNNER Advance DX
User Guide
4751 Canon ImageRUNNER Advance DX
Canon ImageRUNNER Advance DX: Printing Envelopes with the Mailings Feature in Microsoft Word
Printing envelopes from the Mailings feature in Microsoft Word is a two-step process. First, setting up the multipurpose tray with envelopes. Second, printing from the Mailings feature in Microsoft Word.
At the Copier
| 1. Set the envelopes in the multipurpose tray. • Close the flaps and load withthe flap on the near side • Adjust the guides to fit snuggly around the sides of the envelope. | 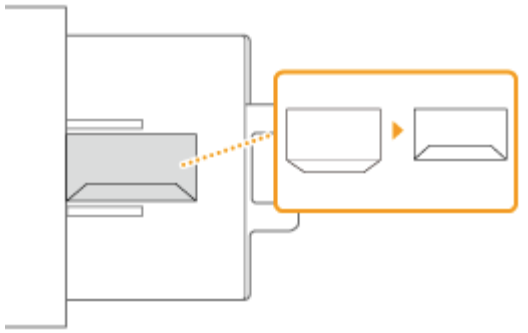 |
| 2. A prompt will appear on the main screen for paper size. Choose Envelope. | 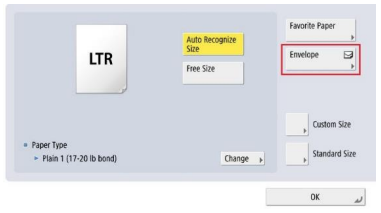 |
| 3. Select the envelope size. 4. Select the loading method. The default loading method when using MS Word is the Short Edge Feed. 5. Select OK. | 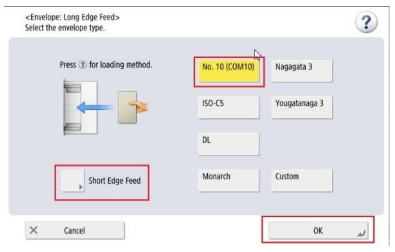 |
At the Computer: Printing an envelope with the MSWord feature uses the default printer.
| 1. Open the Mailings feature in Microsoft Word. 2. Select Envelopes from the toolbar. | 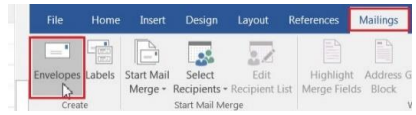 |
| 3. In the Envelope tab, enter the delivery address. 4. Select the Options button. | 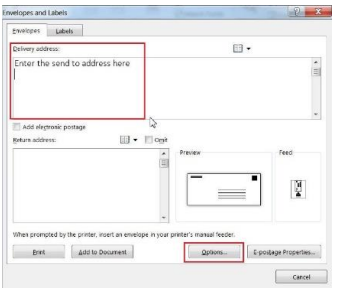 |
| 5. Select the envelope size. | 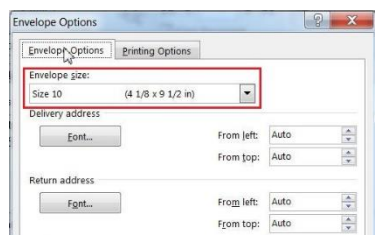 |
| 6. On the Printing Options tab select • Feed Method: Short or Long Edge andwhich position. • Select Face Down • Feed from: Multipurpose Tray. 7. Select OK. | 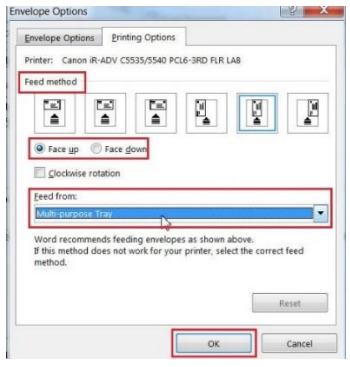 |
| 8. Select Print. | 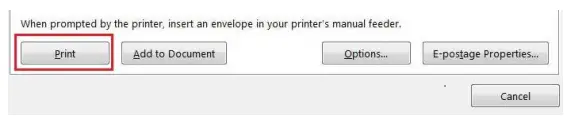 |
| Troubleshooting: Tip #1: If there is an error message it may be due to paper type selected. Change the Paper Type under the Paper Source tab in the print driver to Envelope as shown to the right. 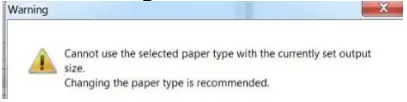 Tip #2 Tip #2Make sure 1 sided is selected on the Basic Tab in the print driver. Envelopes won’t print if 2 sided is selected. | 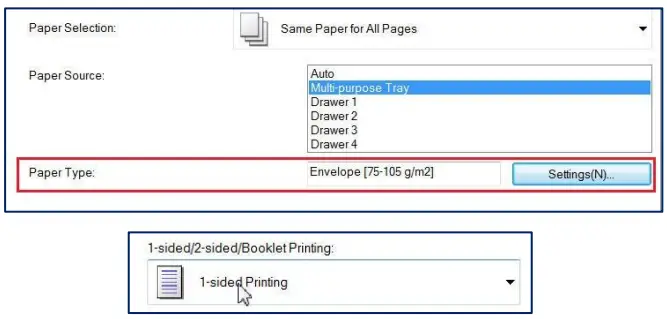 |
Canon ImageRUNNER Advance: Set Paper Drawers to Print Envelopes
Set up a paper drawer to permanently store envelopes. Drawer 1 is set up differently than Drawer 2, these instructions address both drawers.
Preparing the Envelopes:
Important:
Do not use envelopes that have glue attached to their flaps, as the glue may melt due to the heat and pressure of the fixing unit. Envelopes may become creased, depending on the type of envelopes or the condition in which they are stored. Streaks may appear where envelopes overlap.
| Flatten any curls. Pick up about five envelopes. Flatten any curls and loosen the stiff areas in the four corners. | 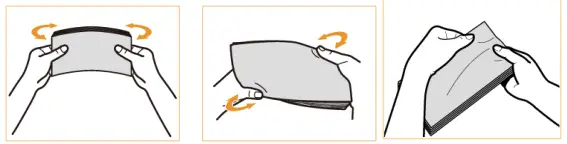 |
| Smooth the envelopes out and remove any air inside them. Place the envelopes on a flat surface and push in thedirection of the arrows to remove the air inside the envelopes. | 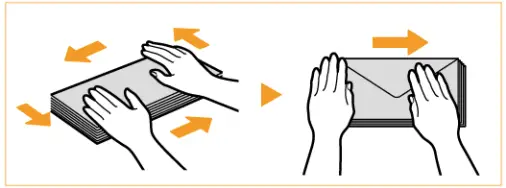 |
| Press down on the four sides. | 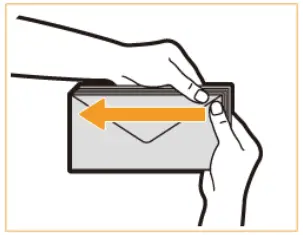 |
| Align the envelopes on a flat surface. Note: Check that no envelopes are tucked underneath the flap of the envelope above or below them. | 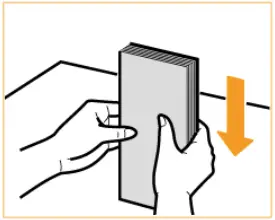 |
Prepare the Paper Drawers:
Affix the appropriate envelope tools in the drawer. Drawer 1 uses both Envelope Tools A and B, while Drawer 2 only uses Envelope Tool A.
| In Drawer 1: Fit Envelope Tool B around the paper guides. Face the side of the tool that does not indent towards the left of the drawer. | 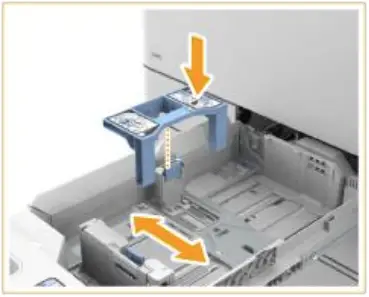 |
| Remove the Envelope Feeder Attachment A stored in paper drawer 2. | 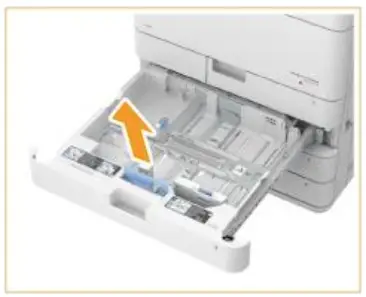 |
| Attach the Envelope Feeder Attachment A by aligning the protruding areas with the holes located on the bottom of the paper drawer. | 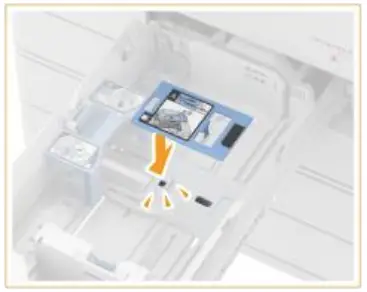 |
| The two Envelope tools work together to align the envelopes. | 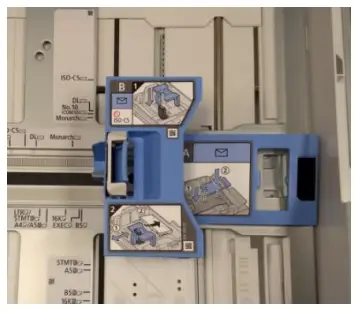 |
| Load the envelopes with the front side of the envelopes (the side without the glued areas) face up. Load up to 25 envelopes at a time. | 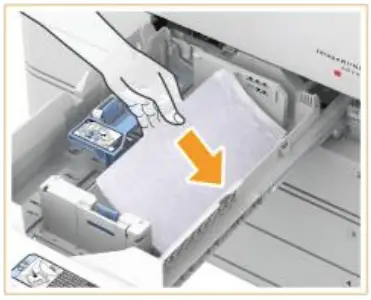 |
| In Drawer 2: Drawer 2 supports “Short Feed” envelopes. All envelopes require Envelope attachment type A Attach the Envelope Feeder Attachment A by aligning the protruding areas with the holes located on the bottom of the paper drawer. | 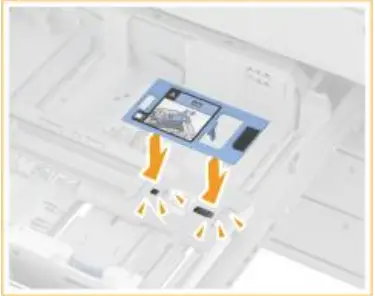 |
| Load the envelopes with the front side of the envelopes (the side without the glued areas) face up. Load up to 50 envelopes at a time. |  |
| Drawer 1: COM10 No. 10, Yougatanaga 3, DL, ISO-C5. Close the flaps and load the envelopes so flaps are on the right side. | 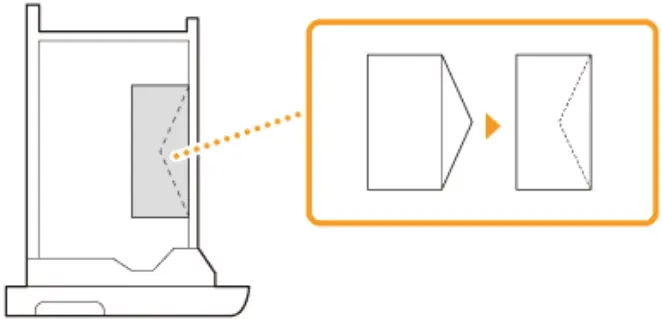 |
| Drawer 2: COM10 No. 10, Monarch, DL, ISO-C5. Close the flaps and load the envelopes so flaps are on the near side. | 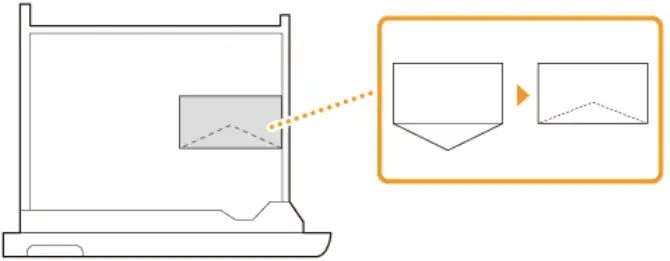 |
Register the type of envelope in the Paper Drawer:
| Select Settings/Registration. |  |
| Select Preferences>>Paper Settings>>Paper Settings. | 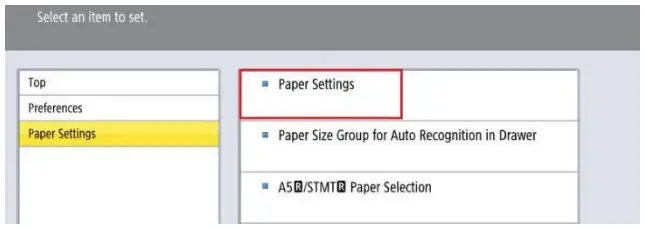 |
| Select the paper drawer in which the envelope is loaded and press Envelope. | 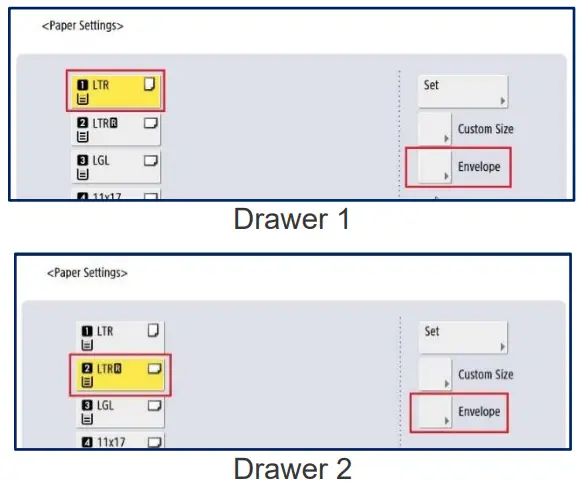 |
| Select the type of envelopes loaded in the paper drawer. | 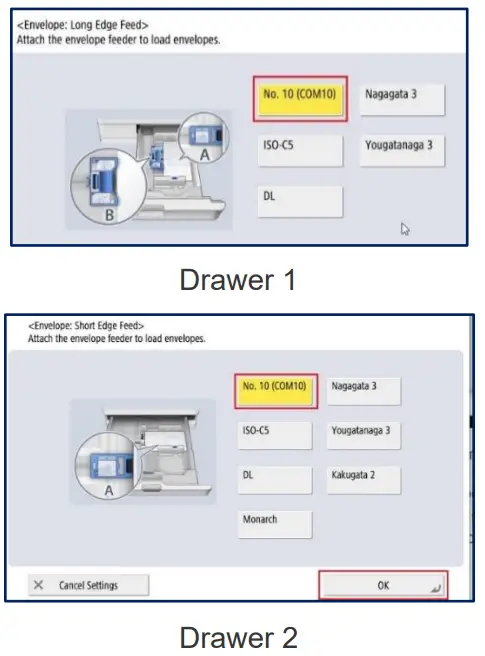 |
©2018 Loffler Companies
MN – Bloomington: 952.925.6800 • Mankato: 507.625.8040
Rochester: 507.292.8888 • St Cloud: 320.255.8888
Willmar: 320.905.0289
WI – Eau Claire: 715.834.2679 • Hudson: 715.834.2679
La Crosse: 608.782.7587
7/21/2020


