![]() To be the Chief Evangelist
To be the Chief Evangelist
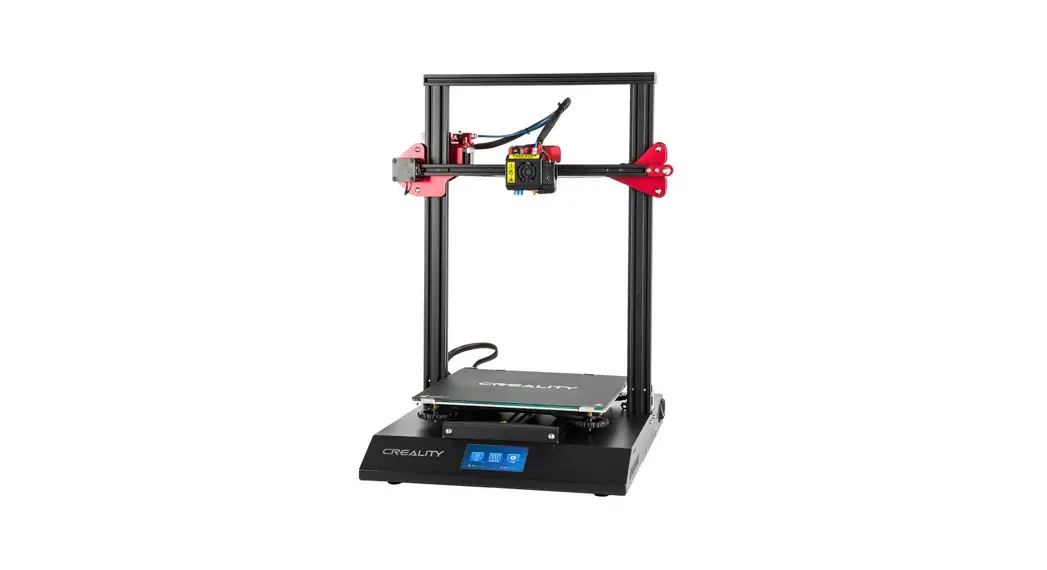
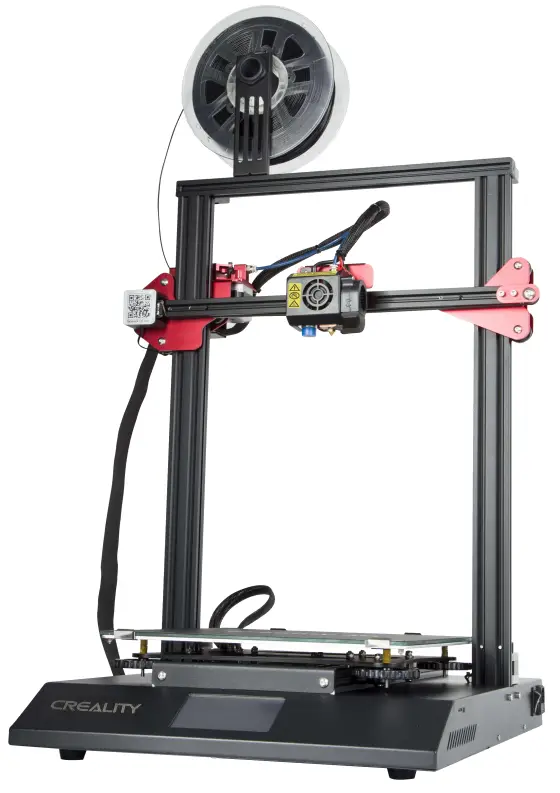
CR-10S Pro Printer
Guide Book
To make a Top-quality 3D printer
CR-10S Pro 3D Printer
V.1.0
- This guidebook is for standard CR-10S Pro.
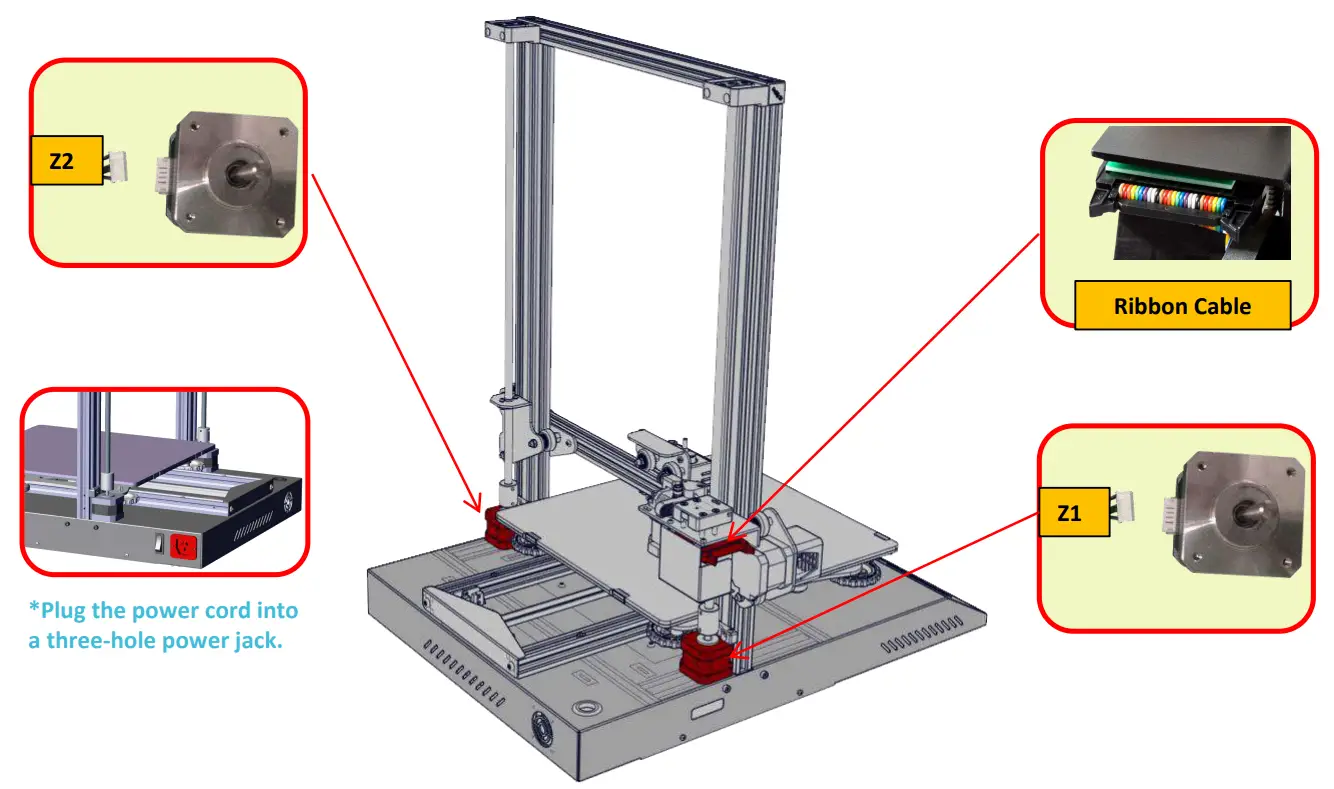
- Please plug the power cord into a three-hole power jack.
- Detailed instructions for use are available on the TF card.
Preface
Dear consumers,
Thank you for choosing our products. For the best experience, please read the instructions before operating the Printer.
Our 3D team will always be ready to give you the best service. Please contact us via the phone number or e-mail address provided at the end when you encounter any problem with the Printer.
For a better experience in using our product, you may learn how to use the Printer in the following ways:
- View the accompanying instructions and videos on the TF card.
- Visit our official website at www.creality3d.cn You will find relevant software/hardware information, contact details, and operation and maintenance instructions on the website.
Notes
- Do not use the printer any way other than described herein in order to avoid personal injury or property damage.
- Do not place the printer near any heat source or flammable or explosive objects. We suggest placing it in a well-ventilated, low-dust environment.
- Do not expose the printer to violent vibration or any unstable environment, as this may cause poor print quality.
- Before using experimental or exotic filaments, we suggest using standard filaments such as ABS or PLA to calibrate and test the machine.
- Do not use any other power cable except the one supplied. Always use a grounded three-prong power outlet.
- Do not touch the nozzle or printing surface during operation as they may be hot. Keep hands away from the machine while in use to avoid burns or personal injury.
- Do not wear gloves or loose clothing when operating the printer. Such cloths may become tangled in the printer’s moving parts leading to burns, possible bodily injury, or printer damage.
- When cleaning debris from the printer hotend, always use the provided tools. Do not touch the nozzle directly when heated. This can cause personal injury.
- Clean the printer frequently. Always turn the power off when cleaning, and wipe with a dry cloth to remove dust, adhered printing plastics or any other material of the frame, guide rails, or wheels. Use glass cleaner or isopropyl alcohol to clean the print surface before every print for consistent results.
- Children under 10 years of age should not use the printer without supervision.
Introduction
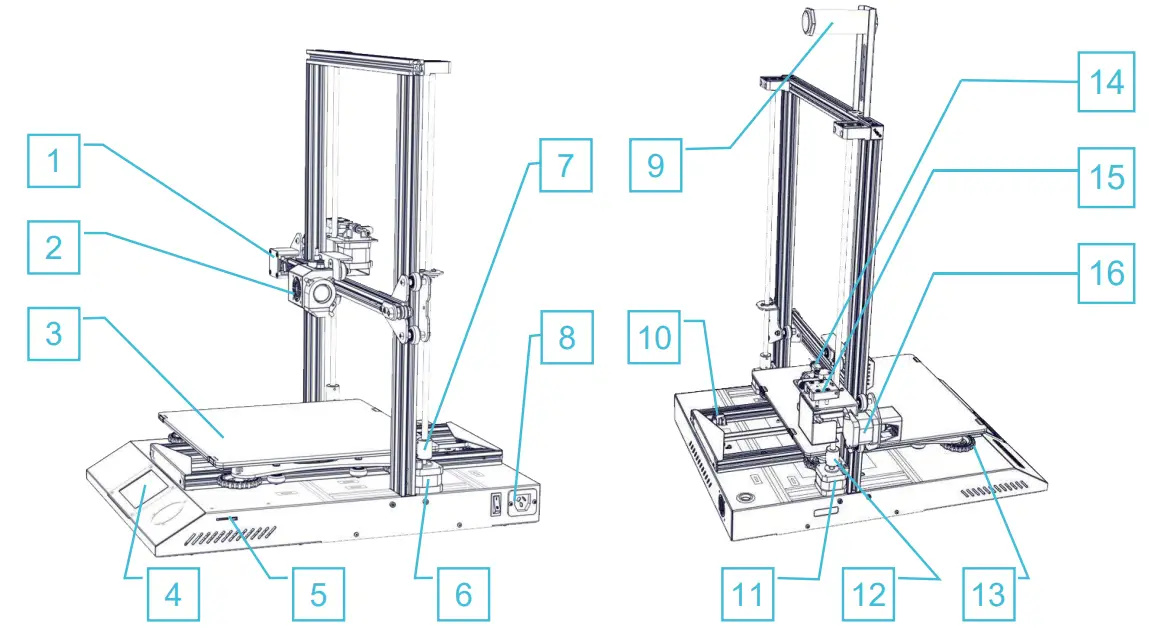
| 1. X Limit switch 2. Nozzle kit 3. Hotbed 4. Touch screen 5. TF slot & USB port 6. Z-axis motor (Z2) 7. Z-axis coupler (Z2) 8. Power switch & Power socket | 9. Filament holder 10. Y Limit switch 11. Z-axis motor (Z1) 12. Coupler (Z1) 13. XL bed-leveling nut 14. Extruder (E) motor 15. Filament detector 16 X-axis motor |
General List
Tool List
| No. | Image | Name | Qty |
| 1 |  | Wrench & Screwdriver | 8 |
| 2 |  | TF Card & Reader | 2 |
| 3 | 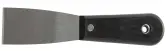 | Spatula | 1 |
| 4 |  | Pliers | 1 |
| 5 |  | 0.4mm Nozzle Cleaner | 1 |
| Image | Name | Qty |
 | Filament Holder Bracket | 1 |
 | Filament Holder Tube | 1 |
 | Filament Holder Tube Nuts | 2 |
 | Power Cable | 1 |
 | USB Cable | 1 |
| No. | Image | Name | Qty |
| 11 |  | PTFE Tube | 1 |
| 12 |  | X-Axis Spacer | 1 |
| 13 | Feeler | 1 | |
| 14 | 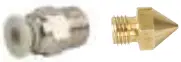 | Spare Parts | 2 |
| 15 |  | M5X25 black HexBolt and Lock Washer | 4 |
| 16 | 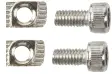 | M4X8 Screw and M4 T- nut | 2 |
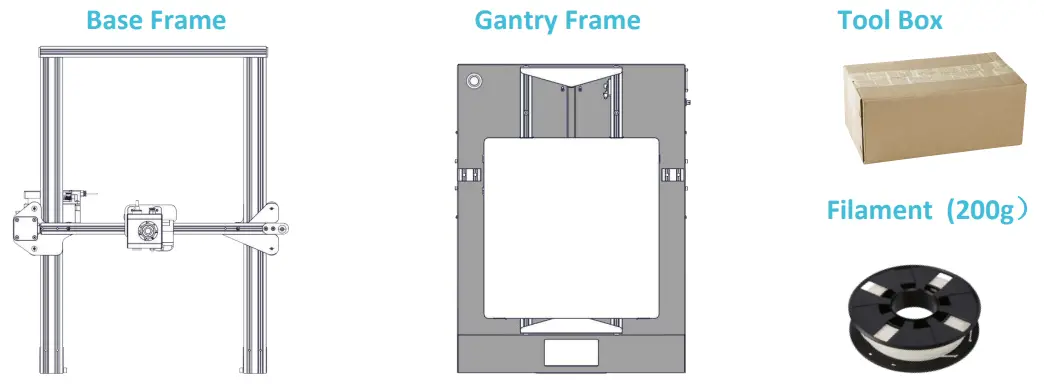
Device Installation
 |  |  |
| M5X25 4pcs | X-Axis Spacer | M4X8 2pcs 2pcs M4 T-nut |
Gantry Frame Installation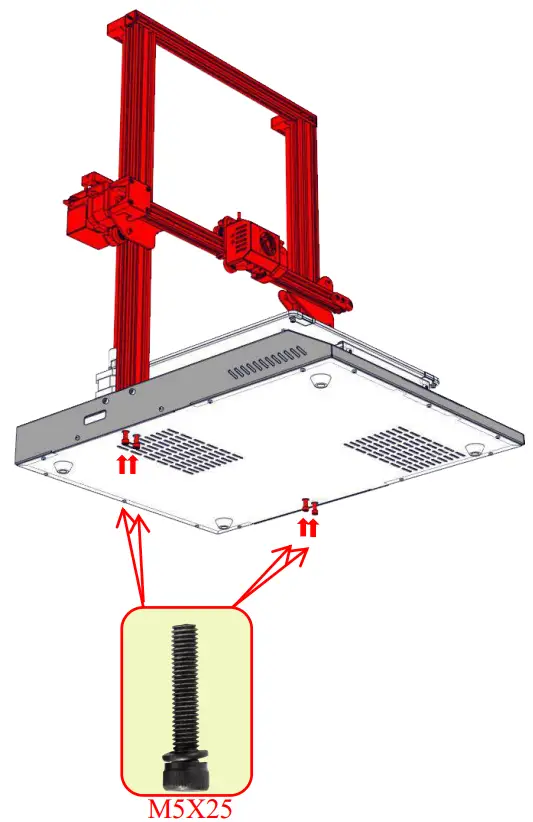
Filament Holder Installation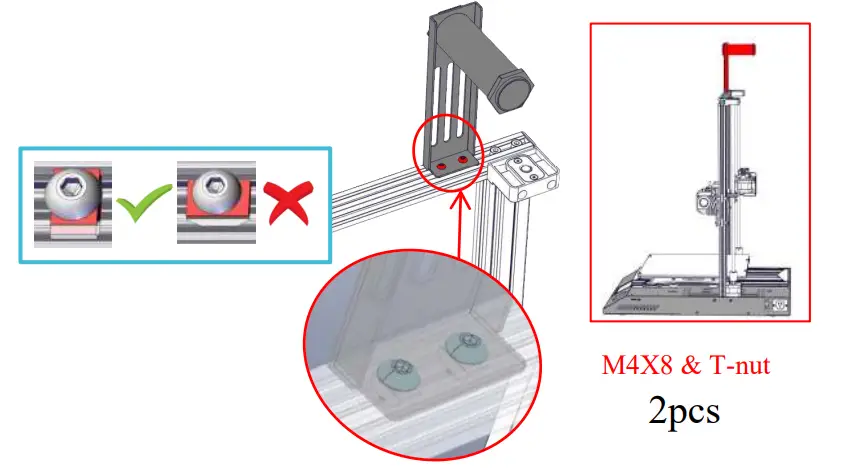
X-axis adjustment
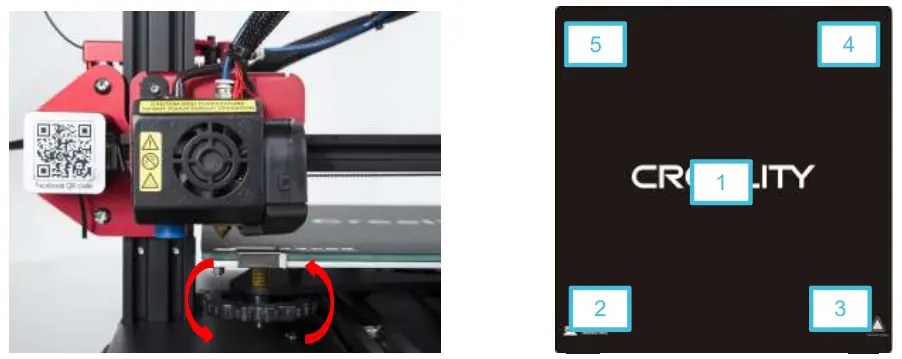
Cable Connection
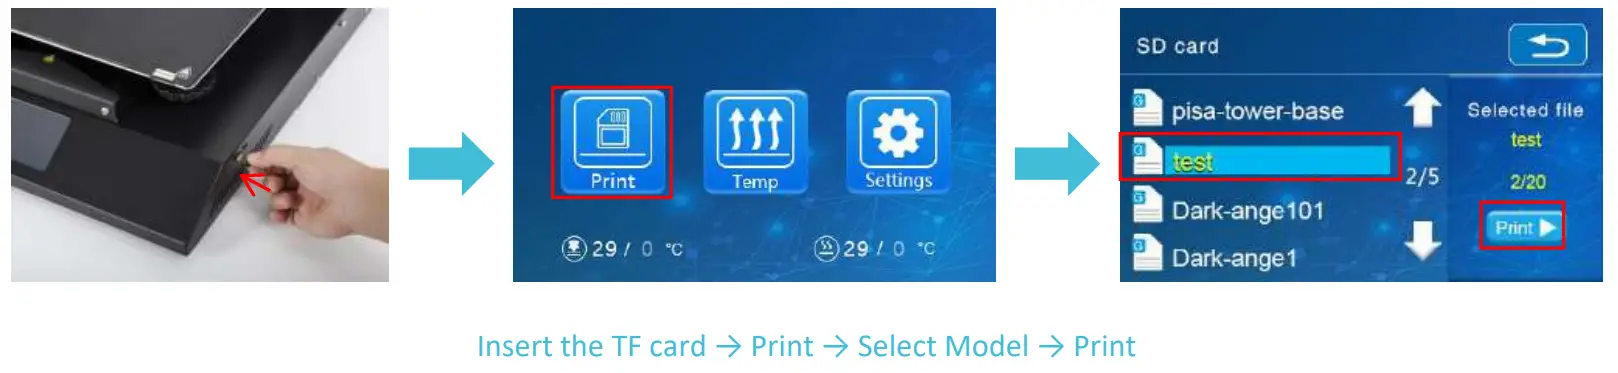
Screen Information
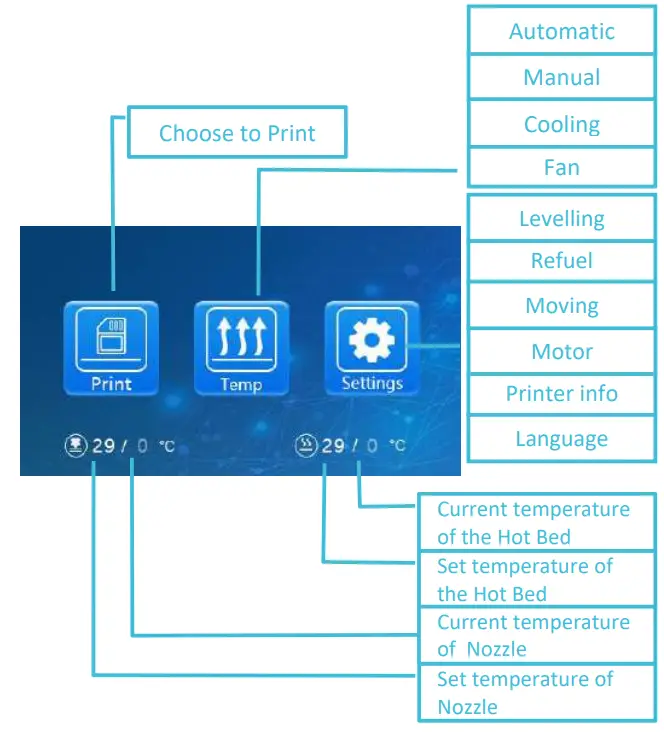
Screen Information
| Main Menu | Sub Menu | Explanation | ||||
| TF card | Selected file | Stop | ||||
| Pause/Continue | ||||||
| Adjust | Print speed | |||||
| Nozzle temp. | ||||||
| Hot-bed temp | ||||||
| Z offset | ||||||
| fan | ||||||
| Temp | Automatic | PLA\ABS (1950\240°) | ||||
| Manual | Nozzle preheat | |||||
| Hot-bed preheat | ||||||
| Cooling | Cool down? Yes \ No | |||||
| Fan | Turn on \ Shutdown | |||||
| Setting | Leveling | Z-axis: Z home, +0.1mm,-0.1mm | ||||
| AUX leveling | Please click numbers to assist in leveling (01-(, ) | |||||
| AUTO leveling | Auto leveling, please wait… | |||||
| Check level (Measurement parameters) | ||||||
| Refuel | Withdraw | |||||
| Feed | ||||||
| Moving | X-axis | I Y- axis | I Z-axis | I Home | ||
| Motor off | yes \ no | |||||
| Language | English \Chinese | |||||
| Printer info | Machine type, Firmware version, Printing size, website | |||||
Loading Filament
Preheat
Method 1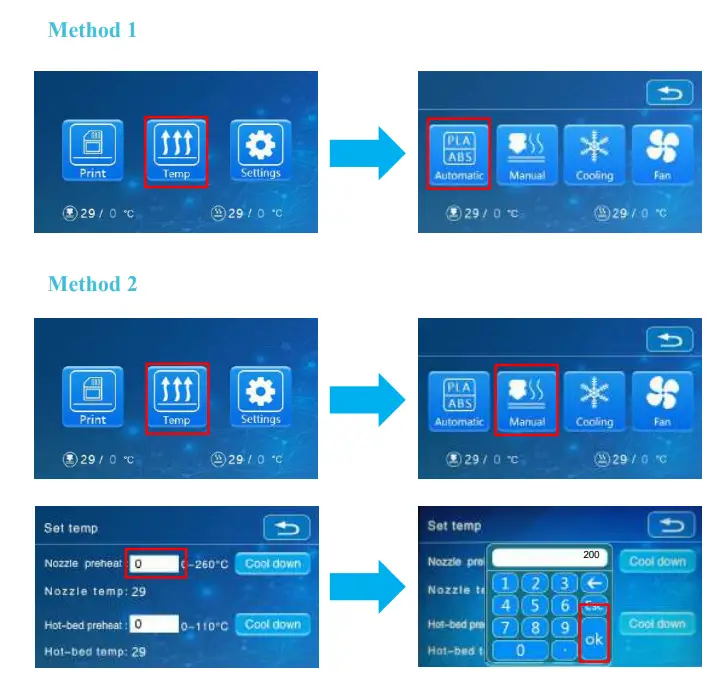 Feeding
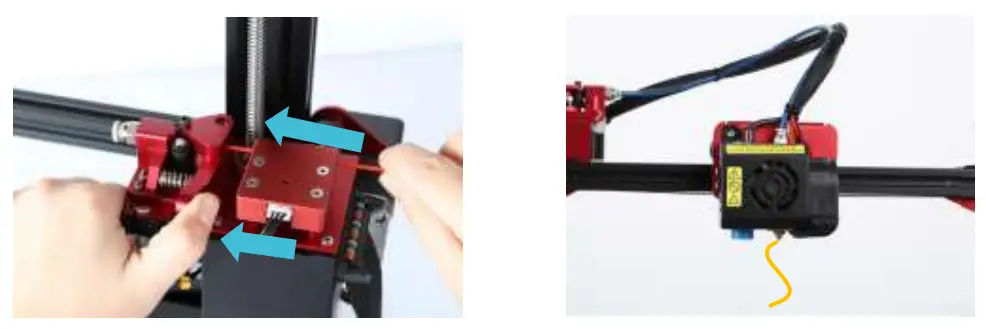
Press and hold the extruder lever and insert the 1.75mm filament through the filament detector and through the extruder motor. Continue feeding until you see the filament
extrude from the nozzle.
Replacing Filament During Print:
- Cut the previous filament near the extruder and slowly feed the new filament through the filament sensor and extruder until the new filament is fed into the PTFE tube.
(OR) - Preheat the nozzle and withdraw the used filament. Feed the new filament as pictured above.
Bed Leveling pt.1

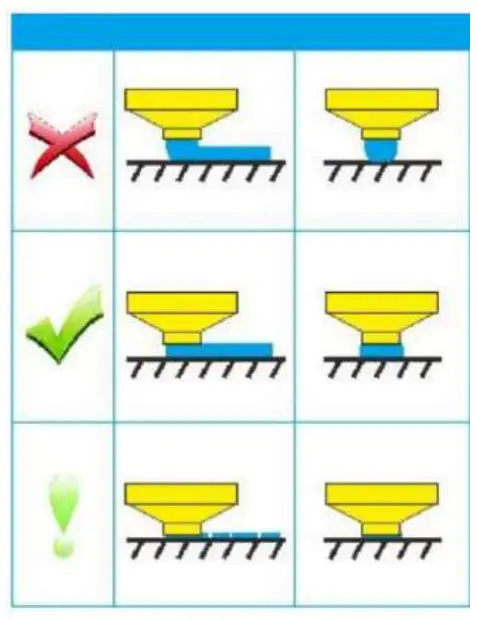
- Slightly tighten the four leveling nuts at the bottom of the platform before initial leveling.
- Select “Settings” → “Level mode”, and click on the number ②.

- Adjust the platform height by turning the knob underneath. Use a piece of A4 paper (standard printer paper) to assist with the adjustment, making sure that the nozzle lightly presses on the paper.

- Complete the adjustment on all 4 corners.
- Click the number ① to test the platform height in the middle.
- Repeat the above steps one or two times if necessary.
Automatic leveling
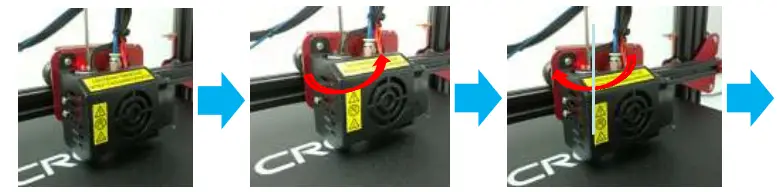
- In “Settings” → “Leveling mode” → Place the .2mm feeler gauge between the nozzle and the hot bed → If the gap is too thin or too large, click “Z+” or “Z-” on the interface to adjust the gap to slightly more than 0.2 mm(the distance between the nozzle and the hotbed should be about 0.25 mm). At 0.2 mm the feeler can easily pass through the gap between the nozzle and the printing platform.

- To adjust the position of the auto-level sensor, turn the sensor clockwise to lower it and counter-clockwise to raise it.
- If the LED is lit, raise the auto-level sensor by turning it counterclockwise.
- slowly turn the sensor clockwise until you see the LED light up again.
 Restore hotend to original Auto-level the printing surface home position 16-point precise bed height Printer will automatically measurement compensate for variable bed height *When using the auto level feature on the CR-10S Pro, we suggest adding a raft from the build plate adhesion section in Cura’s settings.
 Restore hotend to original Auto-level the printing surface home position 16-point precise bed height Printer will automatically measurement compensate for variable bed height *When using the auto level feature on the CR-10S Pro, we suggest adding a raft from the build plate adhesion section in Cura’s settings.
Software Installation
- Double-click the Cura icon to install the Cura Slicing Software.

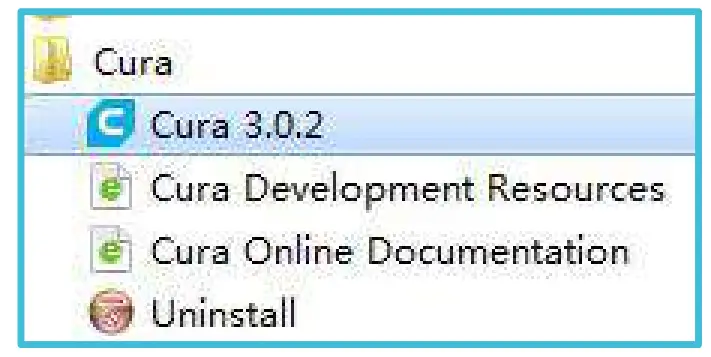
- Start Cura 3.0.2 from the Start Menu.

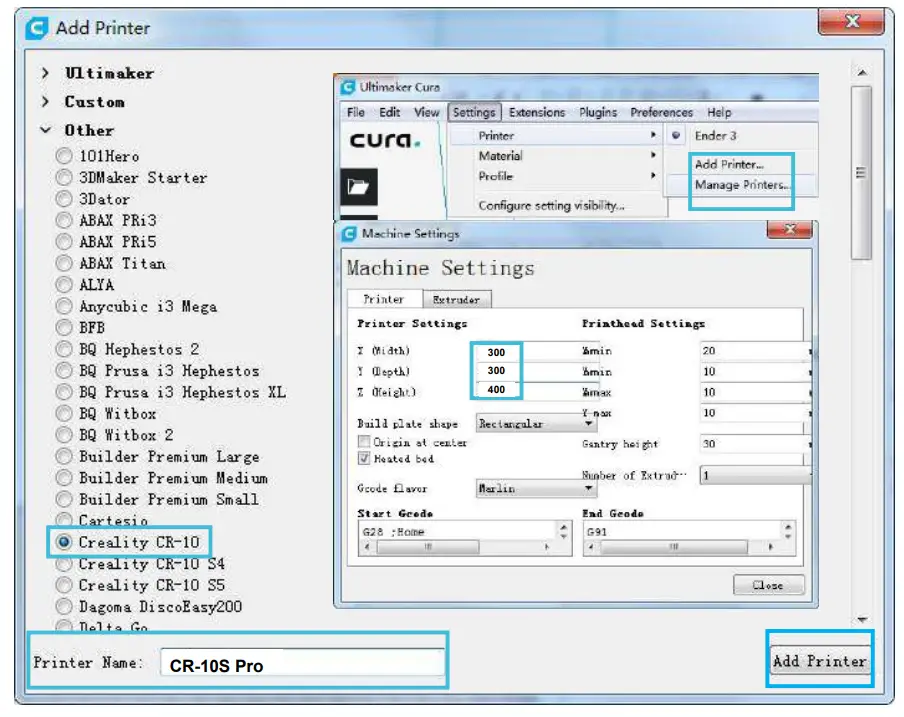
- Select Other→Creality CR-10→ Rename the printer: CR-10S Pro →Add Printer.
- Settings→Printer→Manage Printers…
- Change Printer Settings to (300,300,400).
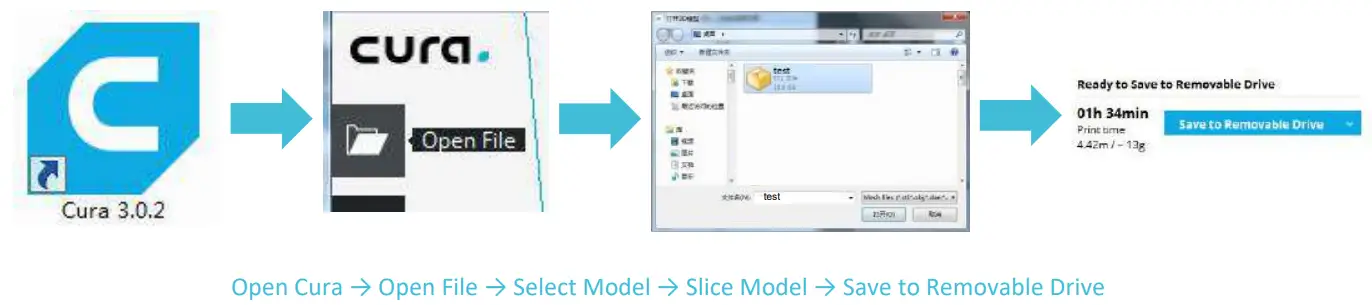
The First Print
- Slice

- Print

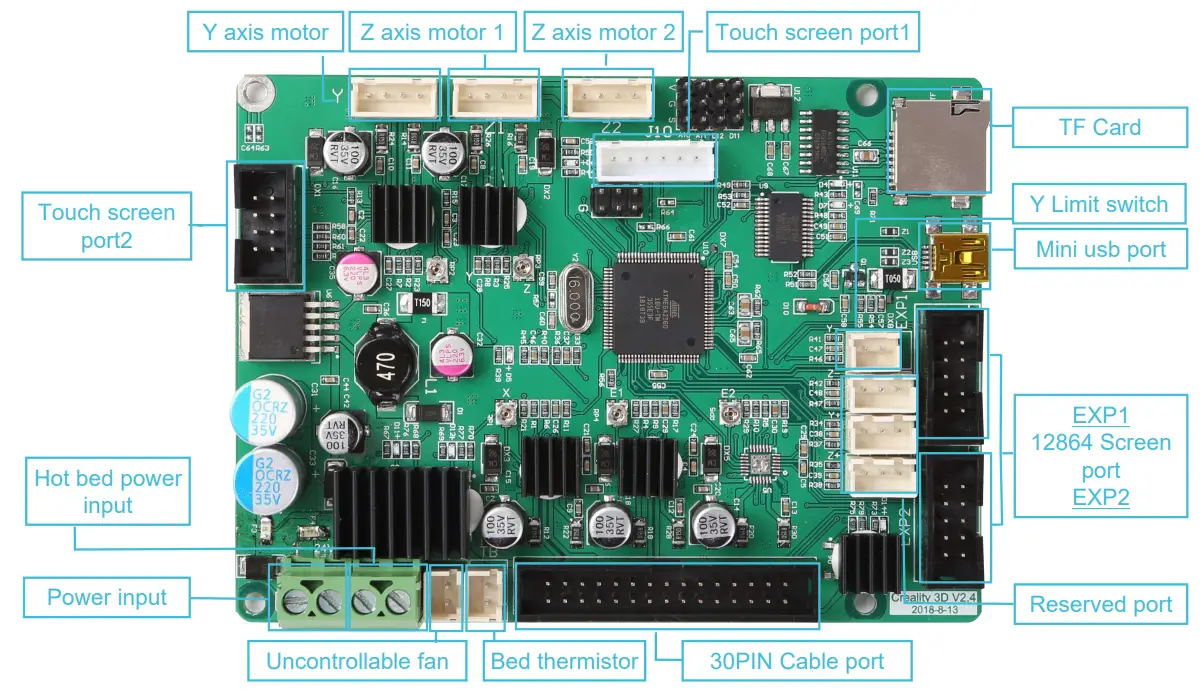
Circuit Wiring
After- Sales Service
After-Sales Service Terms
- We provide a 12-month warranty on 3D printers (excluding the nozzle assembly) purchased on or after January 1, 2017 and a 3-month warranty on the nozzle assembly thereof. Products purchased before January 1, 2017 whose warranty periods have not expired are subject to the original warranty terms.
- The warranty period of each product starts from the date of production. Any product with renewed warranty period is subject to the renewed warranty terms.
- Within the warranty period, we will provide free accessories to replace those damaged during the operation in accordance with the instructions for use which are not caused by user negligence (determined by our professional assessment).
- We will continue to provide warranty services for any product having been repaired as long as its warranty period has not expired.
- In case of any problem, you may find the solutions in the instructions for use or search for the solutions on our official website (www.creality3d.cn) or contact us via phone or email.
- We provide free remote technical support for every consumer during the service life of the product. You may request solutions from our after-sales team via phone or email within working hours. For any request submitted beyond normal working hours, we will reply as soon as possible.
- Please provide a completed after-sales service card or S/N number when applying for the warranty service. Otherwise, warranty services may be refused.
- We are entitled to refuse warranty claims for any fault or damage due to failure to follow instructions for use, including but not limited to (i) unauthorized modification; (ii) incorrect installation or use; (iii) use of any third-party component; (iv) use of any non-specified software; (v) use of low-quality filament; (vi) use under non-specified environment; and (vii) misuse (overload) or improper maintenance (corrosion or oxidation).
- We are entitled to refuse to provide warranty services for any fault or damage due to force majeure, including but not limited to fire, earthquake, lightning strike, flood, violent conflict, etc.
- We provide after-sales services between 8:30 and 21:30 every day from Monday to Saturday, except on official holidays. 12
After-sales Service Card
Product Name:_________________________
Purchase Date:______________________
S/N No.:___________________
Purchased Channel:____________________
Fault description:_________________
User Name:__________________________
User Tel:_____________________
User Email:____________________
Return Address:_____________
To be the Chief Evangelist
 https://www.facebook.com/groups/1700252256935330/
![]() Shenzhen Creality3D Technology CO., LTD.
Shenzhen Creality3D Technology CO., LTD.
Tel:+86 755-2103 4006
Official Website:www.creality3d.cn
Company Address:12/F, Block 3,1inChengYuan,
Tongsheng Community, Dalang,
Longhua District, Shenzhen, China,518109


