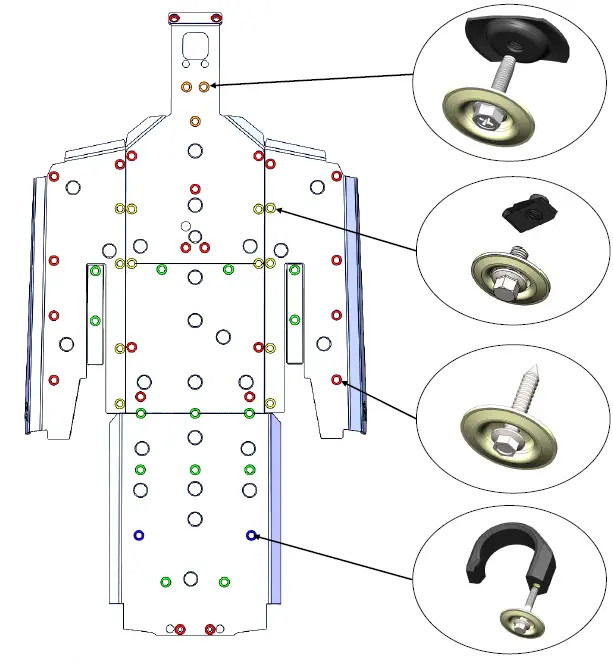
RZR XP 1000 2 Seat Seizmik Skid Plate
OVERVIEW
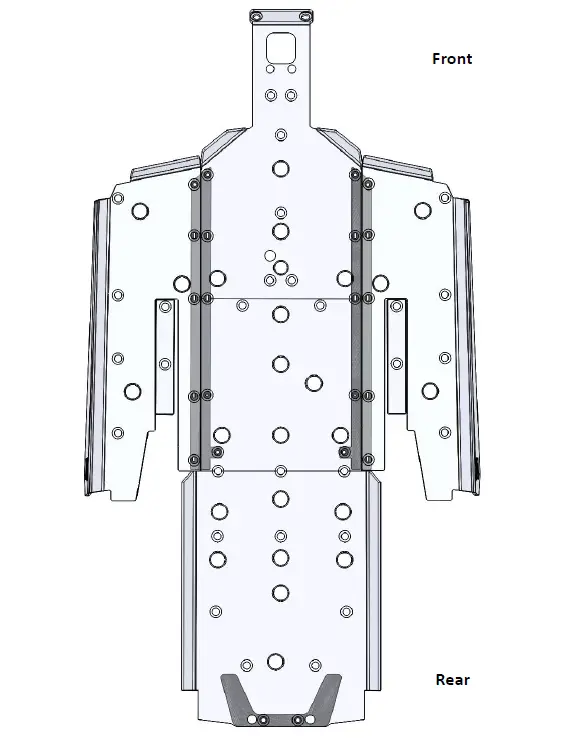
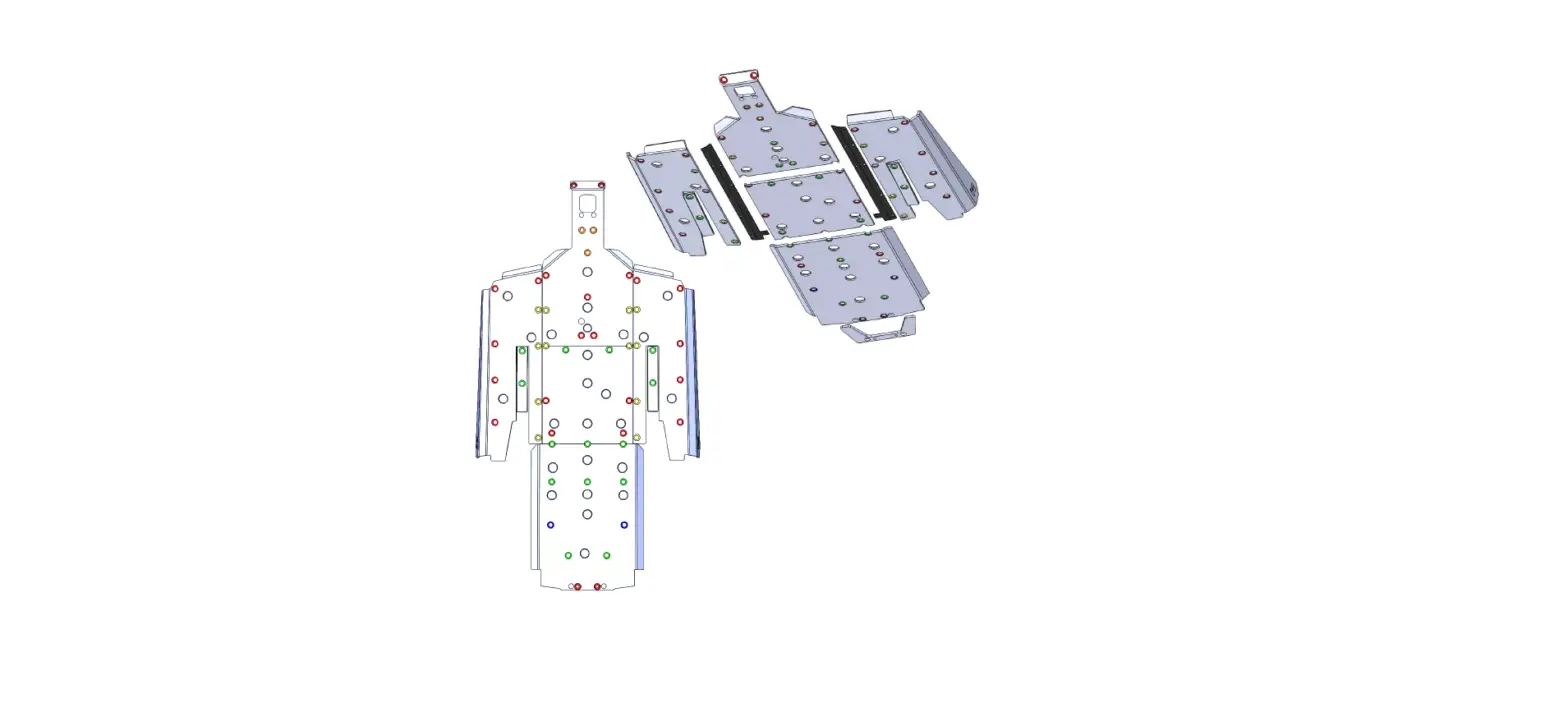
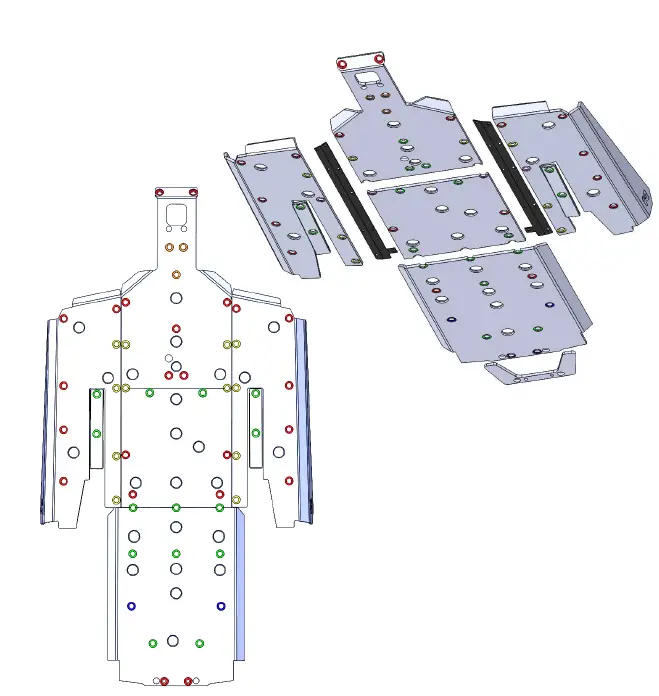
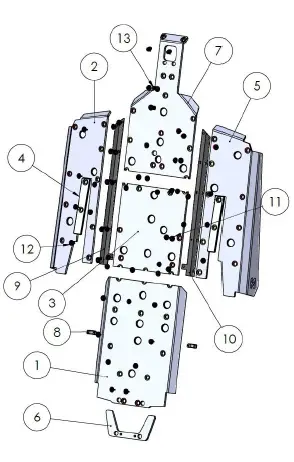
View looking up at the underside of the vehicle
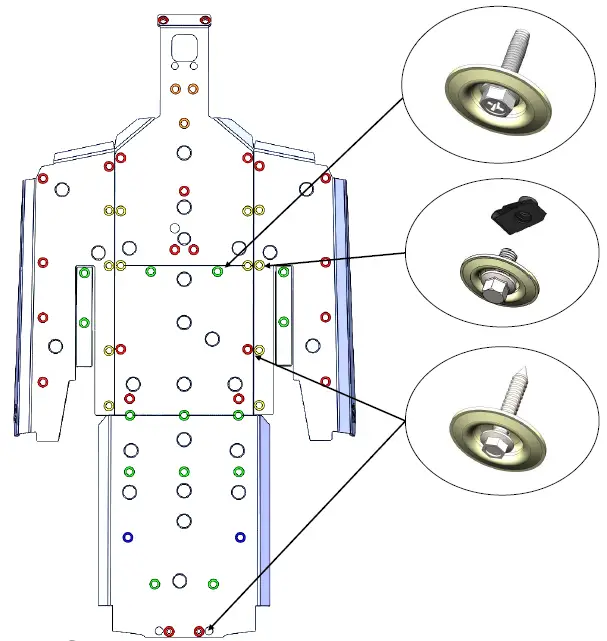
Parts List

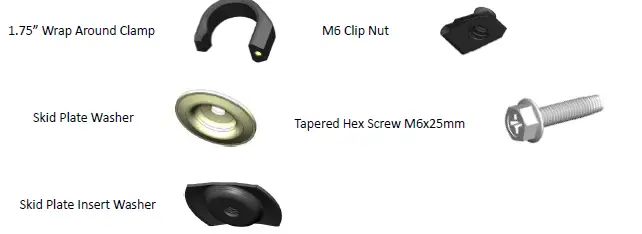
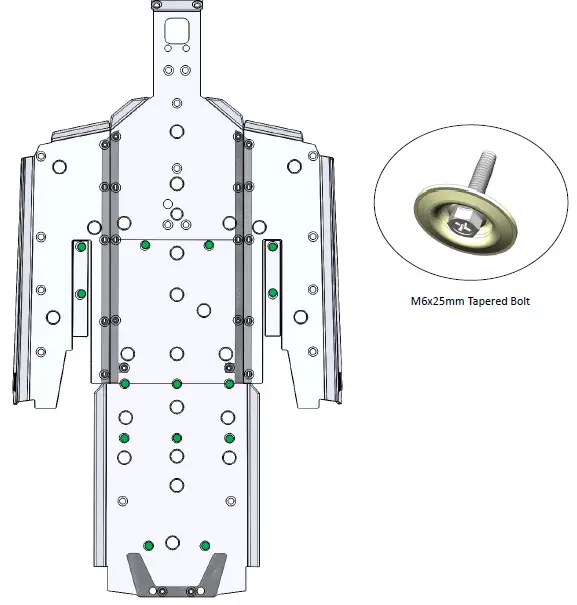
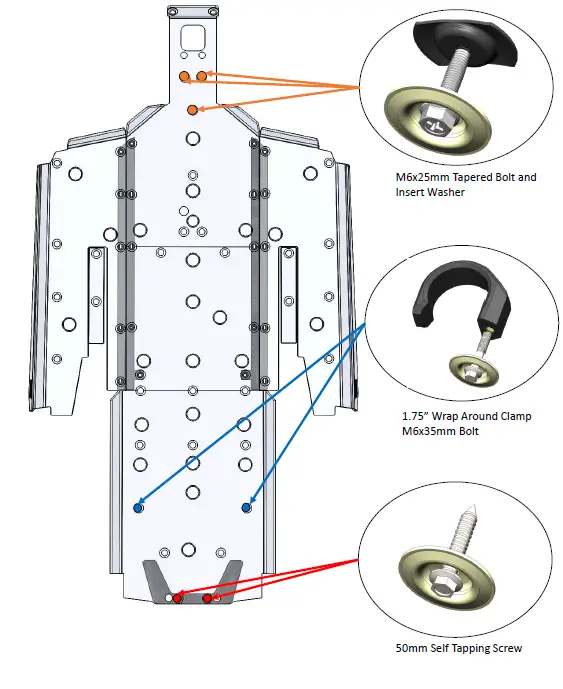
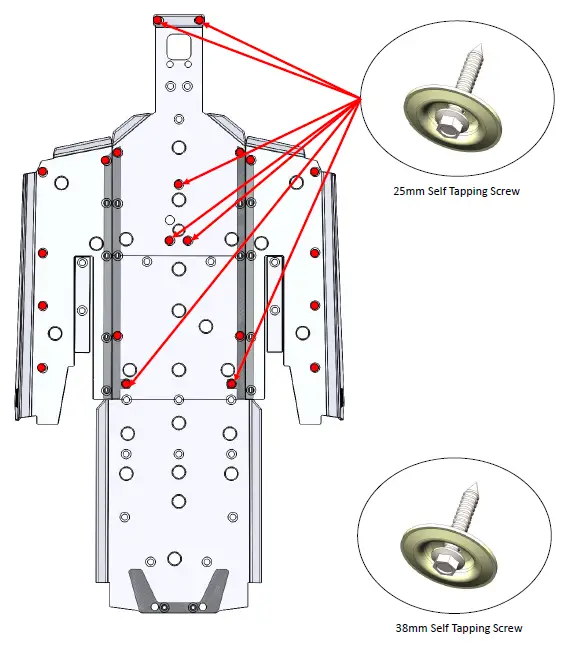
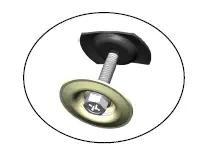
- GREEN holes use M6x25mm tapered bolt and washer into factory threaded holes

- BLUE holes use M6x35mm with wrap around clamp

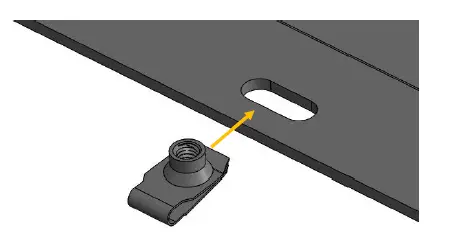
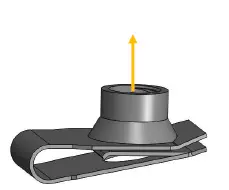
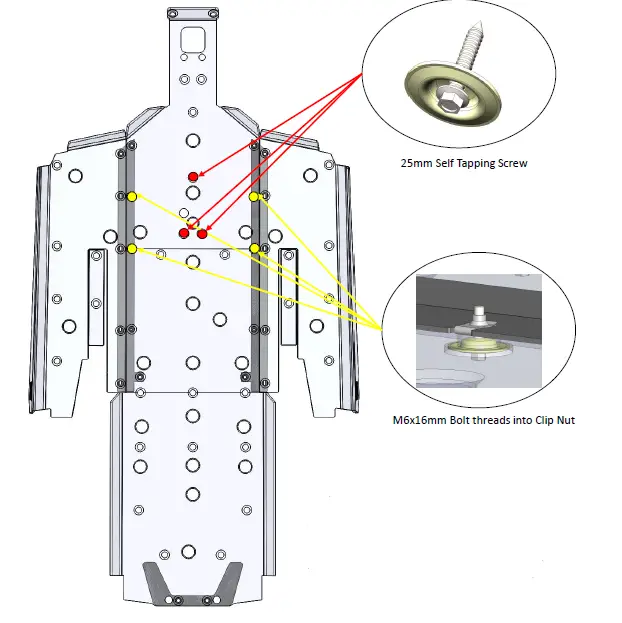
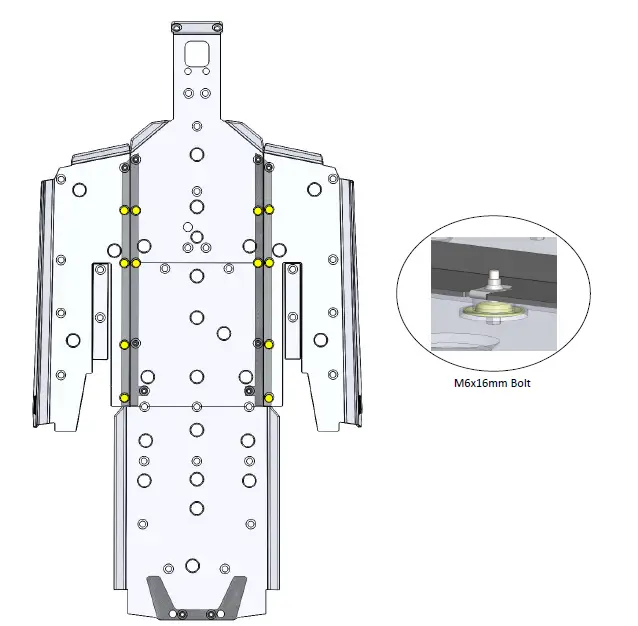
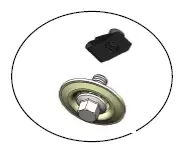
- YELLOW holes use an M6x16mm bolt and washer into clip nuts attached to metal brackets.

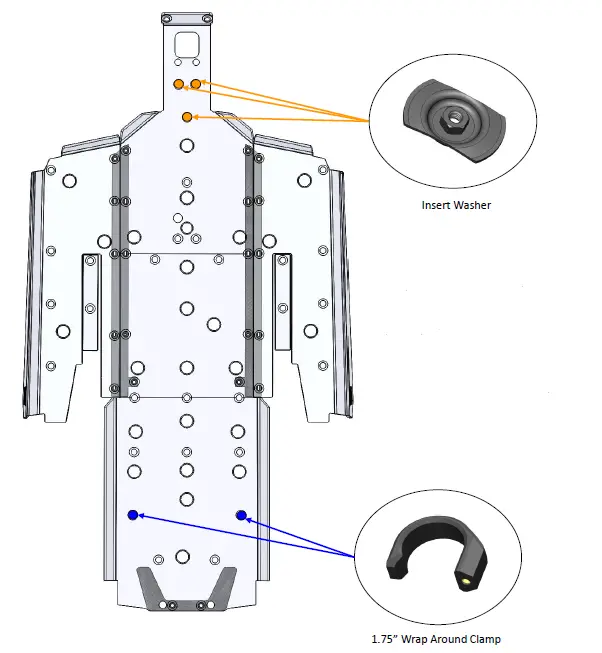
- ORANGE holes use M6x25mm tapered bolt and insert washer placed into factory hole in sheet metal

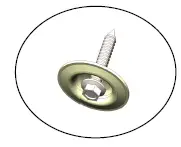
- RED holes use Self Tapping Screws- Some locations may or may not require pre-drilling of a 1/8” pilot hole.

Instruction
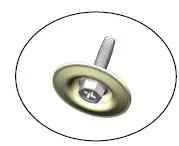
- Uses OEM Threaded holes
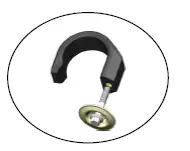
- Uses Clamps
- 16mm bolt threads into brackets with clip nuts
- Uses insert washer into sheet metal hole
- Self Tapping Screws-May or may not require predrilling of 1/8” pilot hole.

- Uses OEM Threaded holes
- Uses Clamps
- 16mm bolt threads into brackets with clip nuts
- Uses insert washer into sheet metal hole
- Self Tapping Screws-May or may not require predrilling of 1/8” pilot hole.

- Attach all clip nuts to slotted holes in metal brackets.

- Threading should face upwards, toward the vehicle

- To start, remove the stock skid plate.
- Then, place insert washers (Shown in ORANGE) into holes in Sheetmetal. The side shown faces upwards, toward the vehicle.
- Snap clamps (Shown in BLUE) round metal tubing in the general location shown. Threading should face inward.

- To start, loosely install the center 3 bolts and washers (Shown in RED) into pre-existing holes so that the front panel is held in place on its own.
- Next, loosely attach the metal brackets to the front panel using 4 bolts and washers (Shown in YELLOW) into the clip nuts that you attached to the metal brackets.
- The metal brackets go between the panels and the vehicle frame. The panels will sandwich the brackets to the underside of the vehicle frame.


- NOTE: Spacer goes between vehicle and rear panel

- Always observe the warnings and precautions in this manual when using your Seizmik products. For best results, carefully follow the instructions in this manual and make no modifications.
- If you have any questions, or comments, need assistance or are missing parts, please call 1-866-838-3366 between 9:00 AM and 5:00 PM EST. You can email us at [email protected]