![]()
Apex Enterprise Femto Quick Start Guide
Troubleshooting
No GPS Signal
The Sync LED off and Alarm LED fix red indicates no GPS signal. Check the About eFemto page in the Advanced Settings web interface, on the tabs for “Status and
Alerts” or “GPS” to see the status of the GPS constellation.
Is my wireless device connected to the eFemto?
Using the Advanced Settings web interface, sign in and the Connected Devices panel for indication of connected users.
Cannot reach eFemto GUI or locked out of device.
Press the RESET button for 10 seconds to reset the system to factory default settings.
Optional Accessories Available
- Power over Ethernet (POE) Device
A full list of optional accessories can be viewed and ordered from
www.verizonwireless.com.Text
Automated Startup
The following Status LED sequence will occur. Upon successful setup, the LED will blink green.
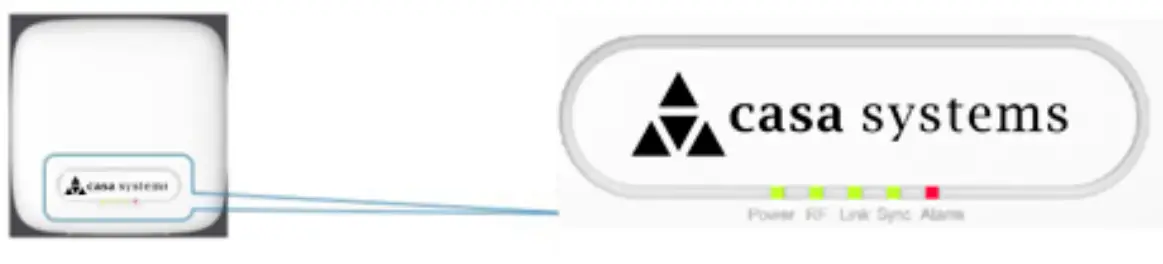
Note: If the LED fails to turn green after one hour or is blinking a series of red pulses, consult the troubleshooting section (below).
| LED | Color | Function |
| Power | Green | ON=All the power rails are present. Flashing=Unit booting or firmware upgrading |
| RF | Green | OFF= No activity ON= Transmit or receive activity |
| Link | Green | OFF= No Link ON= Link OK. Speed = 1000Mbps |
| SYNC | Green | OFF=No Sync ON= auto-negotiate OK |
| Alarm | Red | ON=System Alarm |
GPS Installation
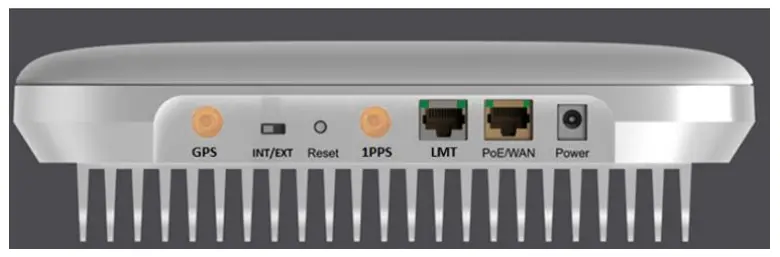
Connect the GPS antenna cable (indoor use only) to the GPS port of the eFemto.
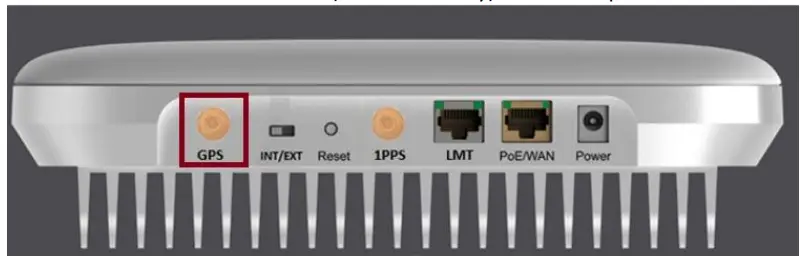
Note: The GPS antenna must stay connected to the eFemto at all times cooperation. The initial GPS fix can take up to 60 minutes.
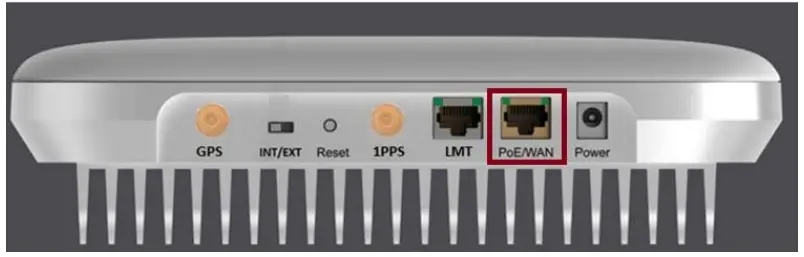
Ethernet and Power Connections
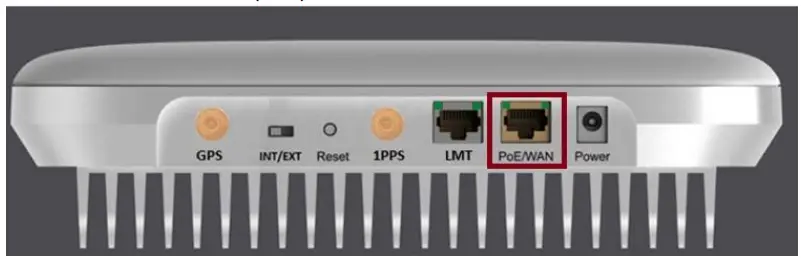
Attach the supplied Ethernet cable from your router or modem LAN port to the eFemto PoE/WAN port for network connectivity.
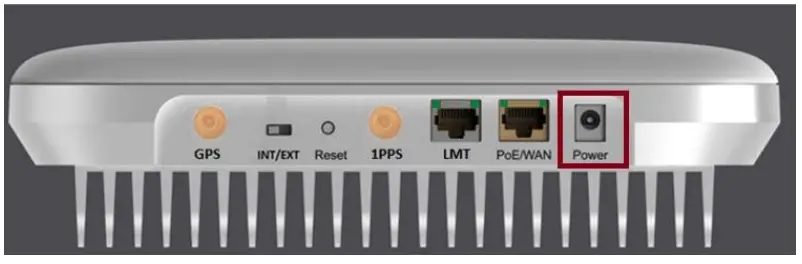
Plug in the Power Supply and insert the power cable into the eFemto Power port. Automatic startup and hardware initialization will begin.
POWER ON
At startup, the eFemto will conduct self-configuration. This will take between 30 – 60 minutes the first time the eFemto turns on.
Connections
Prerequisites
Ethernet and Backhaul (B/H) Requirements
For optimum performance regarding backhaul bandwidth requirements and specific firewall settings, please refer to the User Guide.
GPS Signal
The eFemto requires a strong GPS signal from the provided indoor GPS antenna. For installation other than with the provided GPS antenna, please refer to the online 4G
LTE Network Extender for Enterprise User Guide.
Placement
The eFemto can be installed: vertically or horizontally on a wall, floor, or ceiling. Place the unit at least 10 feet away from products that generate electromagnetic radiation (e.g., microwave oven).
- Identify a location for the eFemto, central to users, but no more than 21 feet from an exterior window or wall to allow for a strong GPS signal.
- Identify a power source for the eFemto.
- Follow device mounting, installation, and power up steps
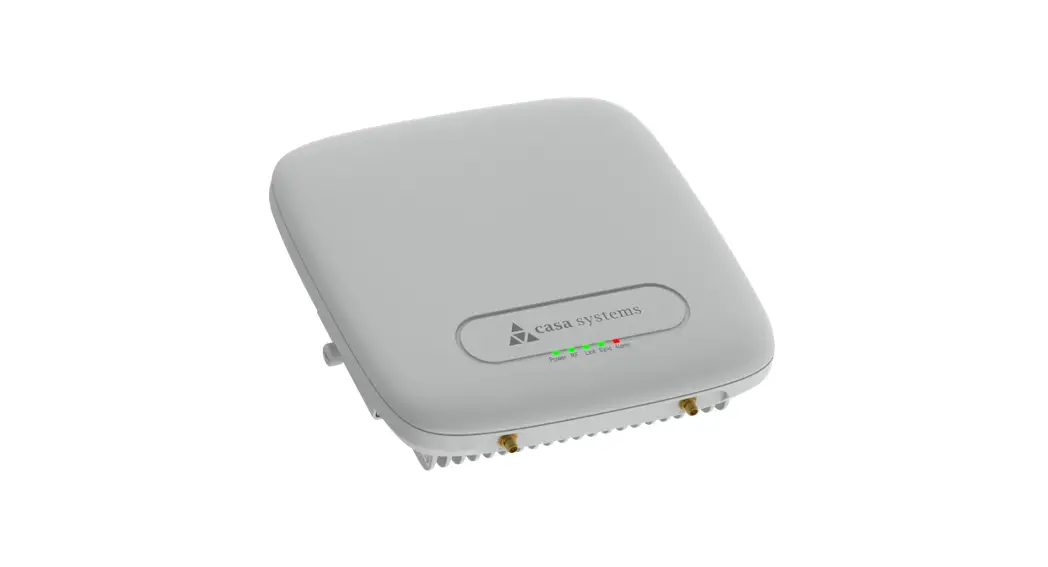
What’s in the eFemto Box
- eFemto
- Mounting Bracket with Hardware
- GPS Antenna and cable
- Ethernet cable – 1.5m
- Power cord
- Power supply (not plenum rated)
- Quick Start Guide
Mounting Procedure
The package contains screws and anchors for drywall mounting. Installation on alternate surfaces will require the purchase of the appropriate anchors and hardware.
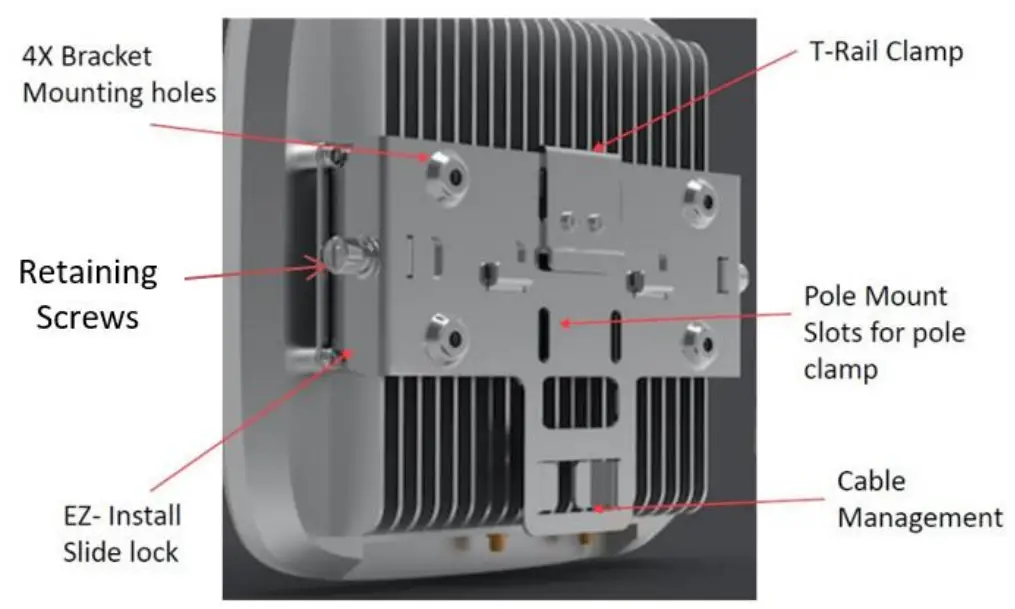
- Determine the mounting location and verify that no wires, pipes, etc., are directly behind or in the wall at the point of mounting.
- Use the wall mounting bracket to act as a template to mark the anchor holes on the wall.
- Drill holes into drywall and push in the supplied plastic drywall anchors. Installation on surfaces other than drywall may require different anchoring hardware which can be purchased at your local hardware store.
- Align the mounting bracket with the wall anchors and attach using the supplied screws.
- Slide the eFemto with mounting bracket into the wall mounting bracket.
- Fasten retaining screws (Self-tapped screw,1018 harden, PA4*25, Phillips 2#, Color-Zn plating) on the side of the bracket.
- When power is supplied through the POE port, the POE power source should meet the requirements of ES1 and PS2
Cautions and Warnings
![]() Caution: The eFemto emits radiofrequency electromagnetic energy. To comply with FCC RF exposure compliance requirements, this device must be installed to provide a separation distance >20 cm from all persons during normal operation. For operation within the 5GHz frequency range, this device is restricted to indoor environments.
Caution: The eFemto emits radiofrequency electromagnetic energy. To comply with FCC RF exposure compliance requirements, this device must be installed to provide a separation distance >20 cm from all persons during normal operation. For operation within the 5GHz frequency range, this device is restricted to indoor environments.![]() Warning: Read and understand the installation instructions and all safety warnings before connecting the eFemto to the power source. Failure to understand safety precautions may result in injury.
Warning: Read and understand the installation instructions and all safety warnings before connecting the eFemto to the power source. Failure to understand safety precautions may result in injury.![]() Warning: Operate the eFemto only with the power adapter supplied with the product.
Warning: Operate the eFemto only with the power adapter supplied with the product.![]() Warning: Do not cover the eFemto or block the airflow to the device with any objects.
Warning: Do not cover the eFemto or block the airflow to the device with any objects.![]() California Prop65 Warning: The plastic and cords on this product contain phthalates, a chemical known to the State of California to cause cancer, birth defects, and other reproductive harm. Wash hands after handling. For more information, please visit the following site: www.p65warnings.ca.gov
California Prop65 Warning: The plastic and cords on this product contain phthalates, a chemical known to the State of California to cause cancer, birth defects, and other reproductive harm. Wash hands after handling. For more information, please visit the following site: www.p65warnings.ca.gov
USA: Federal Communications Commission (FCC) statement
This device complies with FCC part 15 FCC Rules.
Operation is subject to the following two conditions:
- This device may not cause harmful interference and
- This device must accept any interference, including interference that may cause undesired operation of the device.
FCC Warning:
Changes or modifications not expressly approved by the party responsible for compliance could void the user’s authority to operate the equipment.
Note: This equipment has been tested and found to comply with the limits for a Class B digital device, pursuant to part 15 of the FCC Rules. These limits are designed to provide reasonable protection against harmful interference in a residential installation. This equipment generates, uses, and can radiate radio frequency energy and, if not installed and used in accordance with the instructions, may cause harmful interference to radio communications. However, there is no guarantee that interference will not occur in a particular installation. If this equipment does cause harmful interference to radio or television reception, which can be determined by turning the equipment off and on, the user is encouraged to try to correct the interference by one or more of the following measures:
- Reorient or relocate the receiving antenna.
- Increase the separation between the equipment and receiver.
- Connect the equipment into an outlet on a circuit different from that to which the receiver is connected.
- Consult the dealer or an experienced radio/TV technician for help.
This device meets the FCC and IC requirements for RF exposure in public or
uncontrolled environments.
FCCID: 2AO38LTE2004-04
Copyright 2020 Casa Systems. All rights reserved.
![]() Version 1.0
Version 1.0
Doc-3185 Rev 1.0


