
POWERTECH HS-9062 Phone Cradle with 15W Wireless Charger User Manual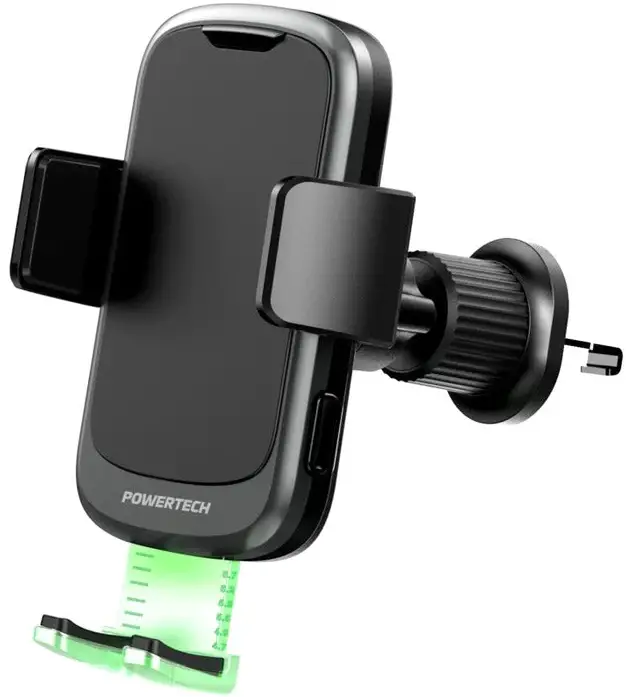
Box Contents
- 1 x Wireless Charger

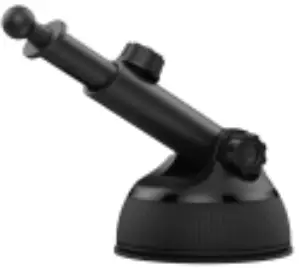
- 1 x Suction Cup Mount

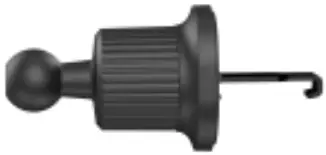
- 1 x Air Vent Mount

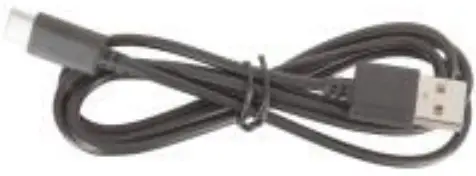
- 1 x USB-C Power Cable


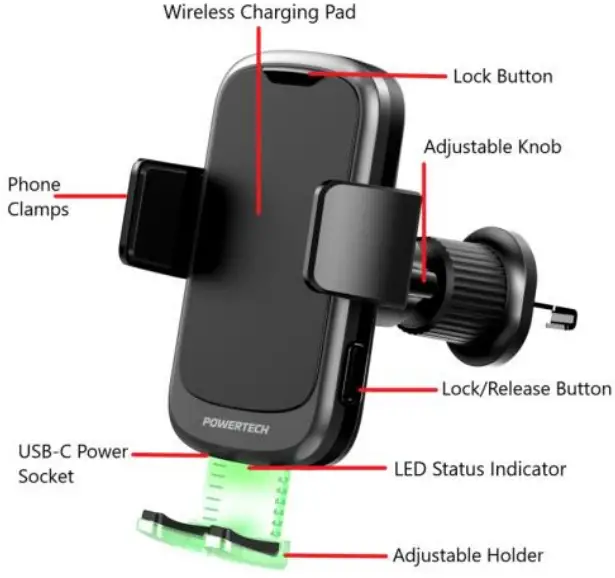
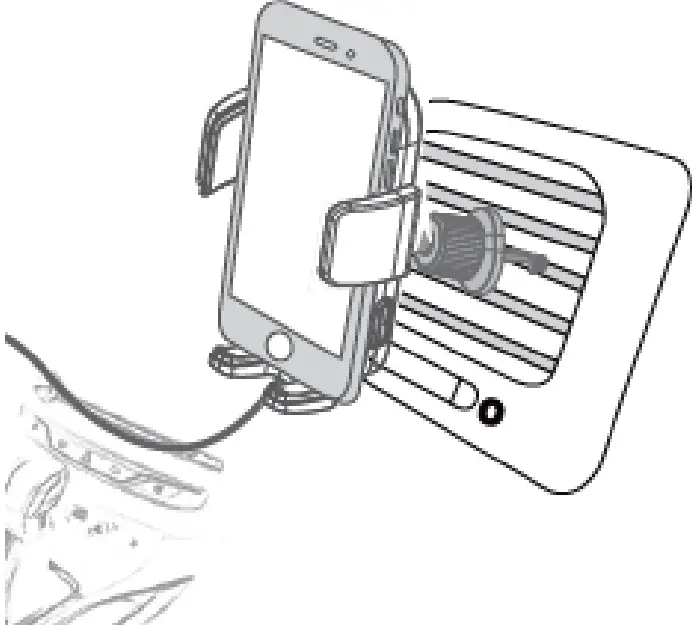
Product Diagram
Installation
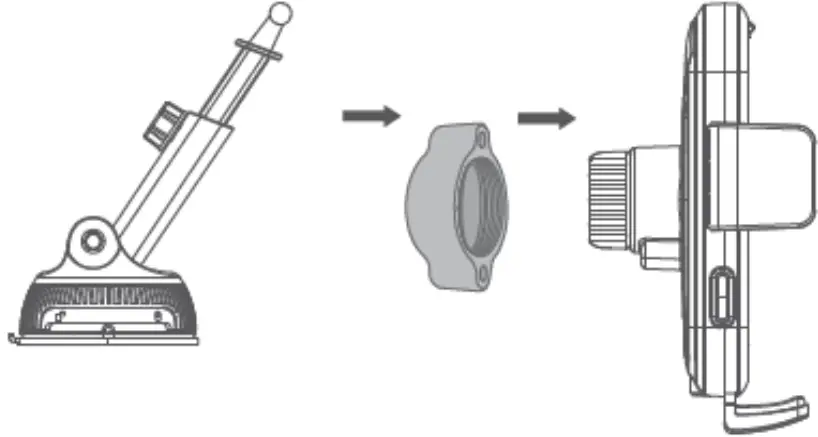
Suction Cup Mount
- Unscrew the adjusta blemounting ring knob from the phone cradle. Place it over the end of the suction cup mount.
- Attach the phone cradle to the suction cup mount and tighten the adjustable mounting ring knob so the cradle and suction cup mount are secured tightly.

- Peel the plastic from the bottom of the suction cup mount and place it on the windscreen of your car or dashboard.

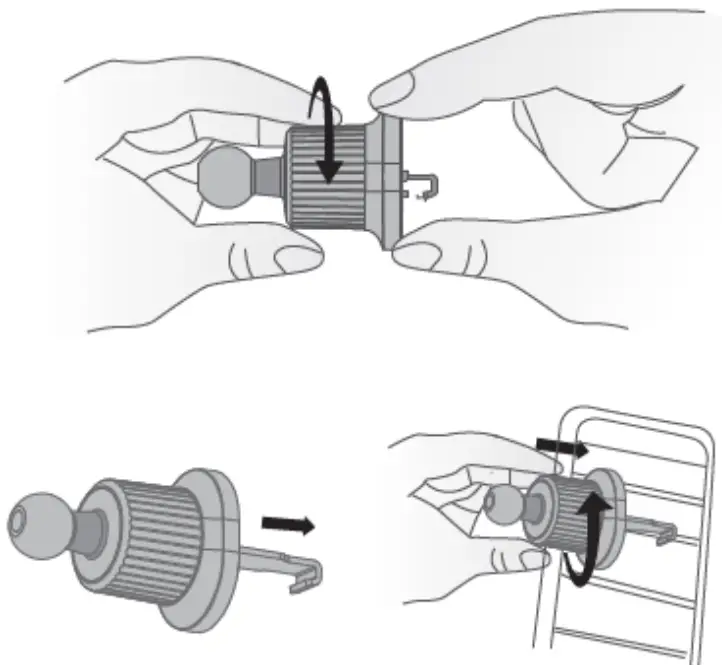
Air Vent Mount
- Screw the adjustable vent mount clockwise to loosen the adjustment and the hook will slowly come out.

- Place the hook and latch it on to your air vent. Screw the adjustment anti clockwise to tighten the adjustment and fix the mount securely to your air vent.
- Unscrew the adjustable mounting ring knob from the phone cradle. Place it over the end of the air vent mount and tighten the adjustable mounting ring knob securely.

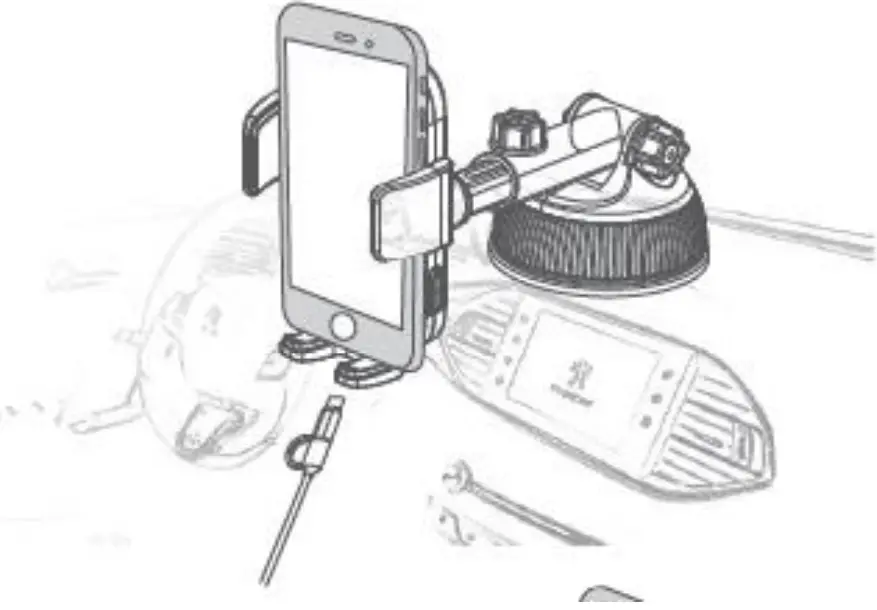
Power
- Insert the USB power cable in a 5VDC/9VDC USB car charger (not included).
- Insert the USB-C plug in to the USB power socket of the phone cradle.
- The LED status indicator will turn green once it has been powered on.
Note: It is suggested to use a Qualcomm® Quick Charge™ 3.0 USB car charger for fast charging. Please check to see if your device supports quick charge otherwise it will charge at 5W.
Operation
Charging
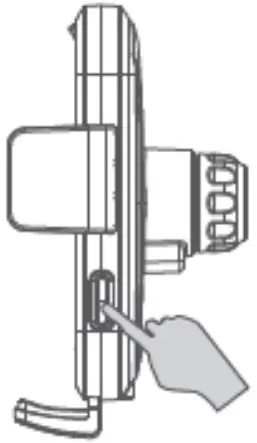
- Press the lock/release button to open the phone clamps.

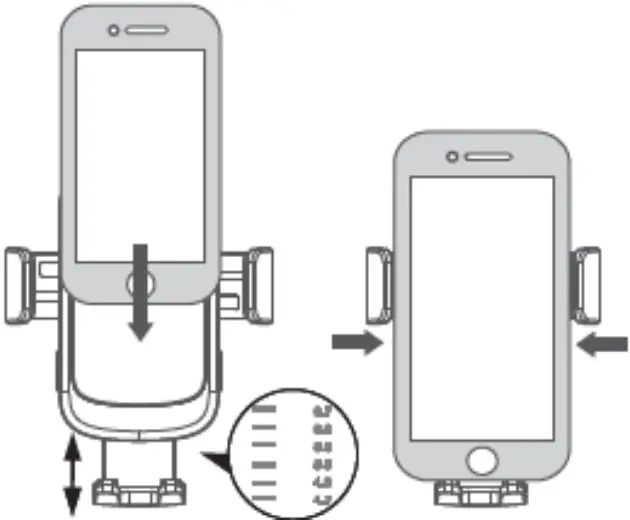
- Slide down the adjustable holder located at the bottom of the cradle and slide your smart phone into the cradle.

- The LED status indicator will turn blue once charging has started.
Note: You may need to change the position of the adjustable holder at the bottom of the cradle. The wireless charging pads are in a different location depending on the type of smartphone.
Troubleshooting
| Problem: | Solution: |
| Will not charge device | Ensure your smartphone supports Qi wireless charging |
| Ensure the mobile device is placed on the charging pad correctly and adjust the adjustable foot holder accordingly | |
| Restart your mobile device and wireless charger | |
| Will not charge device | Take off your phone case as it may be interfering with the wireless charger |
| Will not power on | Ensure the USB cable is connected properly to a suitable USB car charger |
Safety
- Do not place any metal objects, magnets, magnetic stripe cards or metal phone cases between the mobile device and the charger as it may not work properly.
- Keep the wireless charger at least 20cm away from any implantable medical devices such as a pacemakers or cochlear, etc. to avoid interference with the medical device.
- Do not open the case of the wireless charger to avoid damage and injury.
- Keep the wireless charger away from high temperatures as it may cause damage to the speaker and battery.
- Do not expose the wireless charger to water, moisture or liquids to prevent the unit from damage.
Specifications
- Input: 5VDC @ 2A, 9VDC @ 1.7A
Voltage Output: 5VDC, 9VDC
Current Output: 5V @ 1A (5W)- 9V @ 0.8A (7.5W)
- 9V @ 1.1A (10W)
- 9V @ 1.66A 15W)
- Output Power: 5W/7.5W/10W/15W
- Charging Efficiency: 73% (Max)
- Charging Distance: ≤7mm
- Battery: 3.7V Li-ion, 60mA
- Battery Standby Time: Up to 30 Days
- Dimensions: 119(H) x 75(W) x 34(D)mm
Distributed by: Electus Distribution Pty. Ltd. 46 Eastern Creek Drive, Eastern Creek NSW 2766 Australia
Ph: 1300 738 555
Int’l: +61 2 8832 3200
Fax: 1300 738 500
www.electusdistribution.com.au
![]()


