KODAK PIXPRO AZ425 Digital Camera
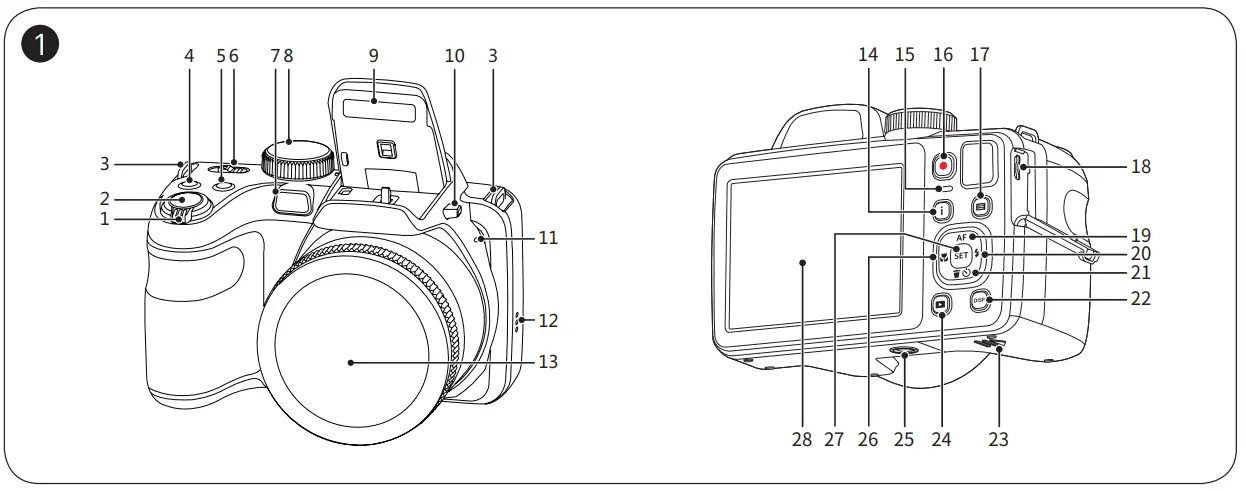
Camera Views
| 1 | Zoom Lever | 15 | Indicator Lamp |
| 2 | Shutter Button | 16 | Fast Video Recording Button |
| 3 | Strap Eyelet | 17 | Menu Button |
| 4 | Exposure Compensation Button | 18 | Micro USB Port |
| 5 | Continuous Shot Button | 19 | AF Button / Arrow Button (Up) |
| 6 | Power Switch | 20 | Flash Button / Arrow Button (Right) |
| 7 | AF Assist Beam / Self- Timer Lamp | 21 | Delete Button / Self-Timer Button / Arrow Button (Down) |
| 8 | Mode Dial | 22 | Display Button |
| 9 | Flash Lamp | 23 | Battery Door Cover |
| 10 | Flash Button | 24 | Playback Button |
| 11 | Microphone | 25 | Tripod Socket |
| 12 | Speaker | 26 | Macro Button / Arrow Button (Left) |
| 13 | Lens | 27 | SET Button |
| 14 | “I” Button | 28 | LCD |
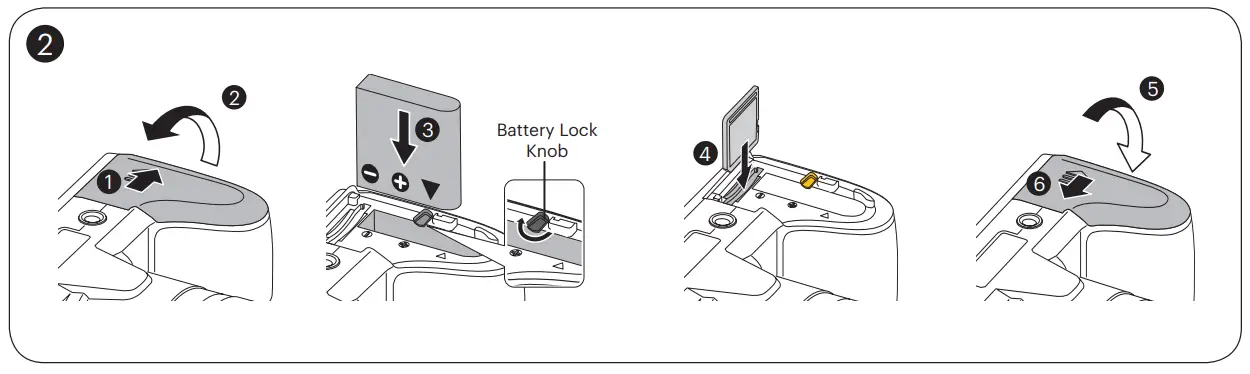
Insert the Battery and the Memory Card
- Open the Battery Cover Door as show in step ① and ②.
- Insert the Battery into the battery compartment.
- Insert the Memory Card into the slot.
- Close the Battery Cover Door as shown in step ⑤ and ⑥.

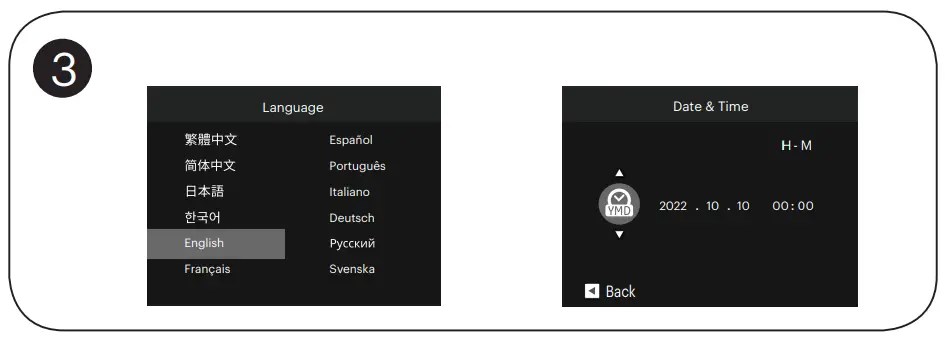
Setting the Language / Date / Time
- Push the Power Switch to turn the camera on and the language menu will appear. Use the Up / Down / Left / Right buttons to select a language and press the
 button to confirm the language.
 - Use the Up / Down / Left / Right buttons again to set the date and time and press the button to confirm.

Taking a Picture
- Hold the camera securely.
- Use the Zoom Lever to select Tele or Wide positions to zoom in or out on your subject.
- Press the Shutter Button half way down to focus on the subject. When the focus frame turns green, press the Shutter Button completely down to take your photo.

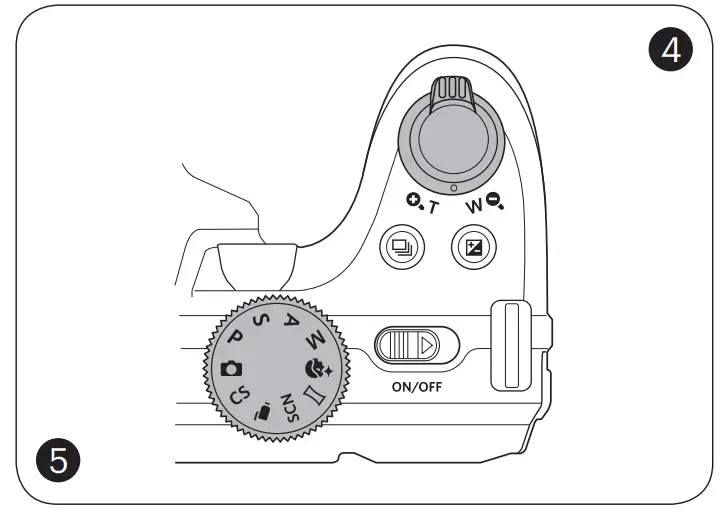
Using the Mode Dial
This camera provides a convenient Mode Dial that allows you to manually switch among different camera settings with ease. Available modes are listed below:
| Auto Mode | Face Beautifier | ||
P | Program AE | Panorama Mode | |
S | Shutter Priority | SCN | Scene Mode |
A | Aperture Priority | Movie Mode | |
M | Manual Mode | CS | Custom Settings |
In Shooting Mode, press the ![]() button to begin recording a video. After recording, press the
button to begin recording a video. After recording, press the ![]() button again to stop recording. The camera will store the video and return to the shooting screen.
button again to stop recording. The camera will store the video and return to the shooting screen.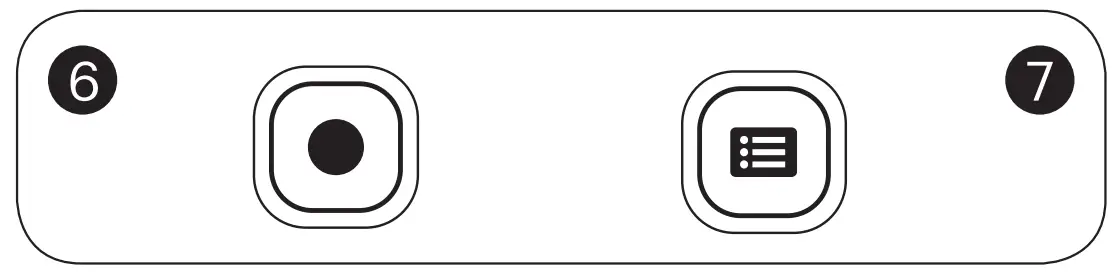
In each mode, press the  button to access the “Easy Menu”. Press the [
 ![]() AF ]/[
AF ]/[ ![]() ] buttons to move among options, then press the
] buttons to move among options, then press the  button to make a selection. Choosing the
  within this list will provide access to the “Full Menu”:
Shooting Mode | |
| Shoot Settings | |
| General Settings | |
| Connection Settings | |
| File Settings | |
Playback Mode | |
| Playback Settings | |
| General Settings | |
| Connection Settings | |
| File Settings | |
IMPORTANT MEMORY CARD INFORMATION
A memory card (SD / SDHC / SDXC) is necessary to store photos and videos and is not included in all camera packaging. It needs to be purchased separately. Please use a memory card which is Class 10 or higher and has a capacity of 4GB to 512GB. The camera is not compatible with Micro SD, Ultra, Ultra Plus, Extreme, XC, or adapters for any of these other memory cards.
- Americas

https://kodakpixpro.com/az425/user-manual/ - Europe
http://www.kodakpixpro.com/Europe/support/multi-langdownloads.php