![]() Owners/Installation Guide
Owners/Installation Guide
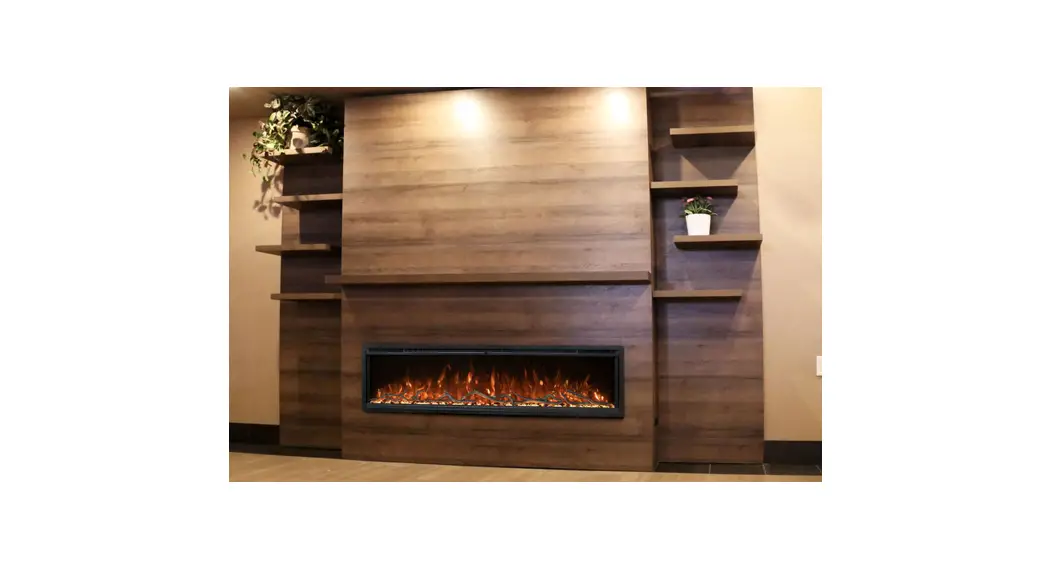
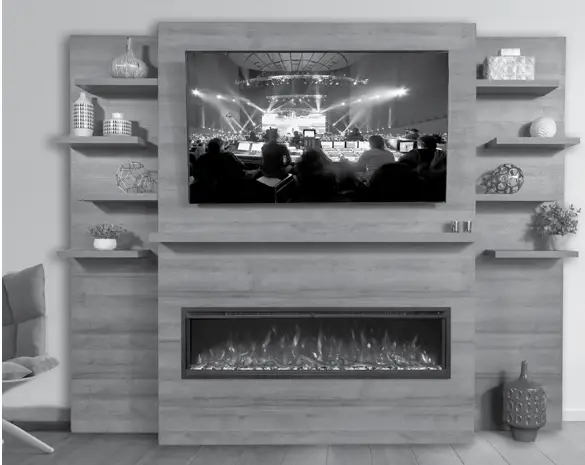
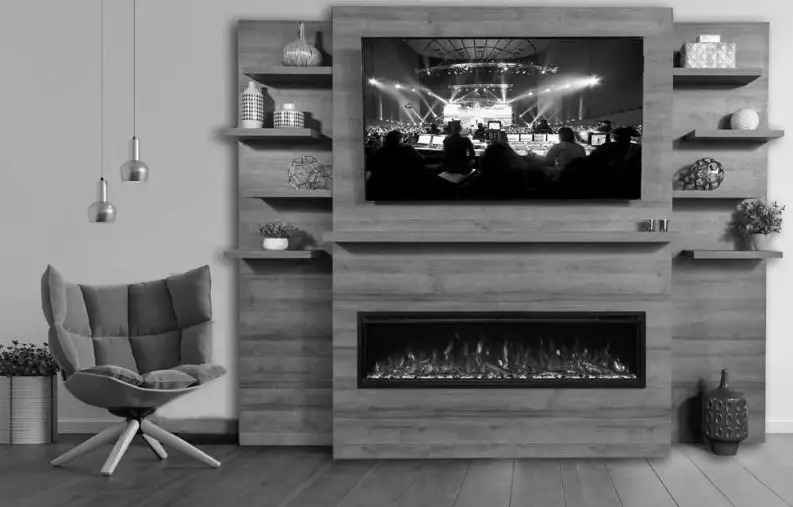
ALLWOOD FIREPLACE WALL SYSTEM
 HOW TO INSTALL VIDEO
https://www.youtube.com/watch?v=TiIAhVh3niI&t=2s
Complete wall modular install guide
- Weathered Walnut
- Driftwood Gray
- Coastal Sand
Assembly, Tools, Parts & Hardware List
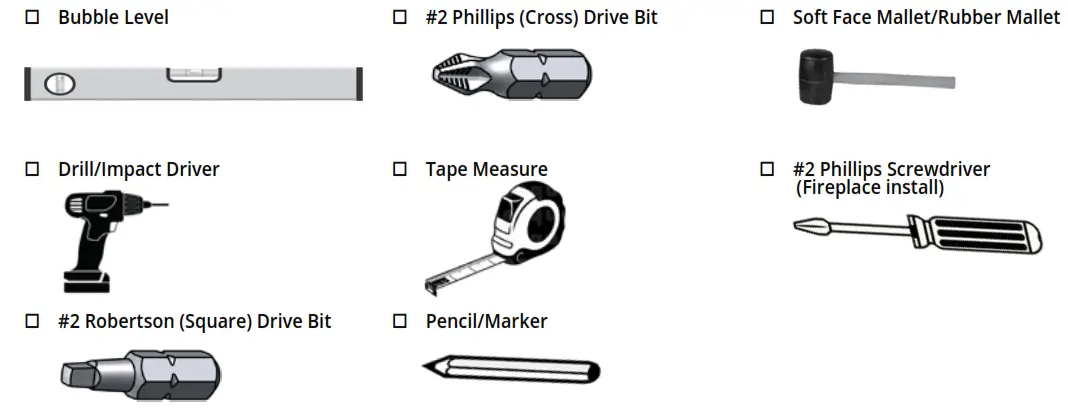
TOOLS REQUIRED
INSTALL PREP
- Locate & prep wall for install, measure to verify best fit.
• Main unit requires 6 foot wide by 8 foot high area
• Main unit plus 1 side shelf wall requires 8 foot wide by 8 foot high area
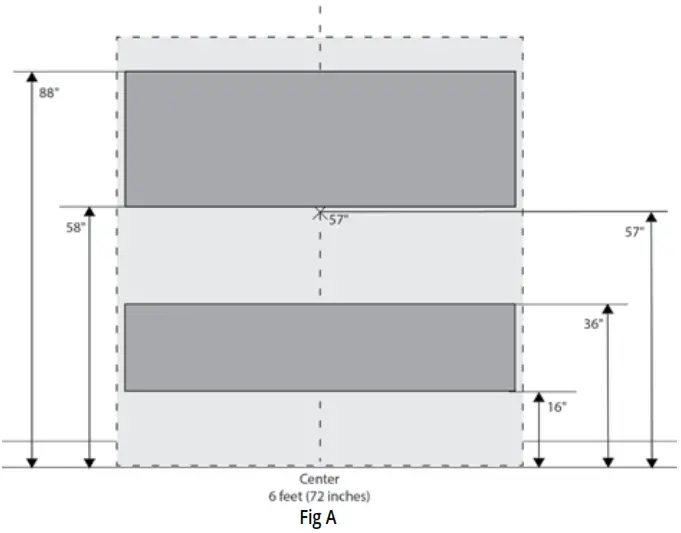
• Complete wall unit – Main plus 2 side shelf walls requires 10 foot wide by 8 foot high area - Locate center of wall where unit will be installed, MARK center point
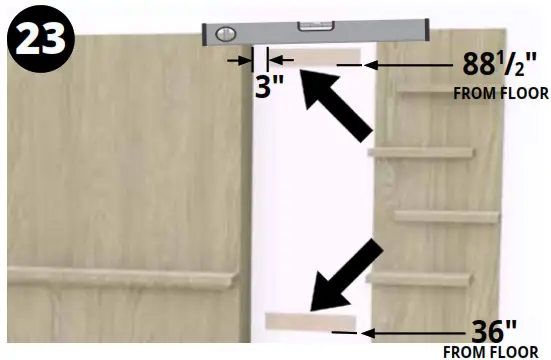
• CENTER MARK @ 57″/58″, from the floor, as your CENTER POINT for mounting and securing unit (Fig A).
• Locate studs in wall for mounting main unit & side shelf walls.
• Locate DEDICATED OUTLET(S) within the highlighted area of main unit to mount (Fig A).
Note: OUTLET POWER For fireplace only,
a dedicated 15 amp circuit is required. OUTLET POWER For fireplace and television, a dedicated 20 amp circuit is required.
Parts & Hardware List
| COMPLETE UNIT | MAIN UNIT ONLY | SHELVING |
| • AFWS-10×8-CS Allwood Fireplace Wall System SET (10’ x 7’ 10″) Coastal Sand Color (WO/FIREPLACE) • AFWS-10×8-DW Allwood Fireplace Wall System SET (10’ x 7’ 10″) Driftwood Gray Color (WO/FIREPLACE) • AFWS-10×8-WW Allwood Fireplace Wall System SET(10’ x 7’ 10″) Weathered Walnut Color (WO/FIREPLACE) | • AFWS-MAIN-CS Allwood Fireplace MAIN Wall (Middle Section 6’ x 7’ 10″) Coastal Sand Color (WO/FIREPLACE) • AFWS-MAIN-DW Allwood Fireplace MAIN Wall (Middle Section 6’ x 7’ 10″) Driftwood Gray Color (WO/FIREPLACE) • AFWS-MAIN-WW Allwood Fireplace MAIN Wall (Middle Section 6’ x 7’ 10″) Weathered Walnut Color (WO/FIREPLACE) | • AFWS-SIDE-CS Allwood Fireplace Single Side Wall (Side Section 2’ x 7’ 10″) Coastal Sand Color (Shelves included) ox2 • AFWS-SIDE-DW Allwood Fireplace Single Side Wall (Side Section 2’ x 7’ 10″) Driftwood Gray Color (Shelves included) ox2 • AFWS-SIDE-WW Allwood Fireplace Single Side Wall (Side Section 2’ x 7’ 10″) Weathered Walnut Color (Shelves included) ox2 |
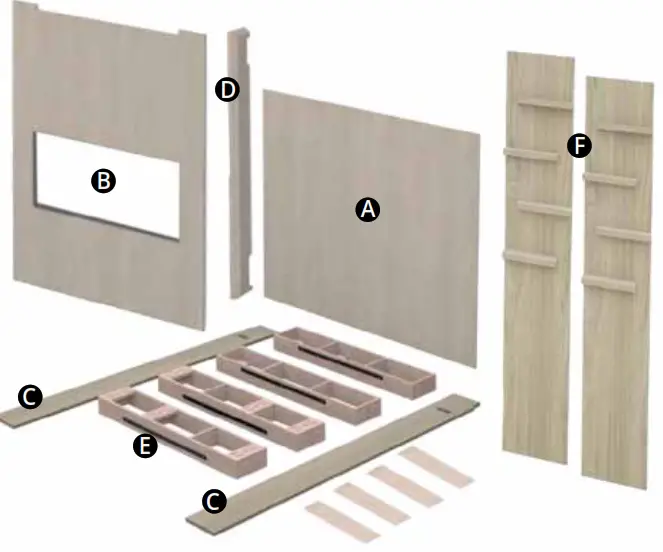
MAIN UNIT
- Front Facia A top B bottom
- Side Uprights C (left & right)
- ALLWOOD Mantel D 6’ x 4” (1)
- Wood Box Framing E (4)
- 1-1/4” Screws (32)
- Shelf Pins (16)
SIDE SELF WALLS x 1 F
- Side Shelf Wall (1)
- Shelves (4)
- Wood Screws (16)
- Shelf Pins (16)
- Wood Wall Cleat/Bracket (2)
LAYOUT ALL PARTS & HARDWARE BEFORE ASSEMBLY BEGINS
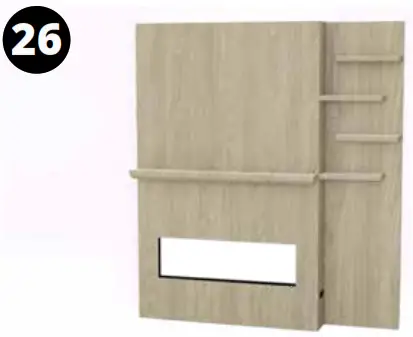
Installation and Assembly
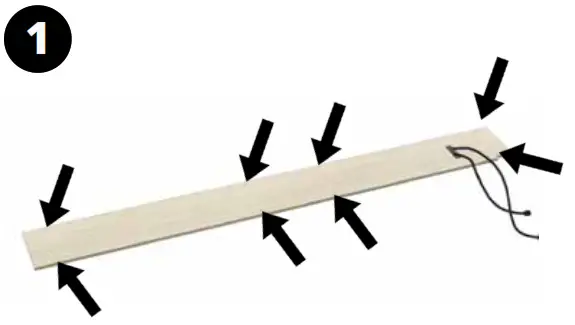
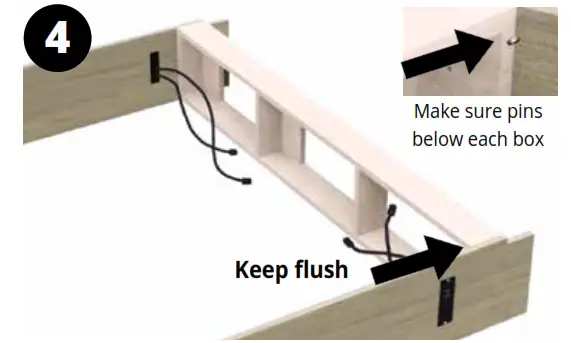
- Locate the two side uprights and insert sixteen (16) shelf pins (included) into inner side walls, in predrilled holes. These are to be placed below each of the four framing boxes. The pins will support and index each of the four framing boxes.

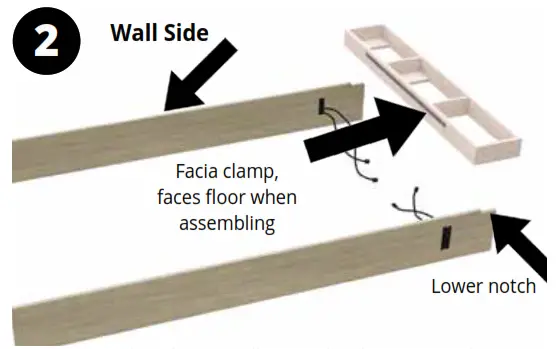
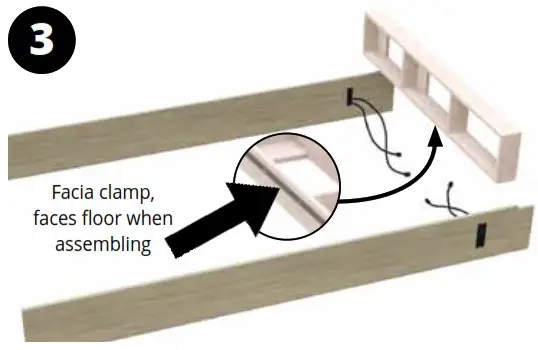
- Set sides of main wall upward with power cords toward center and outlets outward. Wall side facing up.
Note: Lower notch on inner walls goes over baseboard lower wall.
- Make sure you are assembling on a flat level floor. Place 1st framing on lower section, make sure framing boxes are flush with the wall side of side wall.

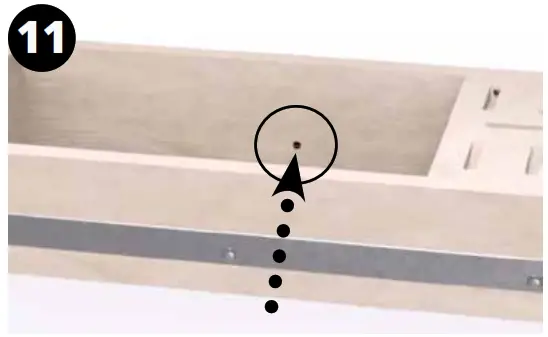
- Make sure boxes resting against shelf pins, then proceed to install screws.

- Partially install one screw until all four (4) framing boxes are attached…

- Continue to make sure shelf pins are secure and below each framing box for alignment and correct position.

- then screw into side wall until flush with inner box frame. Repeat on all four (4) framing boxes.

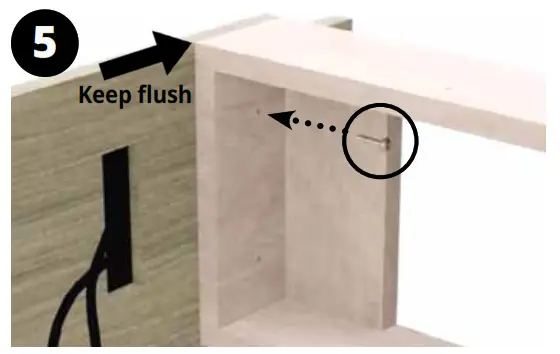
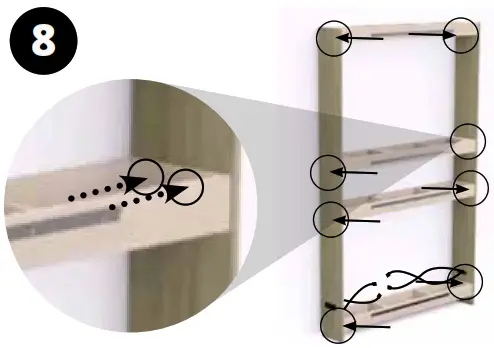
- Raise wall. From the bottom of unit, remove & reuse previous screws, see step 5, and add second secure screws sixteen (16), making sure to keep wall flush with side wall upright.

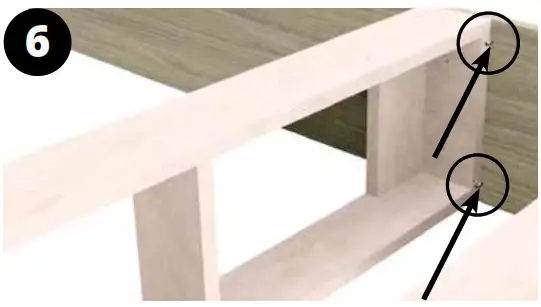
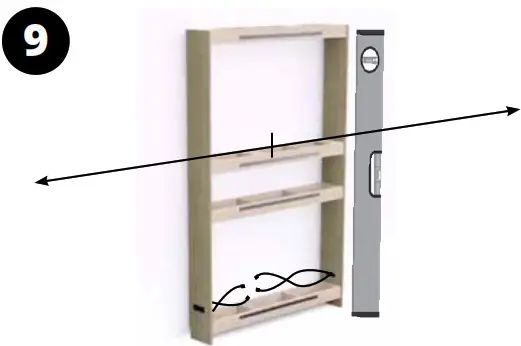
- Locate center of main unit and align with previously marked center.

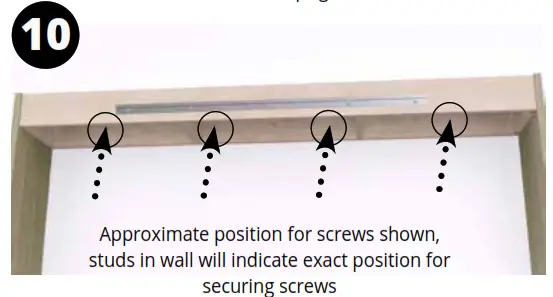
- Once all sure wall is level, and begin to secure four (4) wall screws to wall, must attach to two (2) studs in wall.

- Continue process securing all four (4) framing boxes to the wall.

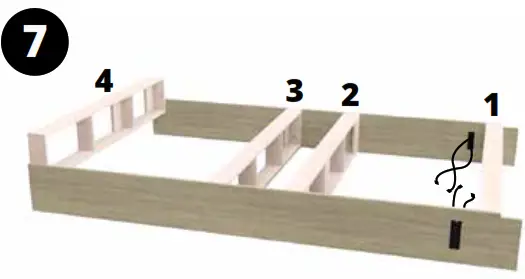
- Once all sixteen (16) wall screws are secured, and unit level, then connect your power outlets. Run extension to third framing box if installing a television.

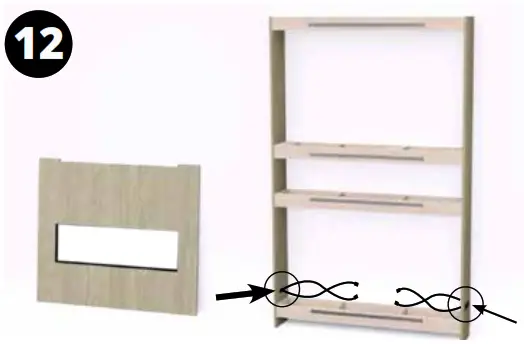
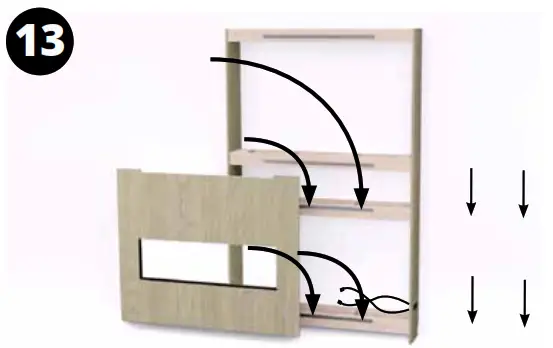
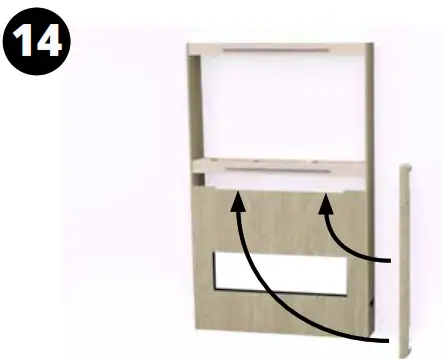
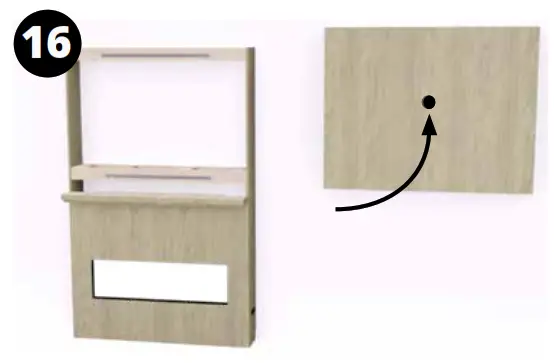
- Mount fireplace front facia, by sliding onto attached upper and lower horizontal mounting strips secured to wall unit.

- Place mantel horizontal in guide mounts on top of lower fireplace facia.

- Place mantel in mount, in lower guide, then prepare for upper front facia. No screws needed, mantel will be secured by lower & upper facia.

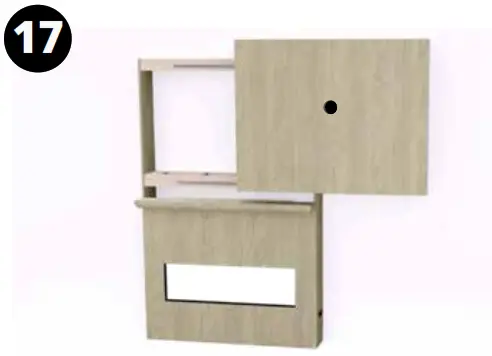
- If installing/mounting a television, It is recommended to cut opening/hole for wiring access once measure for mount and TV size.

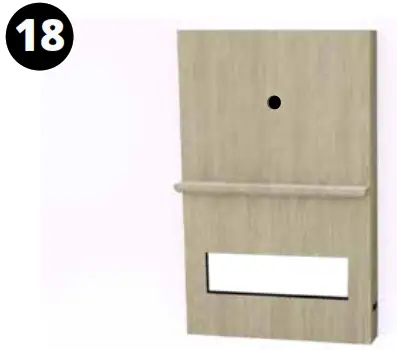
- Secure top facia in guide mounts, by aligning and drop in horizontal metal mounts. If installing/mounting a television, it is recommended to run power cord through panel and plug extension cable.

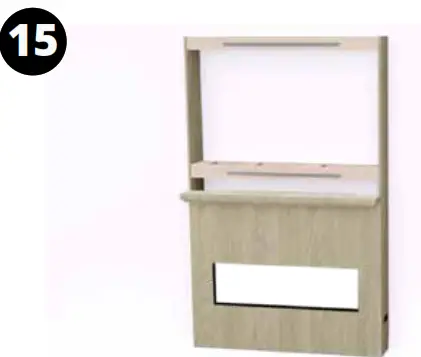
- Make sure all panels are secure to metal horizontal clamps and level. Fireplace unit and television can now be installed nd powered up.

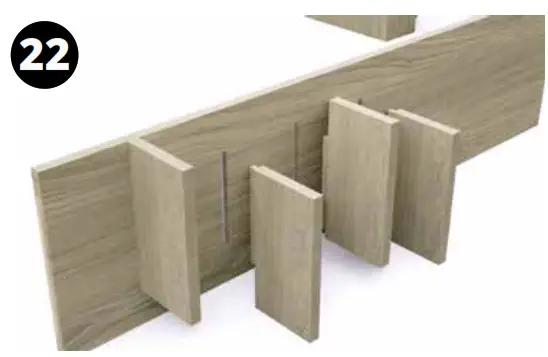
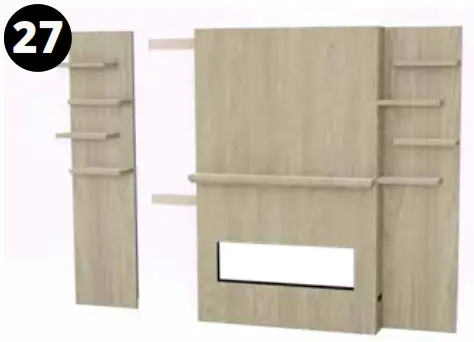
- Place shelf wall on its side to mount four (4) shelves.

- Insert shelf into mounting and align horizontal.

- Once shelf is in place and desired position, then place (A) shelf pins to secure shelves temporarily.
Then (B) insert and tighten shelf screws.
- Continue process (pins & screws) for all eight (8) shelves.

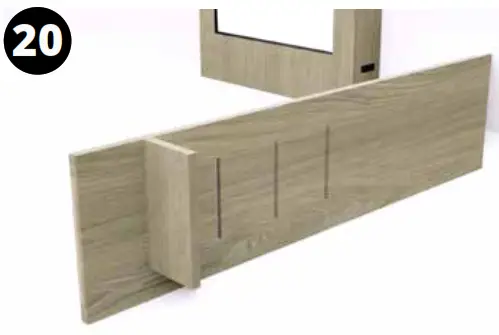
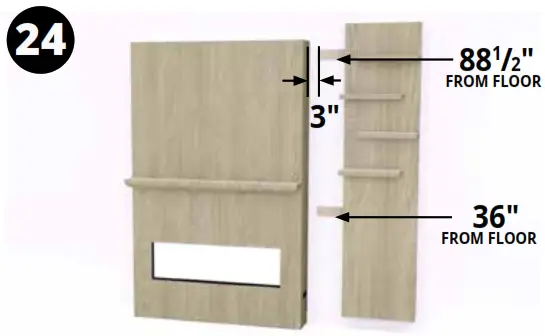
- Measure and level cleat mounting (wood) brackets. Cleat mount brackets MUST attach to at least one (1) stud in wall. Use at least two (2) screws into wall.

- Once cleat mounts are measured, leveled and secure, lift the shelf wall with secured shelves and place over the cleat mounts

- Align wall and drop in place.

- Shelf wall is attached to wall, if applicable, repeat process on other side.

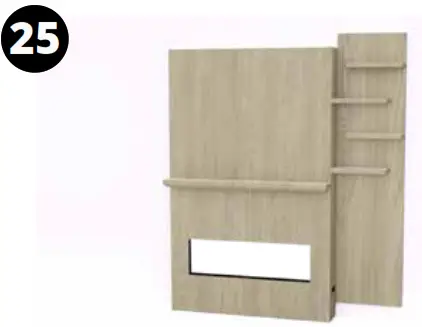
- Secure cleat mounts, leveled, and ready for shelf wall.

- Lift self wall, align and hang on cleat mounts

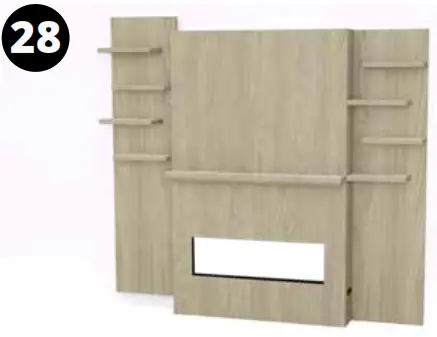
- Allwood Fireplace Wall System now is complete.
See Spectrum Slimline Owner’s Manual for more detailed installation and features.
- Once fireplace unit is removed from box. Place fireplace near panel opening and connect outlet to power cord

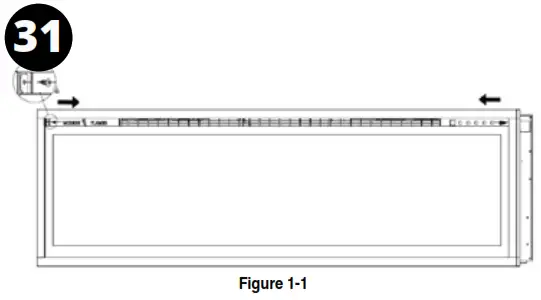
- With one hand on the front glass to prevent it from falling, remove the two screws (1 per side) from the side of the appliance (Fig. 1-1). Set the screws aside.

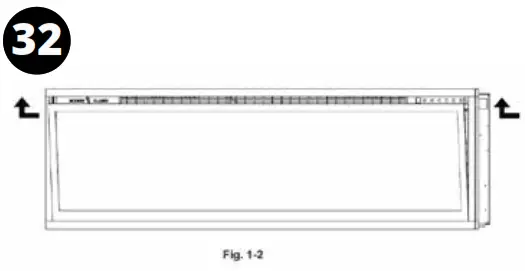
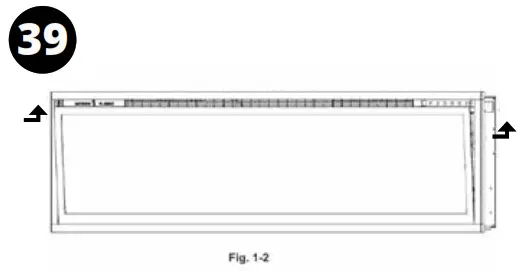
- Carefully lift the front glass up and away from the appliance (Fig. 1-2 ). Place it face down on a soft, non-abrasive surface.

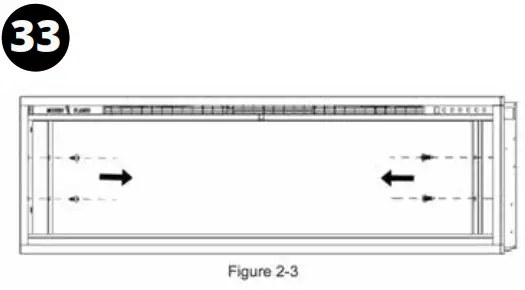
- Remove the four screws (2 per side) from the side of the appliance and remove the brackets (Fig. 2-3).
Set the screws/brackets aside.
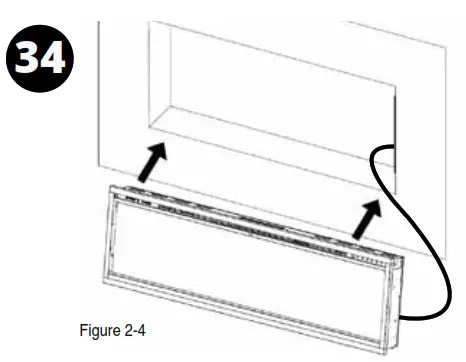
- Plug appliance to extension from wall. Insert the appliance into the rough-in frame (Fig. 2-4)

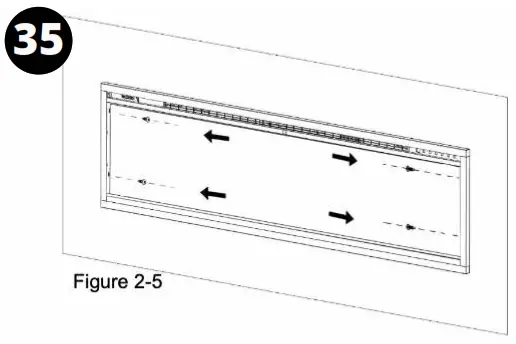
- Then secure it by installing 4 screws (supplied) into the slots on the insides (2 per side) (Fig. 2-5) Screws supplied with fireplace unit.
Fireplace Installation

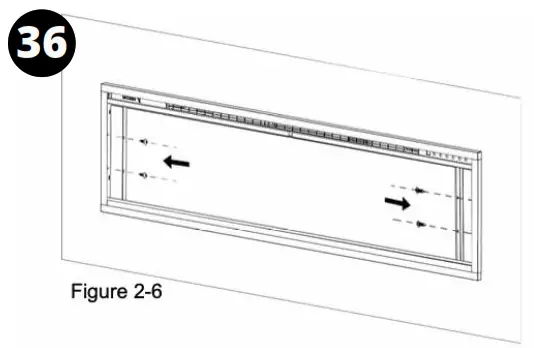
- Next reinstall the two brackets and 4 screws previously removed. (Fig. 2-6).

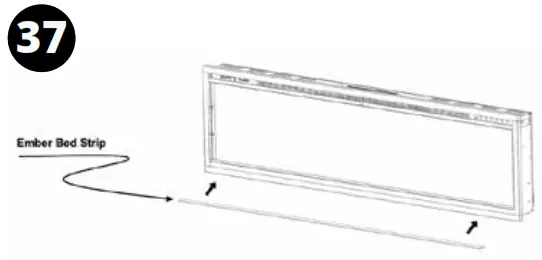
- Place the ember bed strip in position, if ember bed strip is not factory installed.

- • Install logs first, then add Glacier Crystals around logs. (Optional to install logs &/or glacier crystals)

- Re-install glass.

- Fireplace is ready for use.


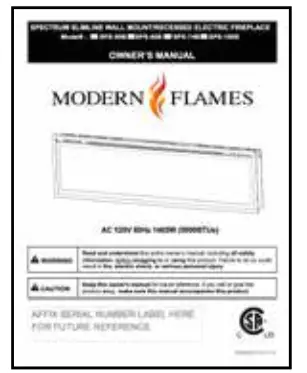
See Spectrum Slimline Owner’s Manual for more detailed installation and features.
DO NOT RETURN TO STORE!
CALL US FIRST
For immediate help with installation, product information or if your product arrives damaged, please call our toll free number at:
1-877-246-9353
(Monday – Friday, 8:00AM – 5:00PM, AZ Mountain Time)
Or email us at: [email protected]
OUR STAFF IS READY TO PROVIDE ASSISTANCE
![]() Thank you for choosing Modern Flames, we appreciate all our customers and hope you have many years of enjoyment of our products.
Thank you for choosing Modern Flames, we appreciate all our customers and hope you have many years of enjoyment of our products.
Take a look at our other products from our RPG Brands family of companies![]() GrandCanyonGasLogs.com
GrandCanyonGasLogs.com
For all your indoor, outdoor gas fireplaces & fire feature products.![]() Wildfireoutdoorliving.com
Wildfireoutdoorliving.com
For all your outdoor living products, such as grills, refrigerators and accessories.![]() [email protected]
[email protected]
modernflames.com


