HorecaTraders 1038046-09 Oven/ Cooker Installation Guide
Safety precautions
![]() Electrical connections must be carried out by competent personnel according to the rules and standards for low voltage installations and according to the requirements of the local electric utility. An appliance supplied ready with a plug must be connected only to an earthed wall socket properly installed according to regulations. For domestic electrical installation, an all-pole mains disconnect device with 3 mm contact gaps must be installed. Switches, plug connections, MCBs and safety fuses that are freely accessible after installation of the appliance and that switch all poles are regarded as permissible isolating devices. Proper earthing and separately routed neutral and protective conductors provide for a safe and trouble-free operation. After completion of the installation, it must not be possible to touch live parts or cables with operational insulation. Check existing installations. Check rating plate for required supply voltage, type of current and fuse protection. Electrical connection using H05VV-F (Td) or CH-N1VV-U (TT) cable or H07V-U (T) installation wires in an insulating sleeve. The connection cable should measure at least 150 cm from the point where it comes out of the wall.
Electrical connections must be carried out by competent personnel according to the rules and standards for low voltage installations and according to the requirements of the local electric utility. An appliance supplied ready with a plug must be connected only to an earthed wall socket properly installed according to regulations. For domestic electrical installation, an all-pole mains disconnect device with 3 mm contact gaps must be installed. Switches, plug connections, MCBs and safety fuses that are freely accessible after installation of the appliance and that switch all poles are regarded as permissible isolating devices. Proper earthing and separately routed neutral and protective conductors provide for a safe and trouble-free operation. After completion of the installation, it must not be possible to touch live parts or cables with operational insulation. Check existing installations. Check rating plate for required supply voltage, type of current and fuse protection. Electrical connection using H05VV-F (Td) or CH-N1VV-U (TT) cable or H07V-U (T) installation wires in an insulating sleeve. The connection cable should measure at least 150 cm from the point where it comes out of the wall.
![]() Always wear gloves when handling unpacked appliances. Do not lift appliance by the operating panel or the door handle. Do not indent sides or top of appliance and do not tip over appliance. For proper ventilation, prepare appliance niche with an air intake opening of at least 25cm². If used at an altitude of over 2,000 metres, a reduced performance must be expected. Only service personnel is permitted to modify the appliance (incl. inlet and outlet lines and mains cable).
Always wear gloves when handling unpacked appliances. Do not lift appliance by the operating panel or the door handle. Do not indent sides or top of appliance and do not tip over appliance. For proper ventilation, prepare appliance niche with an air intake opening of at least 25cm². If used at an altitude of over 2,000 metres, a reduced performance must be expected. Only service personnel is permitted to modify the appliance (incl. inlet and outlet lines and mains cable).
![]() Observe all local regulations. For installation in inflammable materials, observe the rules and standards for fire protection.
Observe all local regulations. For installation in inflammable materials, observe the rules and standards for fire protection.
Oven/cooker installed in base unit
Combination of hob above oven
| Piano cottura – Hob | D | E | F | G |
| CTI4T84MMS…, GK46TIMASZ, GK46TIABSZ | 50,5 | 10 | 60,5 | 3,5 |
| GK47TIMPSZ, GK46TIMPSZ | 51 | 10 | 61 | 4 |
| CookTop Induktion V4000, GK26TIMSZ, GK27TIMSZ, GK46TIGZ, GK46TIMGZ, GK47TIMSZ, GK47TIMXSZ, GK46TIABSF | 51,7 | 10 | 61,7 | 4,7 |
| CookTop Induktion V6000, GK57TIMSZ | 53,3 | 10 | 63,3 | 6,3 |
| GK25TEZ, GK45TEBSZ, GK45TESZ, GK45TEGZ, GK45TEASZ, GK45TEXSZ, GK45TEPSZ | 47,5 | 20 | 67,5 | 10,5 |
| GK55TESF | 53,3 | 20 | 73,3 | 16,3 |
| CookTop V200/V400/V600, GK42HF, GK43F/O, GK43.3F | 43,5 | 20 | 63,5 | 6,5 |
| GK17TIYSZ, GK27TIYSZ | 64 | 10 | 74 | 17 |
| CTI6T75FKTFHD, CTI6T96FKTFHD, GK11TIFKZ, GK11TIXFKZ | 76 | 10 | 86 | 29 |
| GK16TIWSZ | 128,5 | 10 | 138,5 | 81,5 |
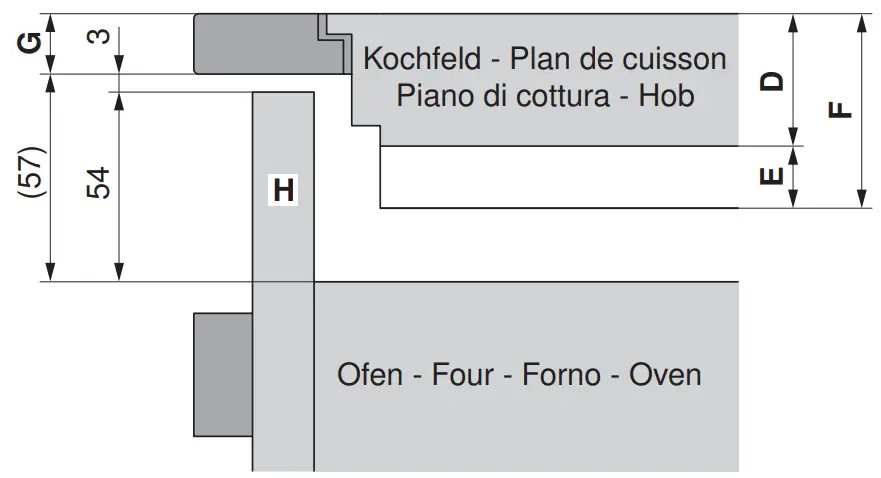
| D | Hob depth |
| E | Min. air gap |
| F | Space require- ment between surface and hob |
| G | Min. worktop depth |
| H | Panel in housing |
The appliance must be installed in a de-energized state.
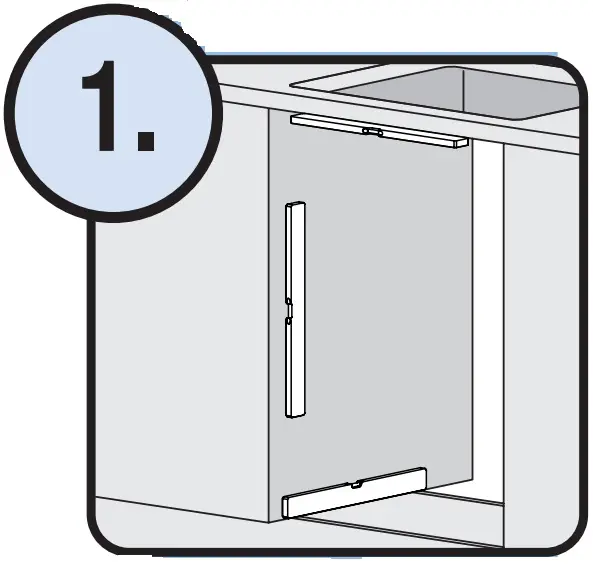
- Check perpendicularity of niche.

- Check appliance/fasteners
- Check connected loads
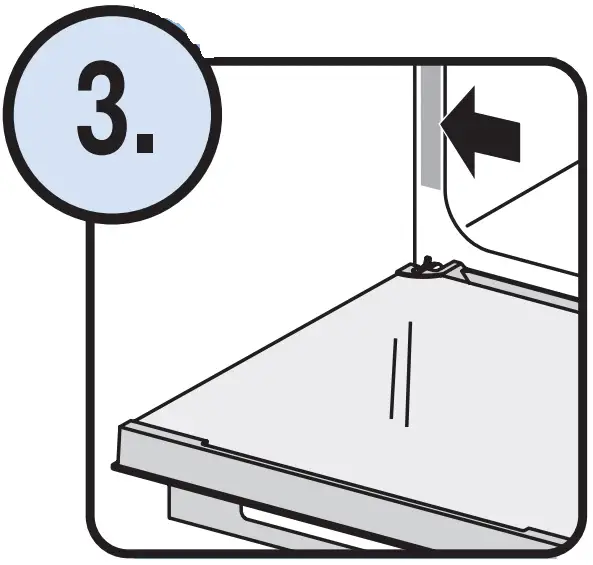
For installation, connected loads must correspond - Install hob
See installation instructions for hob - Connect appliance to mains power supply
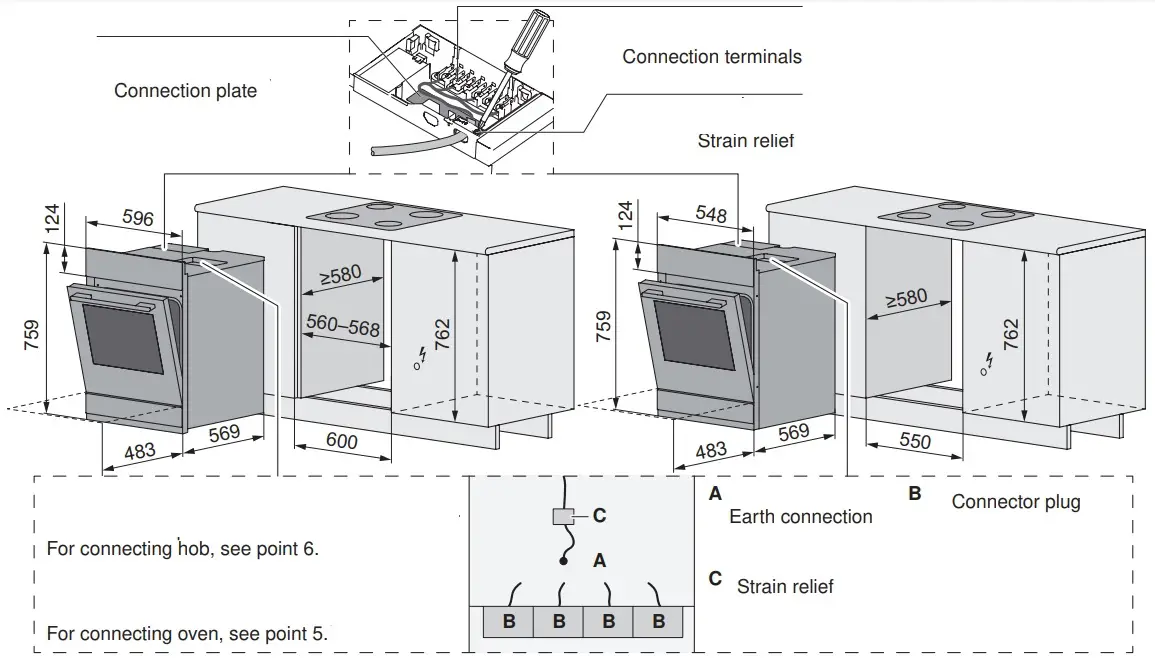
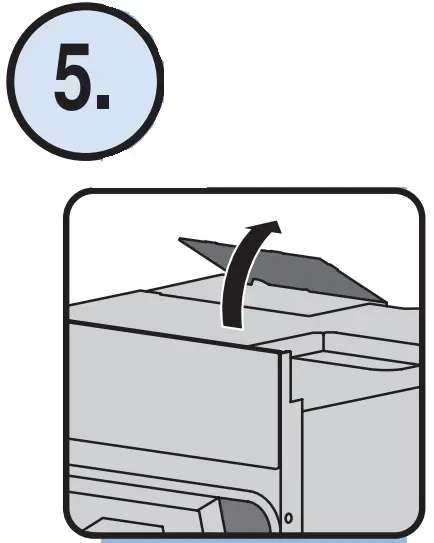
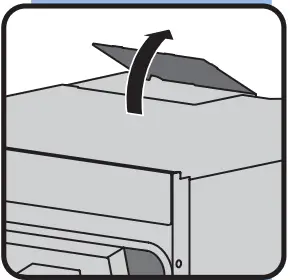
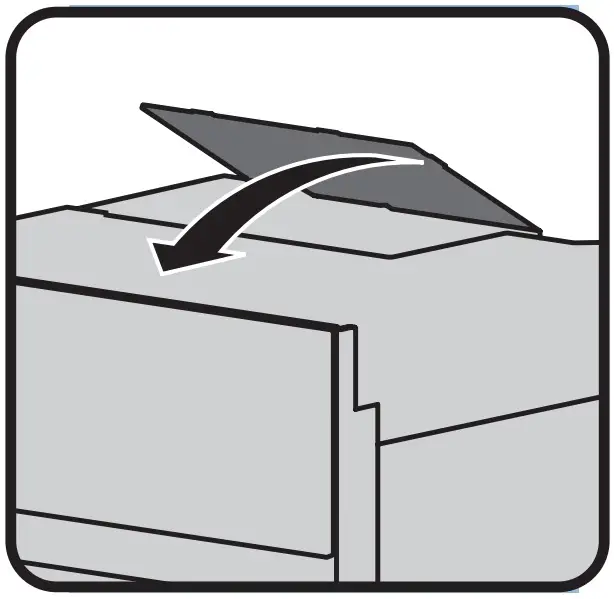
Open and remove cover
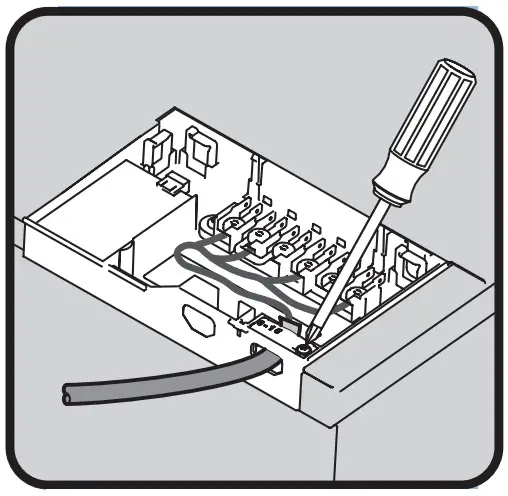
 Connect cable to connecting terminals in accordance with connection plate
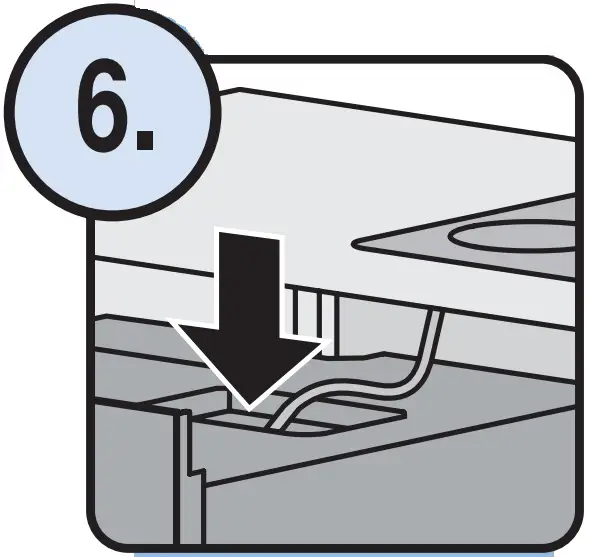
Strain relieve cable
Connect hob
- Connect earth cable and mount strain relief
- Connect remaining connectors acc. to colour scheme

- Connect remaining connectors acc. to colour scheme
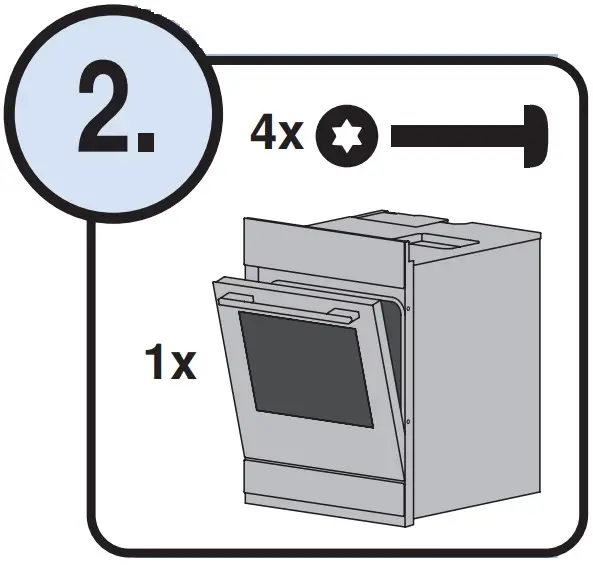
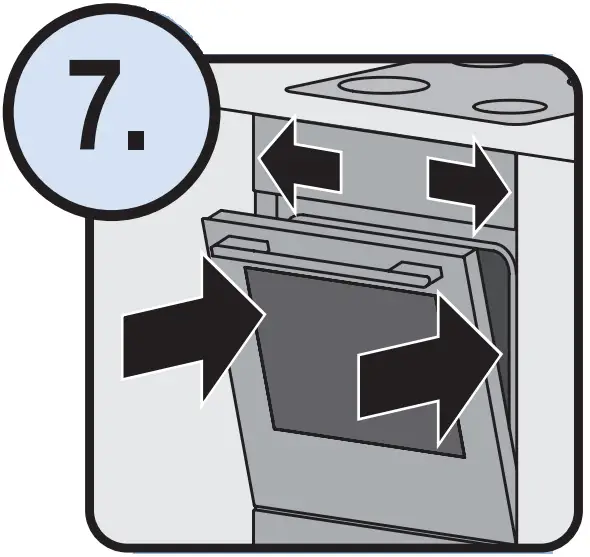
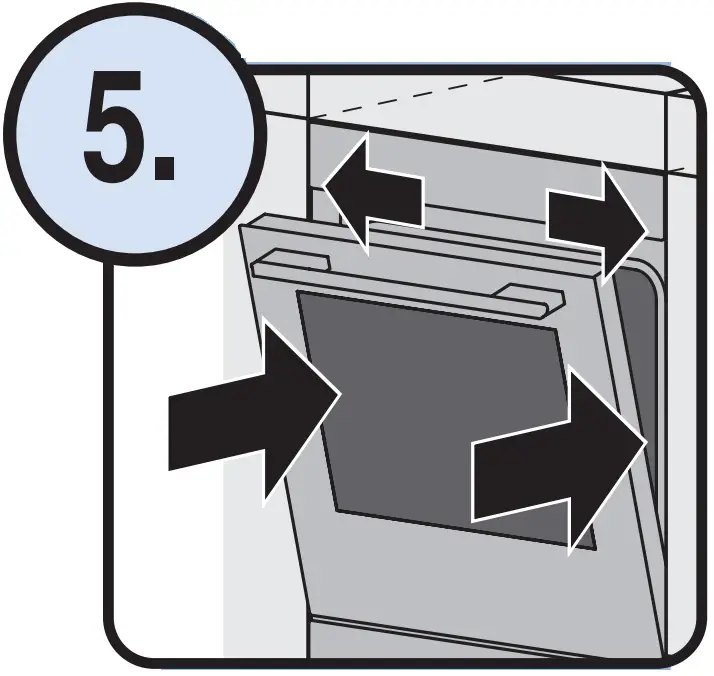
- Push completely in and align appliance
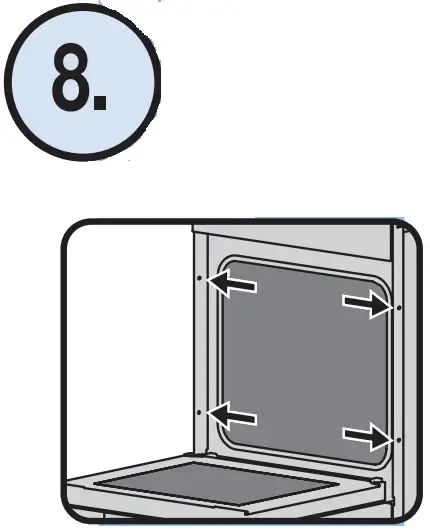
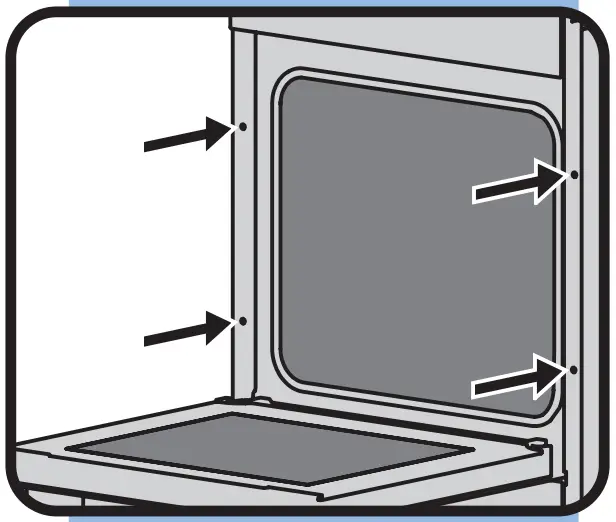
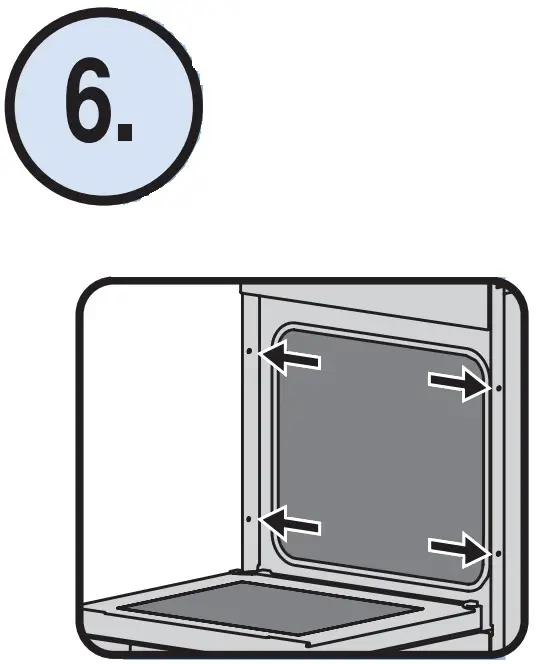
- Secure appliance to niche


At side for 55 cm wide appliance
At side for 60 cm wide appliance
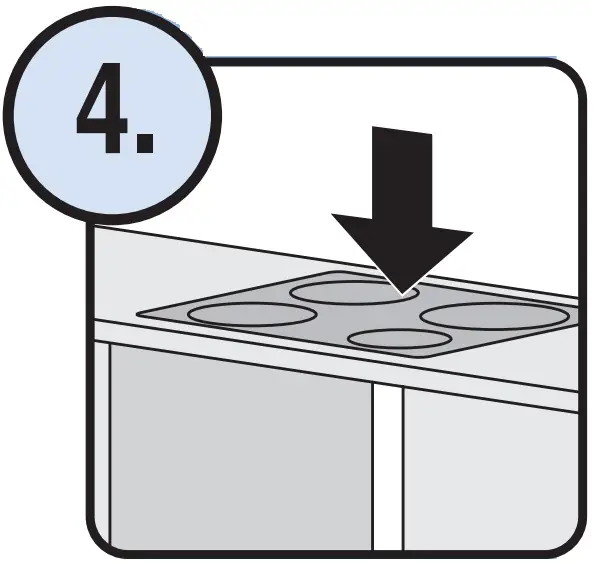
![]() Carry out function and safety checks
Carry out function and safety checks
Oven installed in tall unit
![]() The appliance may not be used in an under cabinet installation.
The appliance may not be used in an under cabinet installation.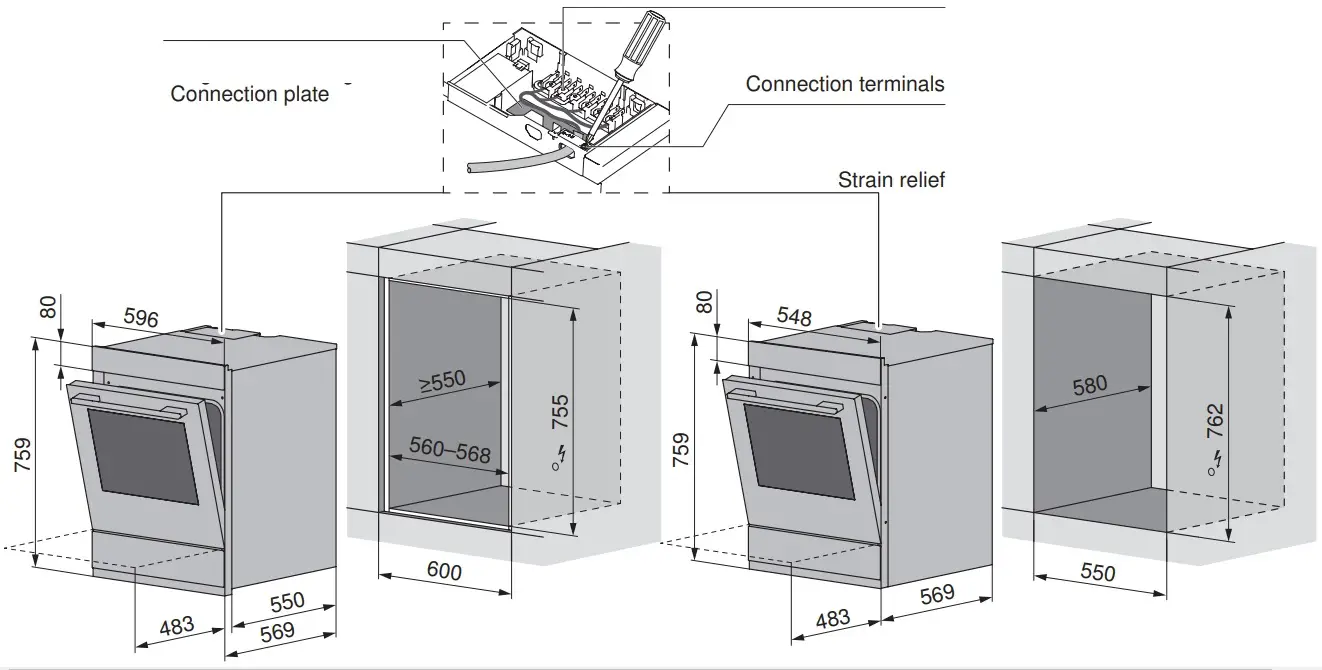
The appliance must be installed in a de-energized state.
- Check perpendicularity of niche.
- Check appliance/fasteners
- Check connected loads
For installation, connected loads must correspond - Connect appliance to mains power supply
Open and remove cover Connect cable to connecting terminals in accordance with connection plate
Strain relieve cable
Replace and close cover
- Push completely in and align appliance

- Secure appliance to niche
At side for 55 cm wide appliance
At side for 60 cm wide appliance

![]() Carry out function and safety checks
Carry out function and safety checks


