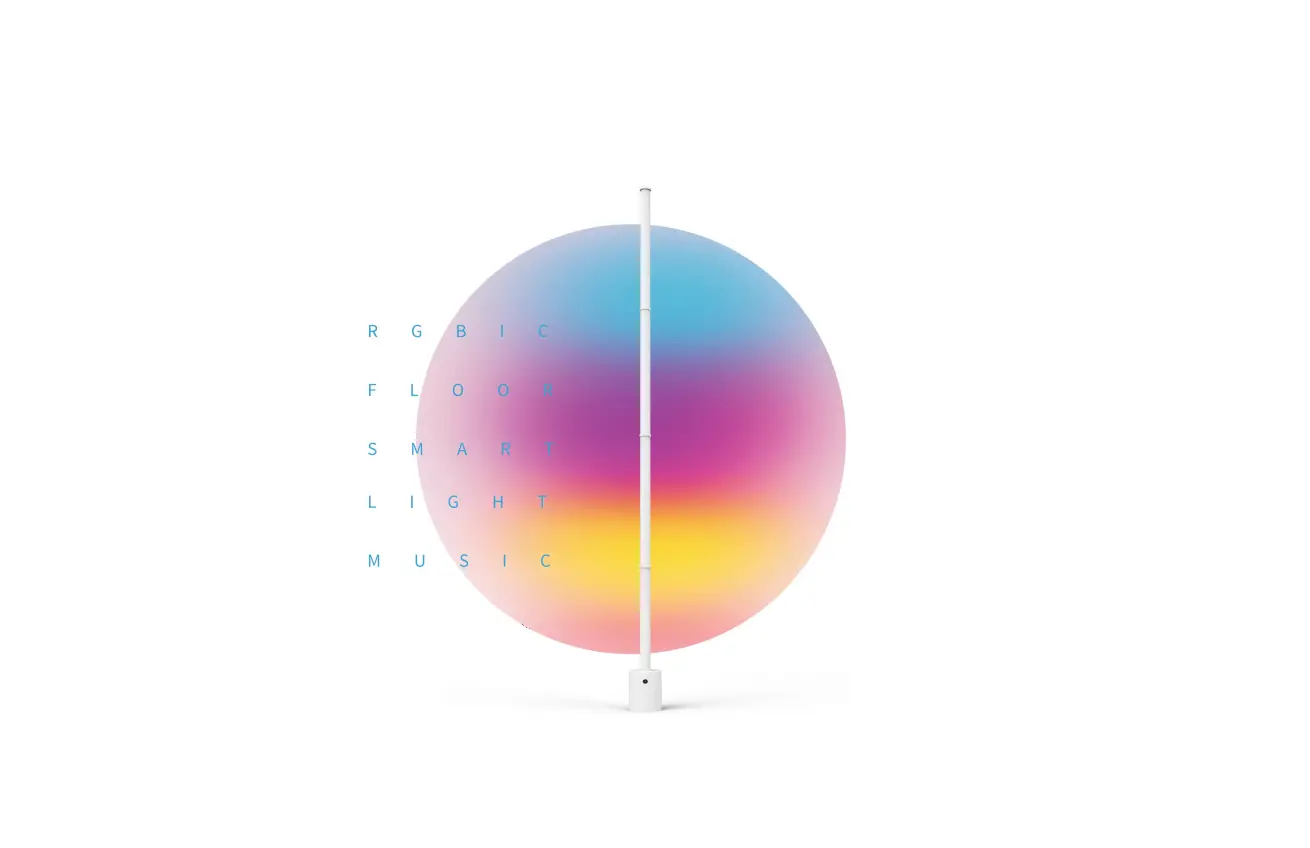
Elaqda B09HZ2QJ63 Smart Corner Flood lamp 16 Million Colors Changing User Guide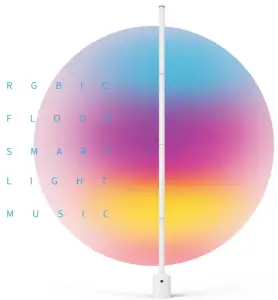
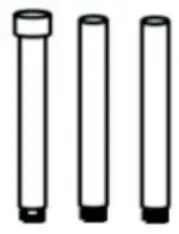
PACKING ACCESSORIES
![]() Please check the packing box and accessories when you got the floor lamp in hand.
Please check the packing box and accessories when you got the floor lamp in hand.
- 3 Pcs Lamp Pole

- 1 Pcs Lamp Base

- 1 Pcs Remote Control (Include Battery)

- 1 Pcs Power Adapter


PRODUCT SPECIFICATION
| Model | L2001-RGB-US/ E1001-RGB-US |
| Product Size | 3.14*3.14*56.30 inch |
| Wattage | 10W |
| Input Voltage/Frequency | 100-240VAC (50/60HZ) |
| LED | 72pcs(505ORGB) |
| Working Temperature | -20 C—+45C |
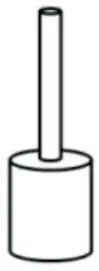
INSTALLATIONS
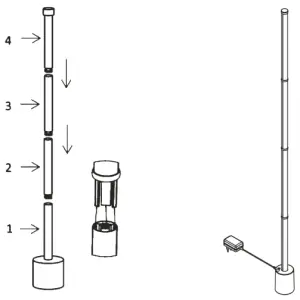
Note:
- Please DO NOT connect to the power before installation.
- Install in order from lamp pole 1 to 2,3,4. (Pole 2,3 are interchangeable)
- As shown in the middle image, make the three plastic part plug into the aluminum tube.
APP CONNECTION
- Download
You can search for [Smart Life]or [Tuya Smart] in various APP stores or scan the QR code above to download.- SMART LIFE APP

- TUYA SMART APP
- SMART LIFE APP
- Register an account on your [Smart life] or [Tuya Smart] app.
- In the [Smart life] or [Tuya Smart] app, on the top corner of Device screen, Click “+” Choose lighting then press “Next Step ” or add option pop-up on screen.
- Enter your WIFI network and password.
- The Smart life app will try to connect your device, then click finish to enter the operation panel after successful distribution network
Note: The router must be 2.4GHz.


[TUYA SAMRT] APP CONNECTION
![[TUYA SAMRT] APP CONNECTION](https://static-data1.manualsee.com/1/img/441/1772187/2022/01/Screenshot_9-129-300x145.png)
![[TUYA SAMRT] APP CONNECTION](https://static-data1.manualsee.com/1/img/441/1772187/2022/01/Screenshot_10-118-300x145.png)
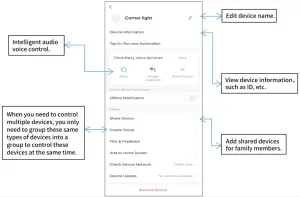
DESCRIPTION OF EACH INTERFACE OF APP
- Edit Interface description.

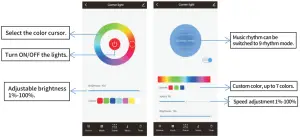
- Music interface description (Figure 5.2).
- Custom operation Instruction (Figure 5.3).

- Operation instructions for scene mode(Figure 5.4).

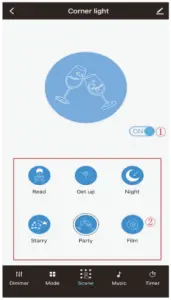
- Turn ON/OFF the lights.
- Switch various scene modes.
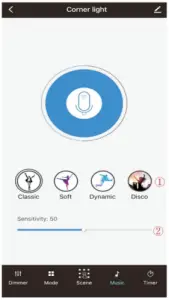
- Music Interface description(Figure 5.5).

- App rhythm modes.
- Sensitivity adjustment 1%-100%.
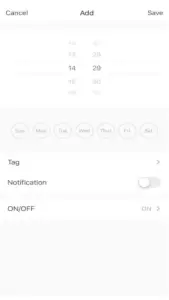
- Timer, notification, ON/OFF setting(Figure 5.6).
- Set a timer to turn on and off the lights.
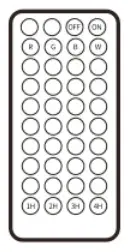
REMOTE CONTROL INSTRUCTION
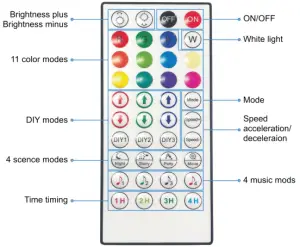
- DIY modes: Press DIY1/DIY2/DIY3 first; Press the above 6 buttons to adjust the brightness of the red, green and blue colors to match the colors you like
- Time timing: Set the timer to close after 1 hour/2 hours/3 hours/4 hours
- Mode: Breath /Flash /Jump /Gradient /Symphony/ Trail/ Popular/ Stacking/ Adjoint
- 4 music mods: Classic/ Soft /Dynamic/ Disco

FAILURE ANALYSIS AND SOLUTION
The fault phenomenon | Cause analysis | Solution |
Not bright | 1)The switching power supply is dead. 2)The positive and negative poles of the power supply are connected negatively. 3)Wrong or insecure connection. | 1)Check the switching power supply. 2)Correct it. 3)Check the writing. |
Wrong color | 4)RGB static color setting error. | 4)Set RGB static colors. |
Mode unchanged | 5)The speed is set too slowly. | 5)Please press the speed button to speed up. |
Can’t remote control | 6)Remote control. 7)Out of control distance. | 6)Replace the battery 7)Reduce remote control distance. |
Warm tips:
- Please remove the plastic insulation gasket before using the remote control.
- Please align the lamp base when using the remote control.
- 1f the lamp pole does not light up during installation, please adjust the tightness of the lamp.


