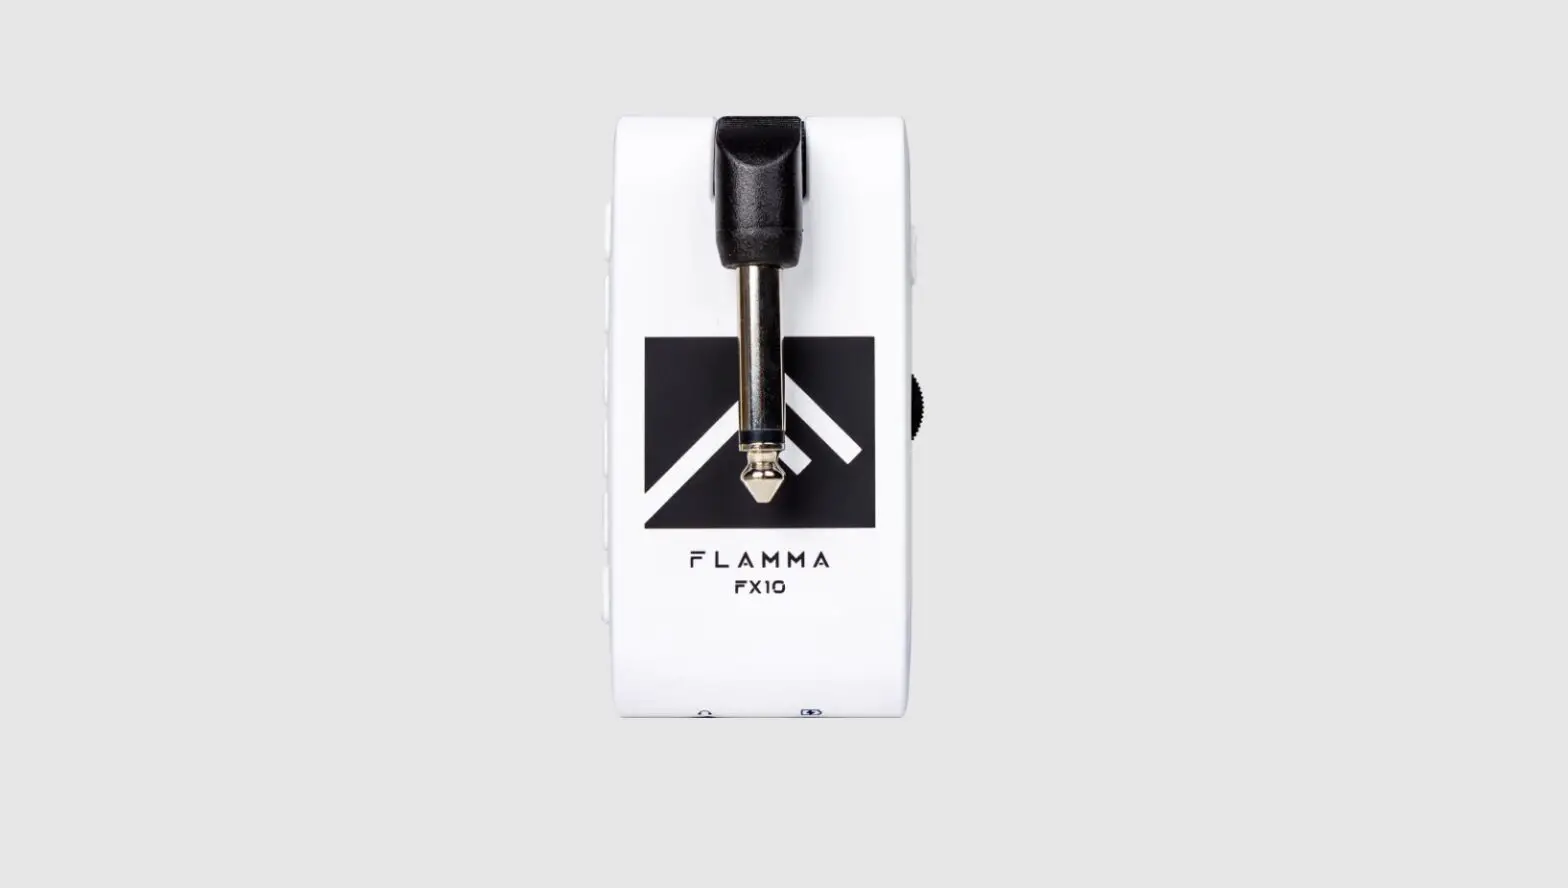
FLAMMA FX10 Portable Modeling Headphone Amps Owner’s Manual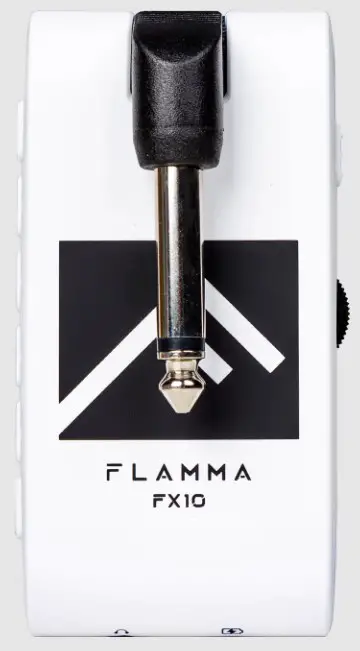
PRECAUTIONS
*PLEASE READ CAREFULLY BEFORE PROCEEDING*
Power Supply
Please use PC USB port or use 5V 1A power adapter to power the product. Unplug the power when not in use or during electrical storms.
Location
To avoid deformation, discoloration, or other serious damage, do not expose this unit to the following conditions:
- Direct sunlight
- Magnetic fields
- Excessive dusty or dirty location
- Strong vibrations or shocks
- Heat sources
- Extreme temperature or humidity
- High humidity or moisture
Cleaning
Clean only with a soft, dry cloth. If necessary, slightly moisten the cloth .Do not use abrasive cleanser, cleaning alcohol, paint thinners, wax, solvents, cleaning fluids, or chemical-impregnated wiping cloths.
Features
- 14 different amp models with individual save function
- 14 built-in effects with parameter adjustment
- 5 levels of TONE color
- 28 different drum groove options to select from
- Compatible with Bluetooth for audio playback
- Supports USB AUDIO recording and audio playback
Layout
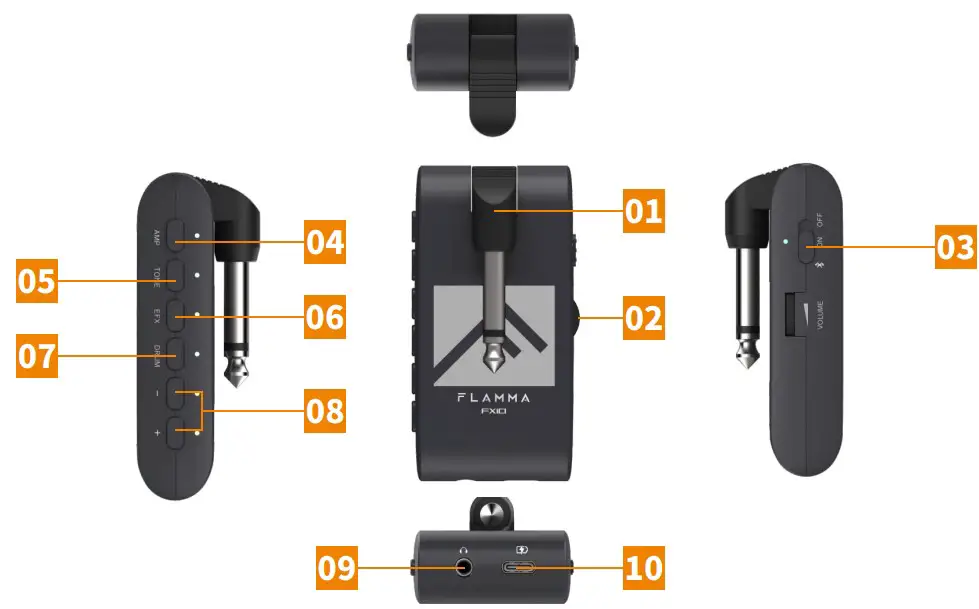
- 1/4″instrument input jack. Connect to the output of the guitar.
- Volume control: Rotate to adjust the volume level of the guitar and drum machine.
- Three-way Power Switch. OFF: Power off. ON: Power on (Bluetooth off). BT ON: Bluetooth on. The power indicator will show current power status.
- AMP button: Press to select AMP module (preset patch), then press the -/+ buttons to select between 14 different amp models. The color of LED indicator will show currently selected amp model
- TONE button: Press to select TONE module. Press -/+ buttons to switch between 5 different tone colors.
- EFX button
a. Press to select EFFECT module. Press the -/+ buttons to switch between different effects
b. When the EFFECT module is selected, press the EFX button to bypass effect.
c. When the EFFECT module is selected, press and hold the EFX button to enter hidden mode. - DRUM button
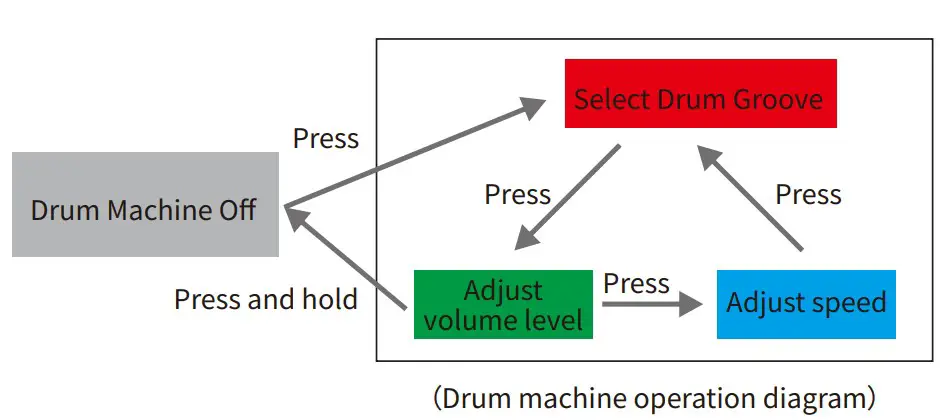
a. Press DRUM to turn on the drum machine. You can press and hold DRUM to turn off the drum machine. The LED indicator will show the On/Off status of the drum machine.
b. When drum machine is on, press DRUM to switch between three parameter adjustment modes. The color of the LED indicator will show current select mode: RED for drum groove, GREEN for volume level of drum machine, BLUE for speed of drum machine. You can adjust those parameters via -/+ button. - -/+ button: Adjust currently selected modules (AMP/TONE/EFX/DRUM).
- 1/8”TRS headphone jack, connect to headphone device.
- USB-C port for charging and OTG function (support USB audio recording and playback).
Instructions
Start:
Toggle the power switch to the ON position. The power indictor will illuminate and turn blue for when power is on. You can toggle the switch to Bluetooth icon to turn on Bluetooth Audio function.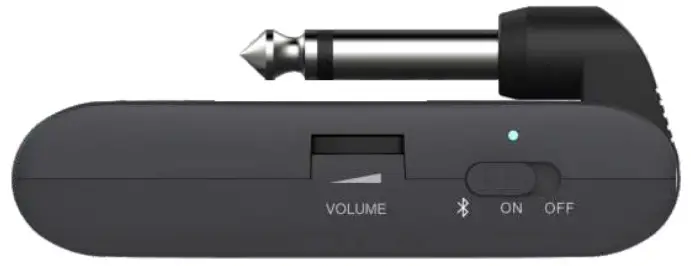
Tone/Effect Adjustment
a. Select amp model: Press AMP to select AMP module (preset patch), then press the -/+ buttons to select between 14 different amp models. The color of LED indicator will show currently selected amp model.
b. Adjust tone color: Press TONE to select TONE module, then press -/+ buttons to switch between 5 different tone colors.
c. Select EFX: Press EFX to select EFFECT module, then press the -/+ buttons to switch between different effects.
d. EFX adjustment: Each effect in the EFFECT module has a hidden parameter adjustment mode and the selected effect can be adjusted between 10 different levels. When EFFECT module is selected, press and hold EFX to enter hidden parameter adjustment mode, then press the -/+ buttons to adjust it. The color of LED indicator will show currently selected level.
| BUTTON | ||||||||||
| COLOR | ||||||||||
| VALUE | 1 | 2 | 3 | 4 | 5 | 6 | 7 | 8 | 9 | 10 |
e. Bypass EFFECT: When the EFFECT module is selected (LED indicator is on), press the EFX button to bypass EFFECT module.
f. Saving: When the parameter adjustment is complete, current tone will be saved into the currently selected AMP module as a preset patch, which includes AMP type, TONE color, EFX On/Off, EFX type, and EFX hidden parameter.
Note: When a module (AMP/TONE/EFX) is selected, the corresponding LED indictor will illuminate completely, otherwise it will illuminate in half brightness.
Drum Machine
a. Press DRUM to turn on the drum machine. You can press and hold the DRUM to turn off the drum machine, the LED indicator will show the On/Off status of drum machine.
b. Select drum groove FX10 has 28 different drum grooves. When drum machine is on, press the DRUM to switch between three parameter adjustment modes. The color of the LED indicator will show the currently selected mode. RED indicates drum groove. Please refer to the groove list in the next session for use.
c. Adjust volume level of drum machine When the DRUM is selected, press DRUM several times to enter volume level adjustment mode (LED indicator illuminate as GREEN). You can press the -I+ buttons to adjust the volume level of drum machine. Please refer to the color of LED indicator for adjustment.
| BUTTON | ||||||||||
| COLOR | ||||||||||
| VALUE | 1 | 2 | 3 | 4 | 5 | 6 | 7 | 8 | 9 | 10 |
d. Adjust drum machine speed
When the DRUM is selected, press the DRUM for several times to enter speed adjustment mode (LED indicator will blink as BLUE). Press -/+ button to adjust the speed via 1 BPM each time. Press and hold -/+ to increase or decrease the speed quickly. The speed of drum machine ranges from 40 BPM to 260 BPM.
Effect List
a. AMP:
| Number | LED Color | Reference |
| 1 | Fender® 65 Twin Reverb | |
| 2 | Fender® 65 Deluxe Reverb | |
| 3 | Acoustic guitar simulation | |
| 4 | Fender® Super Sonic | |
| 5 | Fender® 59 Bassman | |
| 6 | DR.Z® Z-Wreck | |
| 7 | Marshall® JCM800 | |
| 8 | Marshall® Plexi | |
| 9 | VOX® AC30 | |
| 10 | ENGL® Powerball | |
| 11 | Mesa Boogie® Mark V | |
| 12 | Orange® AD 30 | |
| 13 | Soldano® SLO 100 | |
| 14 |  | EVH® 5150 Ⅲ |
*NOTES: AU product names belong to their owners and are only used in this product and manual as a reference to tone types.
b. Tone
| Number | LED Color | Descriptions |
| 1 | Darker | |
| 2 | Dark | |
| 3 | Flat | |
| 4 | Bright | |
| 5 | Brighter |
c. EFX
| Number | LED Color | Descriptions | Hidden Parameters |
| 1 | Room Reverb | Reverb Level | |
| 2 | Hall Reverb | Reverb Level | |
| 3 | Church Reverb | Reverb Level | |
| 4 | Plate Reverb | Reverb Level | |
| 5 | Spring Reverb | Reverb Level | |
| 6 | Mod Reverb | Reverb Level | |
| 7 | Slapback Delay | Delay Level | |
| 8 | Tape Dly+Hall | Delay Level | |
| 9 | Reverse Dly+ModReverb | Delay Time | |
| 10 | PingPong Dly+Church | Delay Time | |
| 11 | Chorus+Hall | Mod Depth | |
| 12 | Phaser+Church | Mod Depth | |
| 13 | Flanger+Plate | Mod Rate | |
| 14 | Tremolo+ModReverb | Mod Rate |
d. Groove
| Number | LED Color | Groove | Rhythm |
| 1 | POP1 | 4/4 | |
| 2 | POP2 | 4/4 | |
| 3 | POP3 | 4/4 | |
| 4 | POP 4 | 6/8 | |
| 5 | POP 5 | 3/4 | |
| 6 | BLUES 1 | 4/4 | |
| 7 | BLUES 2 | 4/4 | |
| 8 | BLUES 3 | 4/4 | |
| 9 | BLUES 4 | 6/8 | |
| 10 | BLUES 5 | 6/8 | |
| 11 | PUNK 1 | 4/4 | |
| 12 | PUNK 2 | 4/4 | |
| 13 | PUNK 3 | 6/8 | |
| 14 | ROCK 1 | 4/4 | |
| 15 | ROCK 2 | 4/4 | |
| 16 | ROCK 3 | 6/8 | |
| 17 | ROCK 4 | 6/8 | |
| 18 | METAL 1 | 4/4 | |
| 19 | METAL 2 | 4/4 | |
| 20 | METAL 3 | 4/4 | |
| 21 | METAL 4 | 6/8 | |
| 22 | FUNK 1 | 4/4 | |
| 23 | FUNK 2 | 4/4 | |
| 24 | FUNK 3 | 4/4 | |
| 25 | FUNK 4 | 4/4 | |
| 26 | JAZZ 1 | 4/4 | |
| 27 | JAZZ 2 | 4/4 | |
| 28 | JAZZ 3 | 3/4 |
Bluetooth Audio
FX10 supports Bluetooth which allows connecting to an external Bluetooth device for practice or performance. Below is the setup procedure:
- Toggle the power switch to BT ON to turn on Bluetooth module.
- Open the Bluetooth menu of your smart device and select pair new device
- Find the “FX10”
- Confirm connection
- After pairing is complete, you can hear the audio tracks from the external Bluetooth device.
Notes: To adjust the volume level of the playback tracks, please adjust it on your external Bluetooth device. The volume level knob of FX10 can only control the volume level of guitar signal and drum machine.
0TG(USB AUDIO) Recording/Playback
The USB port of the FX10 supports USB AUDIO function. You can use the USB cable that comes with the device and connect to the OTG cable (needs to be purchased separately) with your smart phone for recording or audio playback.
Notes:
- The USB AUDIO function is for audio recording or playback on mobile device for practice or directly recording on social media. However, it cannot take the place of professional audio interface. If you would like to use the FX10 with the DAW on your Window device, a third-party ASIO driver is needed. It might be an incompatibility issue or driver issue during use.
- To adjust the volume level of the playback tracks, please adjust it on your mobile device. The volume level knob of FX10 can only control the volume level of guitar signal and drum machine.
Battery and Charging
When the battery is low, the power LED indicator will start to blink in blue, the battery will be run out in 30 minutes. Recommend to charge your device in time. When the FX10 is Off for charging, the power indicator will illuminate and stay RED and turn GREEN when charging is complete. When the FX10 is charging, the power LED indicator will blink in BLUE and RED. then turn to GREEN and BLUE when charging is complete.
Specifications
- Number of AMP models: 14
- Number of EFFECT modules: 14
- Number of DRUM groove: 28
- Bluetooth function: Audio playback
- USB: USB-C port charging/OTG (USB audio)
- Battery Capacity: 720mAh
- Battery Life: Up to 4 hours
- Charging Requirements: 5V 1A
- Charging Time: Approximate 2.5 hours
- Angle of Plugin Jack: 270°
- Dimensions: 82mm (D) * 40mm (W) * 30mm (H)
- Weight: 59g
- Accessories: Quick guide, USB-C cable
![]()


